Will it spin? Since falling down the fibre rabbit hole it’s a question I find myself asking a lot, particularly of ‘fibres’ that aren’t usually spun but look spin-able. So, instead of just wondering, I decided it would be fun to find out.
Preparing the fibre
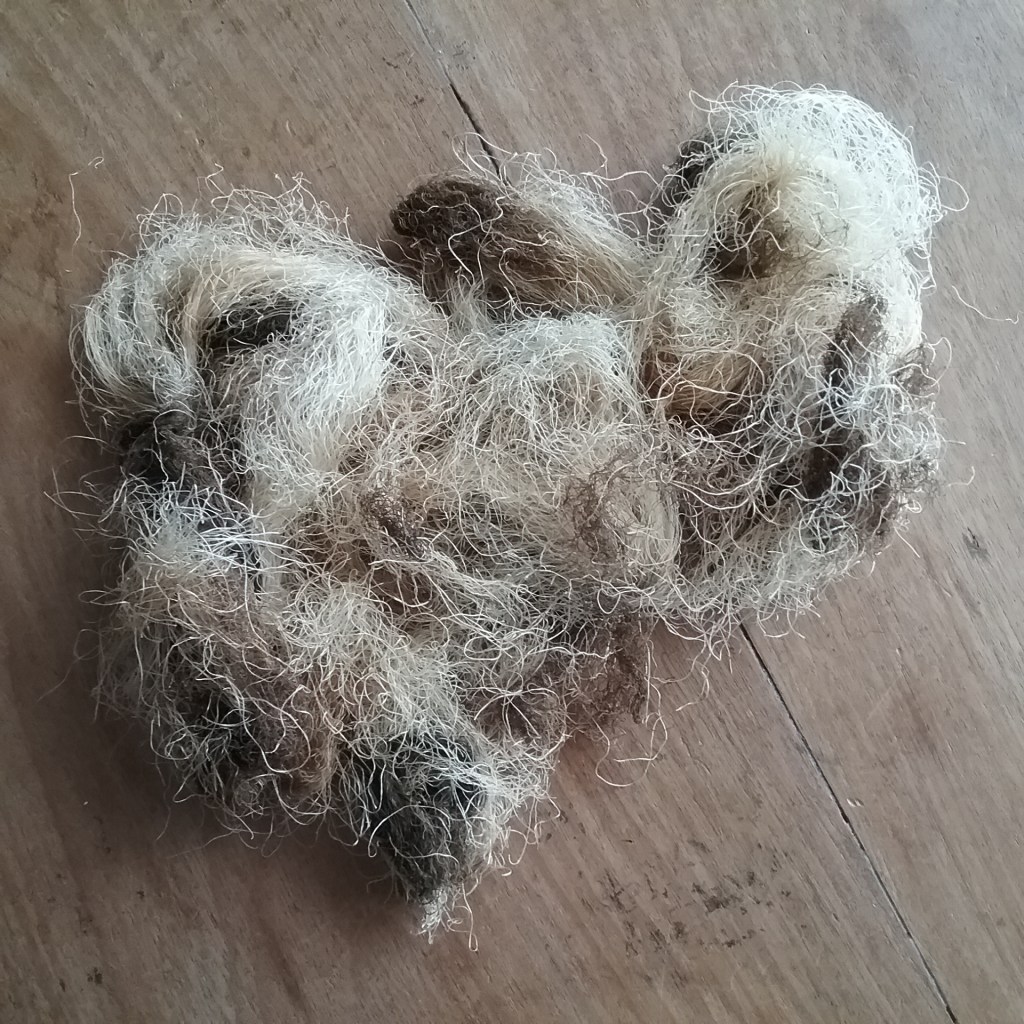
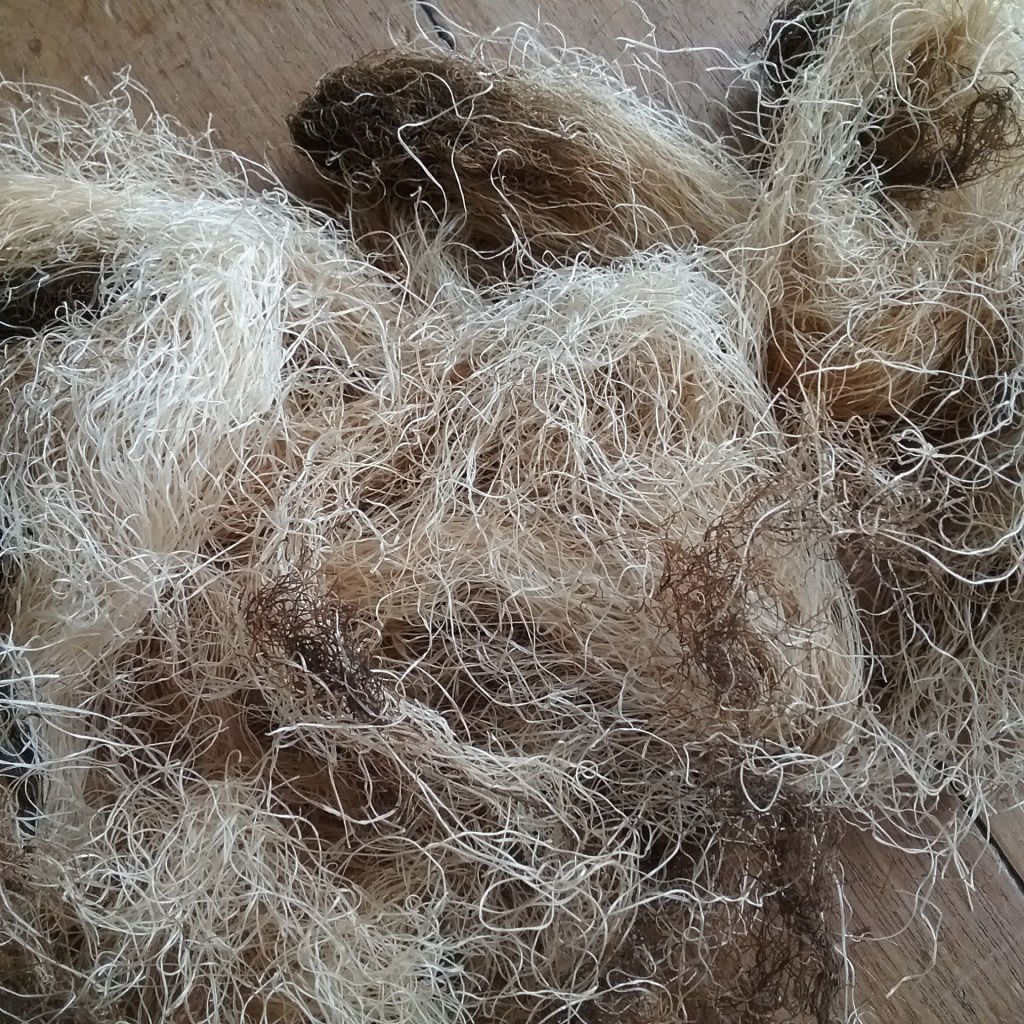
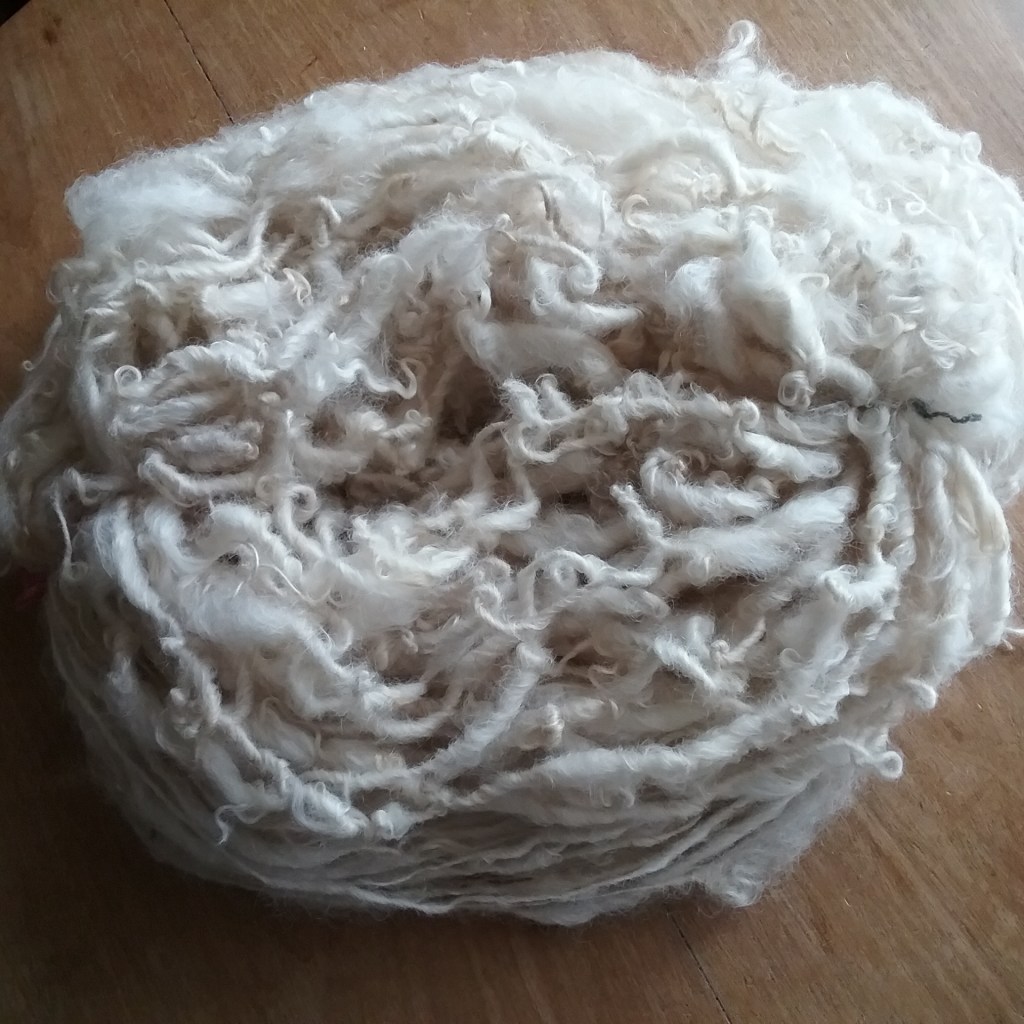
Sweet corn silk is the stringy layer between the husks and the kernels; the plant uses it in pollination. The silk is quite fragile when fresh off the plant and I was concerned that spinning it ‘raw’ would cause the yarn to shrink when it dried or inhibit full drying altogether. After separating the silk from the corn plants I laid it out to dry in the sun for several days and then brought it indoors to dry further. I then gently removed the darker black tips as they had a tendency to snap off which, much like broken fleece staples, would have affected the yarn. I then separated the fibre into more manageable sections to spin with.
Spinning the Corn Silk
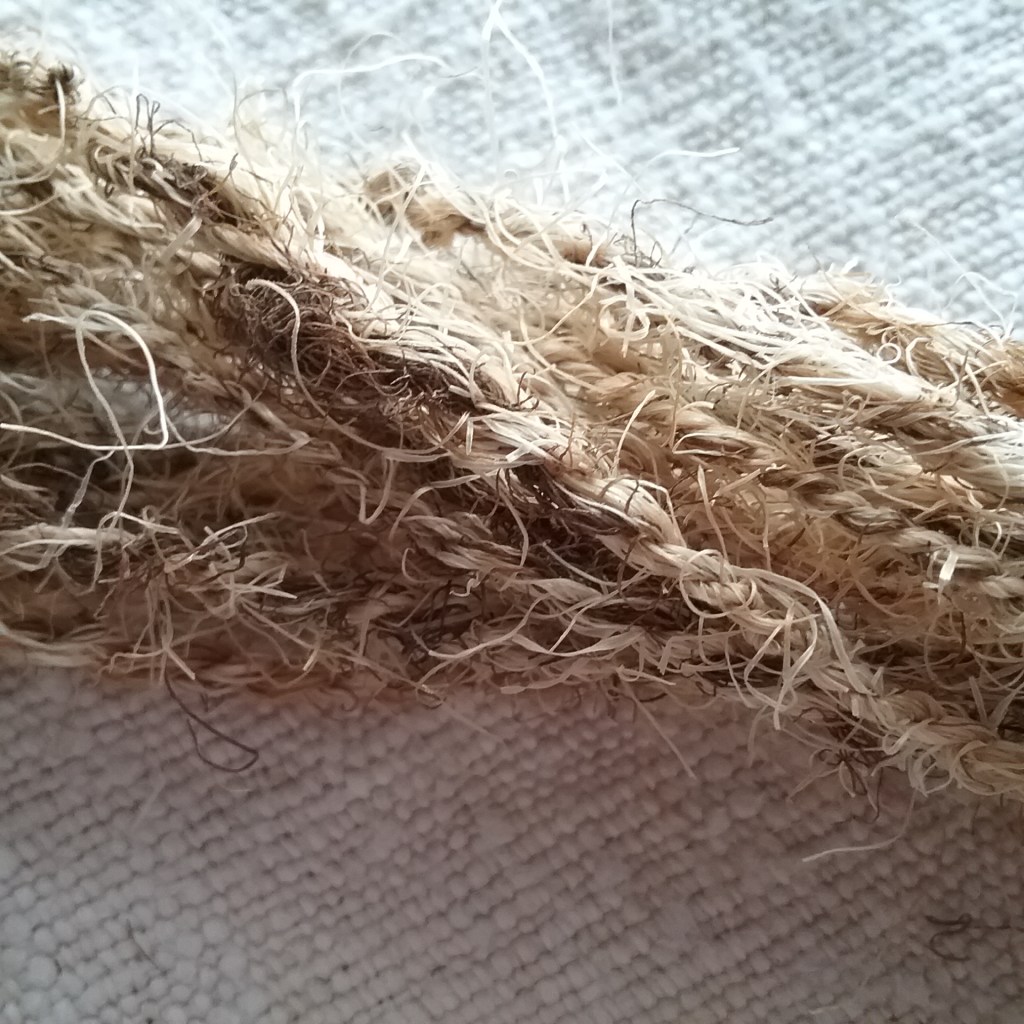
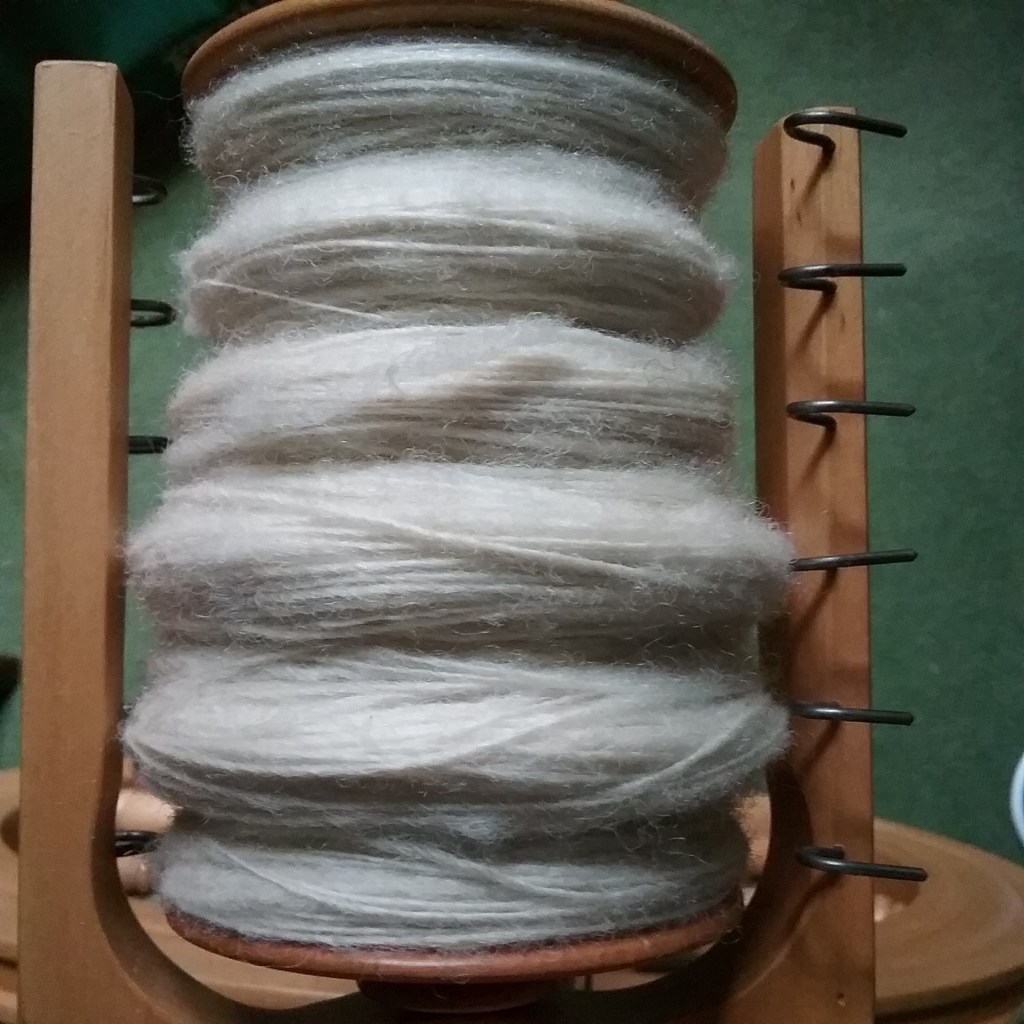
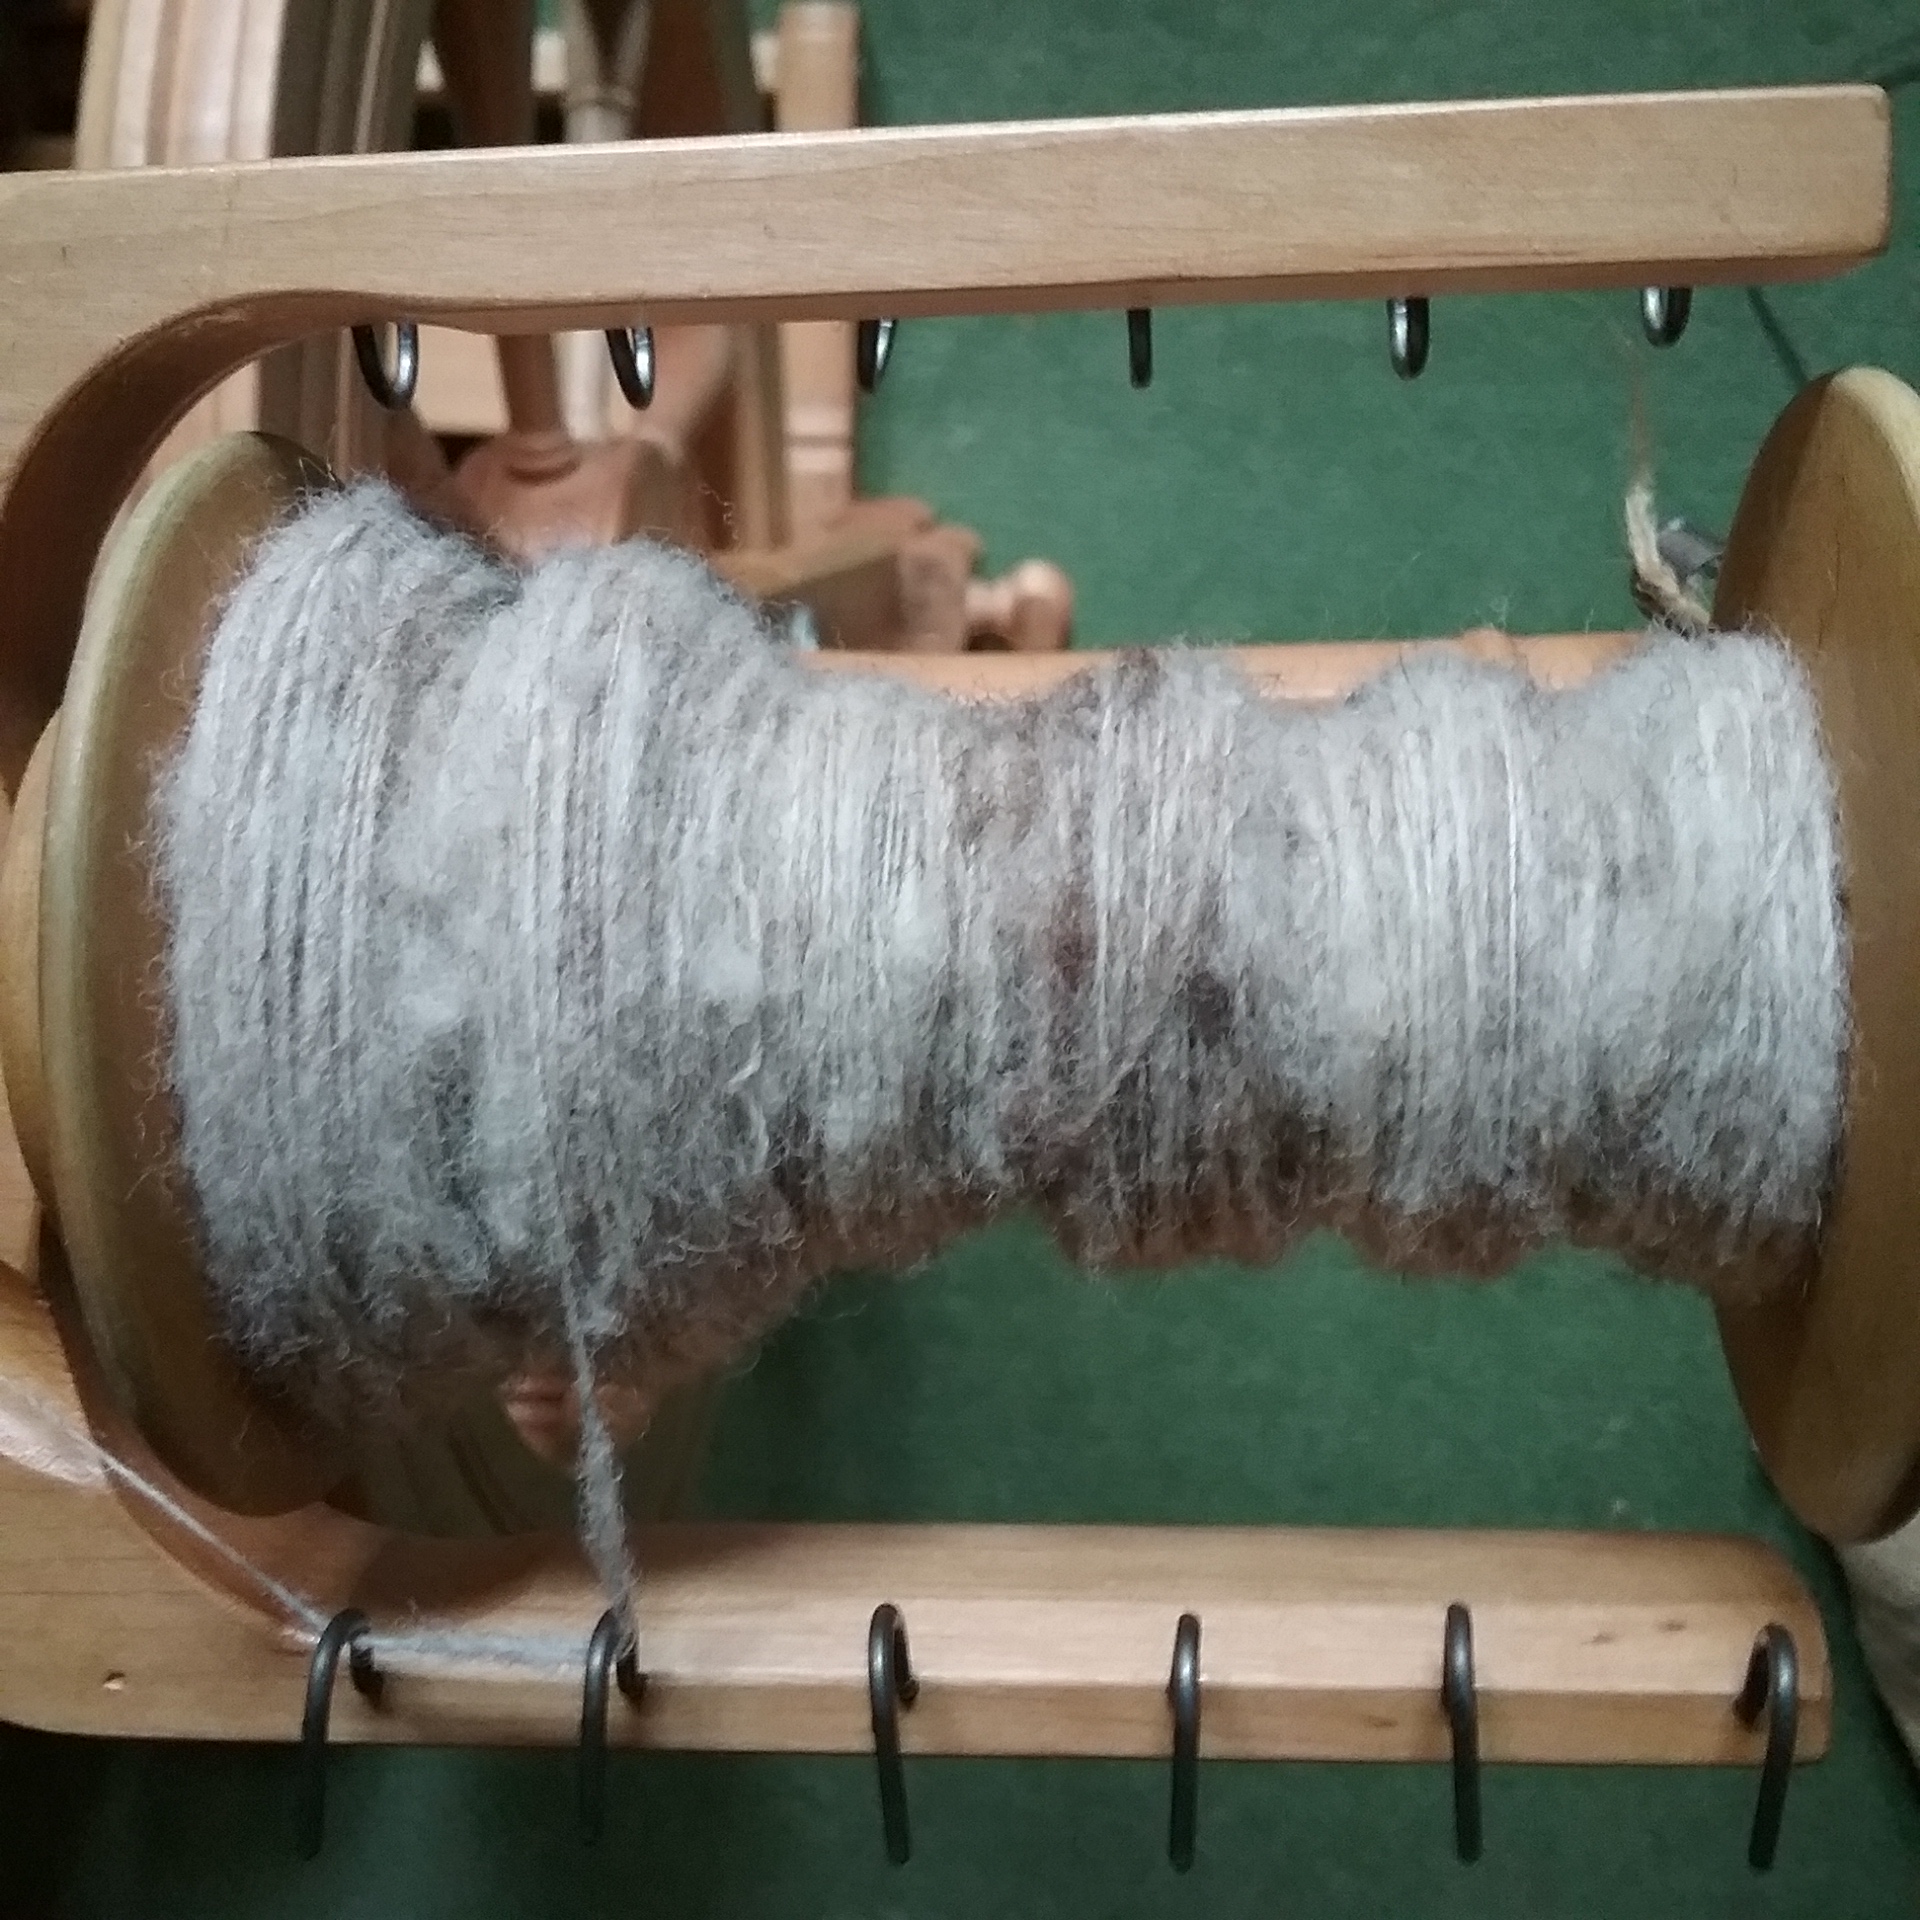
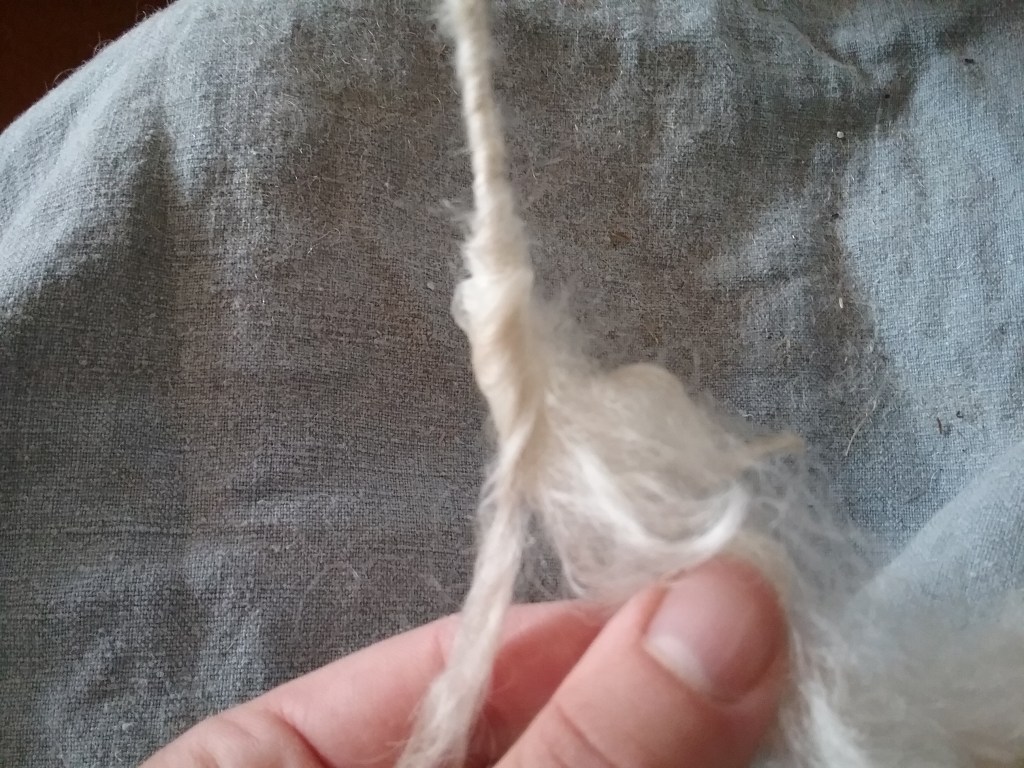
I began by having my wheel on a low uptake and slow speed to get used to the feel of the fibre and help to prevent it breaking. For sweet corn silk there is a very fine line between enough twist to make it hold and too much twist causing it to snap, but starting out slowly and making gradual adjustments made it easier. I held the fibre normally with the usual drafting zone and used a short draw to control the twist. At times the fibres did still break, but I found this didn’t affect my control and, as the staple length was long, most broken fibres were held in place by others.
Sweetcorn fibre drafting zone
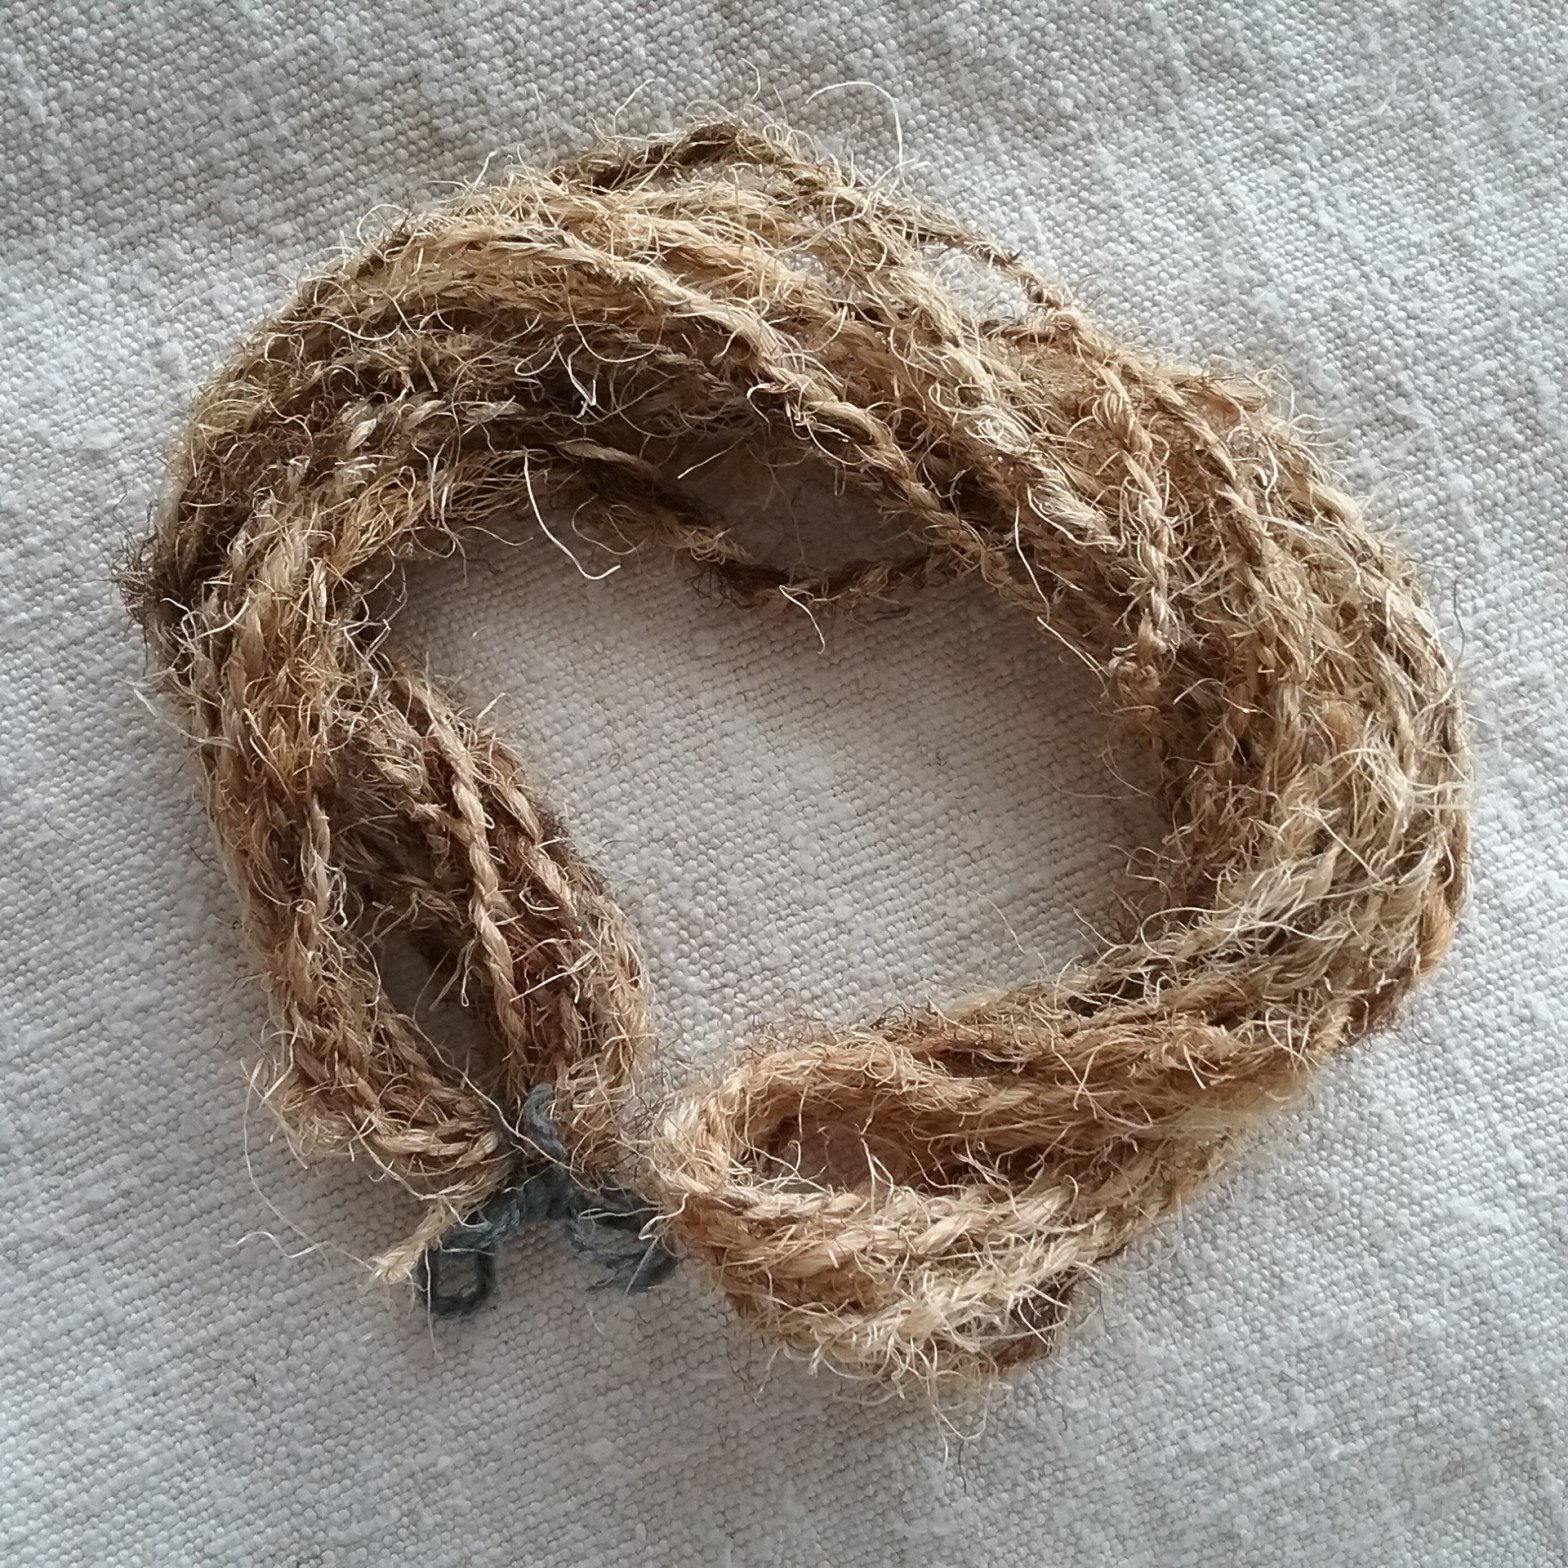
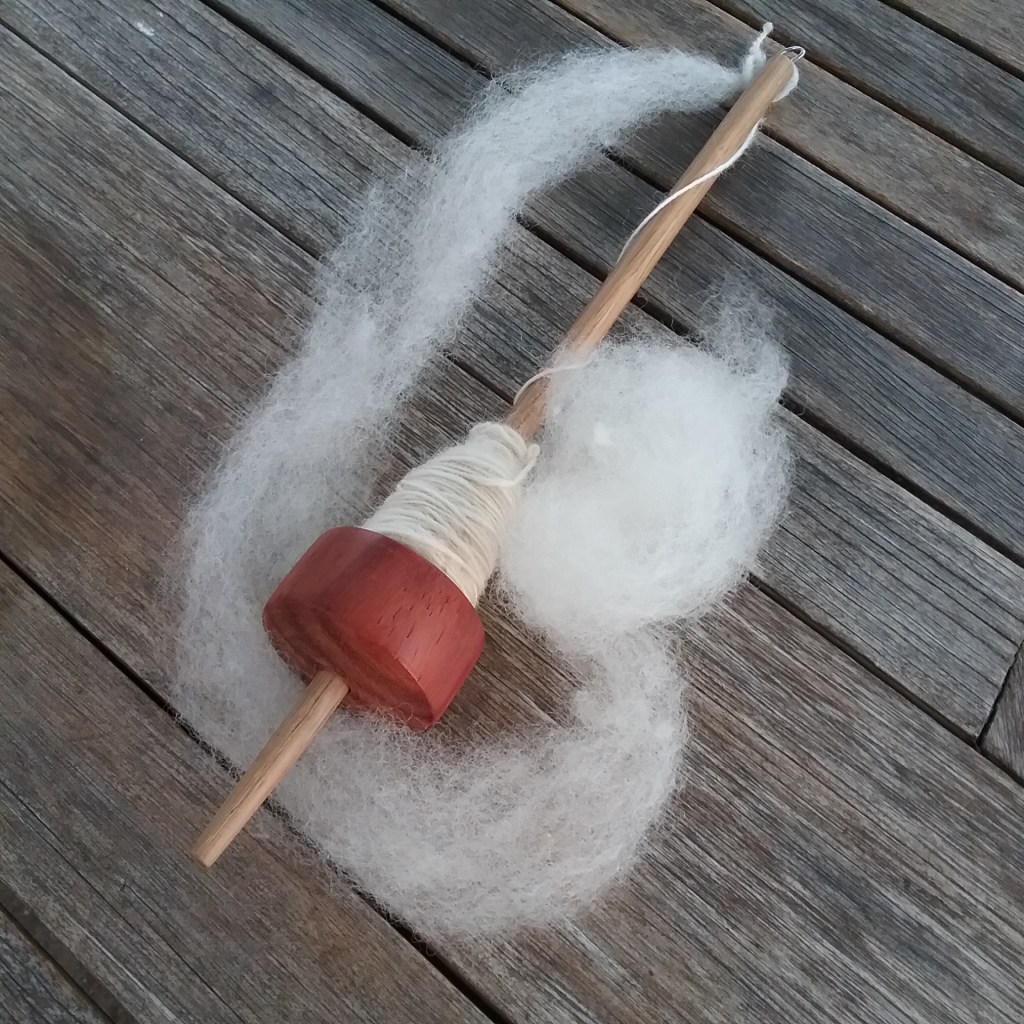
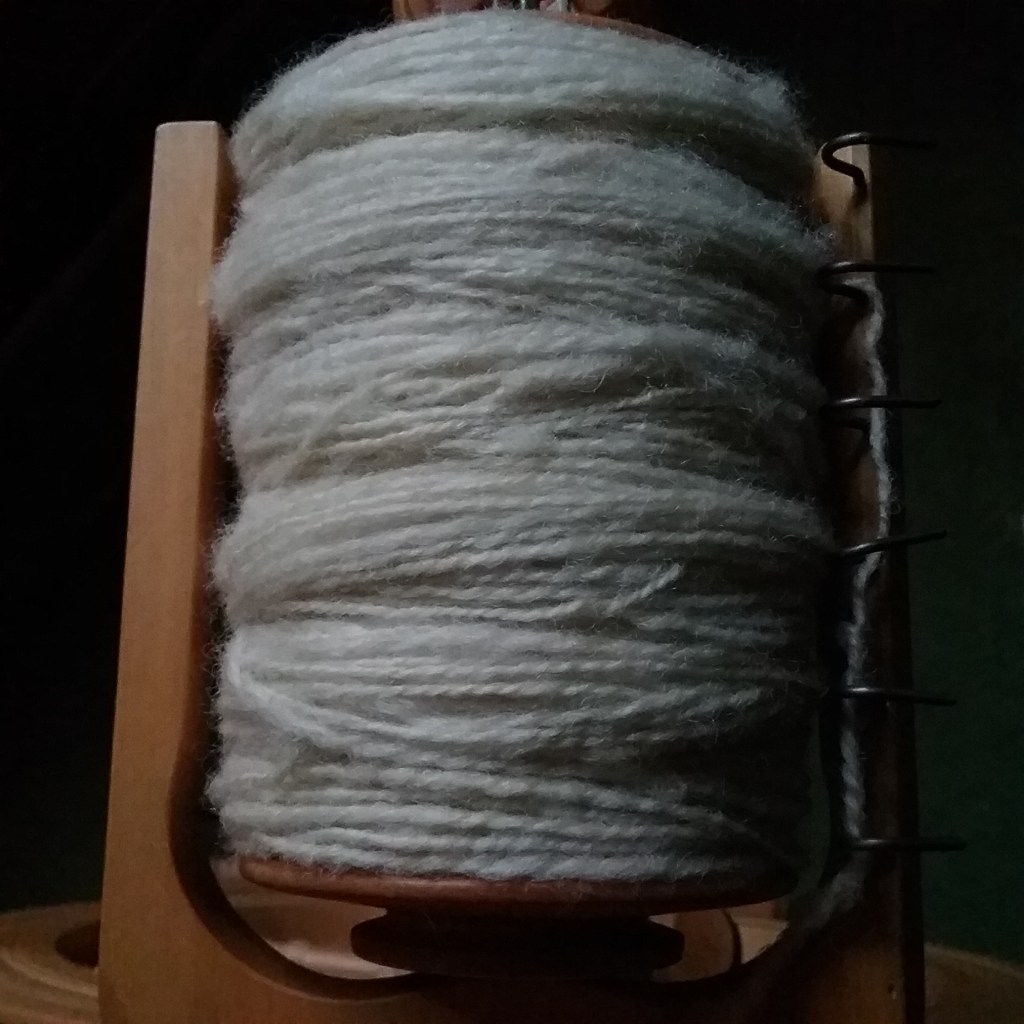
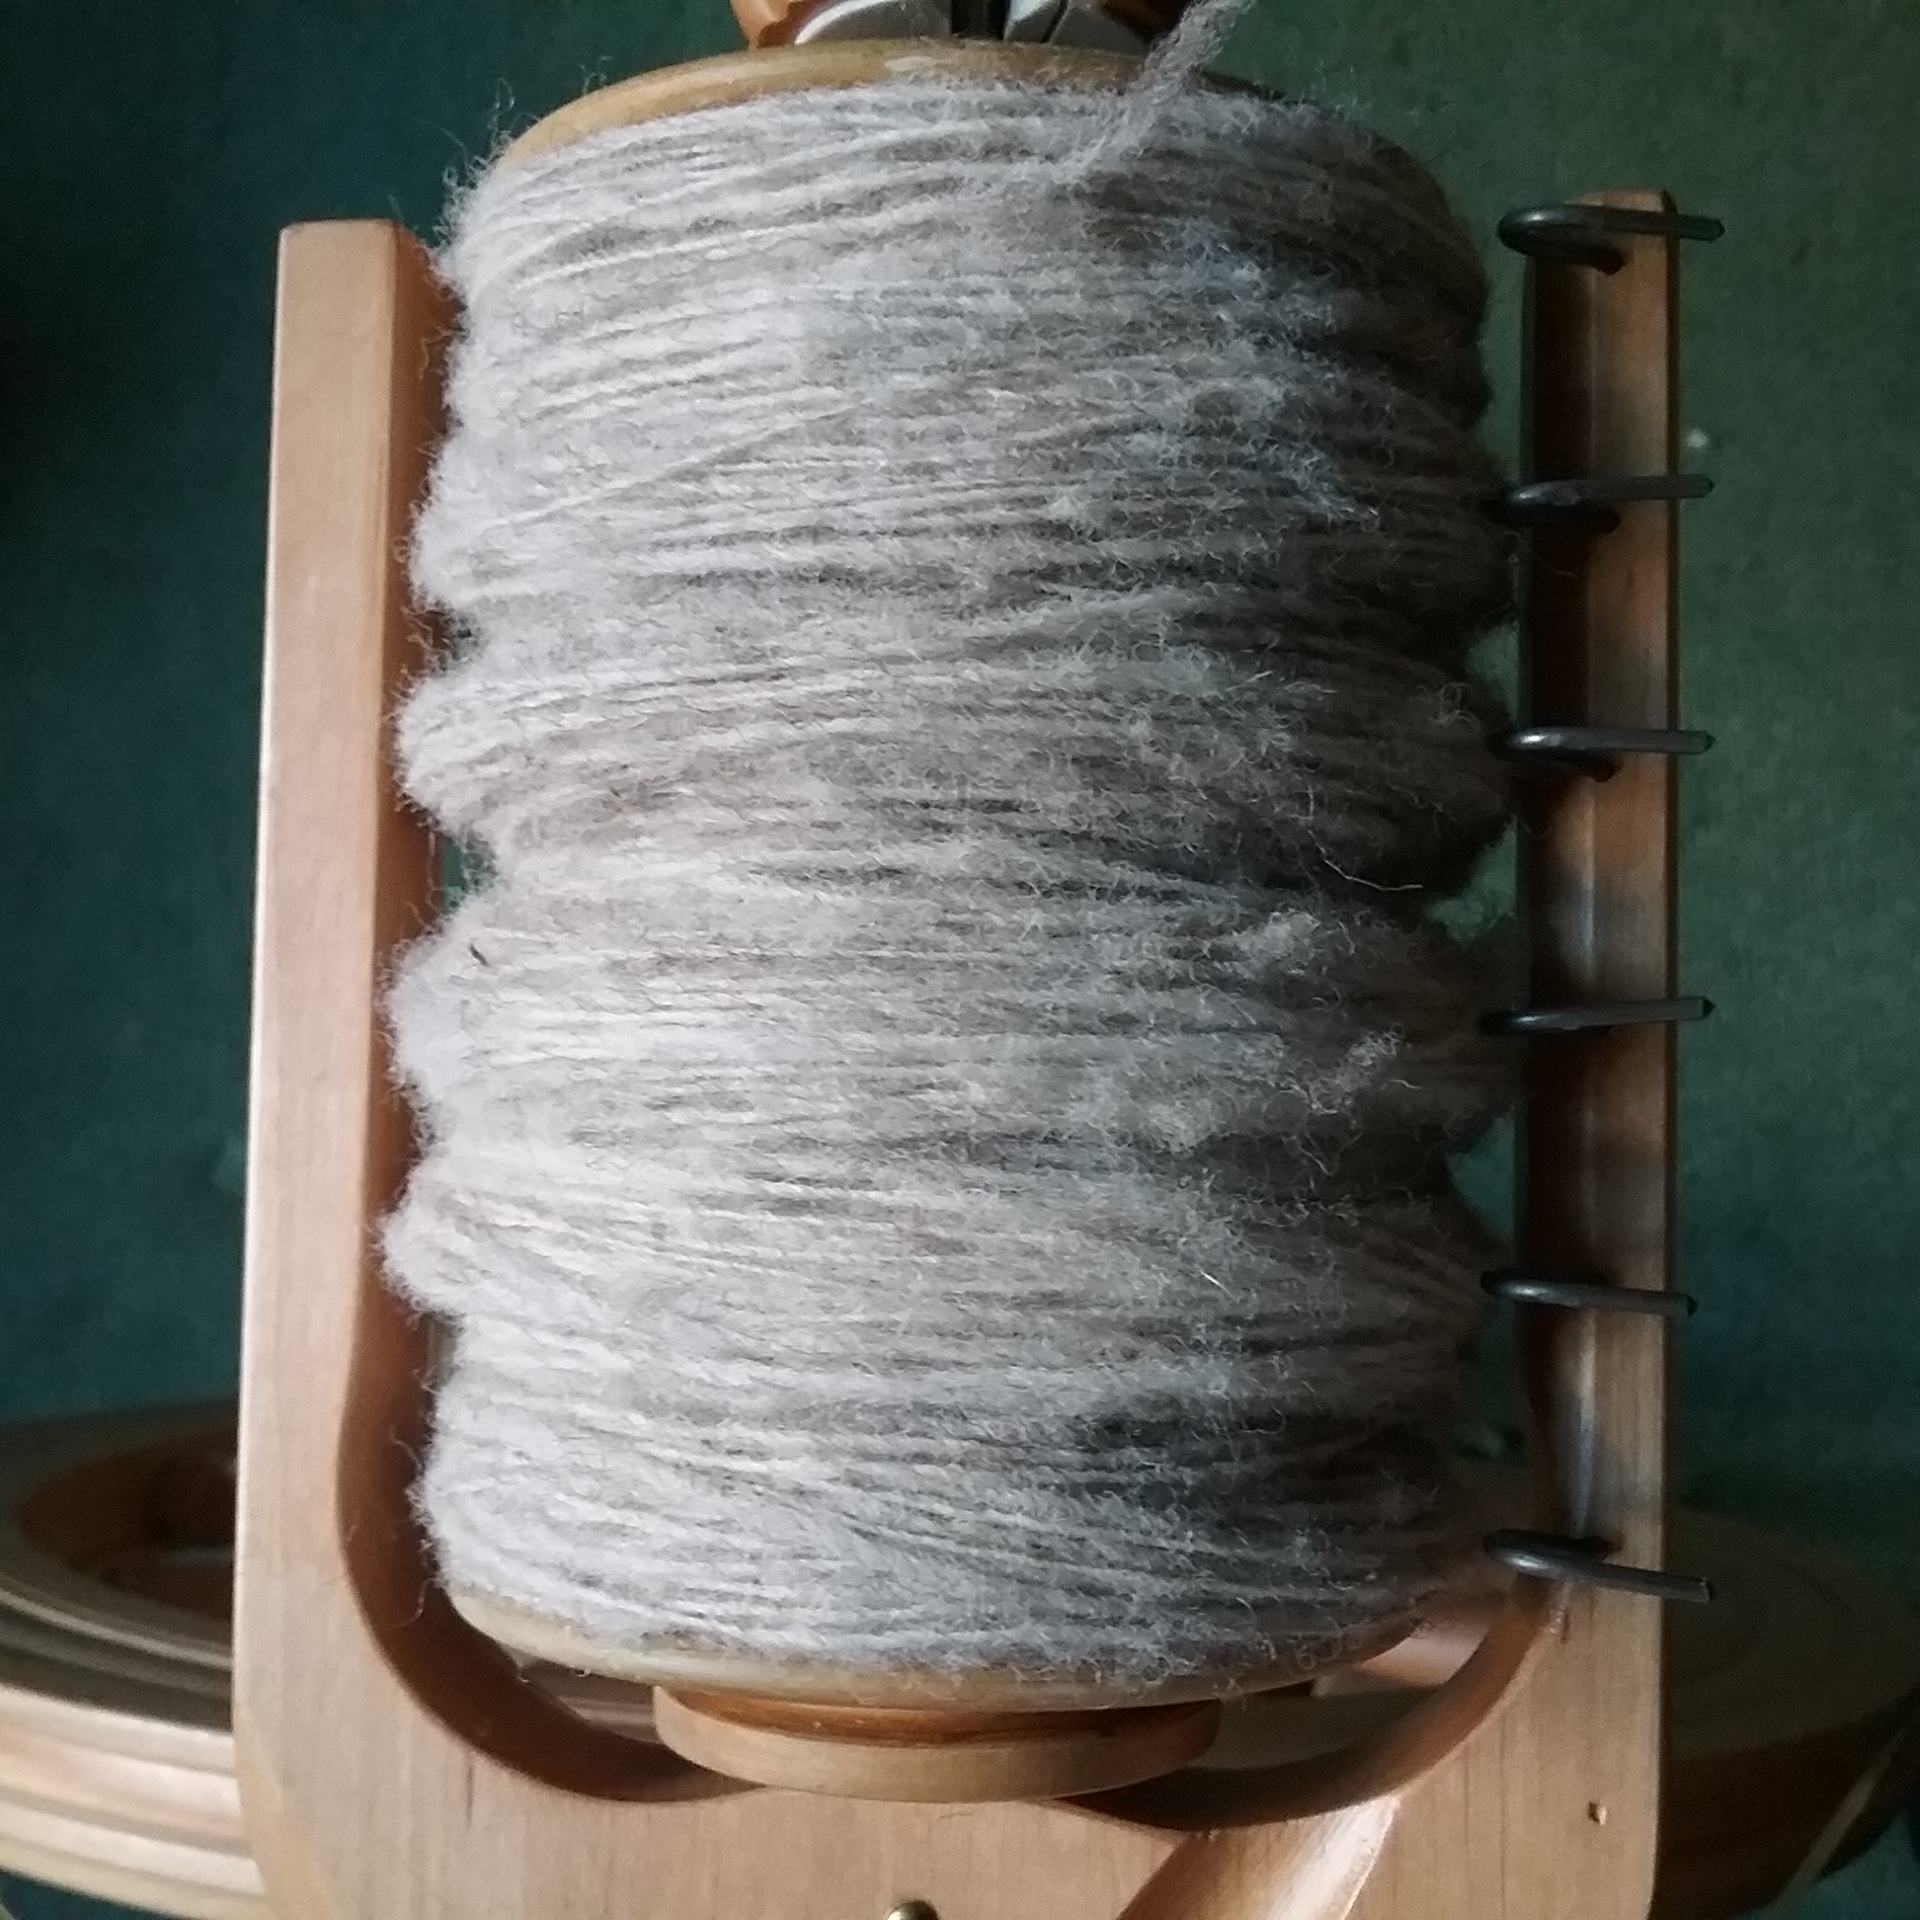
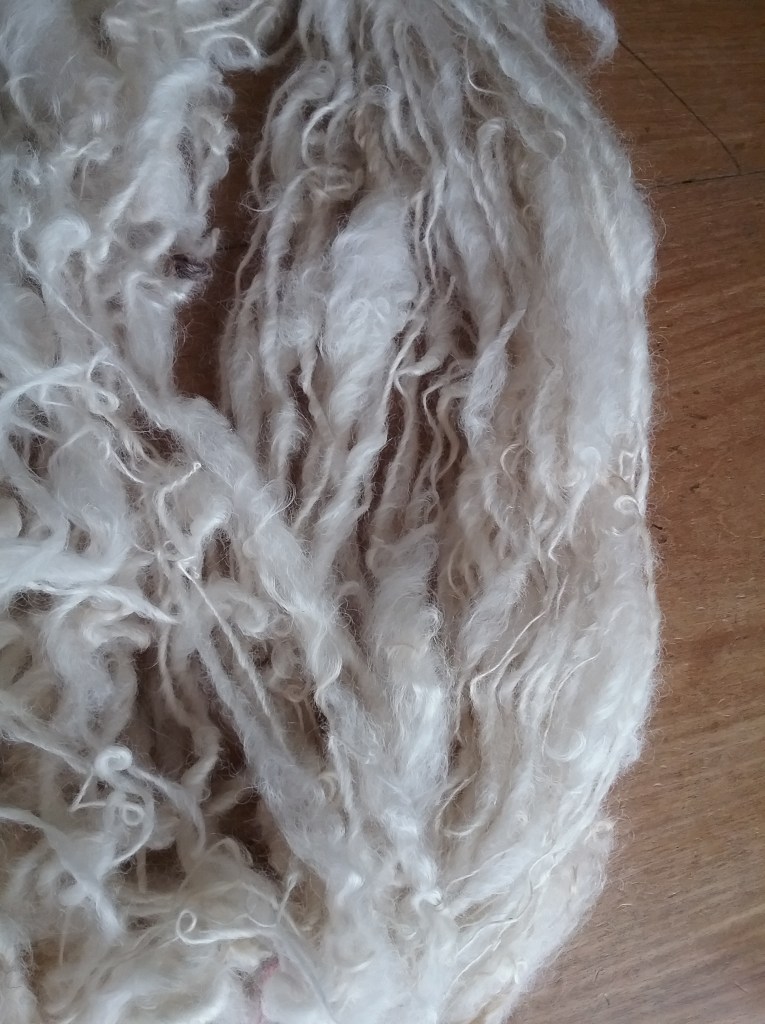
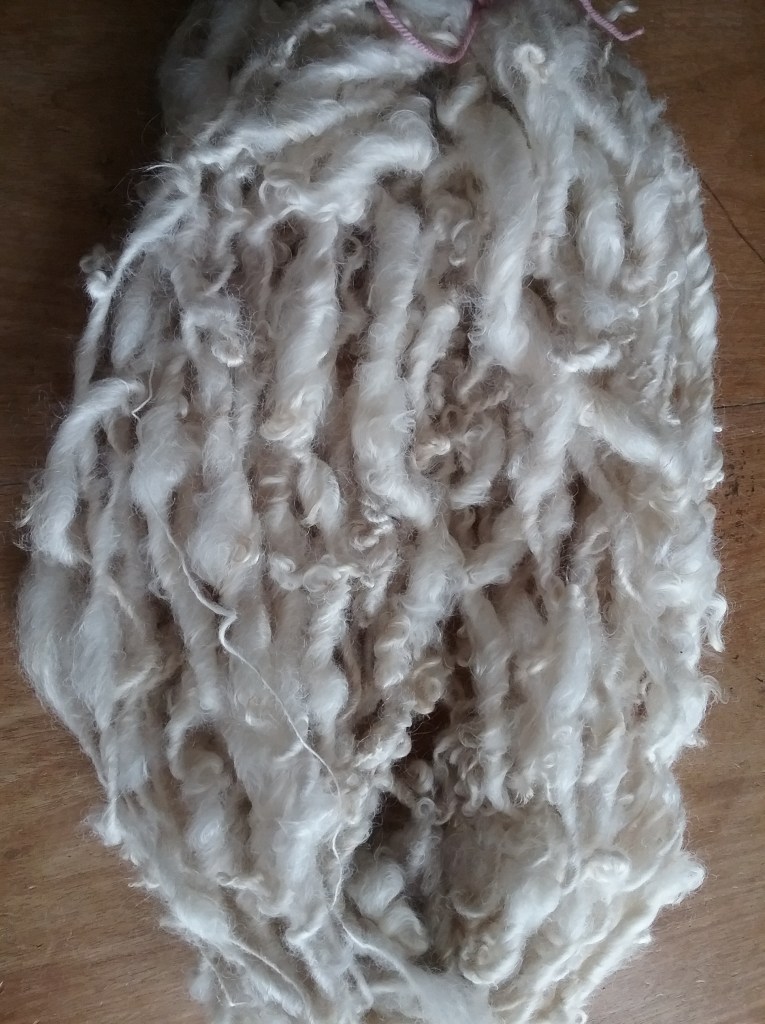
I didn’t feel the fibre would be very strong as a single so decided to try plying it. Andean plying is a method of creating a 2 ply from one single when you have a small length of single (sampling etc.). Fibre is wrapped around the hand (or a plying tool) to create a ‘bracelet’ that can be worn on the wrist with both ends free to be plied together (a bit like a centre pull ball). The bracelet is then unwound as you ply. I’d never Andean plied before, but found it very easy (so much so that I used it on many other projects during TDF). Again, when plying, I started slowly with low uptake to make sure I didn’t break my singles, but they were surprisingly strong and plying was much easier than I expected.
So will it spin? Yes, the resulting yarn was surprisingly sturdy and had a very similar feel to a lightweight rope. Perhaps not the ideal fibre to use in clothing, but it could certainly be used in homeware, gift wrapping or just to tie things up (though I wouldn’t like to trust it to hold anything too heavy).
If you have any suggestions of strange fibres I could try to spin, or if you’ve tried spinning with anything unusual please let me know in the comments below.
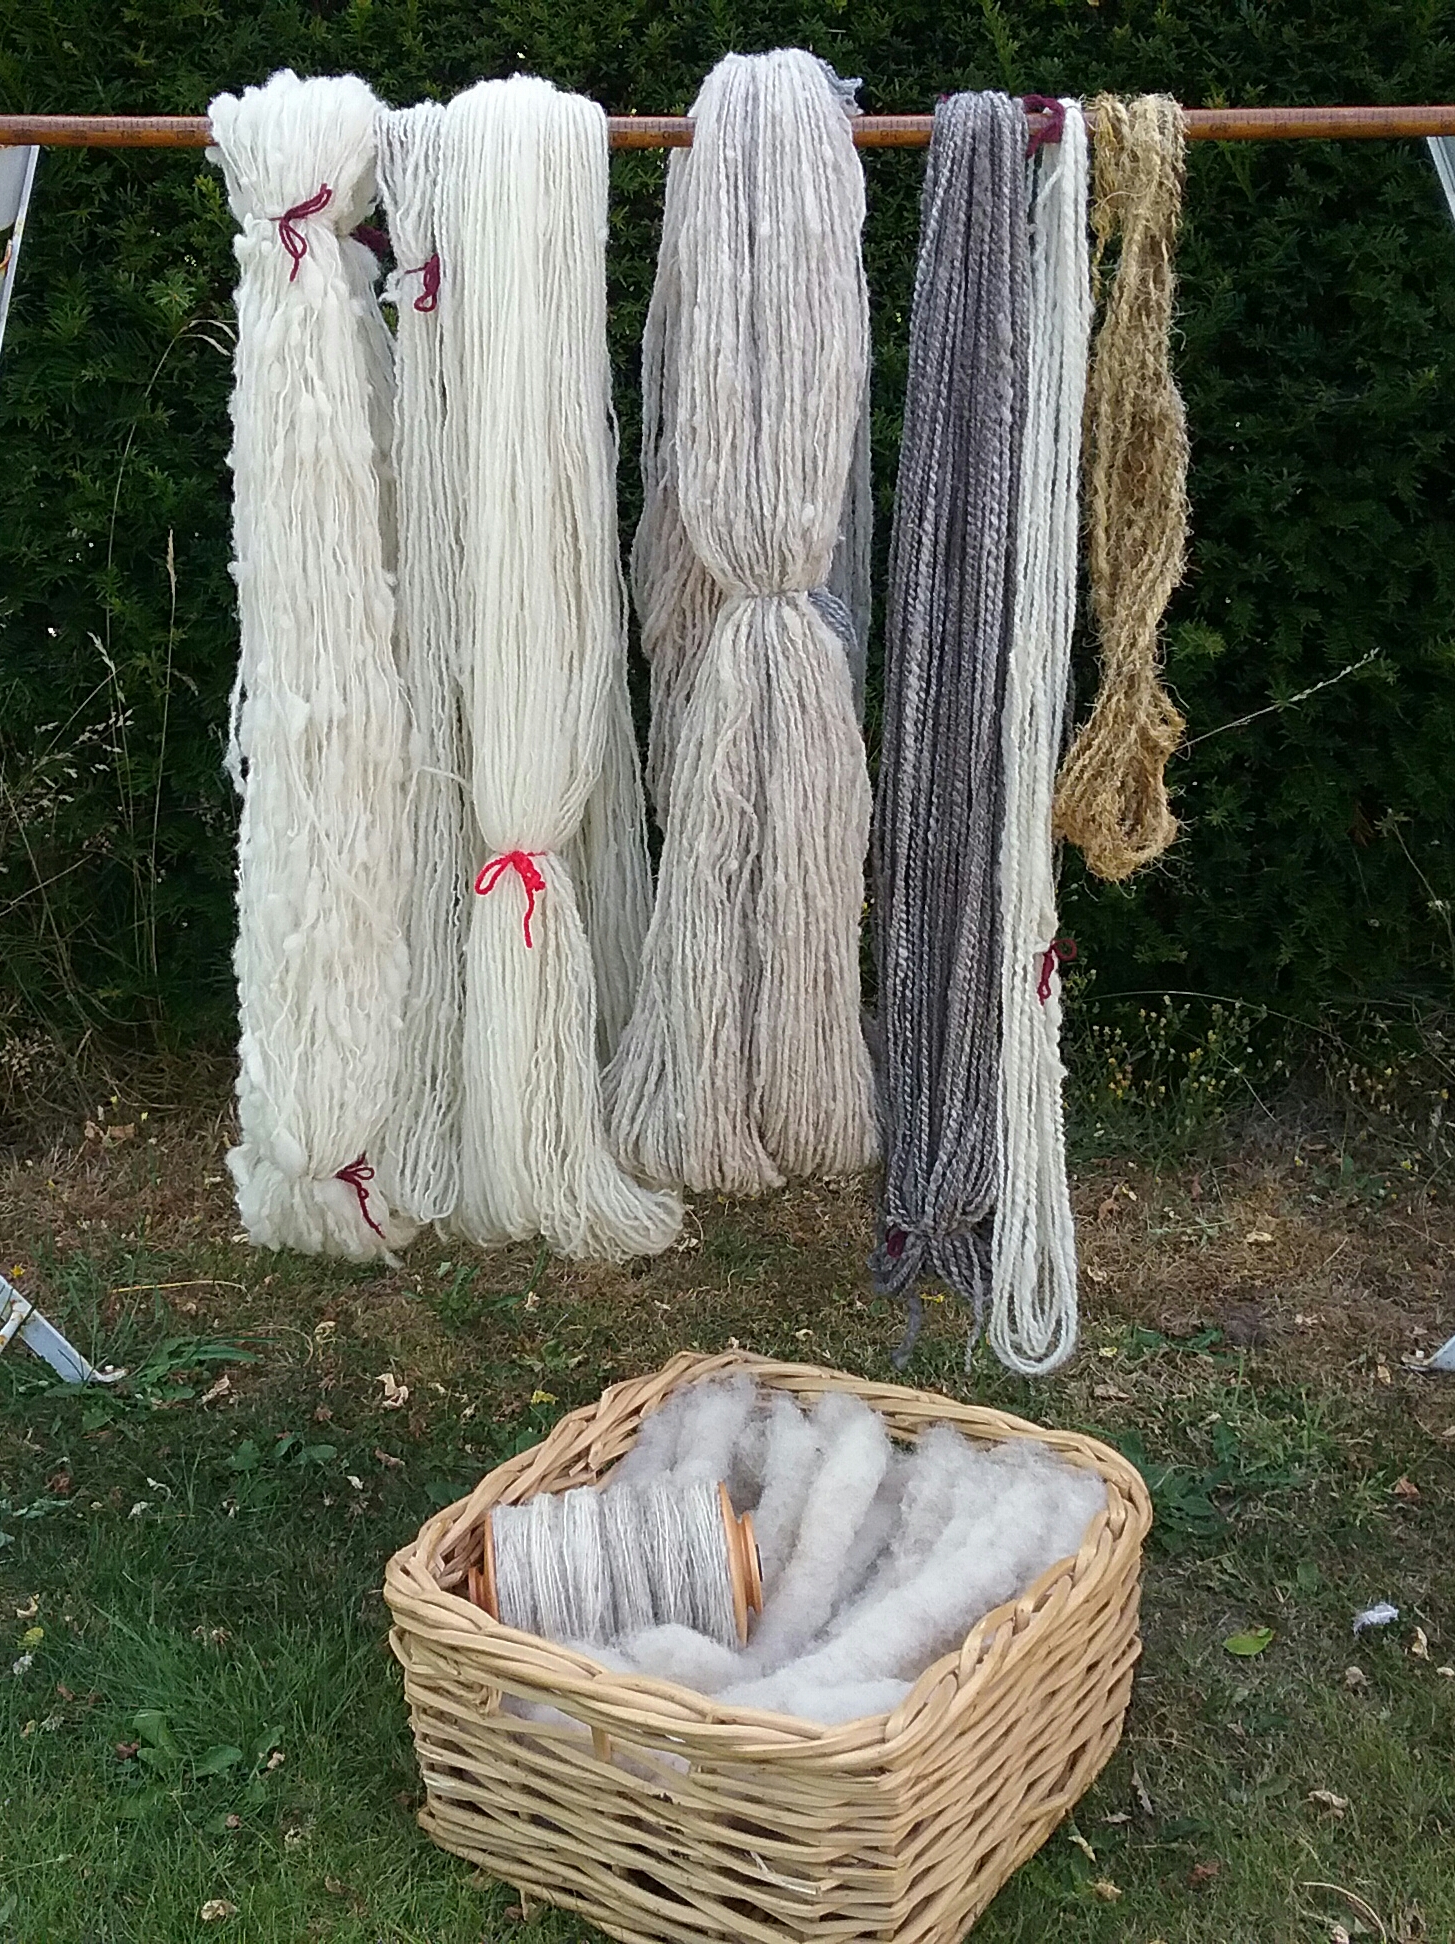
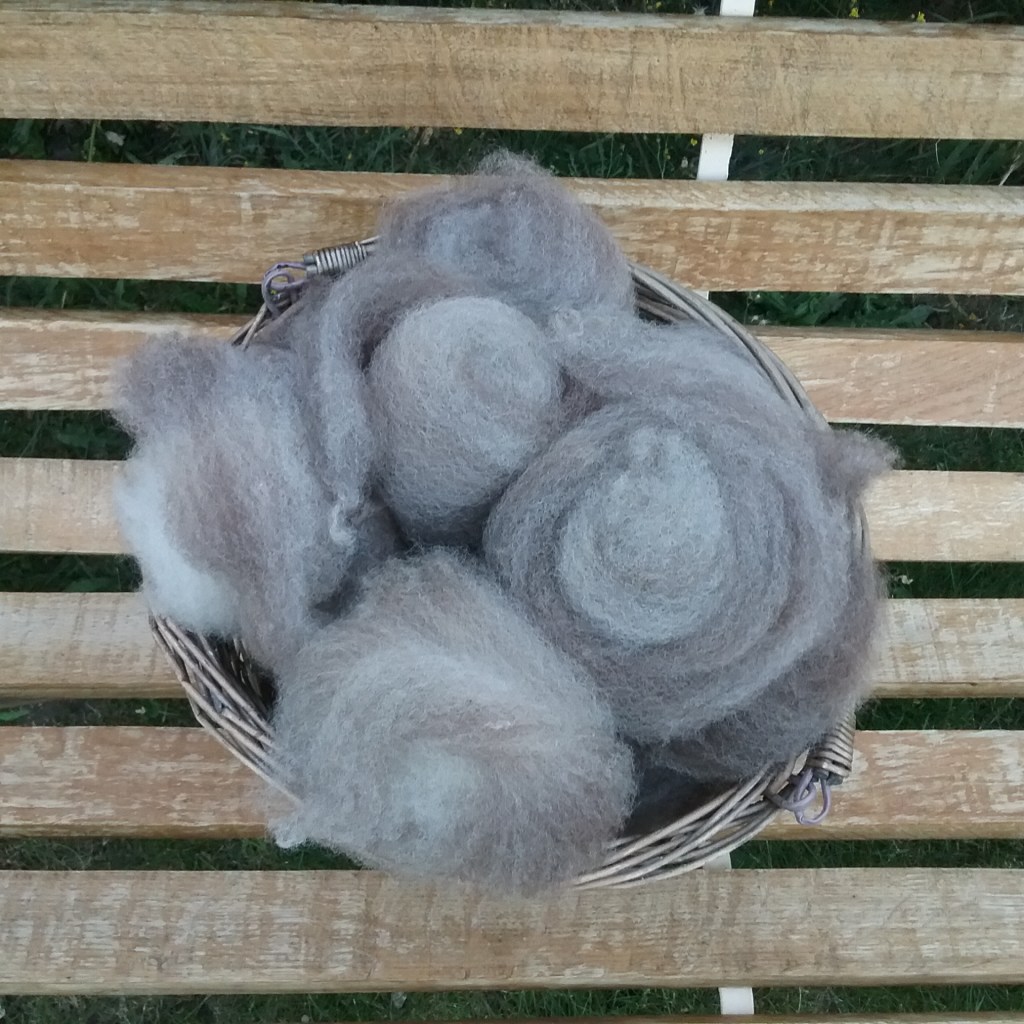
Tour de fleece is over for another year. I had to move my spinning setup this week, which made it a little more difficult and the heatwave definitely slowed me down; nevertheless it was still quite productive. I continued to make progress on my Hampshire Down project and decided to do some more stash busting with my drop spindle. Below are my daily progress photos from days 17-24 (17th – 24th July).
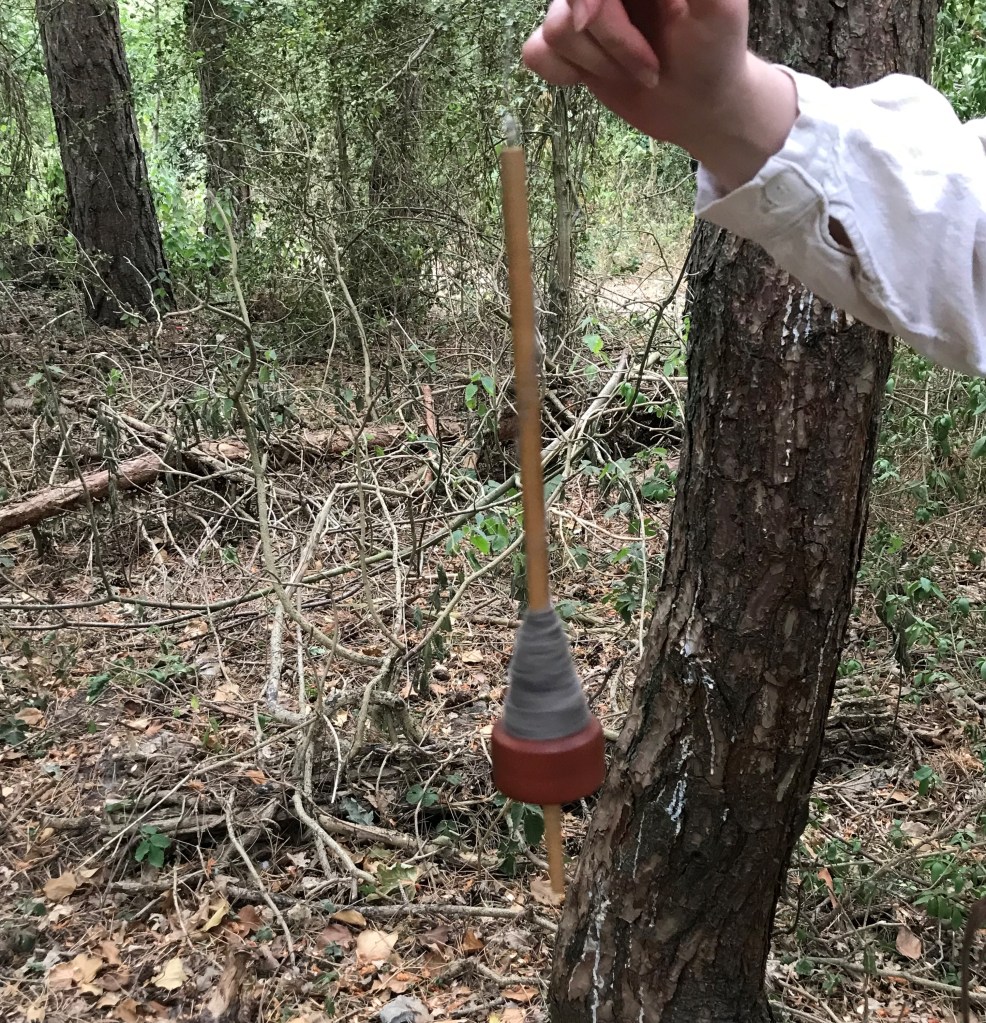
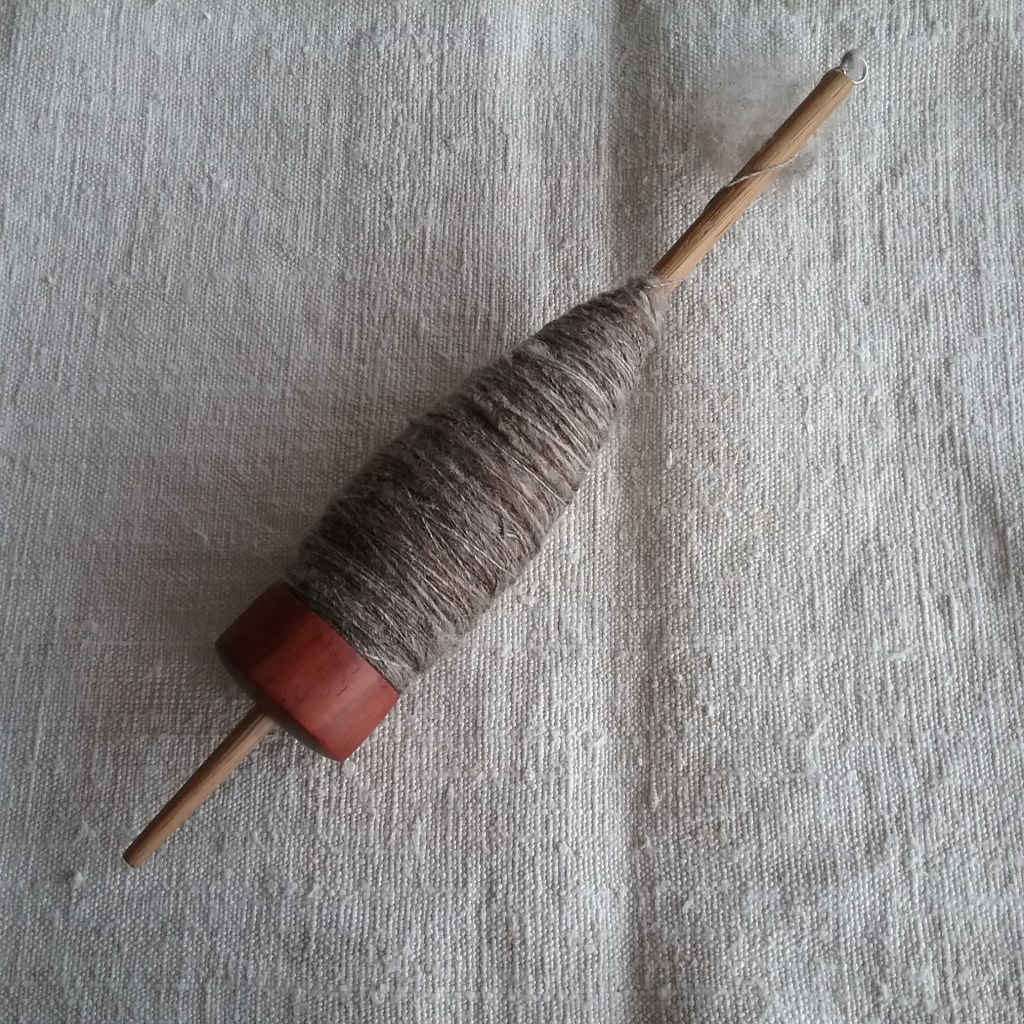
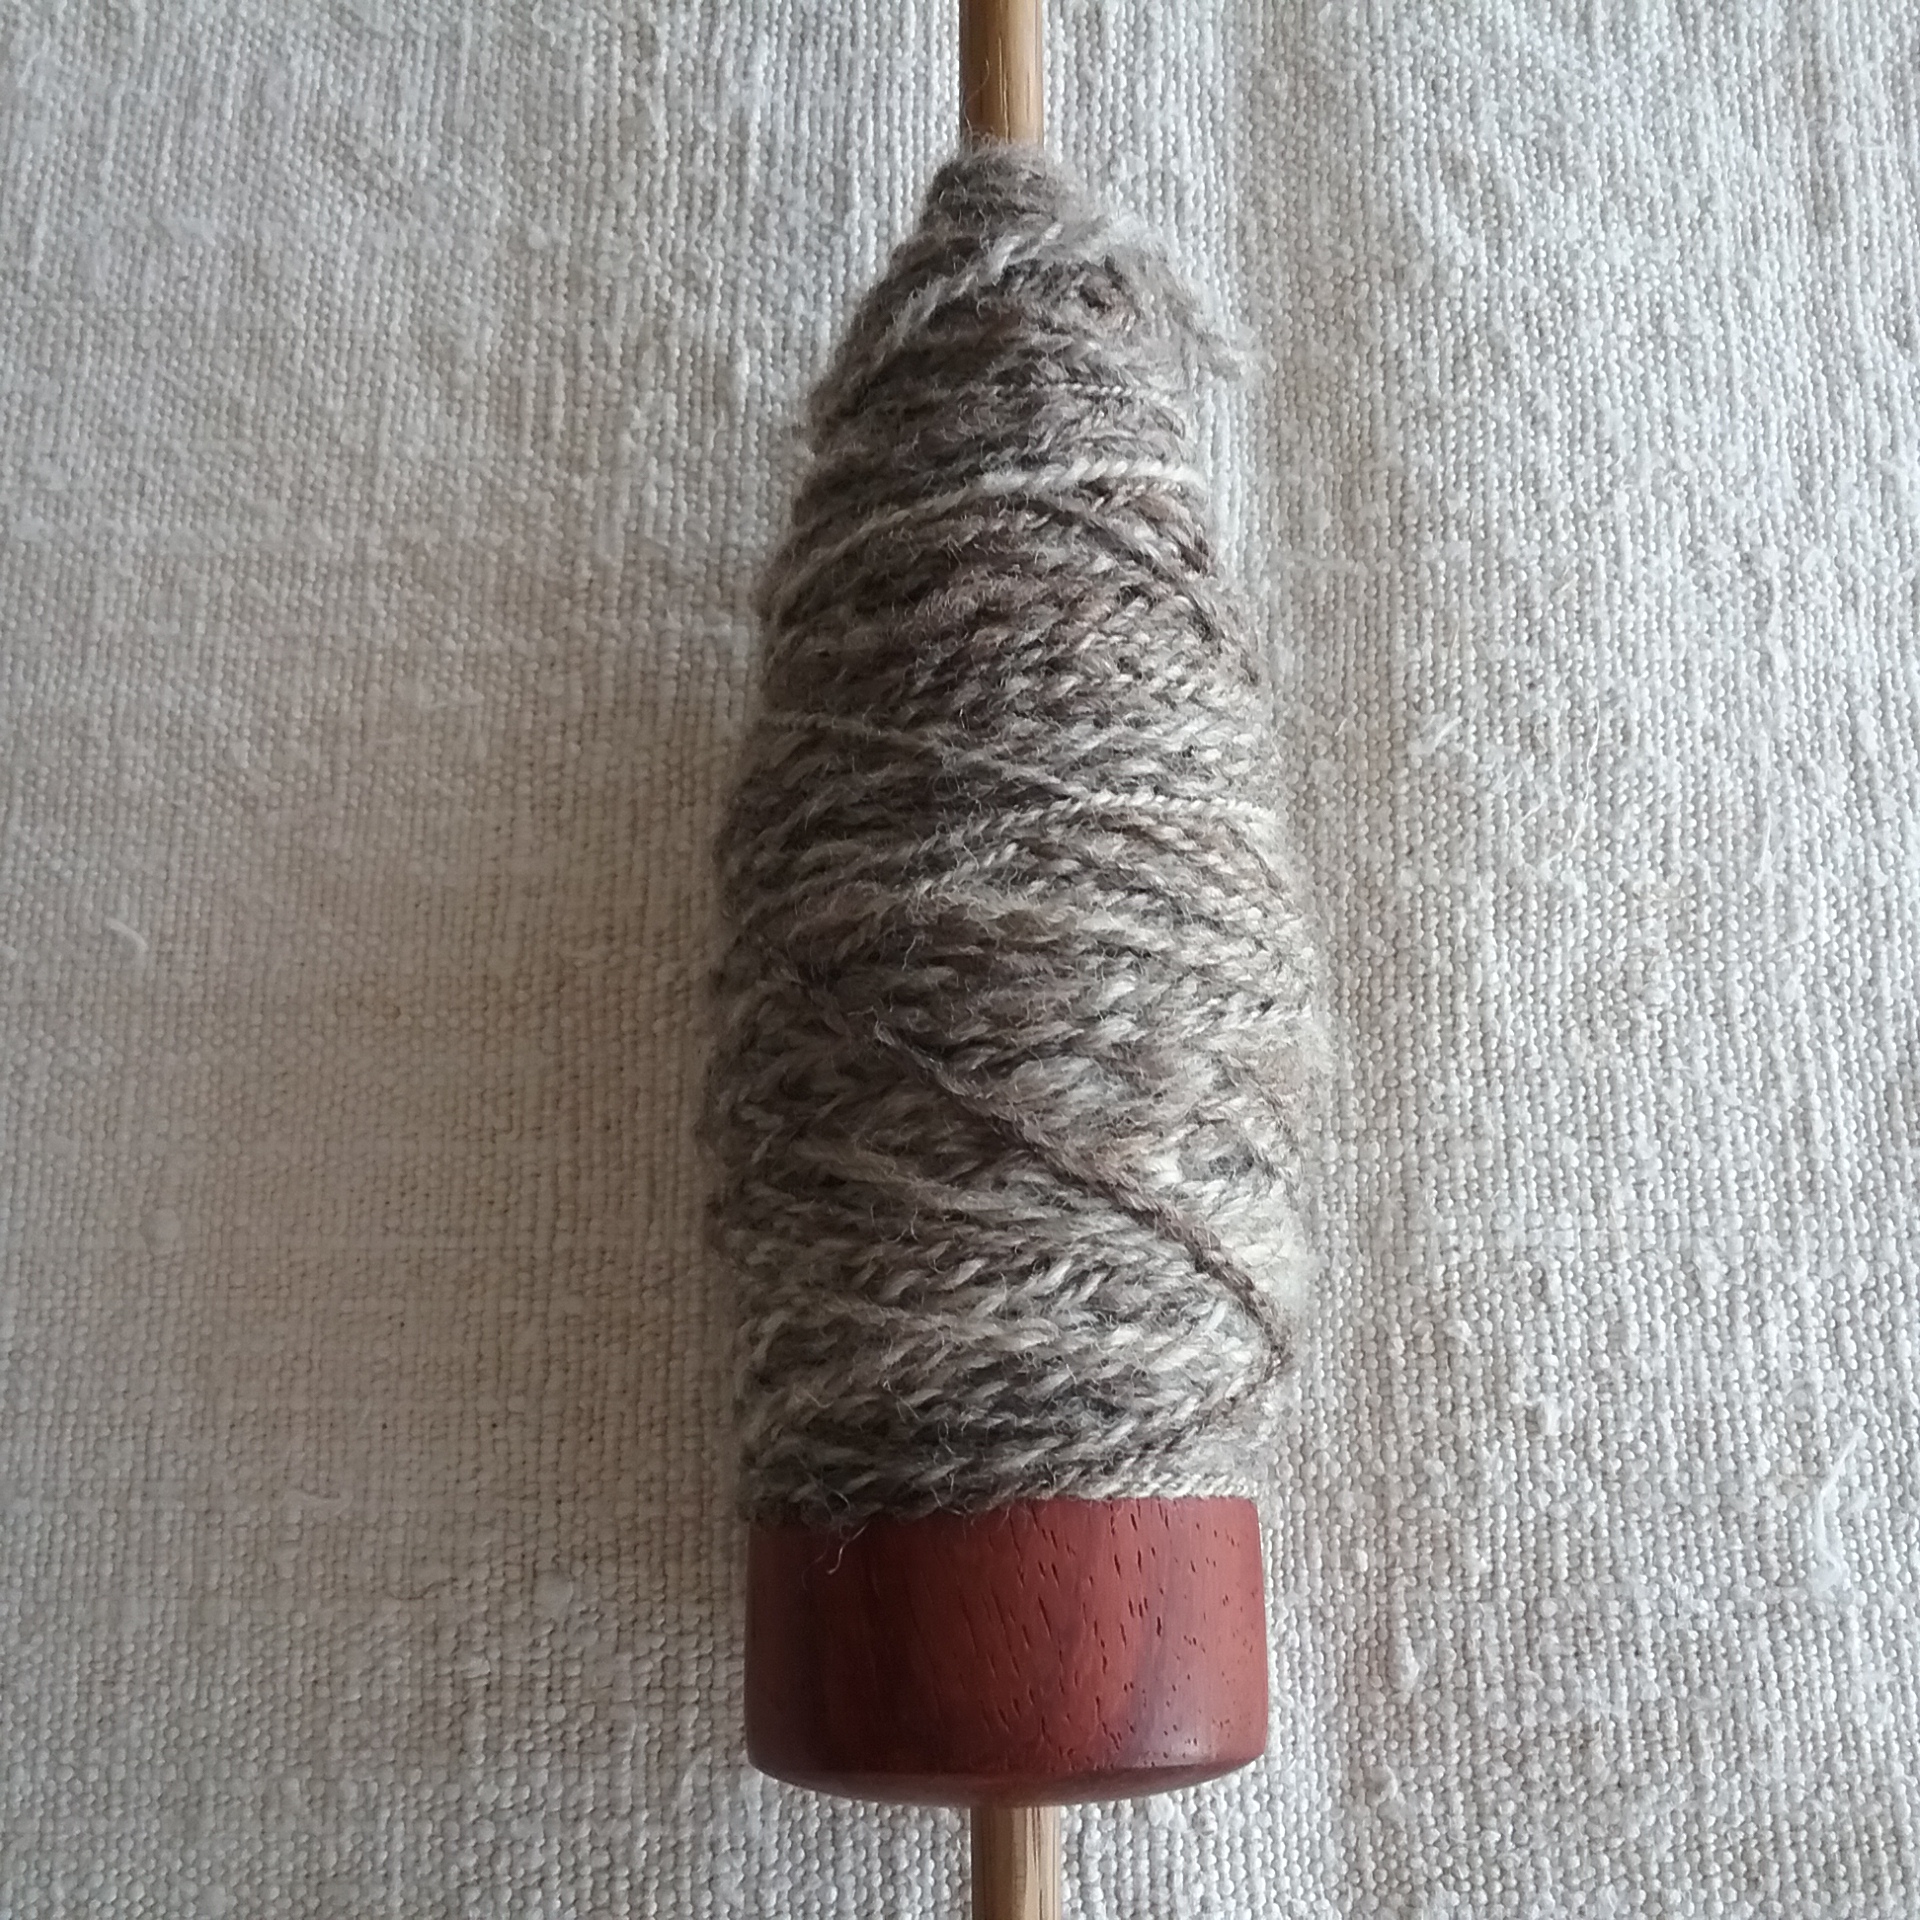
Day 17: Carded some more Hampshire Down Day 18: Started spinning a bobbin of Hampshire DownDay 19: Finished filling the bobbinDay 20: More Hampshire Down cardingDay 21: Combed a small bag of Shetland fleece from my stashDay 22: Took the Shetland and my drop spindle for a woodland adventure (photo credit @leanagibsonphotography)Day 23: Finished spinning the combed ShetlandDay 24: Plied the Shetland spun on Day 23
Reflections
My goal at the start of TDF was to make a big dent in my fleece stash and once again I was a little too ambitious! I didn’t manage to process a whole fleece as I’d hoped, but I made a good start on the Hampshire Down (for which I have a project in mind). I did lots of testing for my DIY wool combs which are nearly finished and also processed some smaller quantities of fleece from my stash that I had put aside while I had other projects on the go. I found it much easier to get into a daily routine of spinning this year and although I challenged myself to do 1 hour of TDF per day, I ended up running over this by an hour or so most days. I re-discovered my love of spindle spinning (most of my work has been on the wheel since last TDF), attempted plying on the spindle for the first time and learnt how to wind and use an Andean plying bracelet. All in all, a very productive 24 days and I’m already thinking about next year’s challenge!
Did you take part in Tour de Fleece this year? I would love to hear how you got on. Feel free to share your results in the comments below!
Another week of TDF has flown by and I’ve had a little less time this week, though have still stuck to my hour/day guideline. I made progress on the Hampshire Down spin and found some Romney I’d saved for combing in my stash. I’m realising that the blitz I had planned for my stash in 24 days was a bit ambitious, so I’m going to focus the final week on making progress on whole fleece projects and sorting out oddments in my stash. Below are my daily progress photos from days 10-16 (10th – 16th July).
Day 10: Started spinning the 2nd Bobbin of Hampshire DownDay 11: Continued filling the second bobbinDay 12: Finished filling the second bobbinDay 13: Began plying the Hampshire Down on my Jumbo bobbinDay 14: Finished plying the Hampshire down Day 15: Found some Romney I’d saved for combing, so combed spun and plied it on the spindleDay 16: Experimented with combing fleeces too long for carding from my stash – Jacob Top, BFL Bottom
For more information about my tour de fleece challenge my introductory blog post is here and my Week 1 Wrap-Up is here. I’m also posting my progress photos daily on my instagram.
If you are also joining in with Tour de Fleece (whether part of a group or going it alone like me!) I’d love to hear how you’re get on – feel free to share your progress/goals in the comments section.
The first week of Tour de Fleece has flown by, but I feel I have made some inroads into my stash. I began by spinning up a small amount of an unknown fleece that has been in my stash since it was given to me. I decided to use this fleece to road test my DIY wool combs (blog post to follow after TDF). I also experimented with some unusual fibre and made a start spinning a Hampshire Down fleece (because it happened to be the nearest to my wheel at the time!). Below are my daily progress photos from days 1-9 (1st – 9th July).
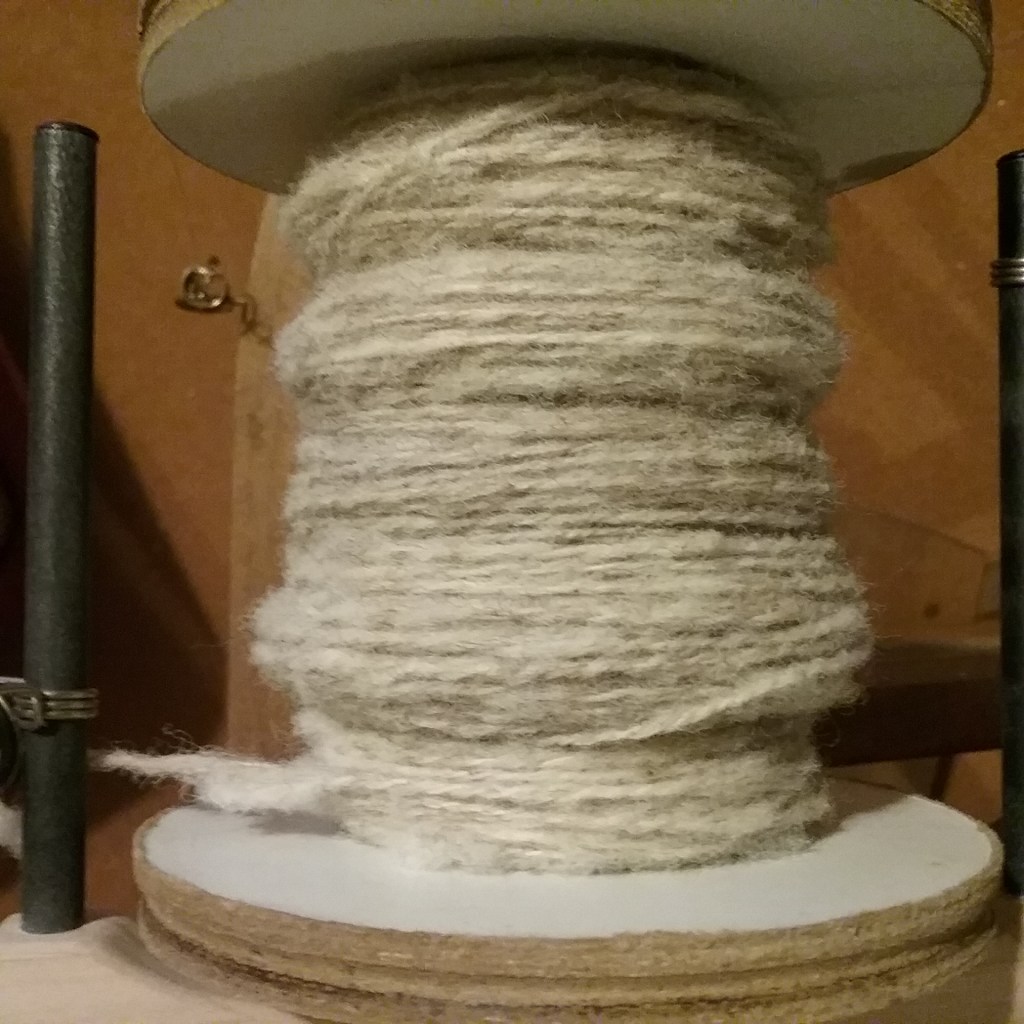
Day 1: Combing the mystery fleeceDay 2: Started Spinning the combed nestsDay 3: Finished spinning the mystery fleeceDay 4: Spinning and plying sweetcorn ‘silk’ fibreDay 5: Plied my yarn from days 2&3Day 6: Carded and spun the combing ‘waste’ into a slubby singleDay 7: Carded some Hampshire Down Day 8: Started spinning the Hampshire DownDay 9: Finished the first bobbin of Hampshire Down
For more information about my tour de fleece challenge my introductory blog post is here. I’m also posting my progress photos daily on my instagram.
If you are also joining in with Tour de Fleece (whether part of a group or going it alone like me!) I’d love to hear how you’re get on – feel free to share your progress/goals in the comments section.
Tour de Fleece is an annual spinning event where crafters spin during every day the cyclists of the Tour de France ride. This year the dates are 1st July 2022- 24th July 2022. This will be my second TDF (I’m not part of any groups) so I have a better idea of how to structure my spinning this year (and know that the time goes much faster than you think it will!)
Last year I used TDF to finish some WIP’s and I challenged myself to spend 1 hour a day on any fibre craft. This year I want to use TDF to make a big dent in my fleece stash so I’m going to aim to spend at least 1 hour a day on either spinning or fibre prep (carding/combing/wool picking). I’m not going to be too strict about timings – this is just what I feel is an achievable guideline.
Like last year I will be taking progress photos to hold myself accountable and will be posting these daily on my instagram and also in a blog post at the end of each week (the first weekly wrap up will be Sunday 10th July).
If you are also joining in with Tour de Fleece (whether part of a group or going it alone like me!) I’d love to hear how you get on – feel free to share your progress/goals in the comments section and if you want to find out what I got up to last TDF I’ve included links to my posts below.
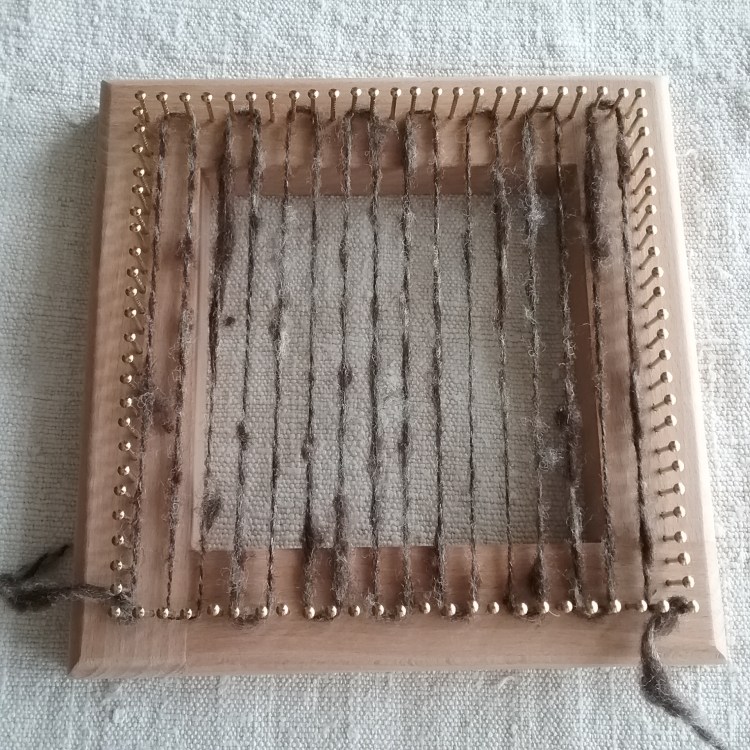
When I began exploring the wool from different breeds of sheep I decided it would be nice to have a tactile record as well as written notes. I had seen several people making colour study blankets or wall hangings documenting natural dyes, so thought a breed study blanket would be a good way of displaying my work with fleece. I decided that each square should be representative of the project/s that I make with the fleece – a sort of mini version to cross reference. Since I work with multiple fleeces at any one time, I don’t plan for the squares to be in strict order, however hopefully they will follow some sort of chronology as I go.
My main Ryeland project was the woven poncho, so my breed study square needed to be plain weave. The easiest way to weave small squares is on a pin loom. These can be DIYed (there are lots of tutorials online), but I recently attended a local yarn fair where a lovely vendor was selling beautiful handmade pin looms so I decided to buy one. There are two directions of weave you can make on a pin loom; bias and straight (links will take you to some good Youtube tutorials). In order to match the weave of my poncho I opted for a straight weave – the process of which I show below.
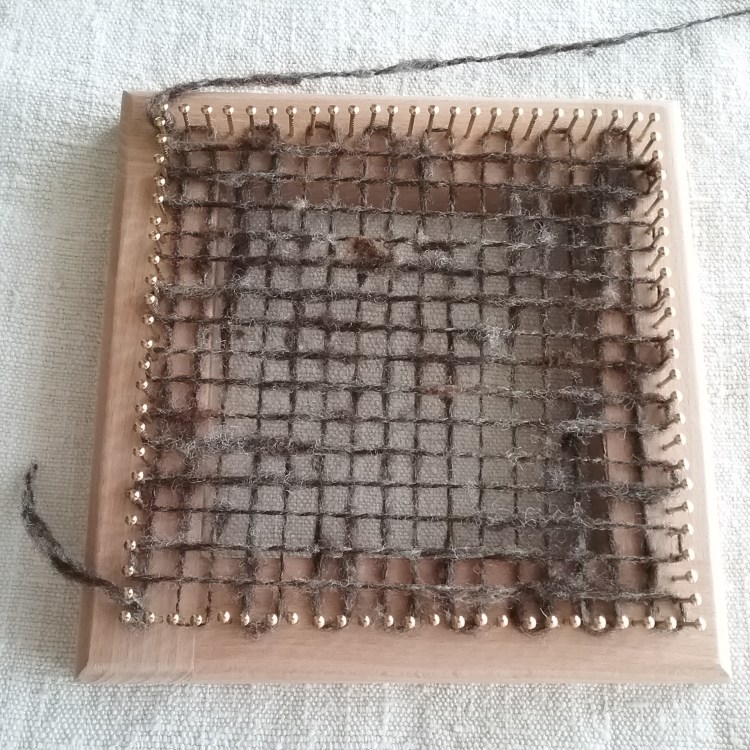
1st warp threads starting from bottom left corner to bottom right
1st weft threads starting from bottom right to top right (I found it easier to rotate the loom 90° to do this).
2nd warp threads in the spaces between
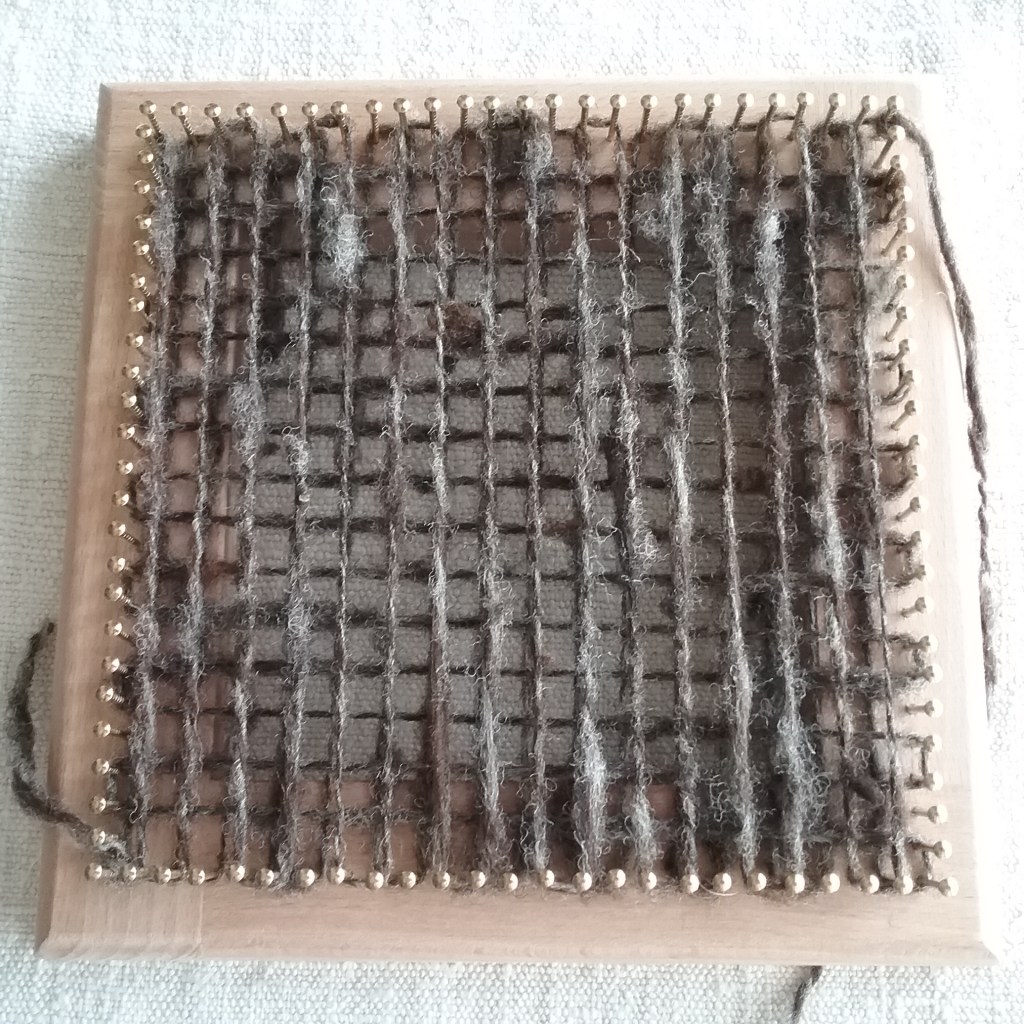
After weaving over and under the warp threads in the rows between the 1st weft threads
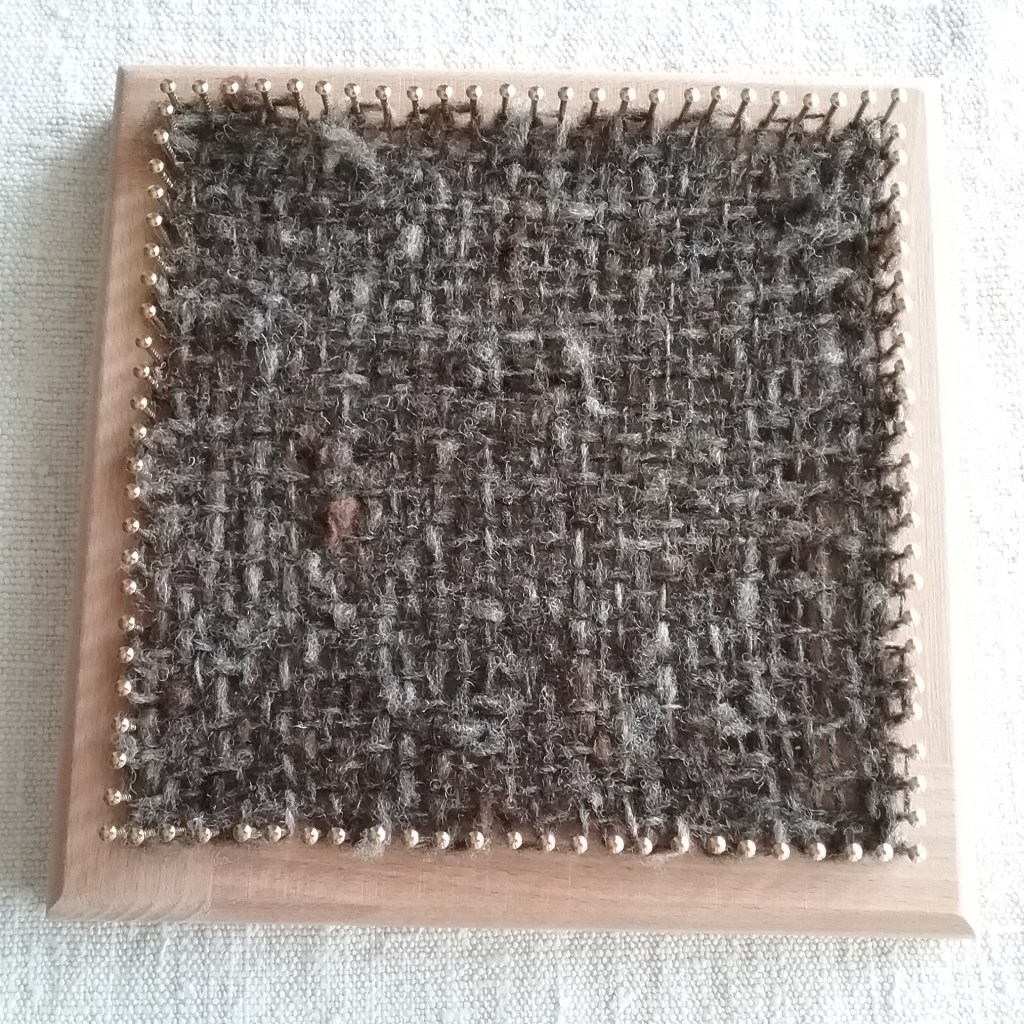
The square was then taken off the loom and washed to allow the fibres to full (fluff up and fill the gaps).
This breed study blanket will constantly evolve and will probably never be 100% complete – at least not anytime soon (there are over 60 different breeds of sheep in Britain alone)! I’m very pleased with how my first square has come out though and am looking forward to having more pin loom adventures in the future.
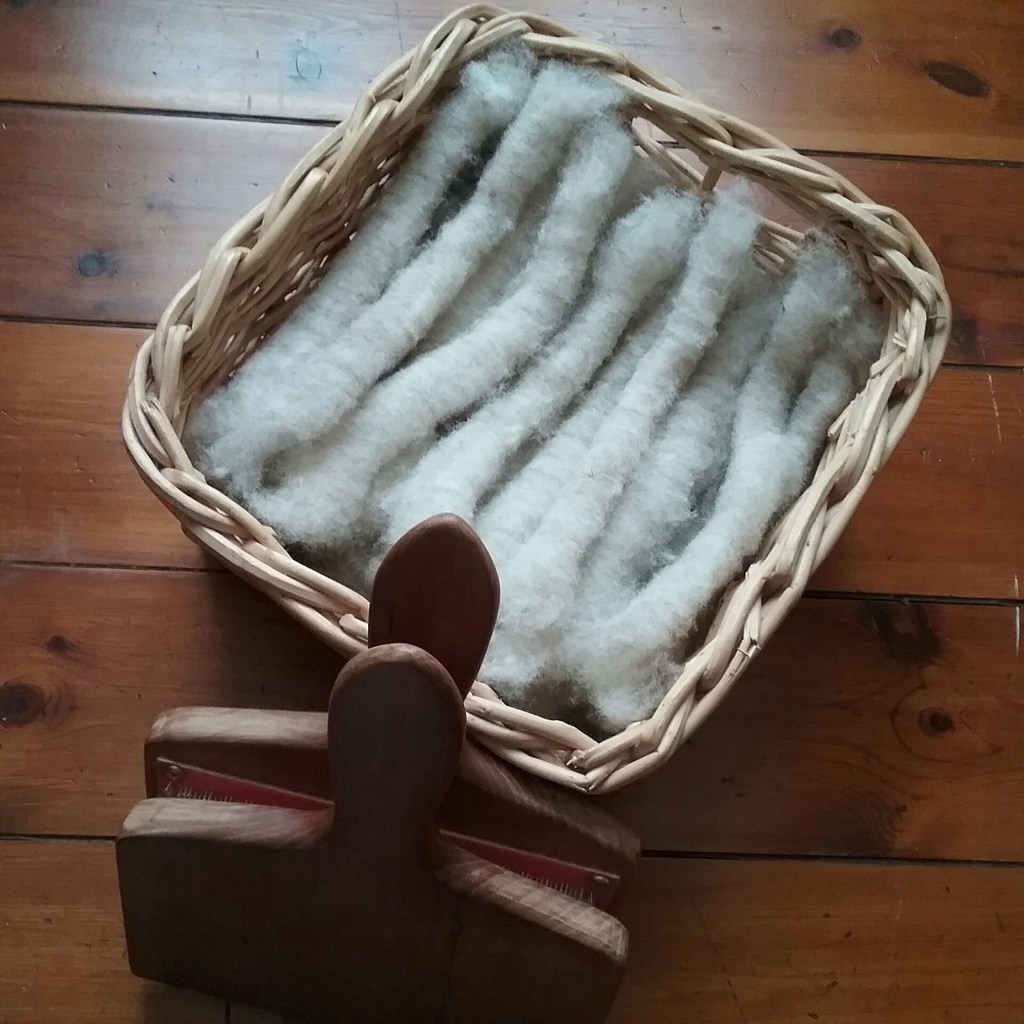
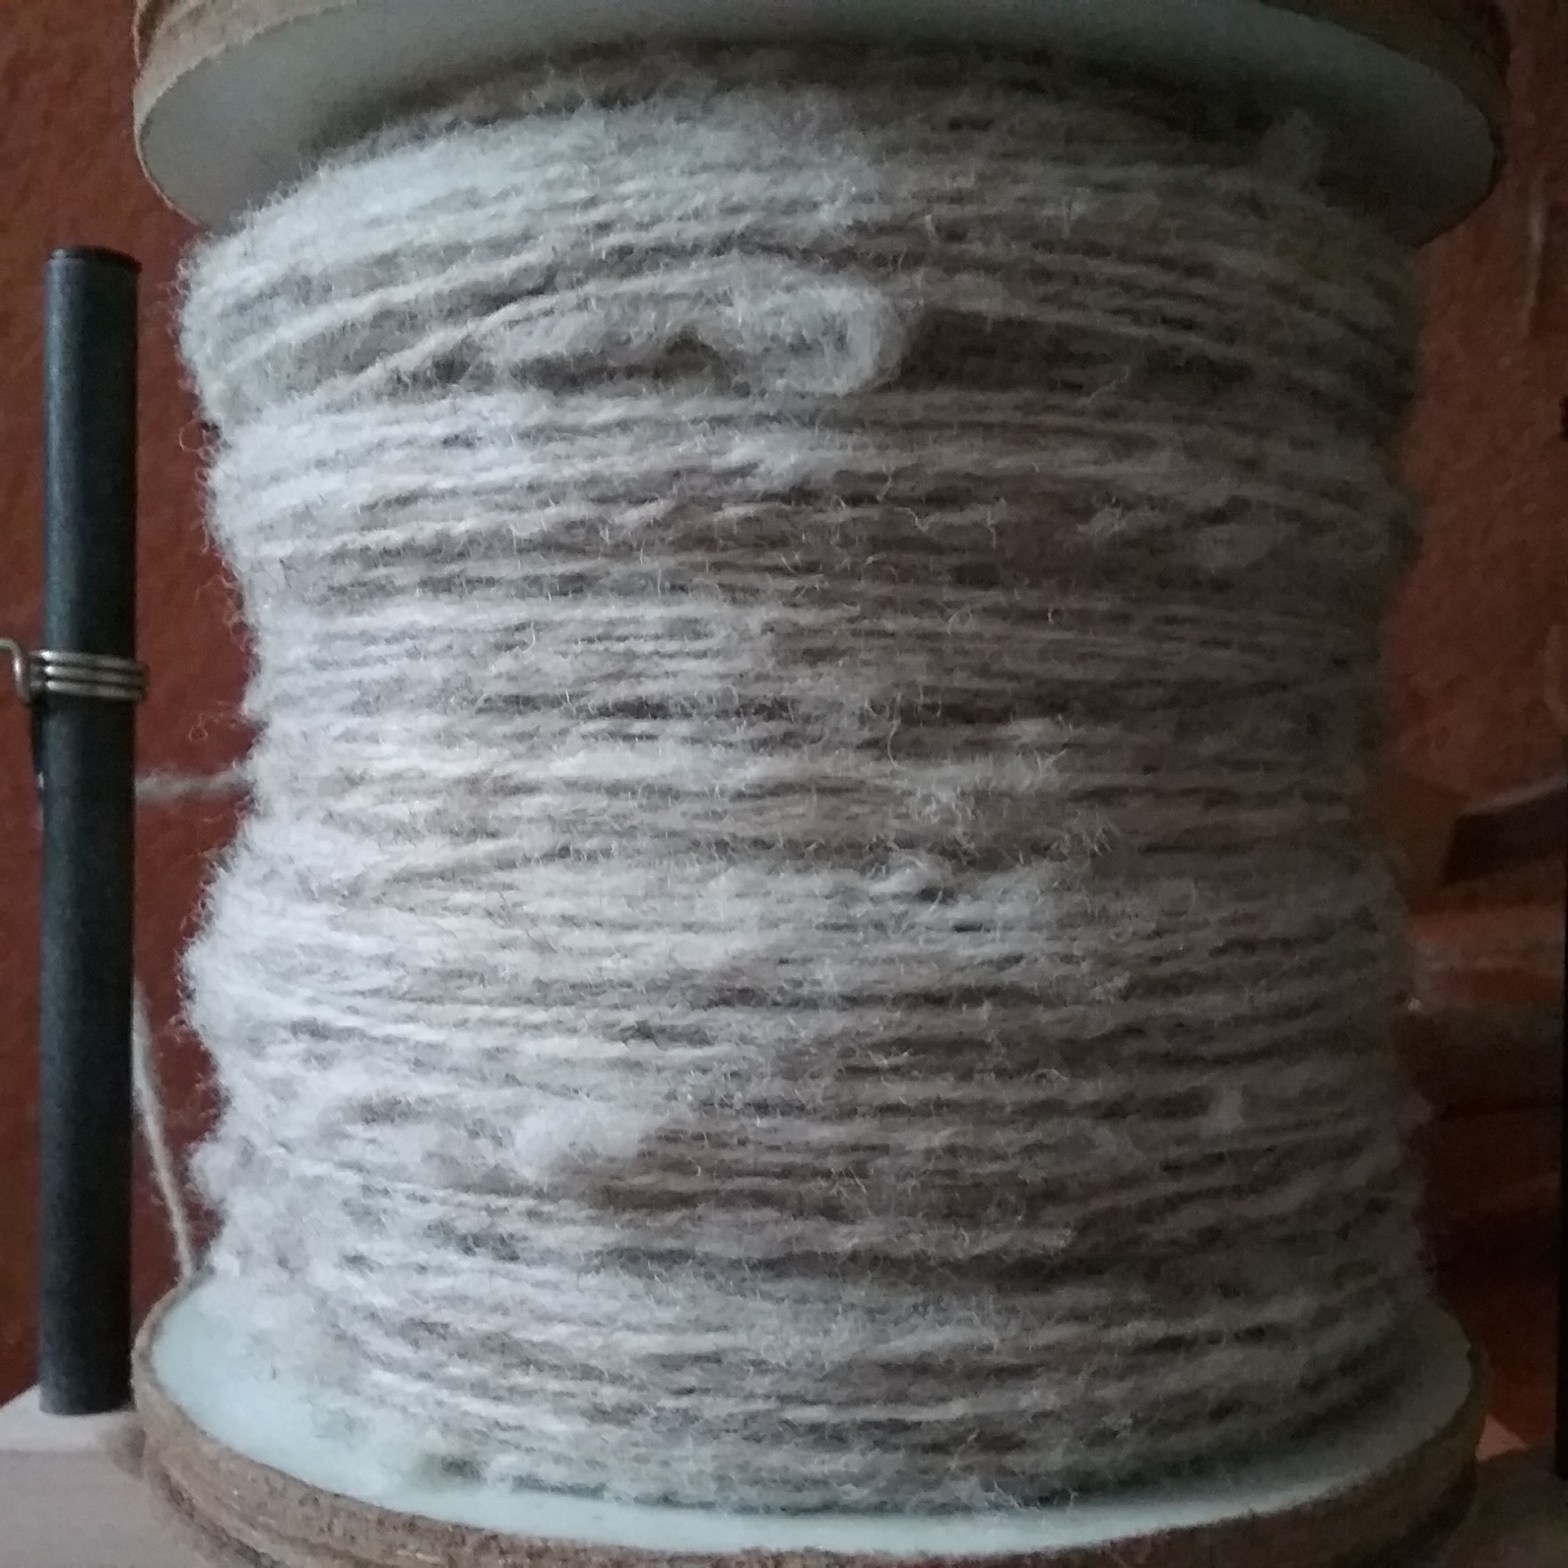
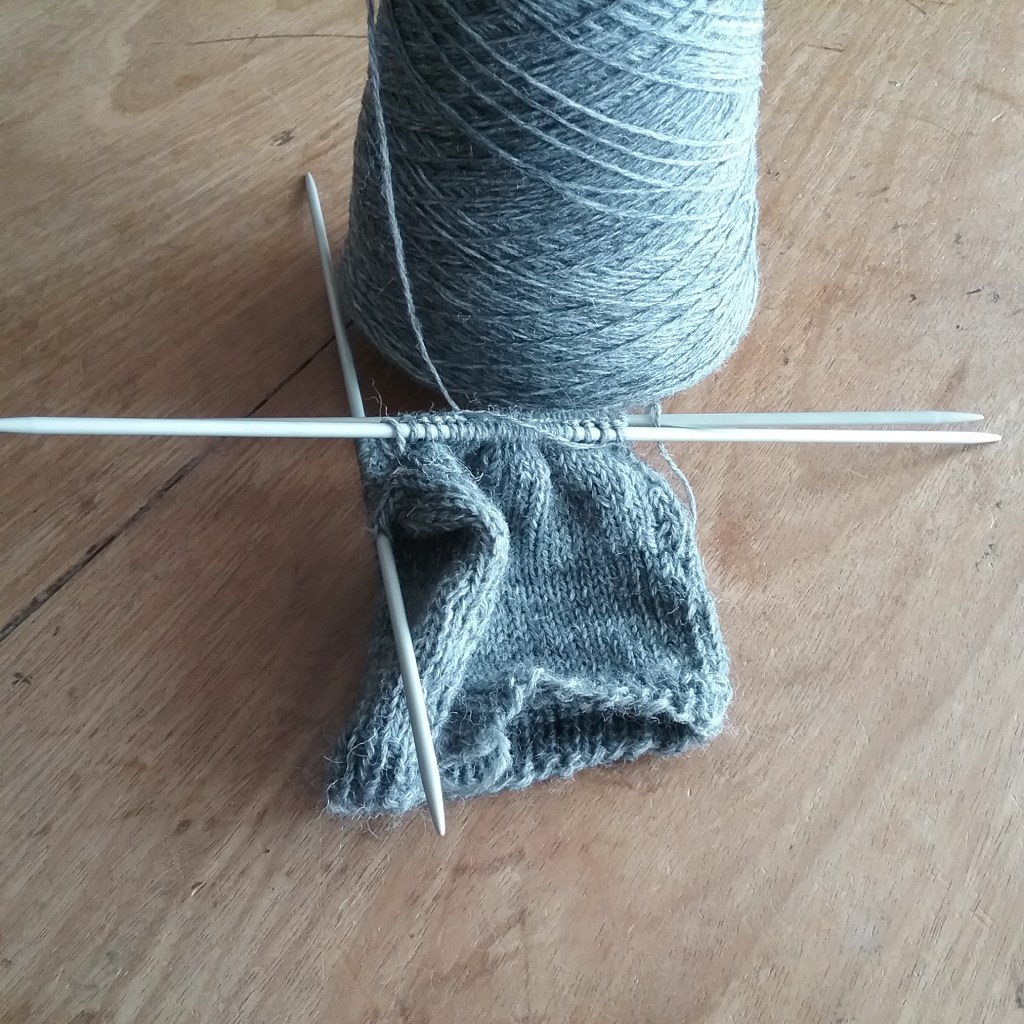
Usually long stapled fleeces are combed and spun worsted style to create an even yarn, however I like to try and keep the quirks of each fleece in the finished wool. I decided I would spin the fleece as it came without any preparation apart from some light teasing apart of the fibres to help keep the shape of the locks. Unfortunately back in 2020 when I washed my fleece, the orifice on my standard flyer was too small for locks to pass through; however I recently fitted a jumbo flyer to my wheel so I can now spin thicker yarns.
Attempting a Coreless Corespun
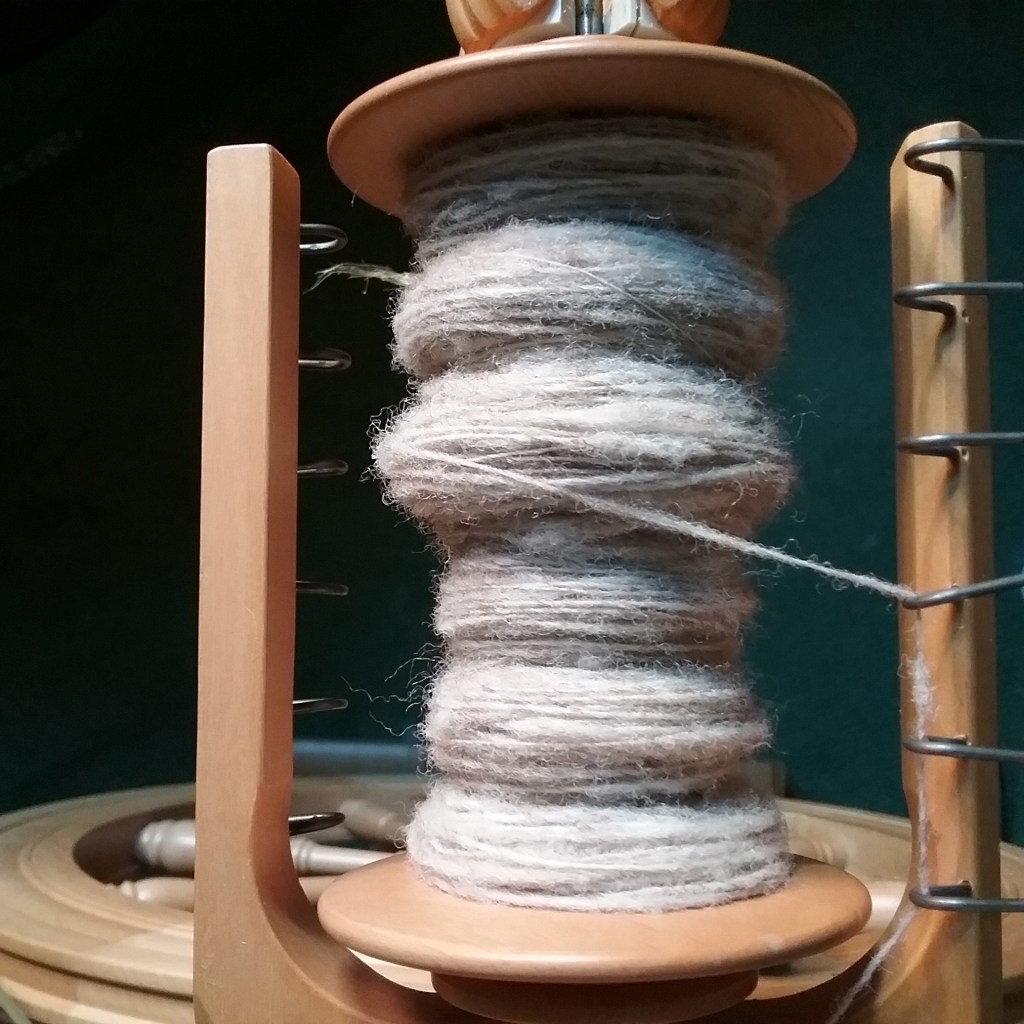
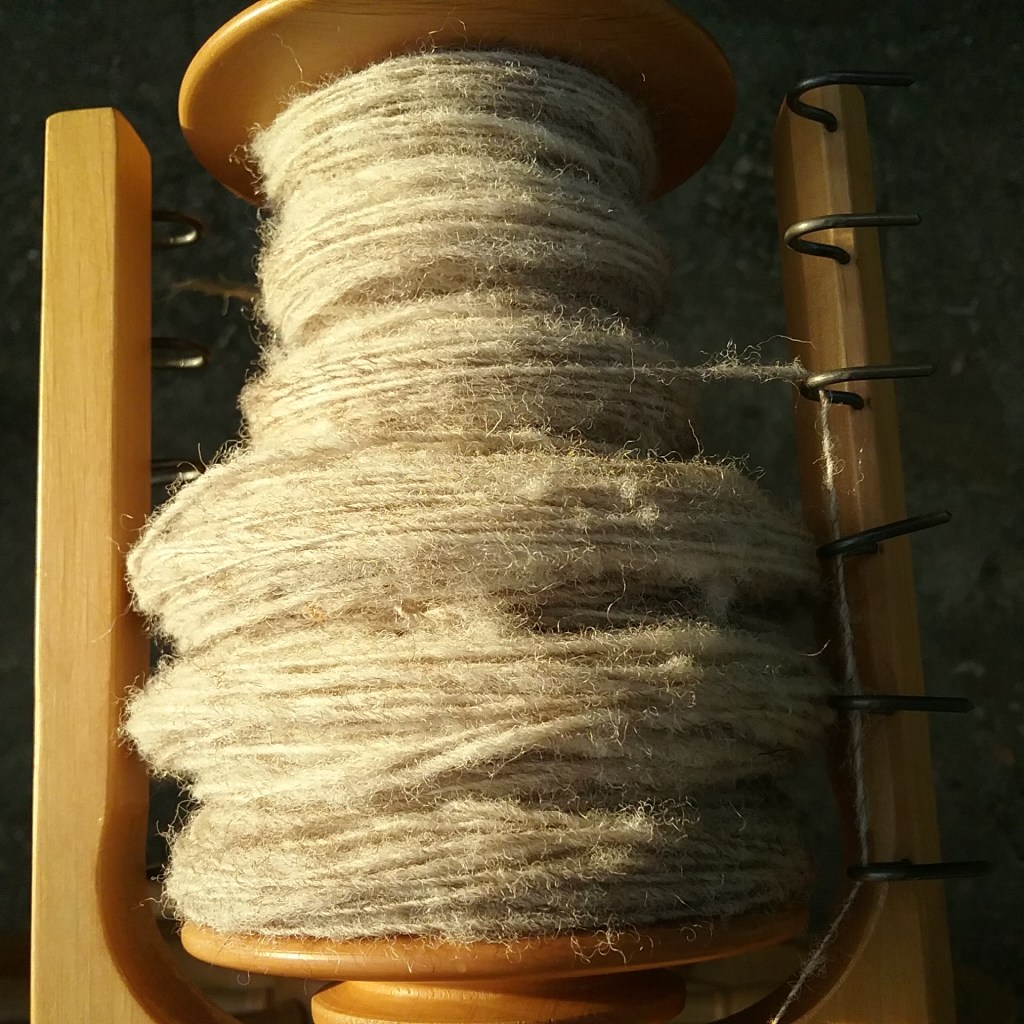
Core spinning is usually done by allowing loose fibre to wrap around a pre-spun or commercial ‘core’ yarn instead of drafting in the usual manner (a good link to this technique on Youtube is here). This core gives added strength and the yarn has a different look. I’ve tried core spinning with roving several times before, but I felt that the Lincoln Longwool fleece would be too slippery to catch properly onto a core, so I decided to try what many people call a coreless core spun. This technique is a little tricky to get the hang of as it involves drafting half of the fleece in your hands to make a core while simultaneously wrapping the other half around the core you’ve just spun. Hopefully the photo below demonstrates this somewhat:
The fleece on the left is being drawn out more than the fleece in my right hand which is wrapping around it.
During my first attempt I drafted the fibres a little too much as there were some very thin sections and fewer locks showing. By my second bobbin full I was drafting the fibre less, treadling at a slower speed and allowing a little more twist to build up in the drafting zone to help create a thicker yarn. To help prevent over drafting I found it was useful to hold the two halves of fleece as if you were plying them together. My first and second attempt are shown below:
1st Attempt2nd Attempt
Although challenging, this fleece is making highly enjoyable spinning and as the yarn has a wide diameter, it is spinning up quite quickly. I don’t plan to ply my yarn as I feel this could flatten the locks out (however there are certainly lots of art yarn type plying possibilities) and I will update this post when I have attempted washing a skein to see how the locks behave after, as, still being a ‘single’ the yarn is a little energised straight off the bobbin. Textured yarns like this tend to be shown off best in weaving, so I think this yarn will be reserved for adding texture and contrast to woven projects, rather than a project in itself.
Hello everyone, I have had further computer problems since my last post which have kept me from blogging, but hopefully these are now fixed. I’ve been working on several things recently, some are bigger projects and are taking quite a long time to complete, so I thought I would share a few of my current WIP’s.
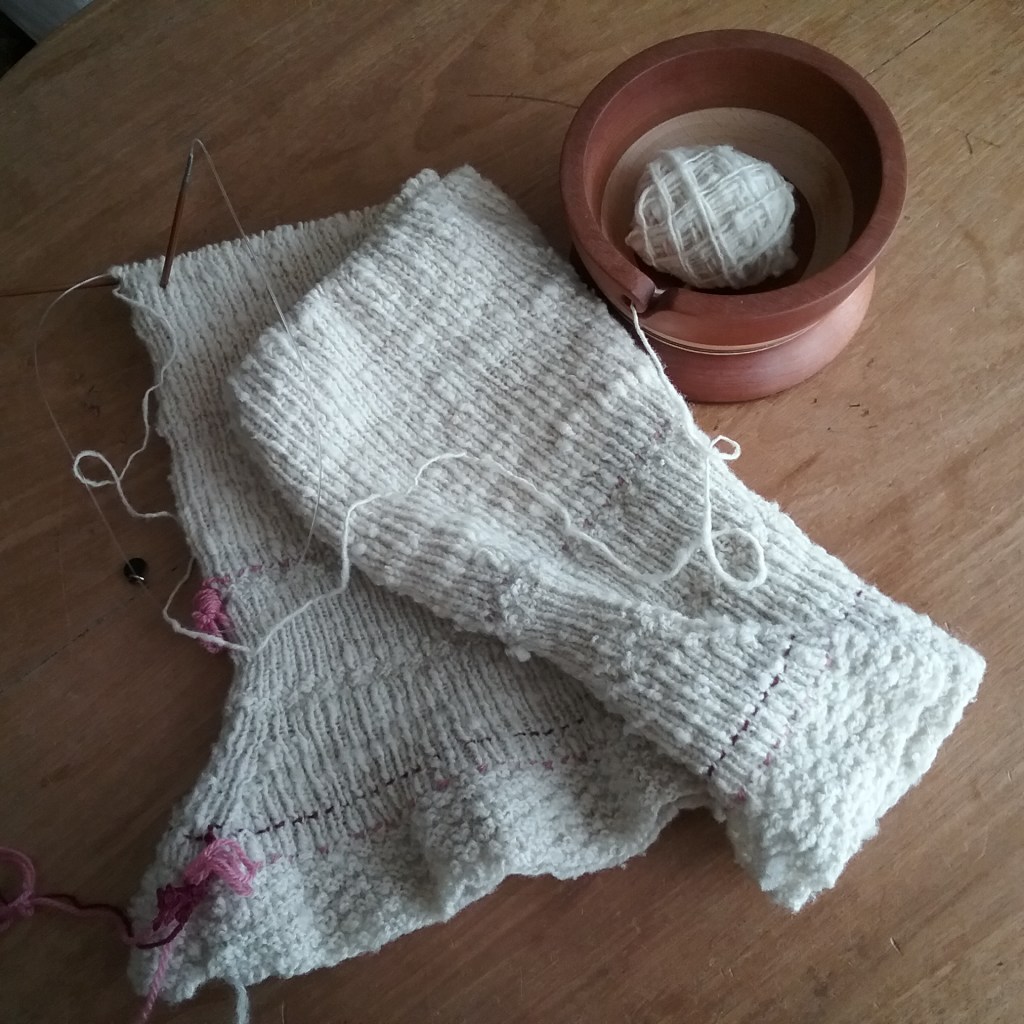
Knitting this year did not get off to a good start; January saw me frogging a lace pattern fingerless glove I began last October, when it was just 2 rows from completion. Even though I had followed the instructions for calculating the size it was too big, but this didn’t show until it was nearly complete. Disheartened after pulling it all out, I opted to put that project aside and instead throw myself into a different knitting challenge. I decided to attempt knitting myself a jumper from my handspun clun forest wool. I knew I probably wouldn’t have the patience to knit a standard jumper, so I opted to make things even more complicated for myself by using an original Victorian knitting pattern to attempt to knit a jumper with ‘leg o-mutton’ style sleeves. With the help of several ‘lifelines’ in case it all went wrong I’ve knitted about halfway up the body of the jumper now.
Halfway through the jumperSecret mystery project
I’ve also cast on another little project that remains a secret for now as it is a gift to a friend.
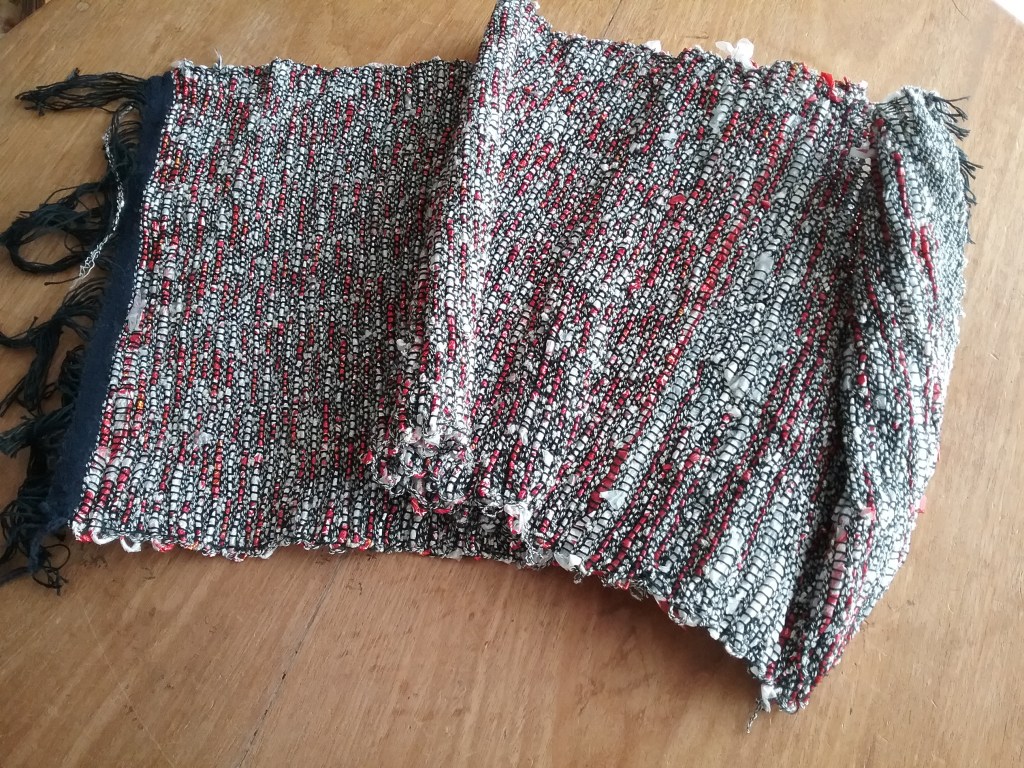
I had been pondering how to use the plastic sweet wrapper yarn I made last Tour de Fleece and after ruling out knitting and crochet (the foil in the wrappers made it too stiff) I decided to try weaving it. I wove one row of sweet wrapper yarn every two rows of black and white yarn from my stash in the hope that after washing, the fabric would have less gaps than if I just used the sweet wrapper yarn. This was the result…
I willdo a full write up of each project when they are finished. Now I can use my computer again I’m excited to get back to the usual more regular posts. Let me know what you are working on in the comments below!
Hello everyone, my computer has had problems for the past couple of weeks, so I have been unable to blog. It is temporarily fixed so, at least for now I can post again.
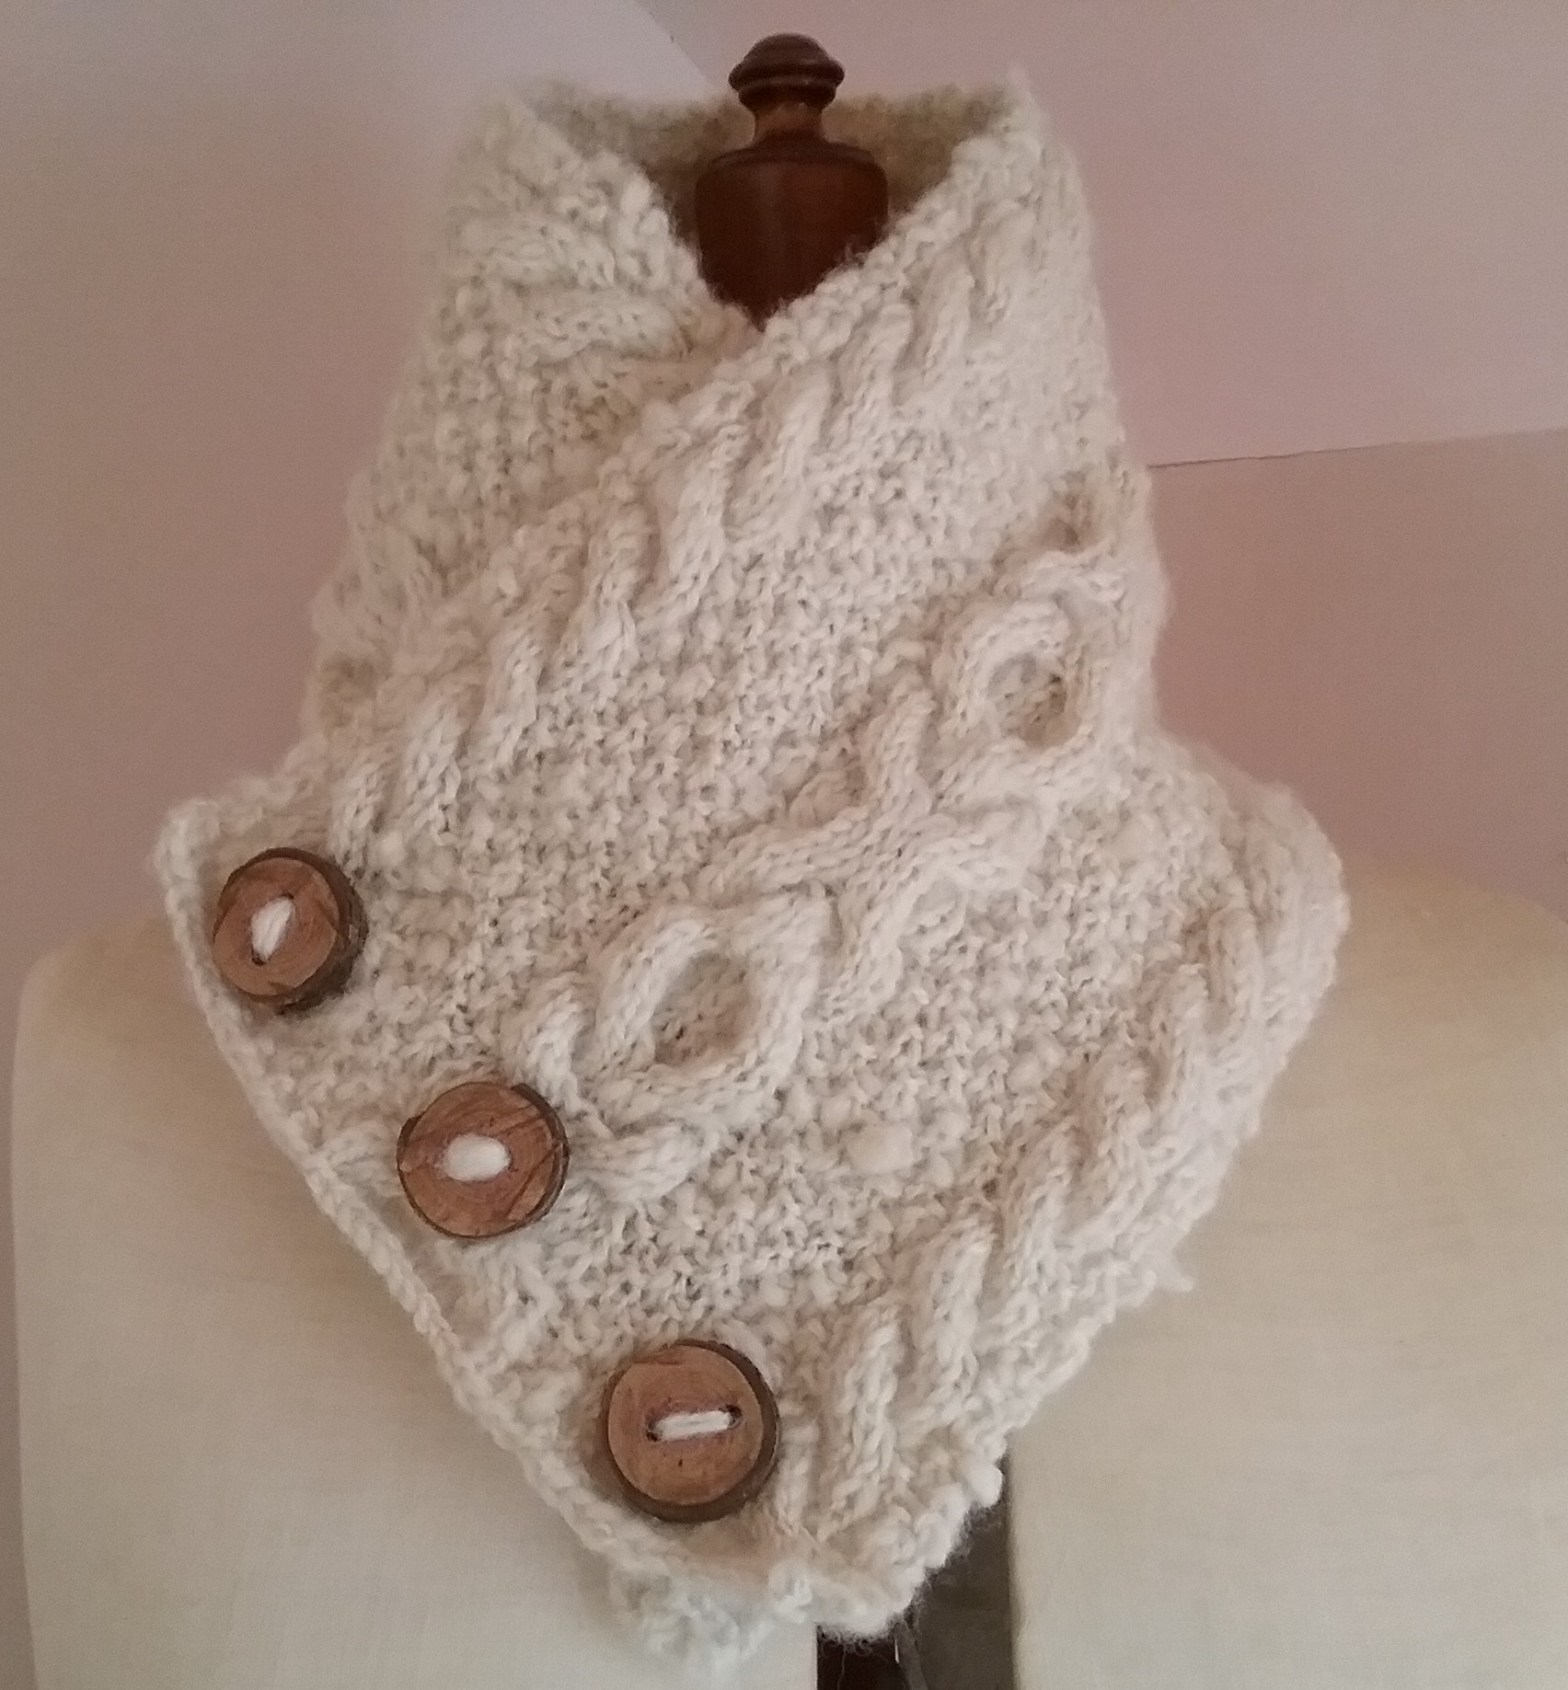
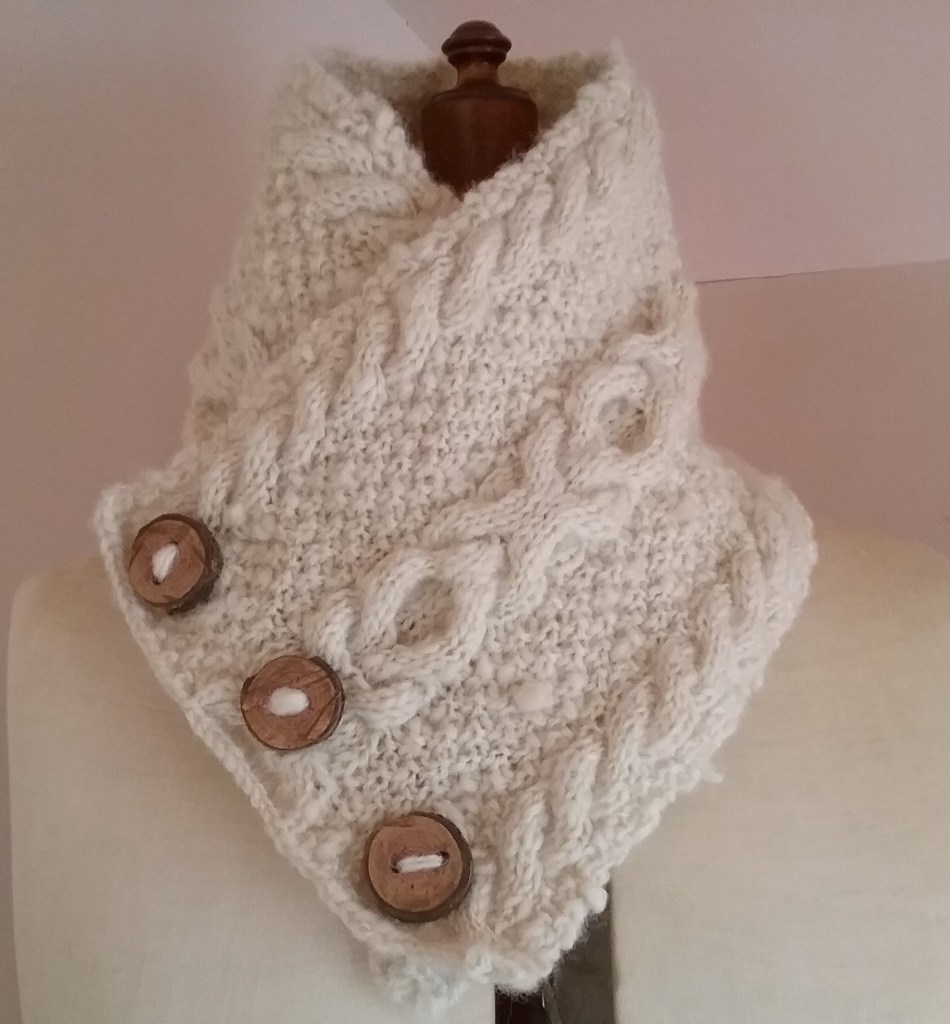
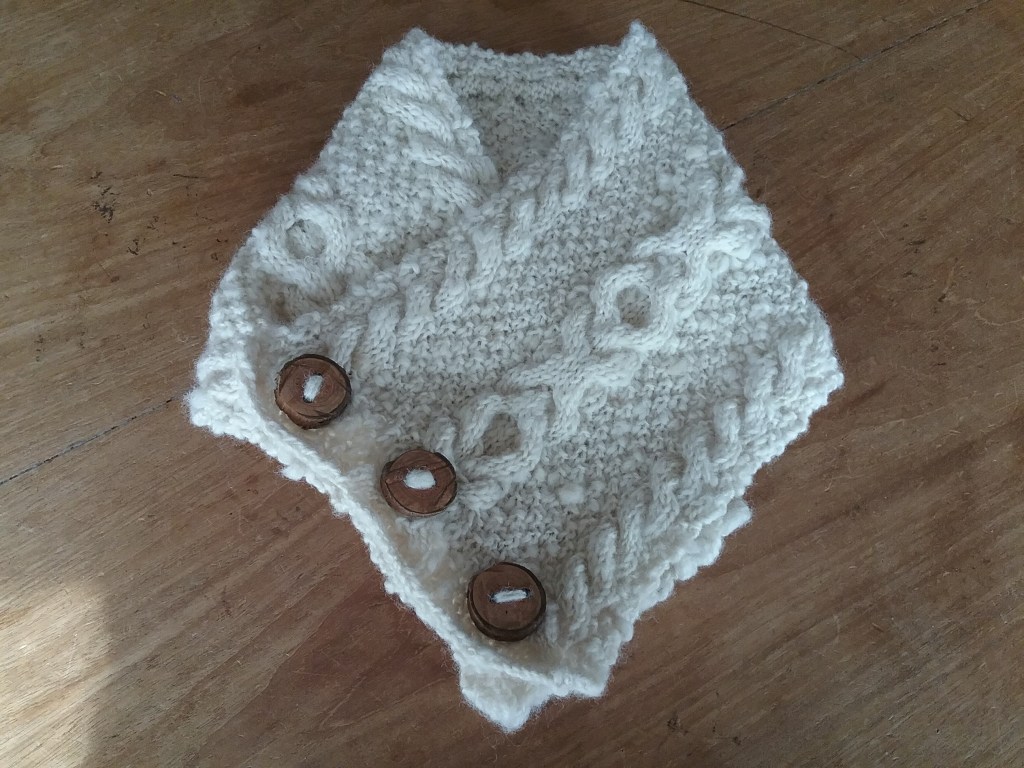
Inspired by the rich history of smuggling associated with Romney Marsh I decided at least one project I made from Romney wool should pay homage to this. In 2020 I purchased the cable button collar knitting pattern from the Wensleydale Longwool shop at virtual fibre east. I had never knitted cable before and the central pattern on the cowl reminded me of an owls face and eyes. I felt this would be a brilliant way to symbolise the ‘owlers’ of Romney Marsh.
I won’t go into details of the pattern as it is linked above, however I did change the button hole placement as I couldn’t seem to get them evenly spaced and the right width on my cowl following the pattern (probably to do with the fact that I was using handspun Romney fleece instead of the Wensleydale its designed for). Having never knitted cable before I found it was very easy to follow and the Romney wool has a stiffness about it that helps show off the cable pattern and keep its shape.
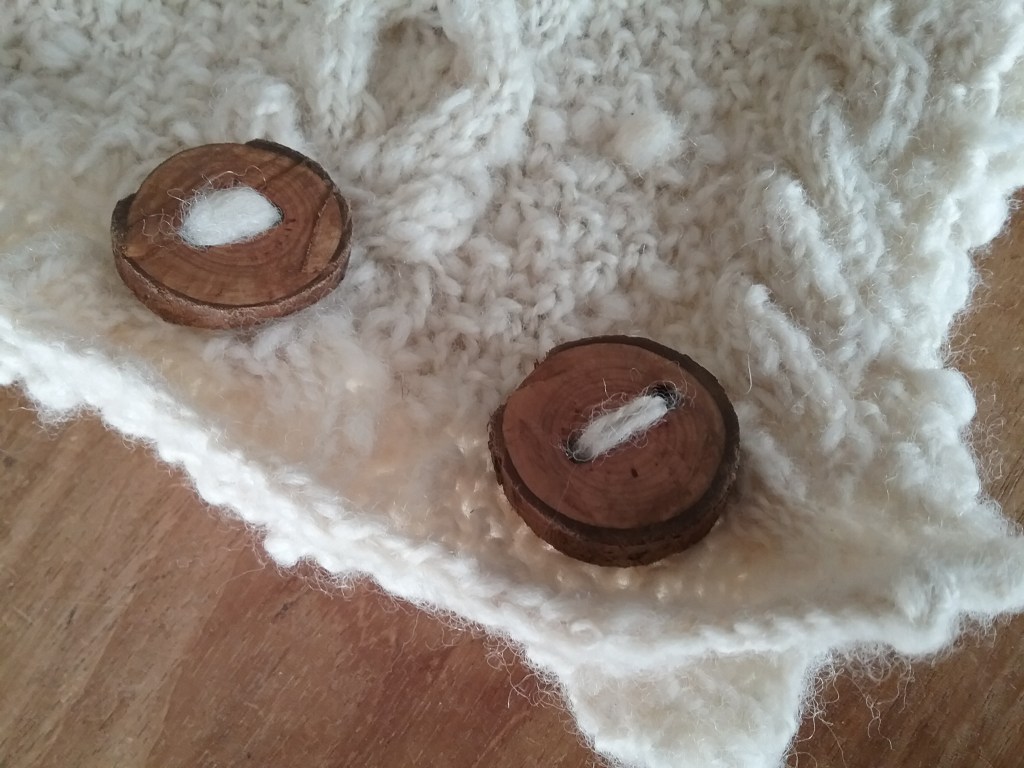
After knitting the cowl, the next stage was to add some buttons. This proved to be the hardest part of the process as no matter how many buttons I tried, I wasn’t quite happy with them. I wanted the cowl to have a natural look, so I decided to make my own buttons. These were made by sawing three sections of a small fallen branch of the required diameter, sanding them down either side and then oiling them to finish. When they were dry I could sew them onto the cowl as per the instructions. These are the first wooden buttons I have ever made, so if anyone has any tips, do let me know in the comments.
Although it’s taken me a year to finally put the finishing touches on this project, I’m really pleased with how it’s turned out. The cabling makes it a very thick fabric so it’s incredibly warm and will be perfect when winter comes again.
In March 2021 I put out a blog post showing my progress of some woven ryeland fabric, which I have finally turned into something. It’s been a long while in the making as my original idea didn’t work, so it sat folded on a chair while I pondered what to do about it. Although this was a simple project I’ve learnt a lot from it and made several mistakes, so I thought I’d talk through it from the very beginning explaining how it’s evolved. If you’d prefer to skip the background and just see the final project, you can jump straight to that section here.
The Original Plan
I’d seen a style of woven jumper by Fran Casseli in Ashford’s The Wheel Magazine (Issue 32) and thought it would look very nice in the Ryeland. I had already calculated the total yardage of wool I had, so I did some quick calculations to find the warp length that I would need. I then directly warped my rigid heddle the full width using a 5dpi reed (I use a weavers choice heddle that lets me swap out my dents rather than buying each size of reed). The idea was to weave the front and back of the jumper on one warp and the sleeves on another narrower warp, thereby reducing the amount of threading. Although I had taken into account extra length for loom waste and shrinkage in the wash, I did not take into account how woollen yarn behaves when warping.
Ryeland Warp Ready for Weaving
So, I wound the warp onto the loom and began pleasantly weaving the first length. I used a piece of waste yarn the length my first half needed to be as a measure that wound onto the front beam with my weaving. After reaching the end of the first piece I had a feeling that I was more than halfway along the warp, but since I couldn’t do anything about this, I hemstitched the end, left a gap and then continued weaving the second piece. I then removed the weaving from the loom, separated the pieces and washed them. This was the point I realised what had gone wrong.
Woollen yarn is particularly good for knitted items because of its ability to stretch and shrink, unfortunately I hadn’t taken into account that it does the same thing when used in weaving. It stretches when put under tension on the loom and then springs back when that tension is removed even before washing. Its springy nature also makes it a little harder to manage when direct warping (not to mention that my setup was not ideal and my warping peg fell off the stool it was clamped to twice!). This is probably why worsted yarn is normally used for weaving! Both my pieces of cloth were slightly different sizes and were too short to use for the original jumper idea.
Thinking of Another Solution
Still wanting to turn my fabric into a jumper I turned to my Saori weaving book for some inspiration. Saori clothing takes an ‘origami for clothes’ approach, so I found a boat neck jumper that I could make by sewing my two existing pieces together as one and weaving another length the same size. Unfortunately I misread the diagram and mistakenly added two measurements together so my second piece of weaving was too long for that jumper. Not despairing, I found another pattern that used two pieces the length I had and tacked it together. When trying it on however, I realised that the woollen fabric was too bulky in this style to drape nicely, and looked more like a marshmallow. As the fabric was a relatively loose weave, cutting it was out of the question and at this point I was running low on ryeland yarn. I folded the three lengths of fabric and sat them on a chair while I debated what to do about them.
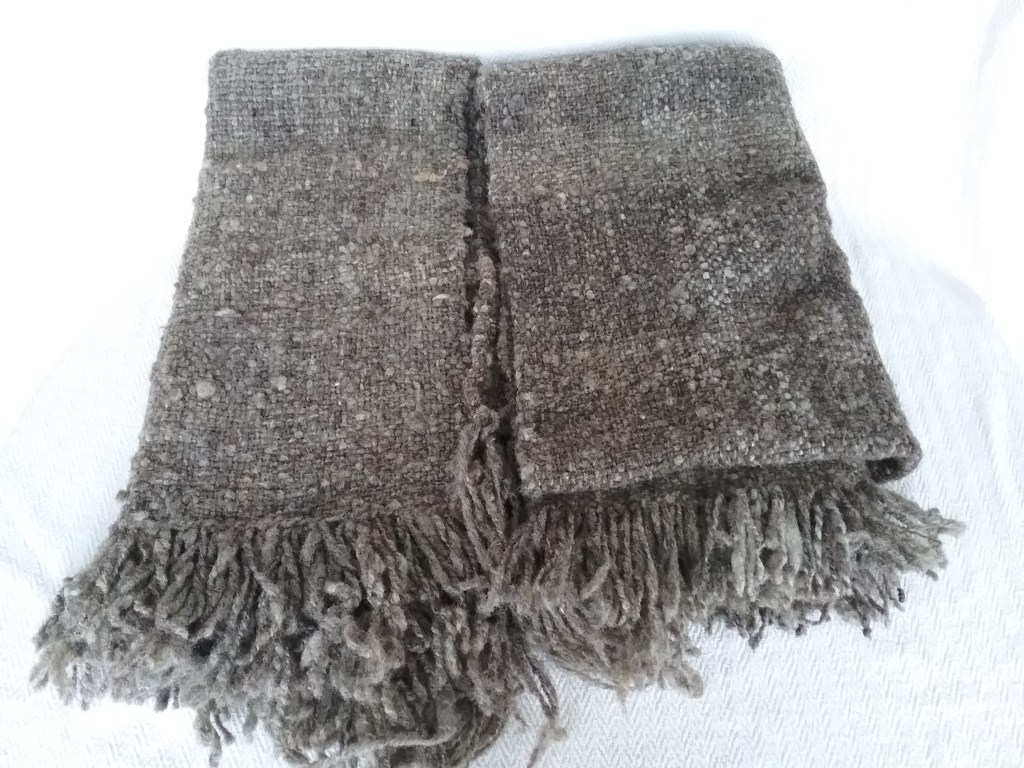
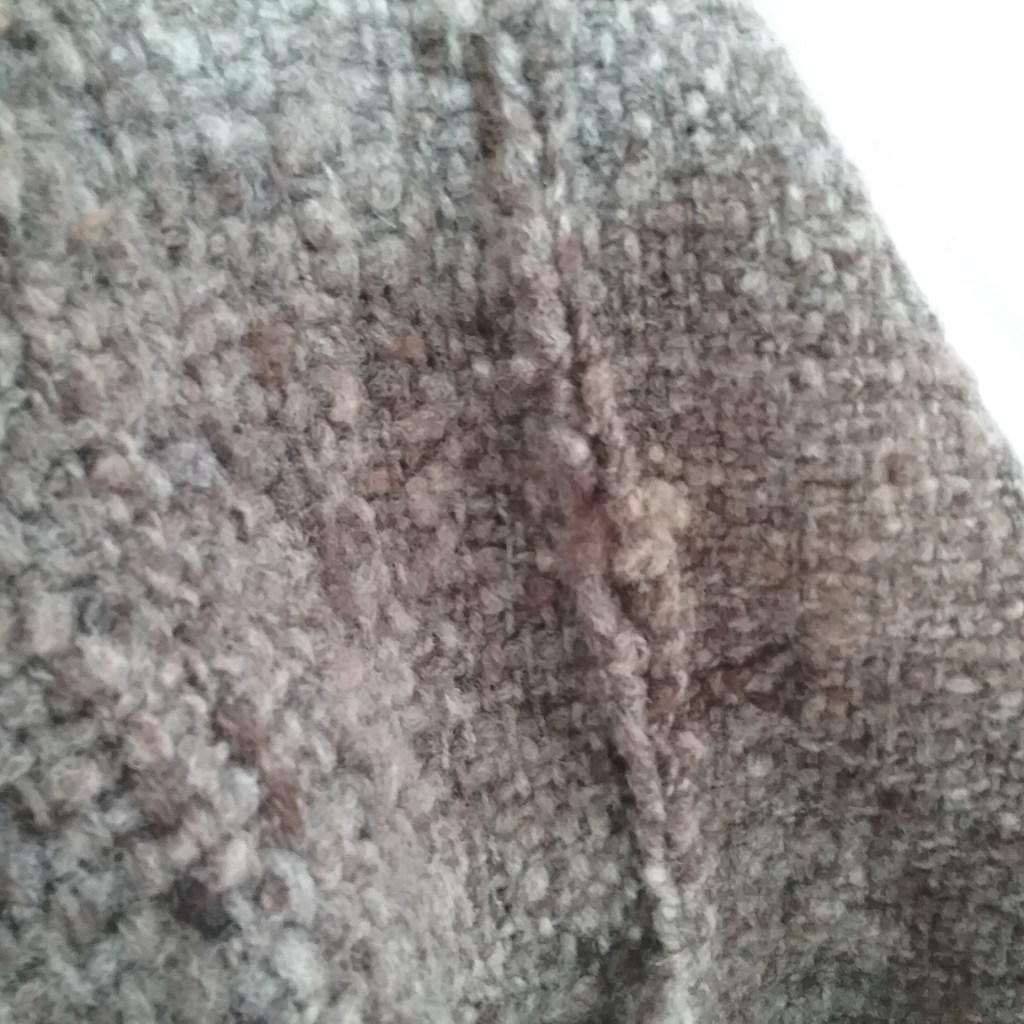
Woven Ryeland fabric after washing
I considered that the Ryeland might look nice stitched together as a blanket, but still didn’t want to give up on the idea of a piece of clothing. There was a circle poncho pattern in the Saori book that I’d wanted to make for a long time, but didn’t think I had enough yarn to make it from the ryeland. I decided that whatever I did I was going to have to weave another length, so if I ran out of yarn I would just have to source some more ryeland fleece.
Third Time Lucky
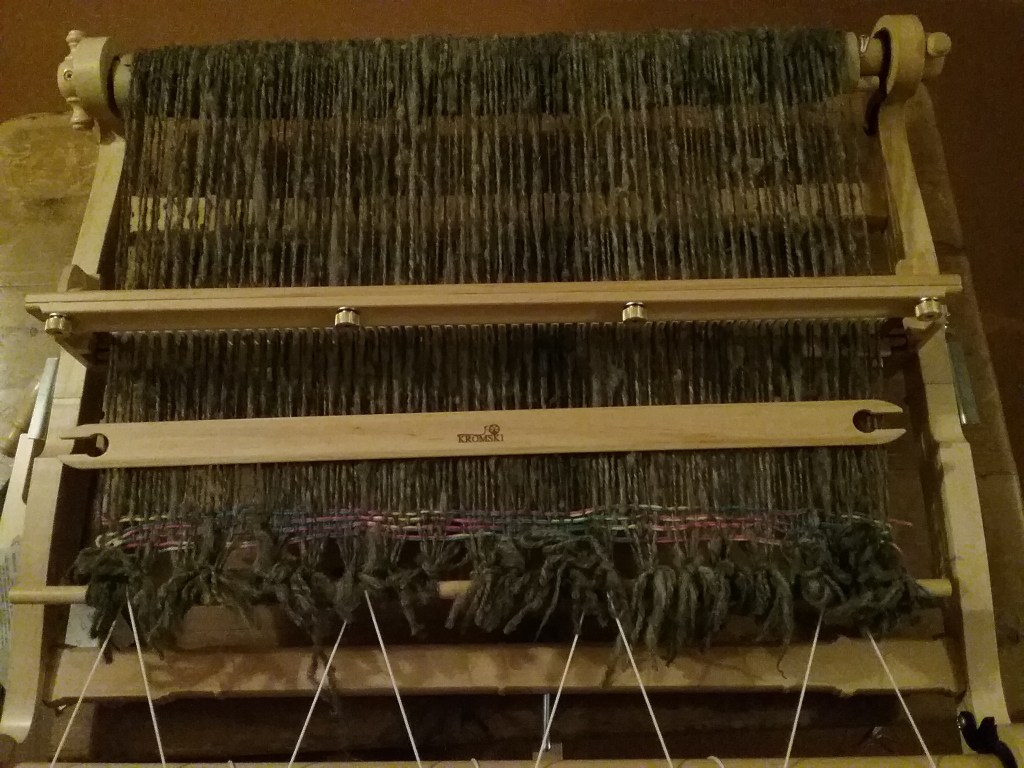
Using the same 5dpi full width set up on my rigid heddle I set to work warping the loom. To try and have less waste (and an accurate length) of warp I decided to try out indirect warping, turning my loom upside down and using the warping pegs (there are a couple of good tutorials for indirect warping from Kromski and Ashford). Once I’d established my threading cross I found it quite easy to do and it saves your legs and back from walking and bending. My previous tensioning issues were also solved as the warp is not threaded under tension.
After weaving and washing I could begin assembly. The first job was to join the two short pieces together to make one length. I had grown very fond of the fringe, so wanted to preserve as much of it as possible. I decided to overlap the two ends so that the neat fringe of one was on top and the knotted fringe of the other was at the back and got trimmed down. I did this on the sewing machine, but the fabric was probably a bit too thick as it got caught on the presser foot a few times.
Then I laid out all the pieces and decided on the asymmetrical arrangement as none of them were quite the same length. This decided, I tacked them down to check the fit before setting to work hand stitching the long seams into place as per the pattern. I could have used a sewing machine, but I wanted to sew using the ryeland wool, which needed a tapestry needle. The seams were sewn right sides together with a short backstitch for strength and a slit left for the armholes (pattern can be found on page 104 of ‘Saori Self-Innovation Through Free Weaving’ Book). Finally I evened up the fringe at both ends and it was ready to wear.
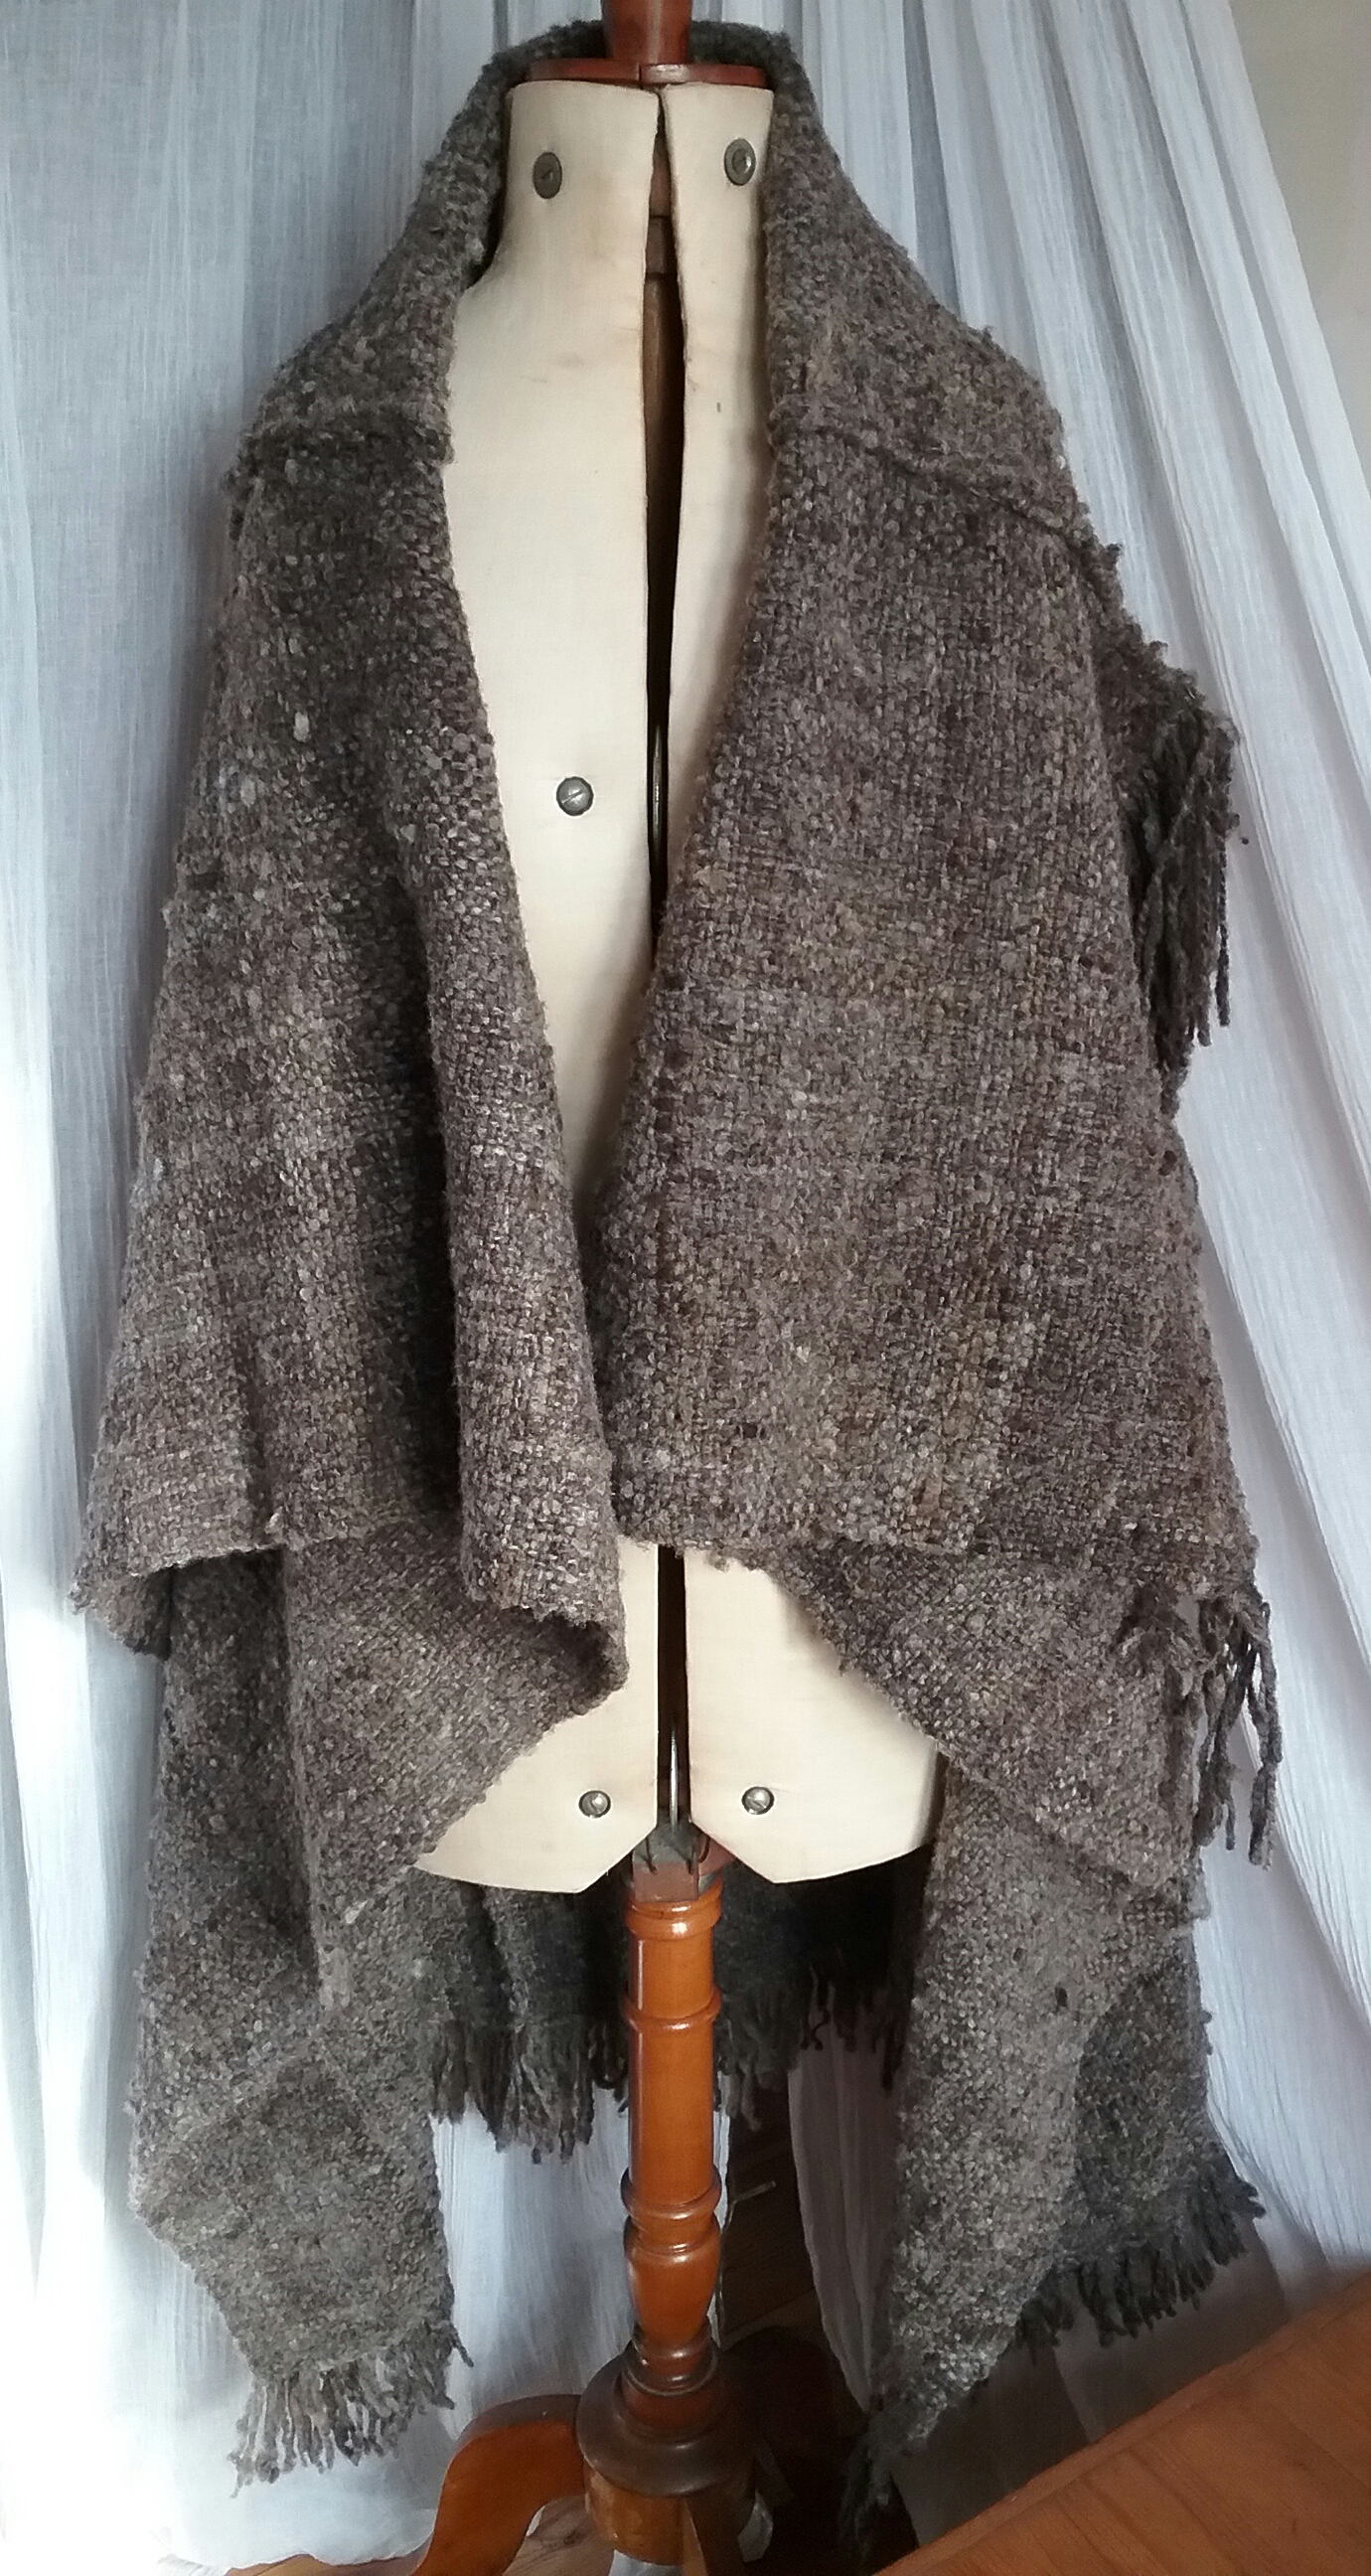
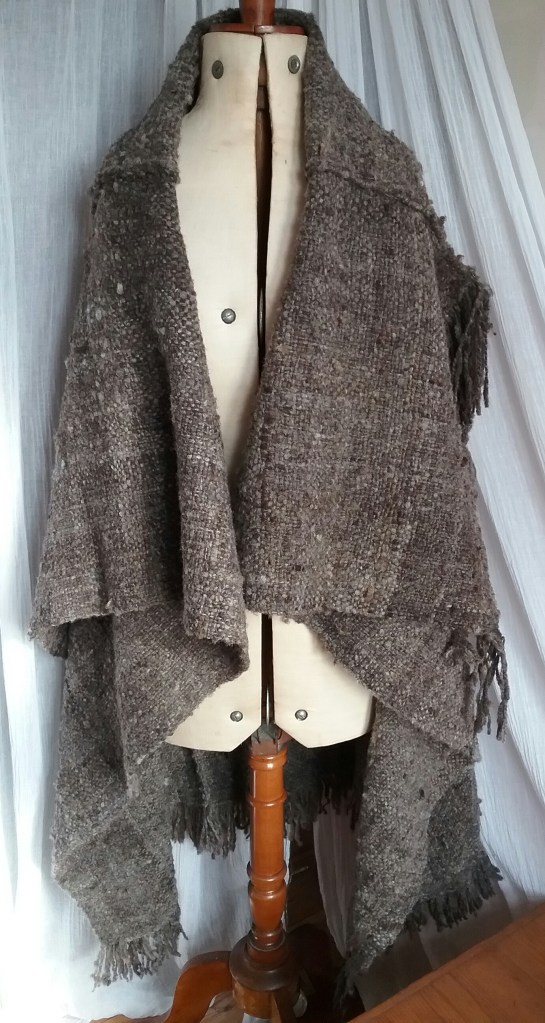
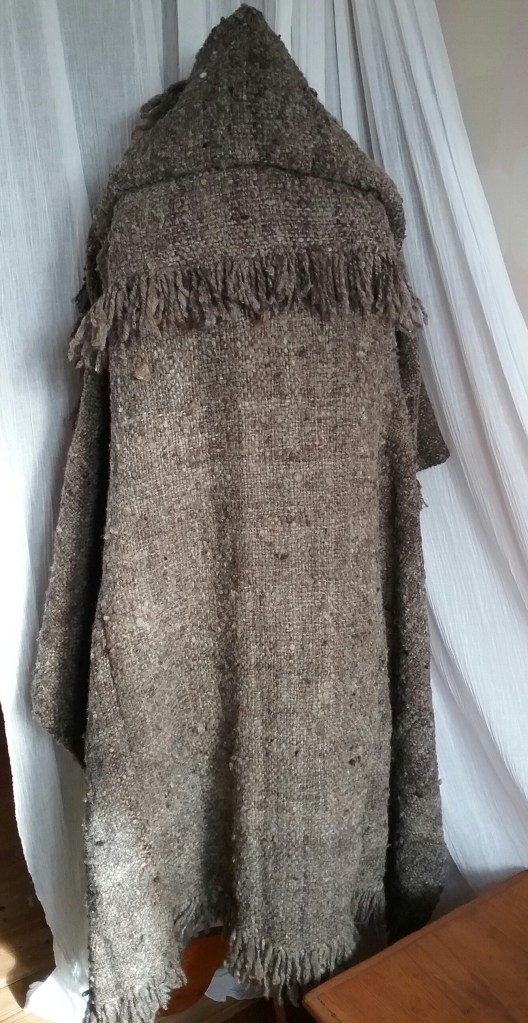
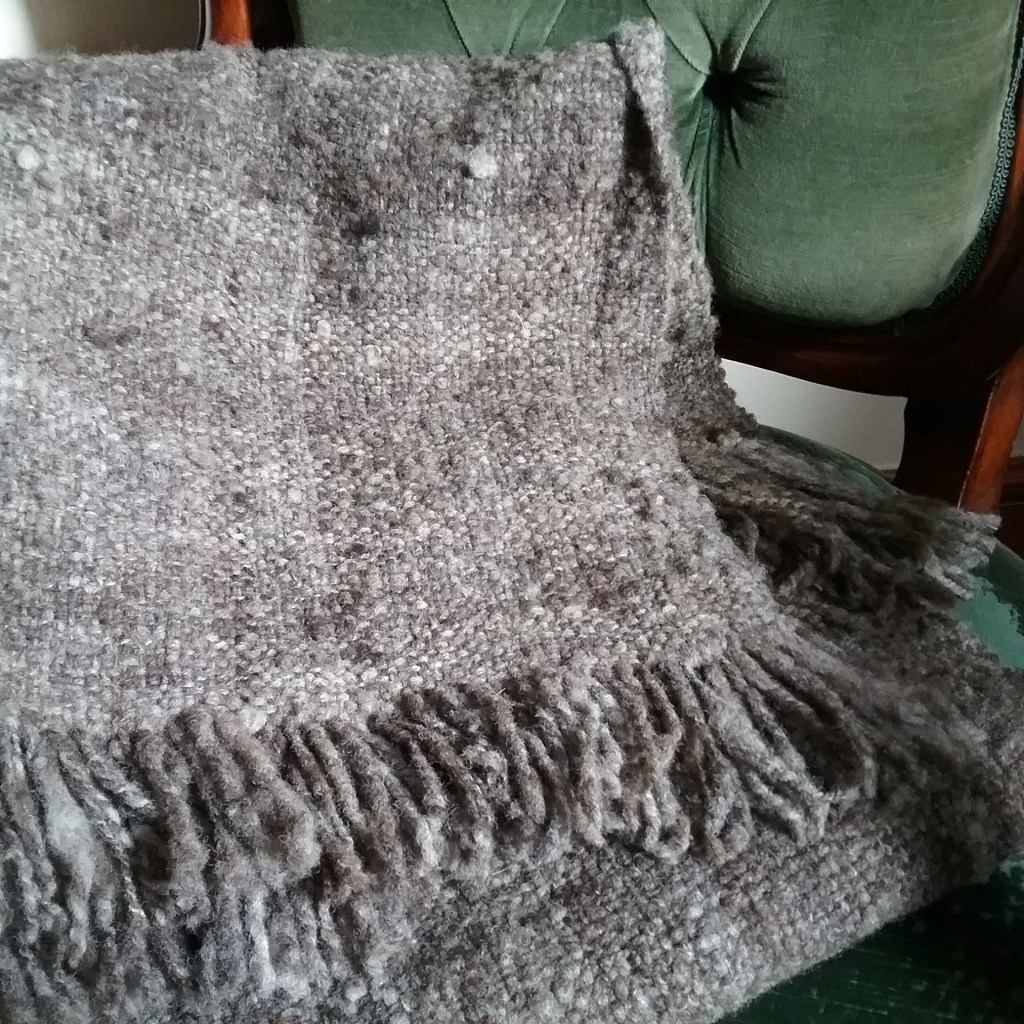
Front of PonchoBack of Poncho showing fringe seamBackstitched SeamAs a Blanket
I am very happy with how this eventually turned out, it works both as a very cosy poncho/jacket, but also can be used as a blanket, so is the best of both. I’m also glad I took the time to think about it as it’s forced me to try indirect warping which has been on my to-do list for quite some time. In spite of my worries about having enough wool, I still have a couple of balls left at the end of it, which shows just how much fabric can be made from one small fleece.