It’s Tour de Fleece time again! This year’s challenge runs from 4th – 26th July
My Tour de Fleece challenge this year will focus around getting on top of my fleece stash after a busy few months where time for spinning has been in short supply. Once again, I’m counting fibre-prep as part of my challenge since it gives me some variety and means I haven’t had to fit in lots of prep ahead of time. Usually I set myself the goal of spinning for a minimum of 1 hour a day, however this year I’m planning to spend much longer than that. That said, I feel it’s important to say my goals this year are very ambitious; I am fortunate to try and go more wool crazy, but everyone has different commitments and life can often throw a spanner in the works. The internet makes it very easy for crafters to compare themselves to others and while there can be a competitive side to TDF, the purpose is to have fun, challenge yourself and maybe learn some new things – whatever your available time, goals and energy.
So, without further ado, what am I actually planning to get up to?
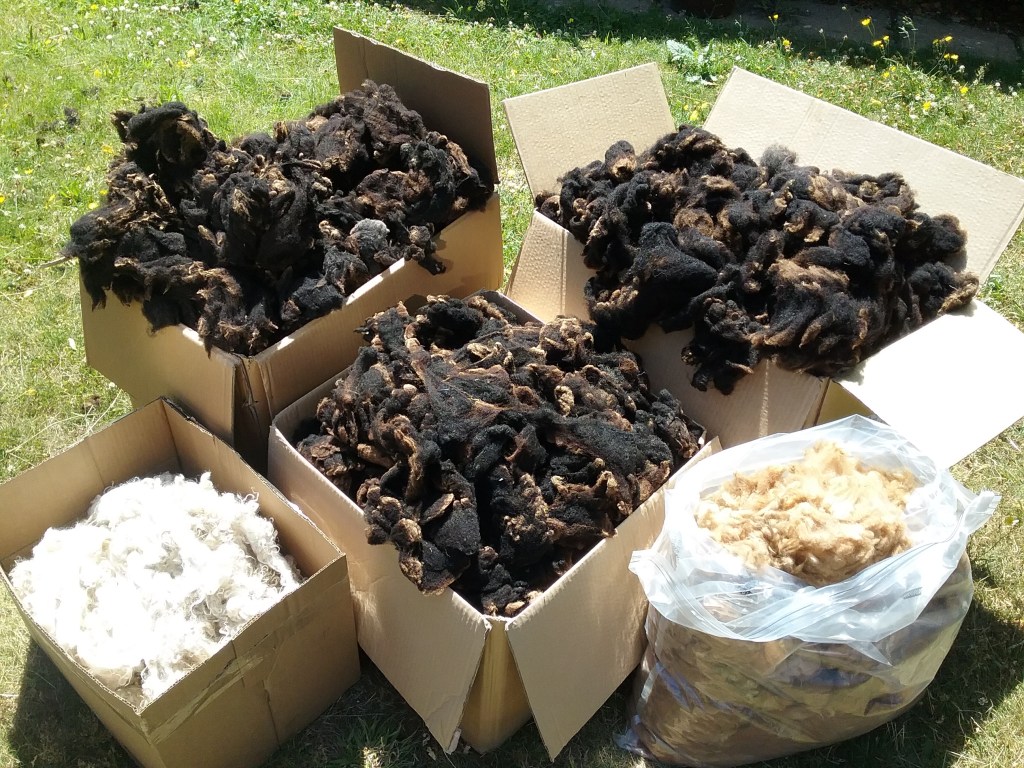
Zwartbles ‘Rug’ Wool – I’ve been skirting lots of these gorgeous fleeces and have recently washed the coarser wool from around the sides and rear of the fleeces in the suint bath. Many handspinners would discard this, but I hate waste and since it’s still very soft, I’ve decided to run it through the wool picker and spin it as chunky singles to weave rugs from at a later date.
Alpaca – I was recently asked if I could spin the fleece of a young alpaca that passed away shortly after shearing, and of course I agreed straight away. This is an absolutely gorgeous fleece and I’ve decided to hand card it to treat it with the reverence it deserves before spinning it as a standard 2-ply suitable for either knitting or weaving.
Angora Goat – During my early days of buying fleeces from online market places I purchased this curly Angora goat fleece. What I did not see in the picture was how much sawdust was caught up in the fibres (and how little would fall out after vigourous shaking and several rounds of washing). I bought the fleece to use the curls, but have come to the conclusion that the only way I’m going to get that pesky sawdust out and detangle the fibres is by putting it through my wool combs. I did a test of this a couple of years ago with my combs hand-held before I made the base and it was quite tough on my wrists, but I’m hoping it will be an easier process if they’re clamped to a table. If I can get it to comb then I plan to spin this as more of lace weight on my spindle so I have a travelling project – if it doesn’t want to play ball I’ll think of something else to use it for as it’s been sitting in a corner of shame for too long now!
Return of The Challenges – I’ve got some more challenges lined up this year to test my skills and have some fun. Like last year I’m aiming for 1 per week and we’ll see what happens. While I have a rough plan for this year’s challenges, if you have any suggestions do feel free to leave them in the comments – If I don’t get round to them this year, I can always save them up for 2027!
As per previous years, I’ll be doing weekly updates on the blog every Sunday (starting from 12th July) and daily updates on my Instagram to hold myself accountable. I’m not sure how much of my list I’ll get through, and as those of you who’ve followed along my challenges before will know, I often have to adapt my challenge as things arise!
If you are also joining in with Tour de Fleece this year feel free to share your goals and progress in the comments section throughout. For anyone interested in seeing what I got up to in previous years you can search posts from July since 2021 in the archives below!
It’s been a goal of mine this year to make one project per month (aside from Tour de Fleece when there’s already a lot going on). I have a long list of projects I want to make, many of which have been put on the backburner over the past few years, and quite a bit of yarn and fabric from my early days of blogging waiting to be turned into something, so focusing on one a month seem a logical way to work through things. So far I’ve been managing well, however life has habbit of upending the best laid plans and I ended up with a spontaneous sewing project (blog post to follow later this year) alongside other committments, leaving me with very little time to work on a project for this month.
I needed something quick and easy that was unlikely to go wrong; unfortunately that excluded all the projects on my list! I’d also started to think about prepping for Tour de Fleece (clearing bobbins and spindles etc.) and had a spindle full of zwartbles I’d spun as a single during some recent demo’s. Initially I was going to ply it and add it to my stash, but I began to wonder if I could do something with it as is (particularly since I used it to illustrate how to spin thicker and thinner yarn, so it wasn’t the most even). Lace knitting is usually the go-to for spun singles, and I began to think of the fishnet gloves I used to wear in dance costumes in my youth. After browsing the internet and my knitting books for inspiration nothing was calling out to me, and actual fishnet was too regimental for what I was imagining, so I began to wonder what it would look like if I just made my own pattern up.
There was a bit of trial and error in the process with a few frogged samples at the cast on stage, however the basic construction of the glove was simple and could be done in any type of stitch. Using needles slightly larger than what would normally suit the yarn, I cast on the number of stitches that would comfortably fit around my forearm at the elbow and knitted a couple of rows K1,P1 rib to give some structure before the lace pattern began. Since lace looks best when stretched out, I ended up taking out some stitches from the initial samples to avoid it being baggy. Then I knitted in the round until I had a tube that reached my wrist, randomly decreasing stitches and adding yarn overs to replace those lost so the stitch count stayed the same for every round.
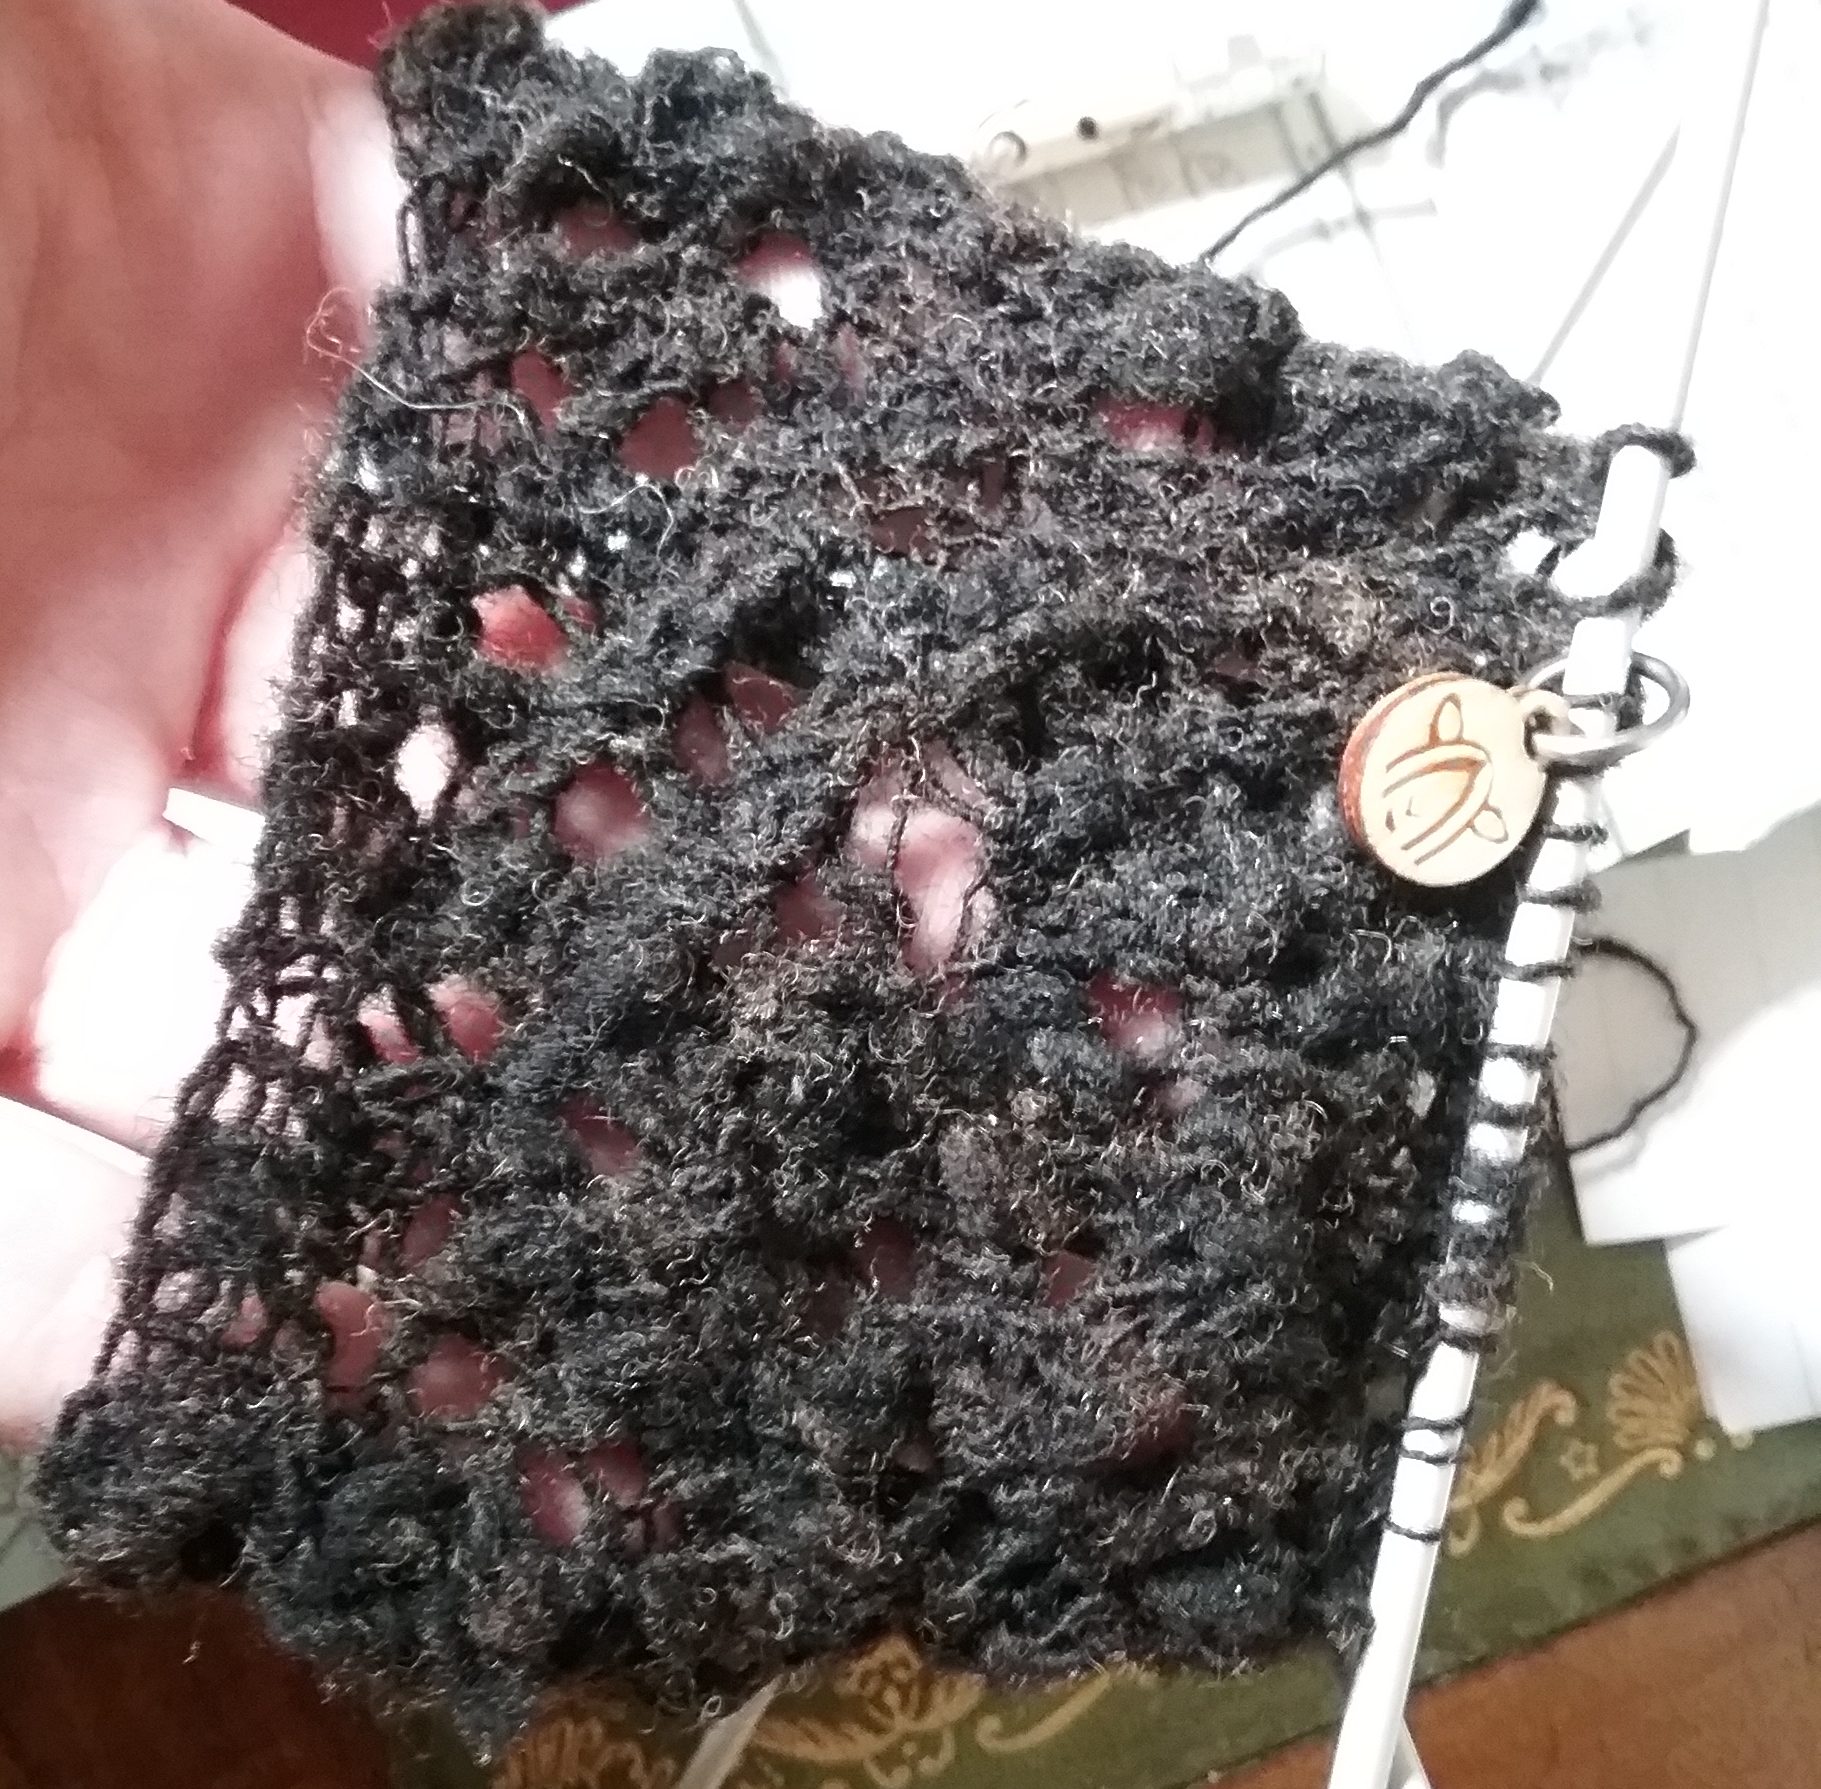
Rib cast on with my little toadstool stitch marker from edelecticcrafts
I’ve never had a problem with laddering when using DPN’s (though am always mindful of it), but I realised early on that if I let the join between each pair of DPN’s hang loosely this would create another interesting lacey effect. I moved the DPN joins around every so often to avoid having any regimented sections running the length of the glove.
Close up of the lace effect taking shape
When I got to the wrist I had to decide what I was going to do about shaping the hand. I like the aesthetic of the fishnet gloves which have a hole for the thumb and fifth finger, however since I plan to wear these when demo-ing I realised that having fabric on the palm of my hand would be more likely to catch on wool and equipment, and potentially restrict my movement. So, the logical option was for me to decrease in a triangle, fastening the tip to the middle finger with a loop. I cast off the back of the wrist using another couple of rib rows, before working back and forth on the remaining stitches in lace pattern, decreasing at either side every so often, making a quick note so I could replicate on the other glove.
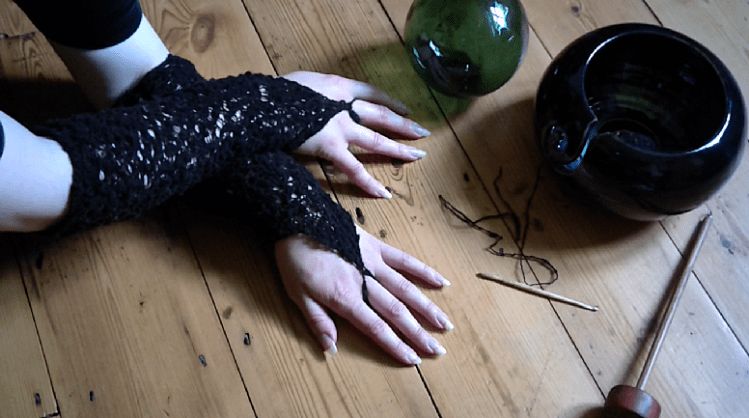
At the tip with one stitch remaining, I swapped to a crochet hook and chain stitched a loop long enough to wrap around my middle finger and meet the triangle tip again before securing and casting off. I then set about weaving in my ends (happily for this project there were very few!), before repeating the whole thing for the other glove.
For a project that was cooked up at the last minute with just a loose vision and some yarn, I think they turned out alright. They will be going on to form part of an outfit that I’m creating for demo’s etc. (the rest of which will hopefully be forthcoming later this year), but I think they’re elegant enough that I could probably get away with wearing them to a more formal occasion!
I have a small stash of vintage belt buckles and clasps picked up from various charity and vintage shops over the years, and I’ve been meaning to get them fixed up with new straps so they’re functional again. I’d been thinking of sewing some from fabric or ribbon, but I also thought it would be fun to have a go at weaving one with my handspun yarn. A Google image search for initial inspiration for handwoven belts returned lots of brightly coloured tablet woven straps and plenty of bead weaving, neither of which were quite what I was looking for, so I decided to look for historical examples. Unfortunately, the nature of natural fibres means historic textiles often don’t survive, however there is belt from a Bronze Age outfit found in Borum Eshøj (image here) and several artists have recreated it (this site has several good quality pictures). I wasn’t aiming to replicate the belt, but it gave me a good starting point and helped me to envisage what my handspun might look like once woven into a thin strip of fabric.
I had some coarser zwartbles yarn left over from my gothic hood warp, so decided this would be a perfect project to use it up (and would also help with some stash-busting ahead of this years TDF). I hadn’t put away all my purchases from EAYF, so was looking at the yak and silk blend I bought from Yarntings thinking how similar the colour was to the verdigris in some of my buckles, and was inspired to create a belt that incorporated it.
The Making
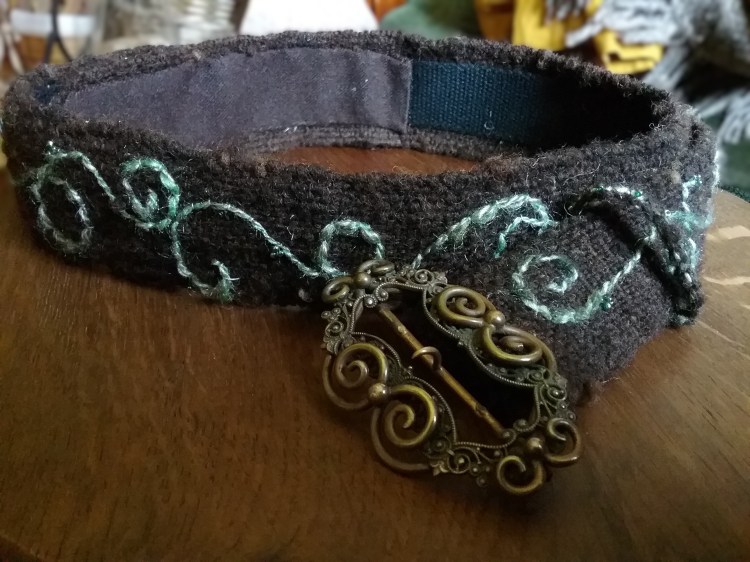
I began by spinning half of the yak/silk into a 2-ply yarn roughly matching the thickness to the Zwartbles; I didn’t know how much yarn I would need, so erred on the side of caution. I then set up a small sample on my pin loom with a Zwartbles warp and yak/silk weft so I could place buckles against it to choose my favourite (I forgot to take any photos at this stage!). I settled on a buckle that is quite Georgian in style with a prominent swirl pattern and some background filigree motifs. I’m not sure if this was originally a belt buckle, it seems too tall to have been a shoe buckle – either way, it’s an interesting design and deserved to be worn again.
I then measured the fastening slot that the strap would need to fit around, before setting this up in dpi on my rigid heddle loom. I opted for using a 10dpi reed, since this would give me the dense weave I was looking for, but in hindsight I think my warp yarn was more suited to 8dpi as I ended up with a few broken warp threads through repeated rubbing against the reed, which I’ll come back to later. I set up my weaving width on my weaver’s choice heddle and added some extra larger pieces to either side to help with stability (I find these interchangeable heddles so helpful for experimenting with mixed thickness warps, but it also saves me from having to buy /store lots of regular heddles).
I measured my warp to fit around my waist with some overlap where it would fit through the buckle, then added a little over 20% to account for shrinkage and loom waste. My loom threaded, I set about weaving. I started by replicating my pin loom sample using the yak/silk as the weft, however found myself not liking the effect (my sample warp was spread slightly wider), as it looked a little too like a checkerboard for what I envisioned. I tried a double clasped weft so the yak/silk would have been woven in the centre, but felt this made the weft too muted. I probably could have incorporated the yak/silk into the warp to have made the weft pop a bit more, but rather than re-threading everything, I decided I would make the belt with a plain weave in the zwartbles and embellish it with the yak/silk.
Decision made, I un-wove my experiments and started to weave with the zwartbles, being careful to keep my selvedge’s as straight as possible. Since I wanted a dense fabric, I beat down with the reed and then with the shuttle on the next pass, however I found that some of my handspun was slightly thicker in places, and repeated passing through the narrow reed caused one of my warp threads to separate. I repaired this rather unconventionally by knotting an extra piece of thread between the breaks and rigging a pick-up stick to help with tensioning, as I had a limited quantity of the matching warp thread and knew the knots would be covered and supported on the back. To mitigate it happening again, I decided to move the heddle between sheds and beat only with the shuttle, which worked well. I did have a few more warp thread breaks as I went along, but these were easily repaired.
Weaving complete, I removed it from the loom and washed it. While I’d been careful to keep my selvedge straight, I did notice that due to the slight variations in yarn diameter, there was a very gradual difference in fabric width, which is only really apparent when the fabric is folded over itself. Interestingly, perhaps because of the handspun variation or the repaired warp threads, there is also a slight curve to the fabric, which is a happy accident since it will follow the curve of my waist when worn.
Embelishment
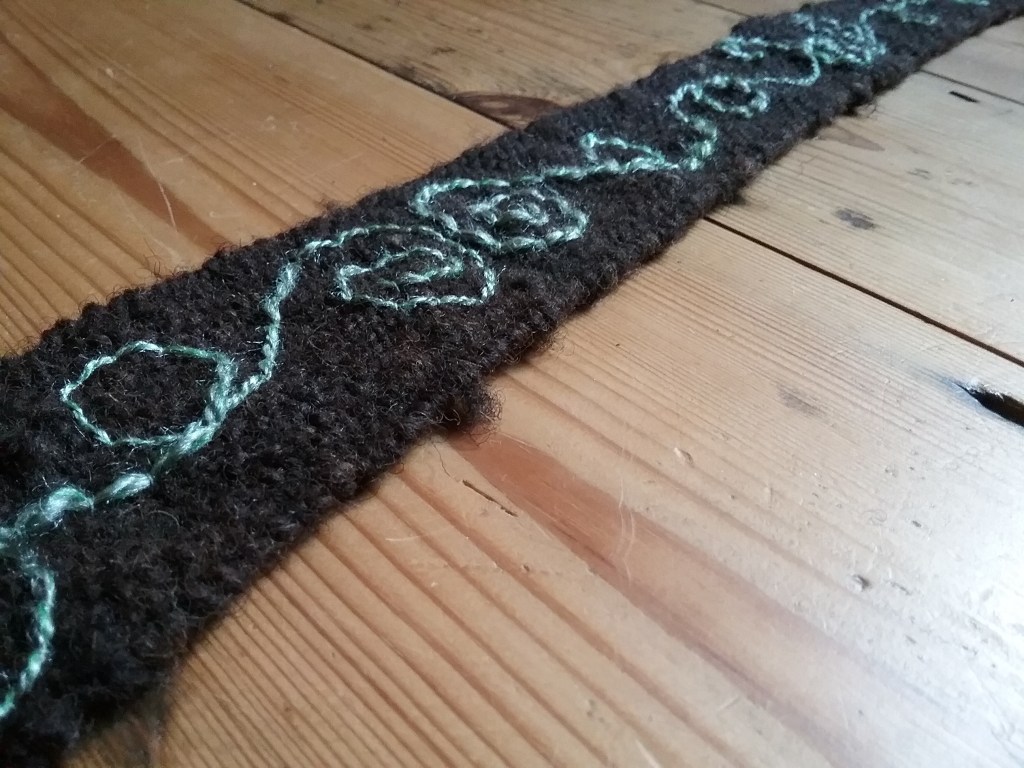
I imagined Celtic style patterns for the embellishment, but also wanted to highlight the swirled pattern on the buckle itself. To keep the yarn smooth and emphasize the colour I decided to couch it into position on the belt, letting the yarn follow the swirling path that seemed natural, guiding it at the start and end of a section into a swirl similar to those on the belt buckle.
Couching embellishment
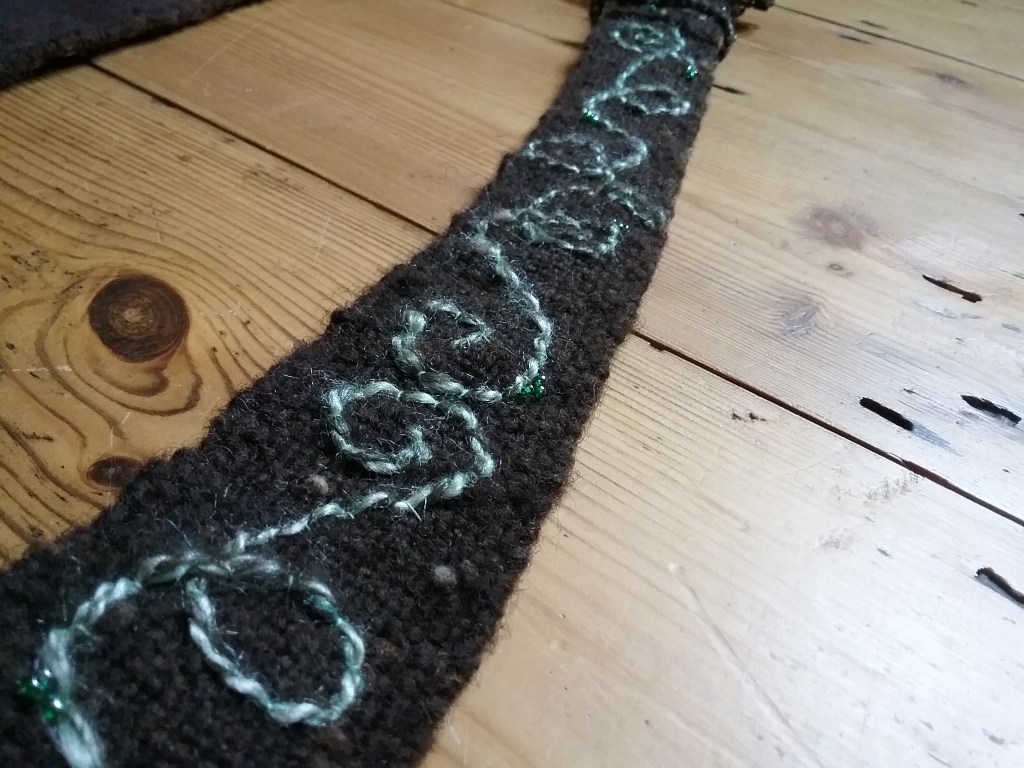
I felt it was missing something mystical so decided to experiment with some beading in places to evoke the little berries on the buckle. I left the area that would be pulled through the buckle without any beads to avoid them catching and fashioned the end into a point to make it easier to thread through.
Bead clusters added to the design
I then added some cotton webbing to the back of the belt, both to give it some structure, and to protect the back of the embroidery, however I stopped short of the part that would slide through the buckle since it was too thick. To cover the back of that area I used a scrap of brown wool fabric, which also allowed the catch to pass through gaps in the weave without the need for setting in grommets (which means the sizing is much more adjustable).
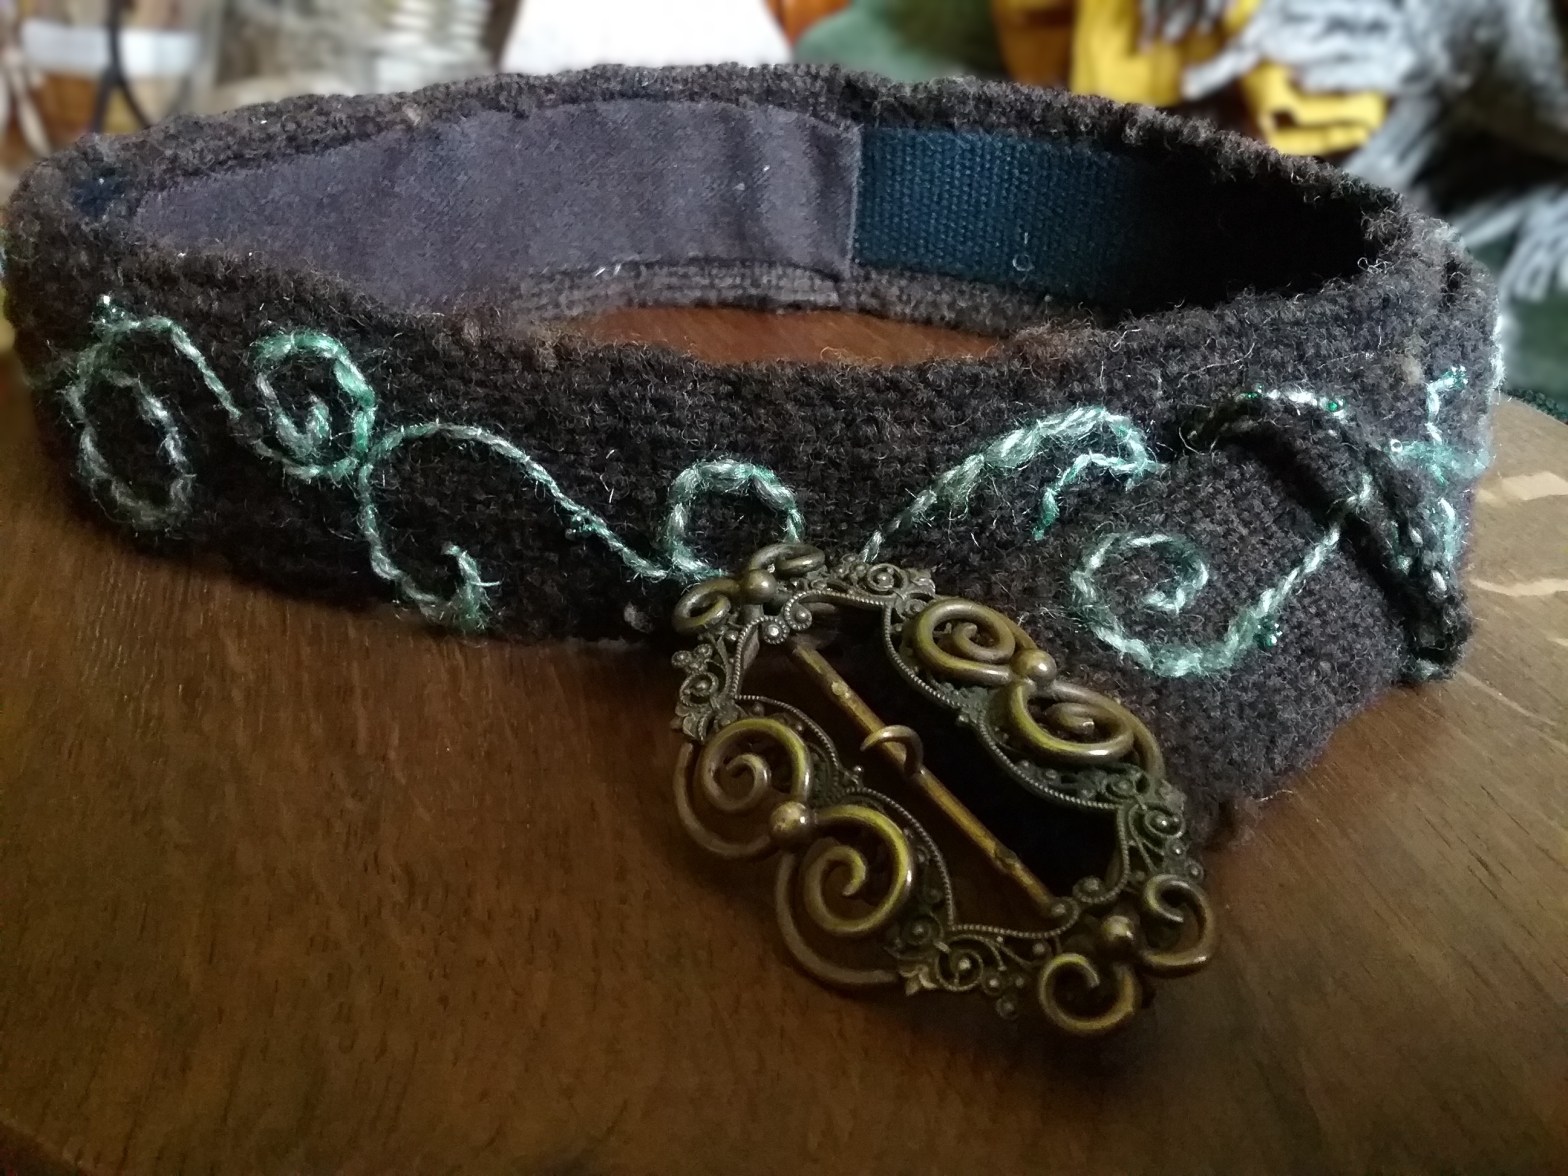
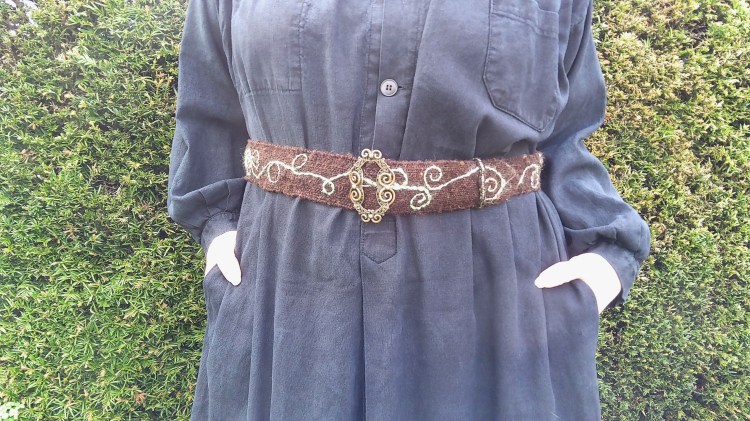
Finally, I made a braided belt loop so the overlap didn’t flop downwards (this was done in a cobra stitch I remember using to make scoubidou’s at primary school!), and with that the belt was complete:
Overall, I’m pretty happy with how the belt turned out – it’s really comfortable, holds good structure, and since I have nearly infinite fastening options I can wear it over everything from tunics to coats without the fit being compromised (I might even be able to fit a distaff in the side of it to spin from!). My one slight grievance is the catch being a bit fiddly to get through the fabric, however you may be able to see in the very first picture that the buckle originally had 3 clasps on the centre bar, but only the middle one remains, so I think this is more to do with the centre bar twist and the catch angle than the belt strap itself (having said that, once fastened it doesn’t readily unhook, so I can’t have it both ways!).
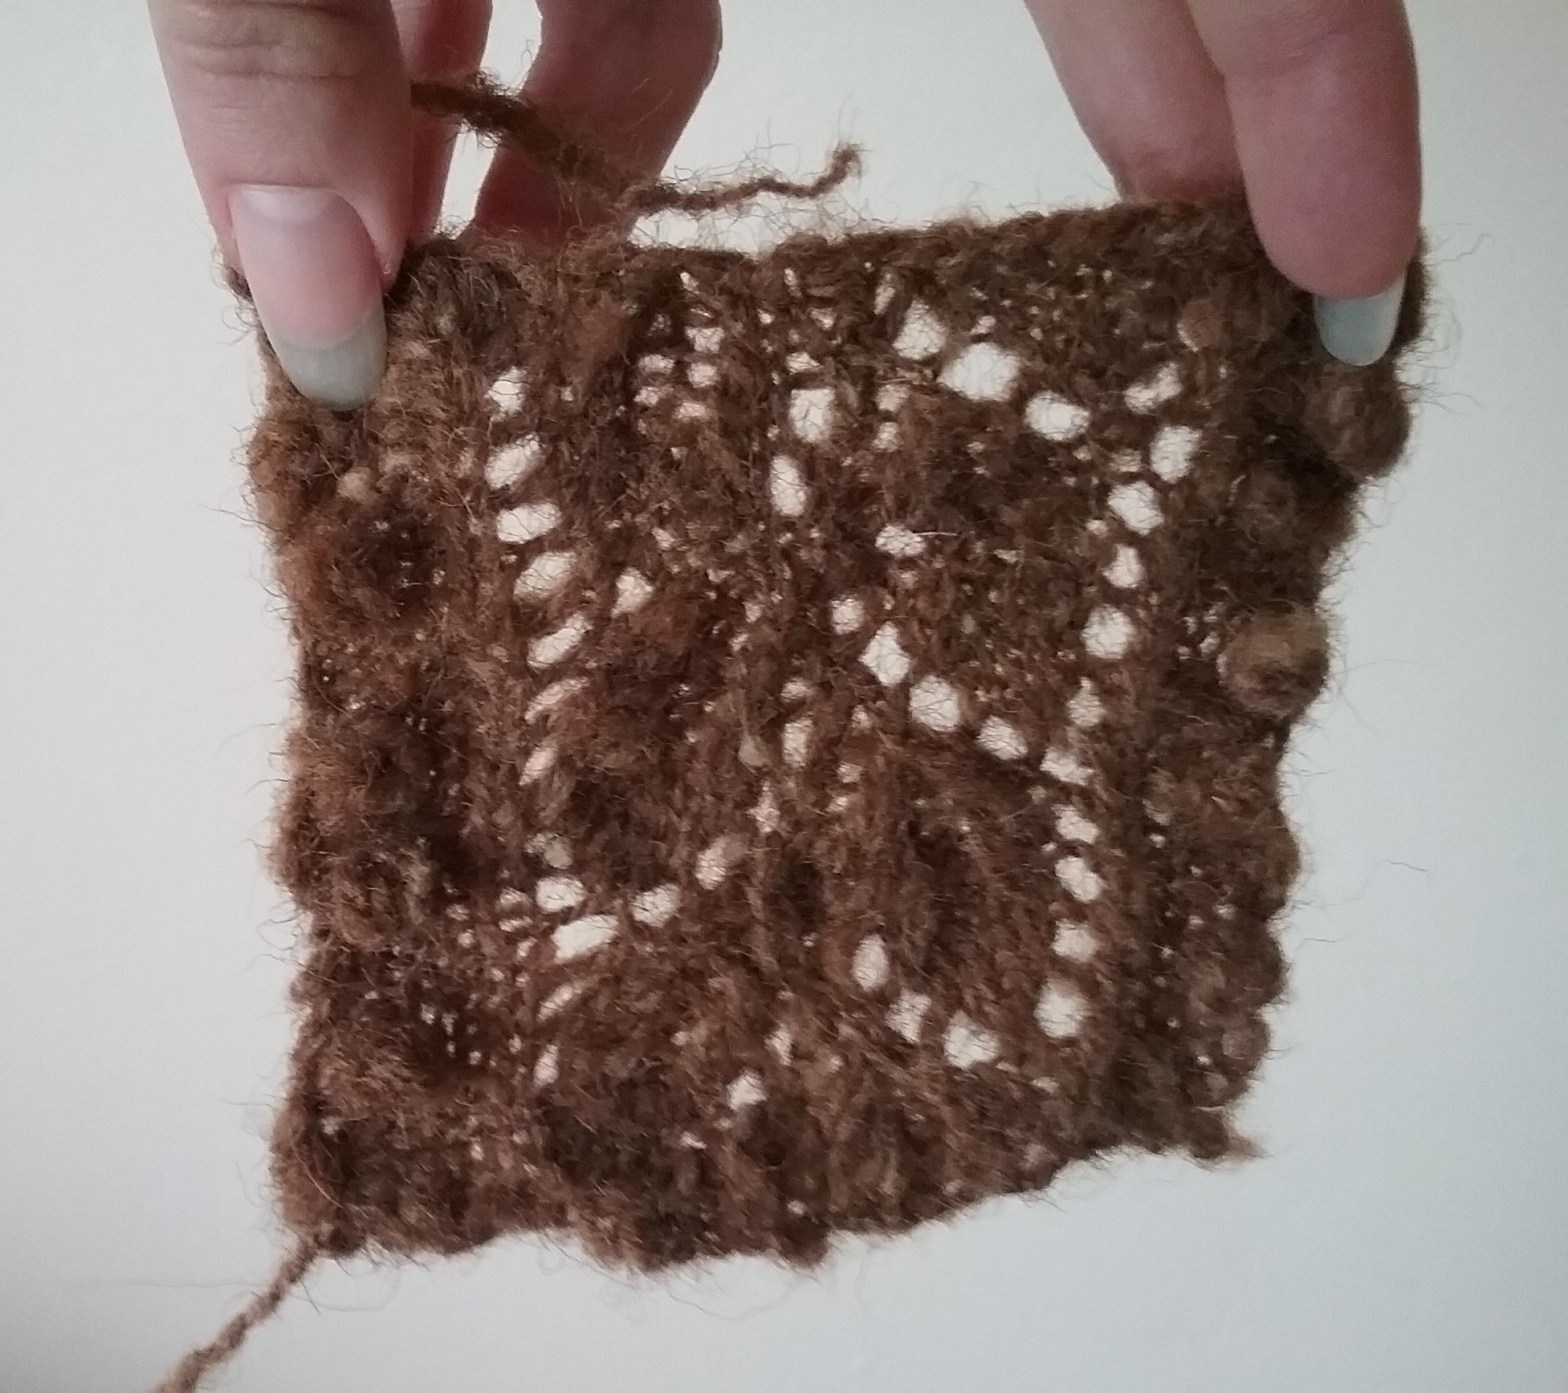
As with all my breed squares, I like to try and replicate the final project. In this case I wanted to adapt the lace work of the Falling Leaves Sweater onto the square, but the pattern is designed for working increases around the yoke, the leaves would need to have been smaller and the cable work would have needed lots of adapting. Rather than rewrite the whole pattern to fit a square, I decided to utilise another lacework leaf pattern and add in elements from the yoke lacework to fit the gaps. I had two balls of Castlemilk Moorit (CMM) yarn left over from the jumper that I thought about turning into gloves using the Forsyte pattern from Kate Atherley’s Knit Mitt’s book. I have a love hate relationship with this pattern – my edition of the book has a misprint in the lace chart, which resulted in initial confusion and I didn’t realise the sizing of my last attempt was completely wrong until I had to frog it 3 rows before the end, so I haven’t actually managed to knit the gloves yet (one day – I’m not giving up so easily!). I knitted a gauge swatch using the CMM and realised that it would be too thick to knit the gloves, however one section of the lace pattern would be the perfect size for the breed square.
I rewrote the leaf lace chart for knitting back and forth instead of in the round and added a purl border either side onto which I made sized down bobbles taken from the Autumn Leave’s jumper yoke pattern. Despite the photo not being the clearest (the lacework only shows up on a light background), I’m quite pleased with how the square turned out and it matches the jumper quite well. I am however, glad I didn’t knit the mittens with this yarn; the daintier lacework would definitely be shown off better with a smoother, thinner yarn. This does mean I still have a couple of balls of coarser Castlemilk Moorit left over, so there may be another project with this fleece in the future – for the time being I think it will be living in my handspun stash.
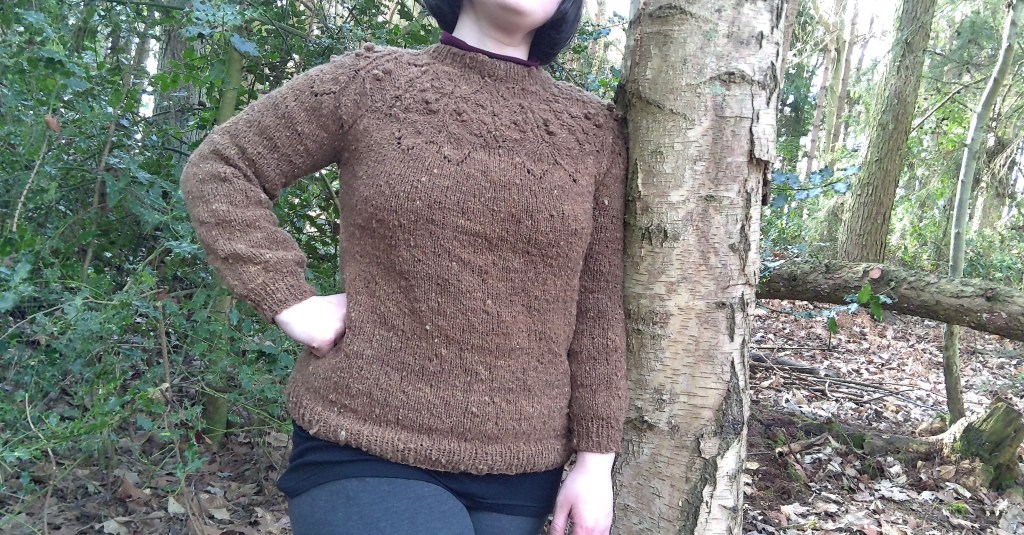
Way back in 2024 I purchased a jumper knitting pattern from Hirismakes at EAYF thinking it could be a fantastic project option for my Castlemilk Moorit (at that point I’d started hand carding the fleece, but put it aside as I wasn’t a hundred percent happy with the rolags). As you know, I like to connect my finished projects to the story of the breed in some way, and felt that this pattern was appropriate considering the breeds origins on the Castlemilk estate and near extinction later on (they are still on the RBST’s watchlist). So, this was a subtly symbolic project with the falling leaves representing the landscape the sheep were bred in (Castlemilk, like many grand estates has a history of forestry), their initial ornamental use, and the precarity of the breed over time.
Castlemilk Moorit is also the perfect colour for autumn leaves, but after spinning the yarn last year and discovering quite a bit of it was coarser than I would be comfortable with next to my skin, I wasn’t sure if clothing was the best choice. However, I then realised that this pattern has a lot of lacework, particularly around the bust, so I would be wearing a layer underneath anyway which would hopefully negate any coarseness. My only concern was if I would have enough softer yarn, however this jumper is knitted from the top down (making a change from the bottom-up jumpers I’ve made so far!), so I decided to start knitting the yoke and if I was worried about the quantity of yarn, I could look at using another yarn for the main body and have it two tone (I later decided against this as I didn’t feel it looked quite right and thankfully had enough Castlemilk Moorit).
Knitting
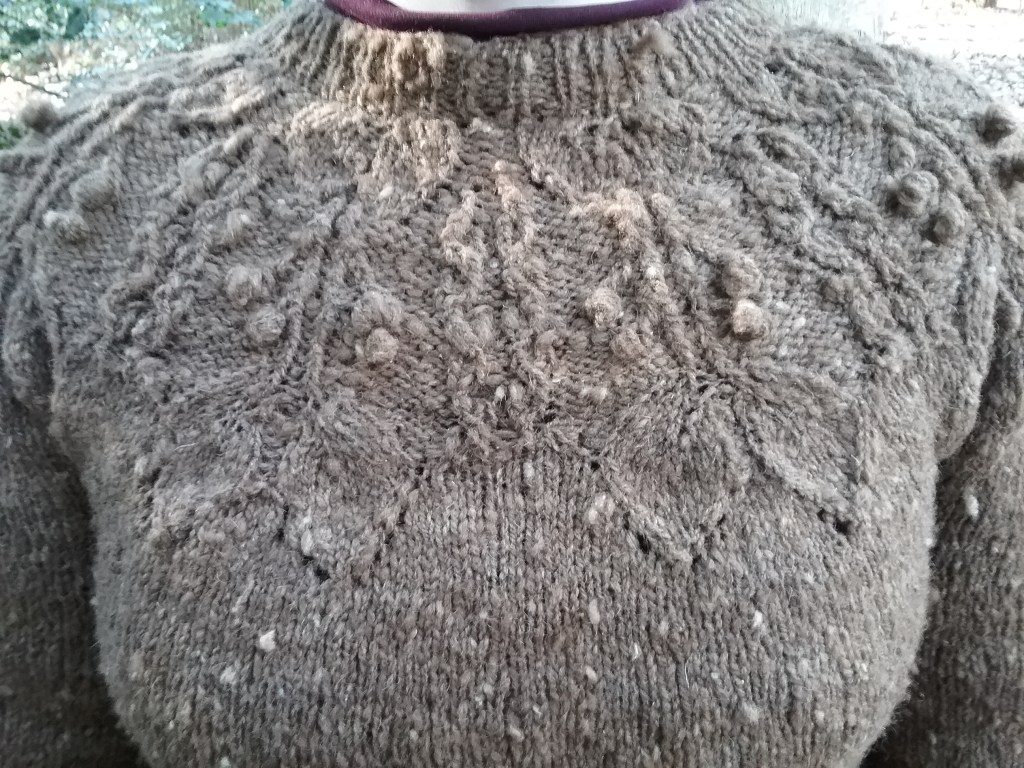
Unlike some of my other knitting projects, I didn’t make any changes, modifications or adaptions to this pattern, so it was just a case of following the instructions. Ahead of casting on, I knitted a very quick swatch and noted that though my yarn was not quite as chunky in appearance as those referenced in the pattern, it wasn’t gappy. However, being handspun by me and therefore textured, it did lack some of the stitch definition illustrated in the original pattern – this isn’t a problem on the finished garment (in fact I think it looks more tree-like), but it did make it a little harder to see the lace pattern evolve as I was knitting the yoke.
Close up detail of the yoke front
I’m not a crocheter, so I was befuddled by the crocheted bobble instructions, but discovered that Iris has a tutorial for these on Youtube, which helped make sense of everything. The lacework finished, it was time to divide for the sleeves. I’ve been using Lykke interchangeable needles for a few of my projects now – I purchased them second-hand and this project made good use of the shorter cables and stoppers. I was able to transfer sleeve stitches to a shorter cable with stoppers at the end while I knitted the body, which gave the armholes some structure when trying it on for length. I also made use of the joiners when trying on the jumper, as the longest cable in the set isn’t quite wide enough to get over my shoulders, but using the joiners I can add another cable’s length.
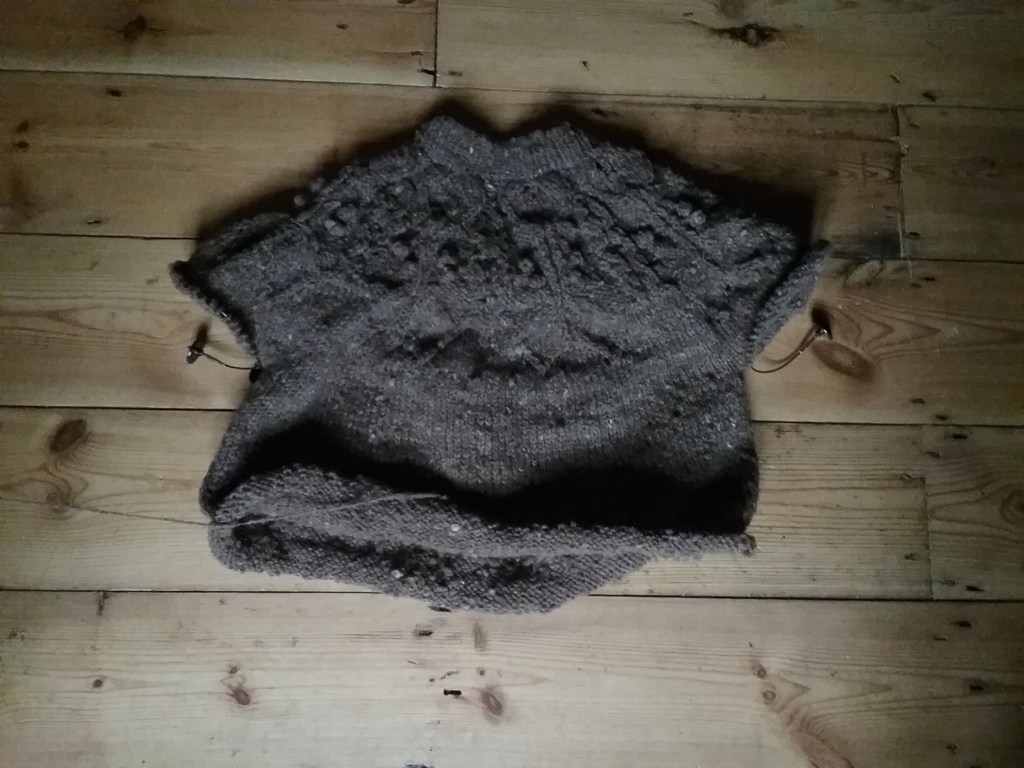
Jumper progress
I completely forgot to switch to the smaller needles on the ribbing of the body, but I don’t think it’s too noticeable and creates a more slouchy waistline on what is otherwise a more fitted jumper. I then re-attached my needles to the sleeves one at a time to continue knitting. I’m not a fan of the magic loop method and prefer to use either DPN’s or a small circular, but since I don’t have the right size of either, I opted to use a slightly fudged combination of magic loop and DPN technique with my existing cable. I remembered to switch to the smaller needles for the ribbed cuffs on the sleeves and then all that was left was to weave in the ends.
I used around 700m of yarn for this jumper and did end up having to use some of the coarser yarn for the bottom of the body and sleeves (where it comes into the least contact with the skin so isn’t noticeable). Though not quite as dramatic as some of my more recent projects, this jumper is perfect for throwing on as an extra layer when it’s chilly and feels like a woolly hug!
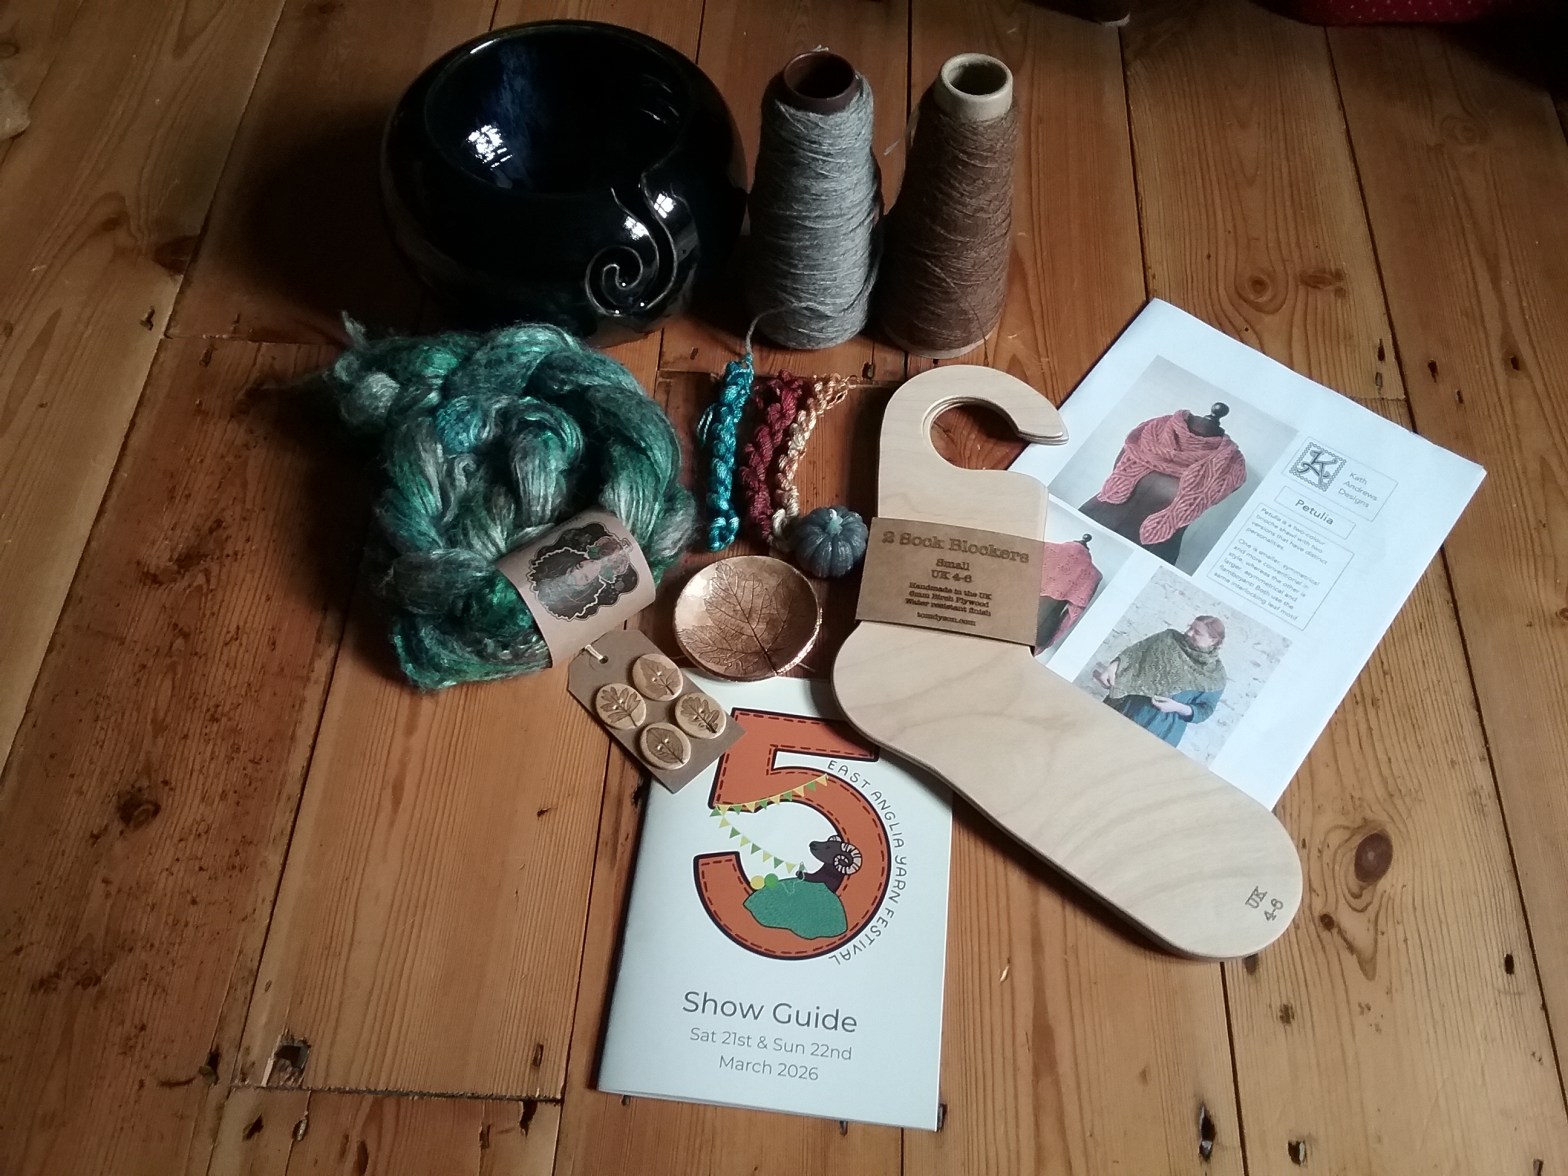
This weekend was the 5 year anniversary of East Anglia Yarn Festival, so I had a day filled with yarn networking and fibre squishing. Despite having two full bags by the end of the day, my haul was quite small and filled with useful things, but I made lots of new connections with lovely people. My fibre purchases this year were two cone ends from Free Range Fibre – one a beautiful brown alpaca, the other a grey Shetland, which will be useful for weaving projects, but could also double as edging on sewing projects, and a 50g yak & silk roving from Yarntings as it was just the right colour to go with some of my very early art yarns, so will hopefully encourage me to think up a project for them (and since yaks aren’t native to England it could be a while before I can process a whole fleece start to finish!).
Yarntings also had some wool and silk embroidery threads in beautiful colours which I plan to use in future sewing projects. By the same token, I also purchased some beautiful leafy ceramic buttons from Buttoned Up and a matching pin dish that will hopefully stop my sewing pins going missing mid-project. I’ve been looking for some sock blockers for a while, but wasn’t keen on versions I’d seen with cartoony flowers, so was pleased to find some plain ones from Tom Dyson. I’ve been gradually working my way through some of the knitting patterns I bought in previous years (more on one of those soon), so decided I would treat myself to the Petulia scarf brioche pattern from Kath Andrews; I’ve never knitted brioche before, but after Kath’s demo felt I should definitely tackle it, and add another string to my knitting bow.
My final purchases consisted of a little pumpkin candle (because it’s never too early to prepare for autumn!) and a gift for a friend (not pictured) from Morningstar Makes, and after admiring her ceramic yarn bowls for such a long time, and seeing this beautiful second (it has a glaze drip blocking the thread guide) in a matching colour to my mug from last year, I decided to give it a good home (and I can put the imperfection to use so it can hold two threads at once without them crossing over!).
Because a yarn fair wasn’t busy enough, a friend and I also booked in a stained glass workshop in the evening with visiting artist Colin at the wonderful Blue Flame Glass Studio. It meant leaving EAYF a little earlier than I normally would, but was fantastic fun. I’m hoping to visit some other fibre fairs this year, but my diary is very unpredictable, so I will see how things pan out. In the meantime, I’m beavering away at more woolly projects which will be coming shortly!
It’s been a while since I’ve posted any projects that are not solely for me, but I do love the challenge of making something for someone else. One of my very good friends is a fellow Lord of The Rings nerd and I’ve also managed to get them on board with the wonders of historical pockets. Unlike modern pockets which range from completely useless to being just about able to squeeze something in (if there are any at all), historical pockets were usually tied around the waist separately, either over or under skirts and put todays pockets to shame. I’ve been putting pockets in all my sewn garments (including my most recent sewing project) and can easily fit a couple of small books in them if I want.
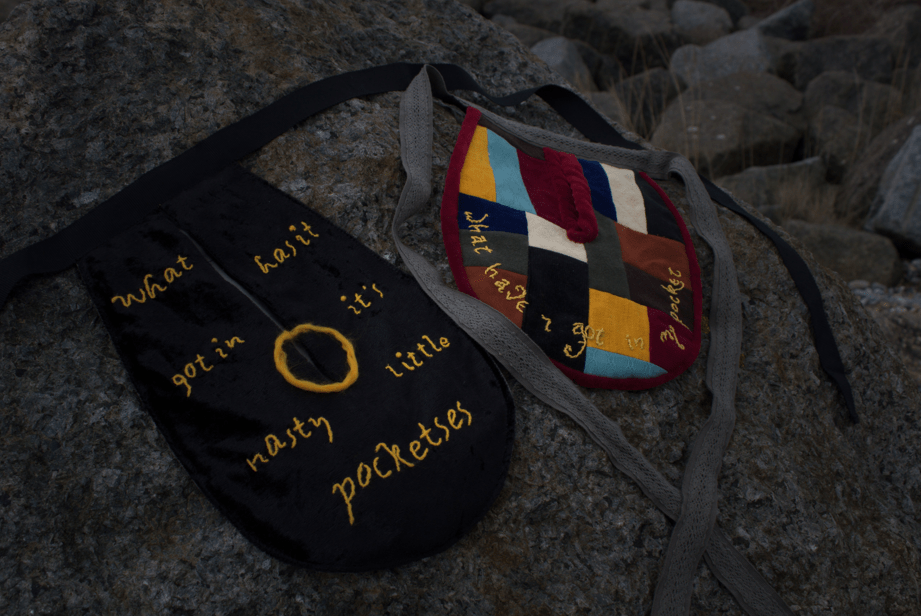
Happily, it was easy to combine pockets and LOTR in the form of Gollum and Bilbo’s exchange during the riddles in the dark sequence. I originally made just one pocket for my friend for Christmas, but then found myself wanting my own. So, since the dialogue is two ways I made two pockets; a darker pocket with Gollum’s line for my friend whose wardrobe comprises of mainly black and a hobbit-y pocket with Bilbo’s line for myself to match my autumnal colour palette.
Gollum’s Pocket
Pockets were historically made from scraps and leftovers so make fantastic stash-busting projects. I had some black crushed velvet style material left over from a project when I was a teenager. Unfortunately it was synthetic, but ultimately it’s better for the environment to use what’s in one’s stash than to buy new (though if you do need some black velvet for a pocket or similar project, I recommend cotton velvet since it has a better stiffness than synthetic). Since this fabric was quite drapey I used a grey cotton blend from my stash for the backing which I’ve used for nearly all my skirt pockets and have been really happy with. I thought this would subtly echo the washed out colours of Gollum’s loincloth in the film.
I free-handed a pocket shape adapting my usual pattern (see further reading section), traced around it on both fabrics and cut them out with about a 1″ seam allowance. For a cleaner finish for what I was going to do later, rather than binding the front opening I rolled it back and stitched it down in a very small seam, before setting the pocket pieces aside.
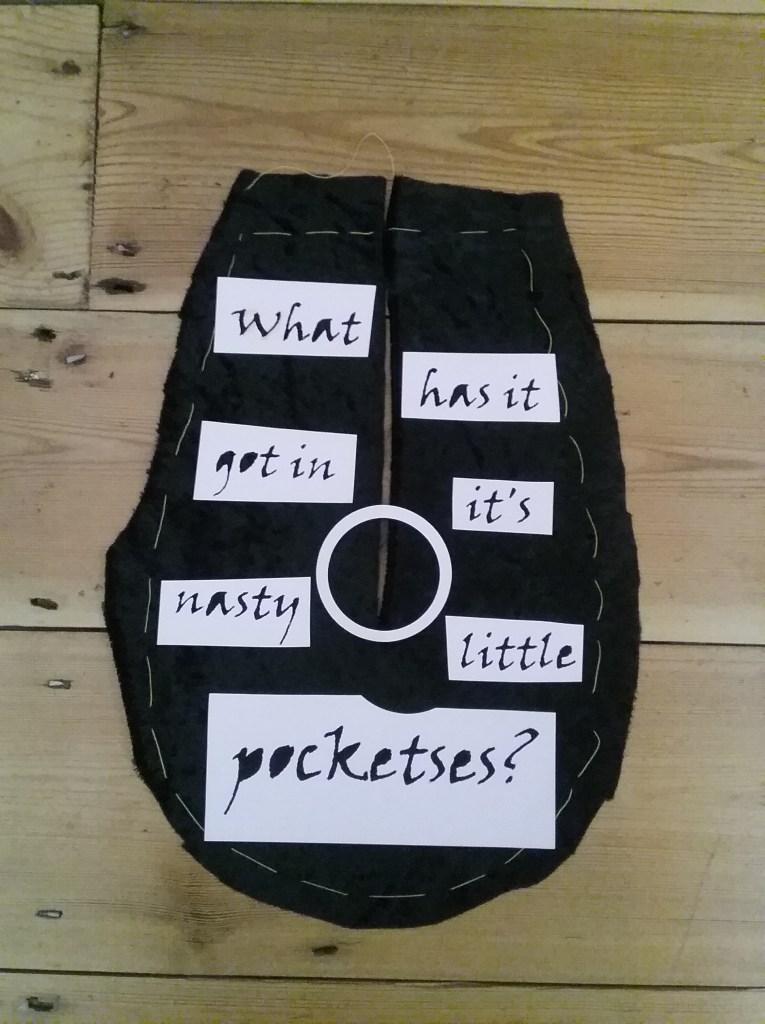
I then had to think up the design; I’m usually quite averse to doing this sort of thing digitally, but it can be useful to move things around and resize them on a computer to see what looks good. You could easily do this on any program, but I ended up using Cricut’s Design Space (I have an early Cricut maker machine which has come in very handy for lots of projects over the years). I don’t have a subscription as I tend to upload my own images for the machine to cut or draw and in this instance I wanted to quickly make a stencil. Once I was happy with the layout I sent the stencil to cut and then laid it out on the front pocket piece to check.
Stencil laid out to check positioning
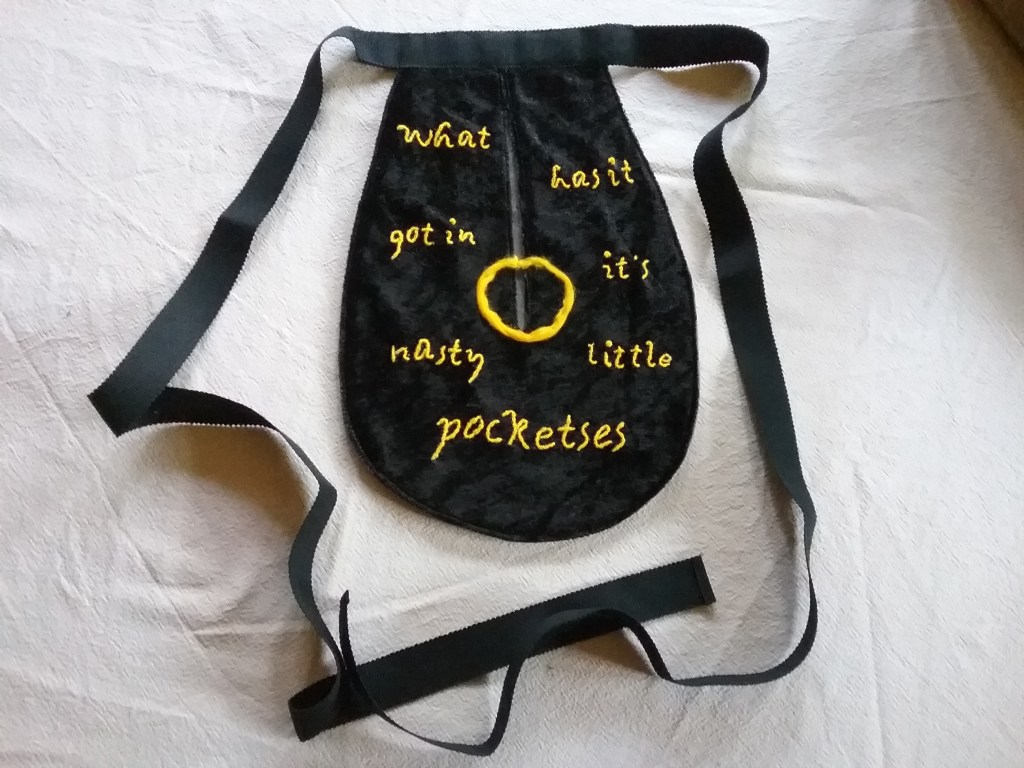
Next came the embroidered text, which was three strands of yellow/gold yarn couched down with yellow thread. The black velvet was a nightmare to draw on as it had a tendency to shift, so this was where the stencil came in handy over free-handing. I would lay out the whole stencil, pick one word and hold it down very firmly before tracing over it using a white wax dressmakers pencil. This temporarily ‘stuck’ the words onto the fabric so I could remove the stencils, place it in an embroidery hoop and stitch it on. The central ring was made of dyed fleece from my stash. I wanted it to echo some of the elegant designs on the book covers, but also to look like it was on fire. To achieve this I loosely needle felted a ‘sausage’ of yarn before sewing it into a circle being careful to catch only the back of the fibres so unlike the couching, it didn’t look stitched down.
This done, I could then sew the back and front of the pocket together with a French seam and add a grosgrain ribbon tie to the top to finish.
Finished Gollum Pocket
Bilbo’s Pocket
In the true spirit of historical pocket making, I wanted my hobbit-ish pocket to use up more scraps. Bilbo’s costumes (and indeed all the hobbits in the fellowship) have rich autumnal hues contrasting with lighter natural shades. Most of the fabrics are corduroys, linens and wools, with the odd touch of velvet, and happily these are fabrics I fawn over. In the Hobbit films, Bilbo is shown wearing a patchwork dressing gown, which the costume designers created from scratch. While the design can be seen in film stills, there is a photograph of the flat fabric in The Hobbit Chronicles: Cloaks & Daggers book (if you’re interested in the behind the scenes, of costume, props and set design, it’s a fantastic read) and it was this I based my patchwork layout on.
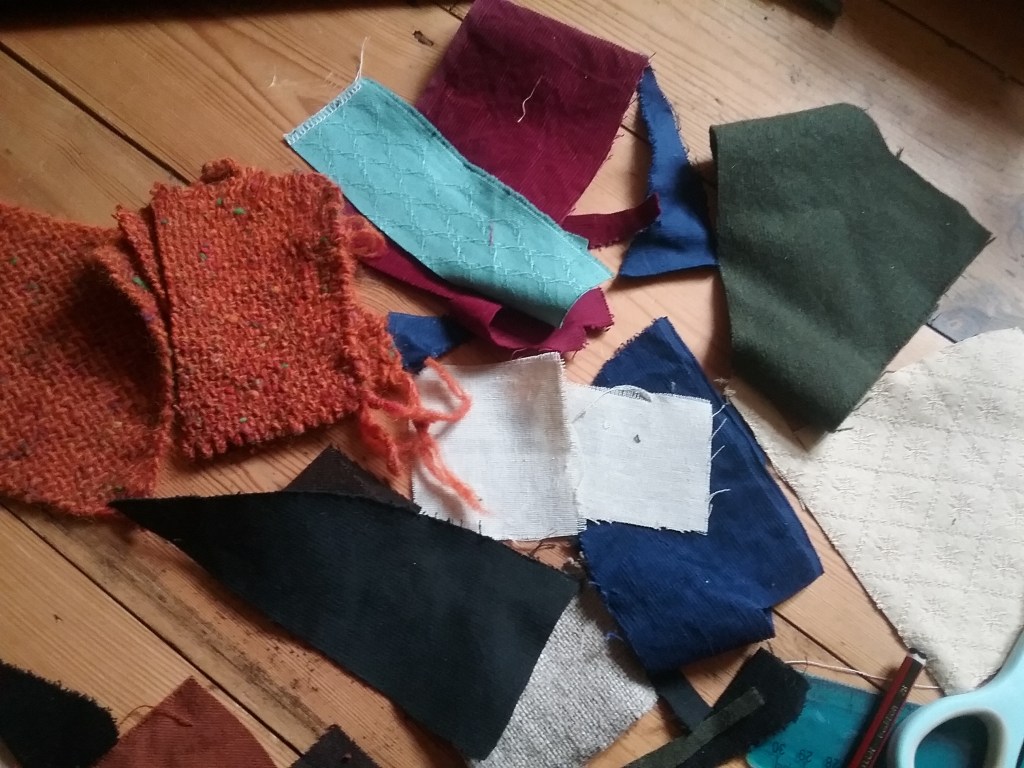
I searched my stash for offcuts and pulled out several scraps of fabric left over from previous projects and picked up some corduroy scraps from the local charity craft centre (I was meant to be dropping things off!). After gathering my fabrics together I felt I needed an orange/rusty coloured fabric; I had an uncut wool fabric in the right colour, but was hesitant to cut into it since this project was meant to be using scraps. I decided instead to weave some pin loom squares that I could cut into shape, but when laying everything out I realised they were too thick, so abandoned that idea and cut a couple of small rectangles from the end of my rust wool (there’ll be offcuts from that fabric eventually after all!).
Pile of gathered fabrics
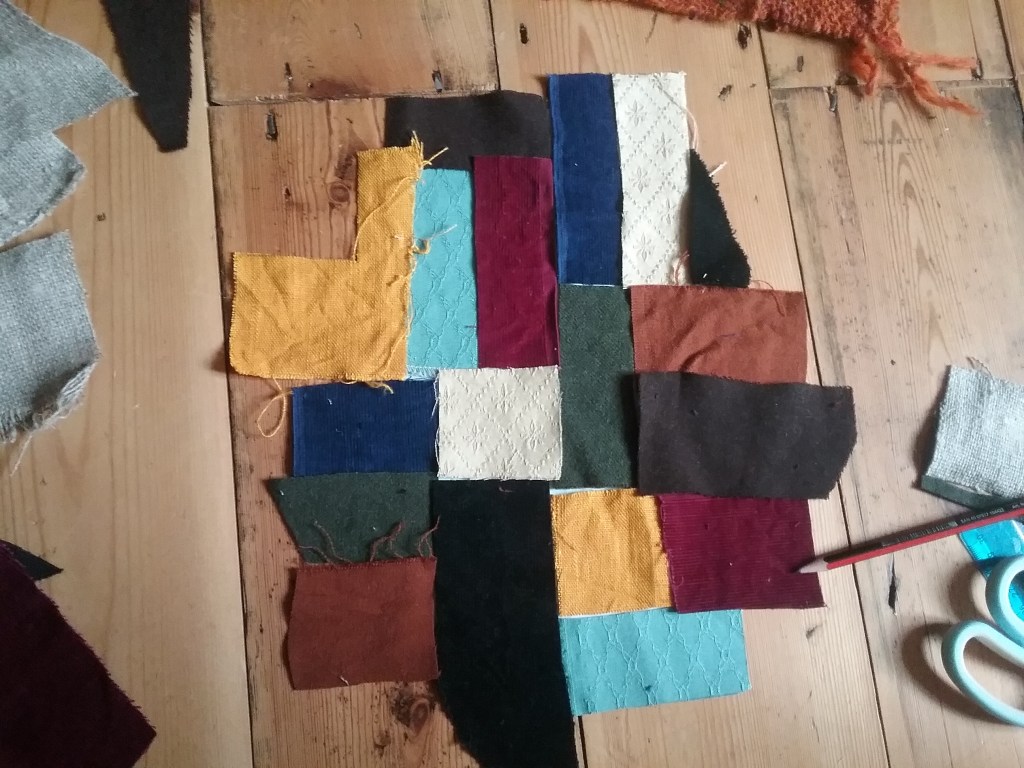
Scraps gathered, I then began to cut them down and arrange them over the pocket shape. I left some overlap to account for seam allowance when sewn together (but not quite enough vertically). Once happy with the layout, I sewed the patchwork pieces together and pressed the seams flat before attaching the grey cotton blend as a backing fabric.
Patchwork pieces arranged over the pocket shape
I had a very small number of red velvet scraps in my stash that came from a childhood coat that was turned into a shoulder cape for world book day when I outgrew it, and I decided these would make the perfect edging for the pocket, as Bilbo’s dressing gown has similar cuffs and collar. I attached the inside edging before going any further so it was easier to wrangle under the machine and kept the raw edges from fraying while I worked on the rest of it.
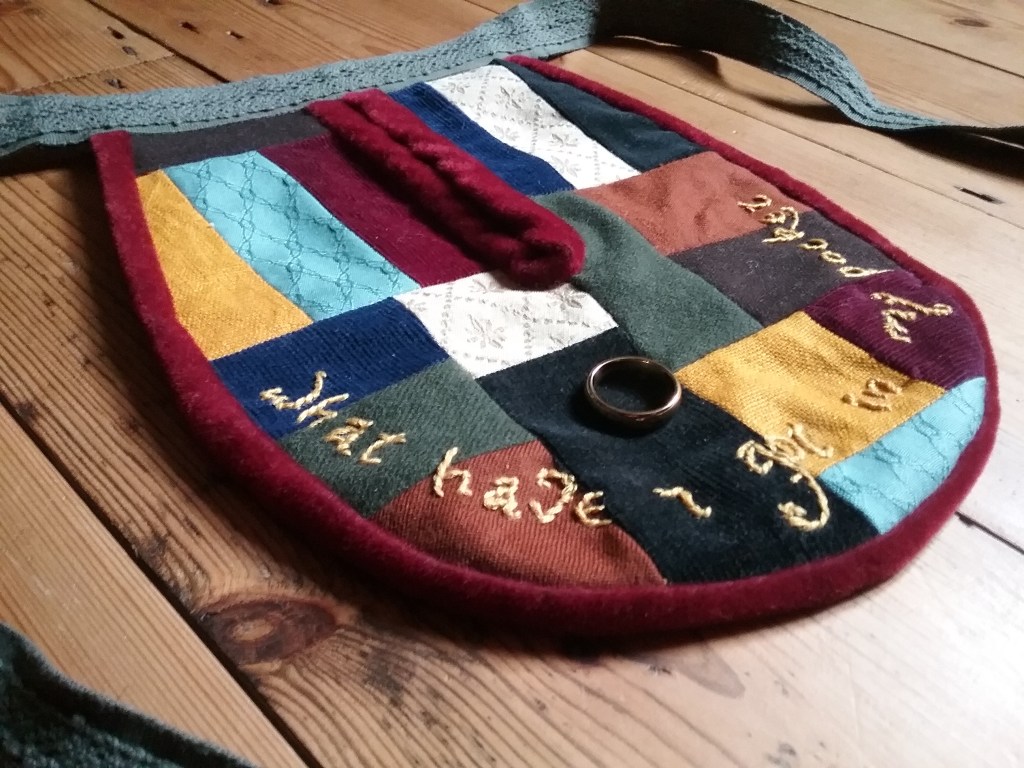
Next it was onto the embroidery, I opted for a gold cotton embroidery thread and stem stitch to resemble Bilbo’s handwriting as depicted in the films. I ended up using the wax pencil and stencil technique again, but ended up forgoing the embroidery hoop since the pocket was quite thick and I didn’t want to crush the velvet. Since I was working on a small section at a time and the fabric was quite stiff this worked out ok and didn’t cause any wrinkling to the embroidery.
Embroidery complete, it was time for the finishing touches. Unlike the first pocket, I finished this in the more traditional method, sewing the back and front of the pocket together wrong sides together with a binding covering the raw edge. I stitched together my very last scraps of velvet into a length that would fit around the pocket, sewing the front seam with the machine, cutting away as much excess seam allowance as I dared to reduce bulk and then hand felling the binding at the back. I then trimmed the excess fabric at the top of the pocket and attached a waistband made of a lace embellished twill tape I ‘burgled’ from my mum’s stash.
Finished Bilbo Pocket
Riddles in the Dark
In true LOTR fan style it was time to get creative with the final reveal and pay homage to one of my favourite scenes. I roped in the wonderful leanagibsonphotography to join me on the other side of the camera in some riddles in the dark pocket-ography (choreography with pockets?!), which you can see towards the end of the video.
I had a lot of fun making these; I love the challenge of having complete creative freedom, yet also be working from an existing reference. I’m really happy with how they turned out and I now have the perfect pocket to put other precious things like seam rippers in when I’m crafting so I don’t put them down and then turn into Gollum for half an hour while I look for them!
Hello everyone, I’ve been busy over the festive period finishing off a project that has long been on my wish list. I never thought I would make much of a jumper knitter, but since tackling my Victorian cycling jumper recreation the other year, I’m not as intimidated by knitted garments anymore and have realised that if I pick a project with interesting constructional or decorative elements, the proportion of active/mindless knitting is just about right (I personally prefer active knitting).
The Plan
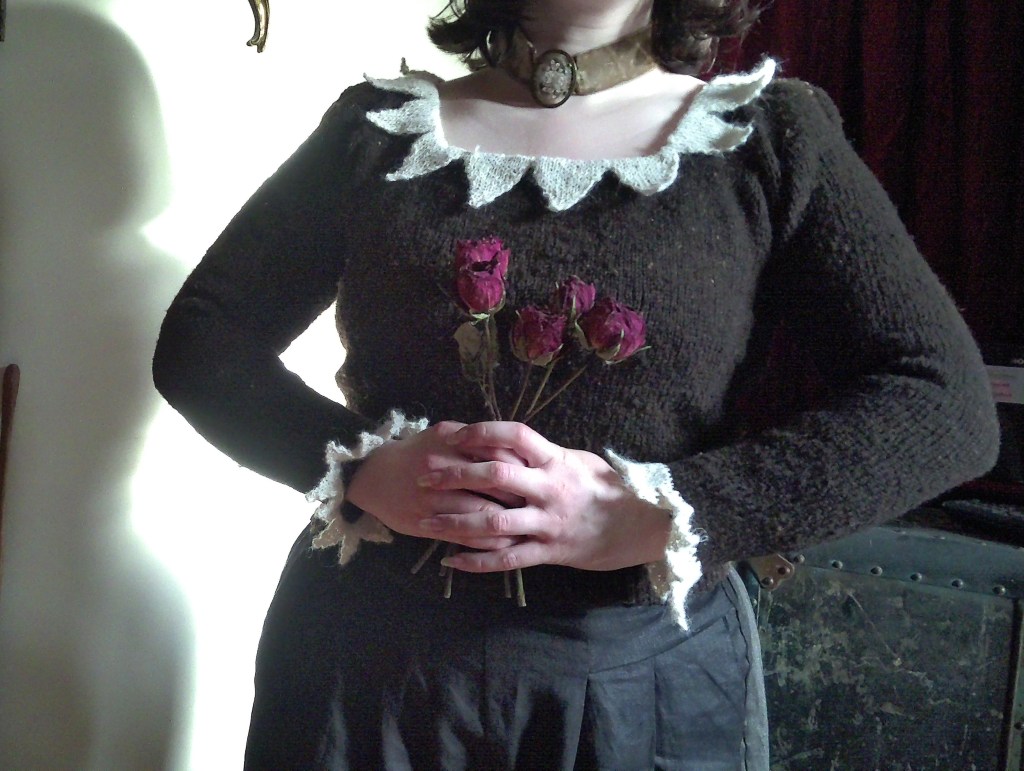
I often find myself browsing the internet for unusual knitting projects, and it was during one of my journey’s down the rabbit hole that I came across Fabel knitwear’s site. I loved the whimsy and vintage silhouettes of Helene’s designs and was particularly taken by the Medieval ruffle blouse, not least because it had a square neckline which is more unusual to see in knitwear. After making the Zwartbles hats I knew I wanted to make a garment for myself and the deep reddish brown of this yarn seemed like it would make the perfect base for the jumper. I paired it with some wonderfully soft alpaca fleece from my stash, which I thought would make an acceptable substitute for the mohair/silk blend used for the ruffles in the original.
The Making
Knitting was a straightforward process and I was following the pattern so won’t go into much detail. The body and the sleeves are knitted bottom up before being joined in the round, followed by knitting raglan and then shaping the neckline, with the decorative ruffles added at the end. I’d never knitted raglan sleeves before, so it was quite a magical moment when I added them to the body in the round and worked them into shape at the shoulders.
The moment I saw how it was all going to come together
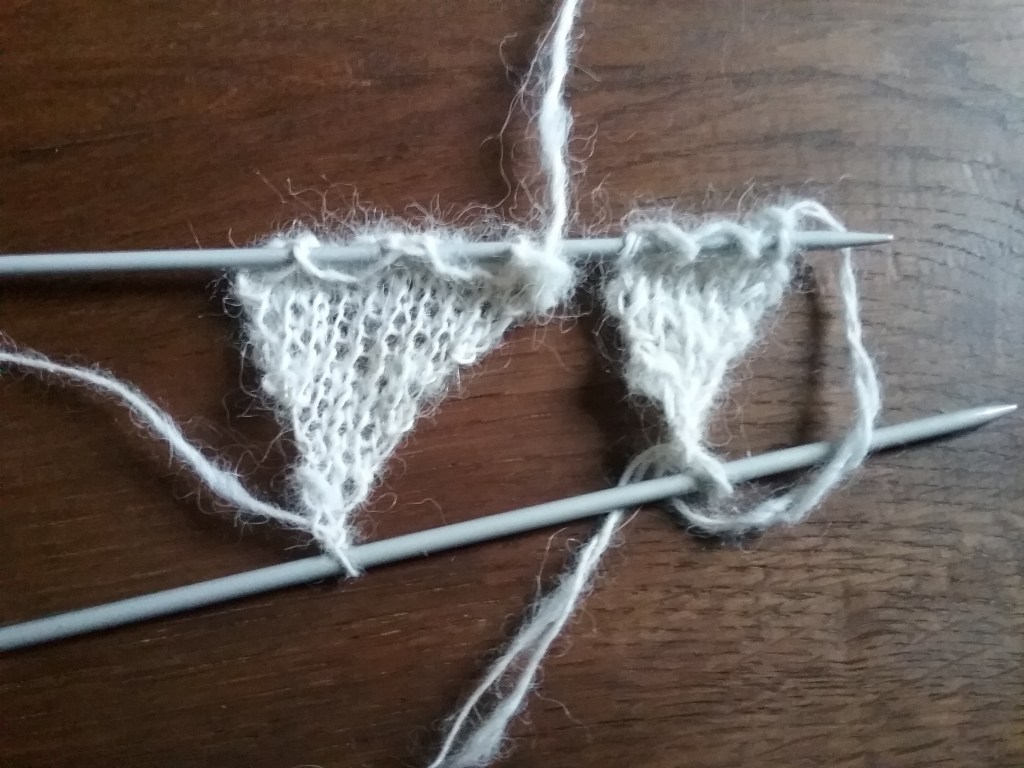
I didn’t take many photos during knitting, but did film the process as I went which you can see in the video below. Then it came to the ruffle detail; Alpaca fibre is finer than most wools and it’s usually recommended to use fine combs or carders with a higher tpi count. When I first got this fleece I experimented with spinning directly from the teased out locks as I didn’t have my combs, which resulted in a thick slubby single. While lovely, this wasn’t the delicate lacey yarn needed for this project, so I decided to sample two different preparation and spinning methods before diving in. I made a sample of combed alpaca spun as a single on my wheel, and a spindle spun sample carded from the combing waste on my vintage hand carders (which are a standard tpi but seem to work ok on finer fibres). Both samples were washed to set the twist before I knitted them into test triangles.
There was little difference in appearance between the carded and combed yarns and since I was looking for the yarn with the most ‘halo’ around I felt that hand carding would be the best option going forward. The wheel spun sample had more excess twist in it (which is unsurprising as I find thin yarns feel quite natural to spin on my spindles), so I initially thought using spindle spun would be the way to go. After knitting my first sample triangle however, I realised that my singles were a bit too thin, so tried another triangle with the yarn held double. This looked much better, so I decided that for the final project I would hand card the fibre and spin it into a 2-ply yarn. I ended up doing this on the wheel as my favourite drop spindle was in the midst of another project and plying is a little quicker to get set up on the wheel (plus I might as well take the opportunity to improve my wheel lace spinning!)
Yarn held single on the left, yarn held double on the right
With my 2-ply alpaca yarn at the ready I began adding the decorative ruffle. Despite following the pattern, when I picked up and knitted stitches around the neckline I ended up with a lower number than the pattern suggested I should. Interestingly the neckline is worked in multiples of twelve and I was exactly one multiple of twelve lower than the smallest patterned size. I worked out I would have two triangles fewer than the pattern, but after placing stitch markers to indicate where the triangles would sit, I felt that it was better to work with the maths of my neckline, than to cram 24 extra stitches in and risk the triangles overlapping oddly.
The pattern reminded me to pick up stitches from the inside so the collar folds over, but I did forget which direction I needed to start my round from and just caught myself before the stockinette side of the fabric would have been backwards! Then it was onto the cuffs and weaving in all those pesky ends before steam blocking the ruffles so they would sit beautifully flat.
I’m pleasantly surprised by how this turned out and how comfortable the raglan sleeves are; raglan sleeves were originally designed to make clothing more accessible and easy to put on, but I was a little worried my thicker yarn might have negated this and reduced my arm movement, but that was not the case. Since it also doubles as quite a festive jumper, I think I might be inspired to go full jester and add some bells to the collar tips in time for next Christmas, in the meantime it will add a little fun to my winter wardrobe!
As ever, do let me know in the comments below what woolly projects you are working on/looking forward to working on in 2026, and if you have any raglan tips or tricks you want to share do let me know!
As 2025 draws to a close, I’ve been reflecting on how much of a whirlwind the past twelve months have been. I’ve had a lot going on this year, but despite a slow start to blogging while I finished my degree, my website stats tell me I managed to write 20 blog posts and have started gradually filling in the gaps on the exploring fleece page where fleeces I was working with were put on hold. I’ve also continued to play around with filming my projects, which has been a fun exercise in storytelling and a good way to learn new skills. The response to these has been very positive, so it’s definitely something I’ll continue with going forward.
I also need to give a very warm welcome to my new subscribers, and to all my followers old or new, thank you so much for joining me in this woolly corner of the internet – I hope you’ve enjoyed this year’s posts. I have lots of exciting plans and ideas going into 2026; I’m not sure how many will come to fruition, but I’m hopeful that I’ll be able to post about creative projects a little more regularly, alongside taking part in the usual fibre challenges (and if you have any suggestions of crafty content you’d like to see then do let me know in the comments).
In the meantime, I wish you all a merry festive season. I look forward to joining you again in the new year!
Some of you will have spotted this post is a little out of order; I’d planned to get this out before making the final projects in Wovember, but I’m quite glad I was delayed as I ended up spinning two very different types of yarn with this fleece, which I think makes for much more interesting reading! Once again, my experience spinning with this fleece may be very different to another since it wasn’t the best quality, so do feel free to share your experiences in the comments!
Standard 2-Ply
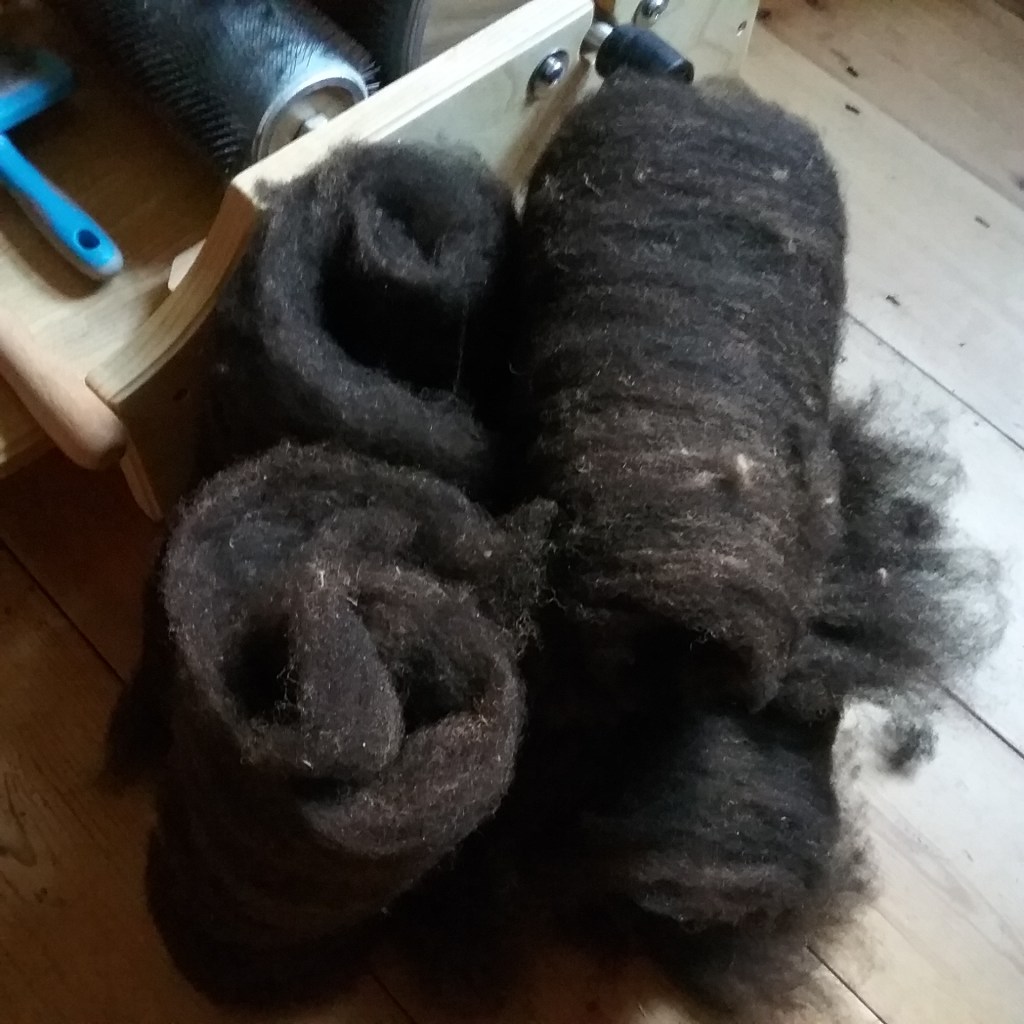
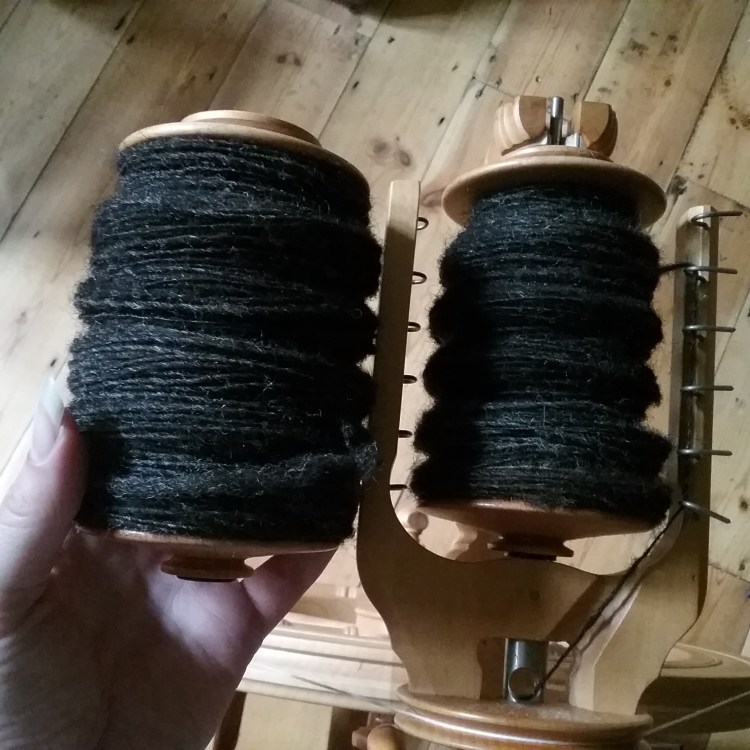
During TDF I combed the fleece to separate the best fibres for spinning with the intention to turn this into a 2-ply handspun yarn (a good all rounder as at that point I hadn’t decided on a project). This was the first whole fleece I’ve used my wool combs on, and I enjoyed having a large basketful of combed nests to spin from for a change. I began spinning worsted style as is traditional for combed fleece, but the fibres also very naturally fell into a thin long draw. I experimented with both techniques (and supported long draw) during spinning and found very little visible difference between them – both had the same diameter, and interestingly the yarn was both stiff and drapey (though I suspect the stiffness was more to do with the yarn being slightly coarser).
Close up of the 2-ply yarn showing off the variaitions in colour
There were a few odd second cuts left in the fibres, which I removed since they were scratchy and the yarn wasn’t naturally lumpy and I was pleasantly surprised by how even the yarn was after plying, as I really hadn’t been sure what to expect from this fleece. Unfortunately I started work on the Raven Collar before I got round to measuring how much 2-ply yarn I salvaged from the fleece (in fact I was knitting and spinning at the same time!).
Art Yarn Singles
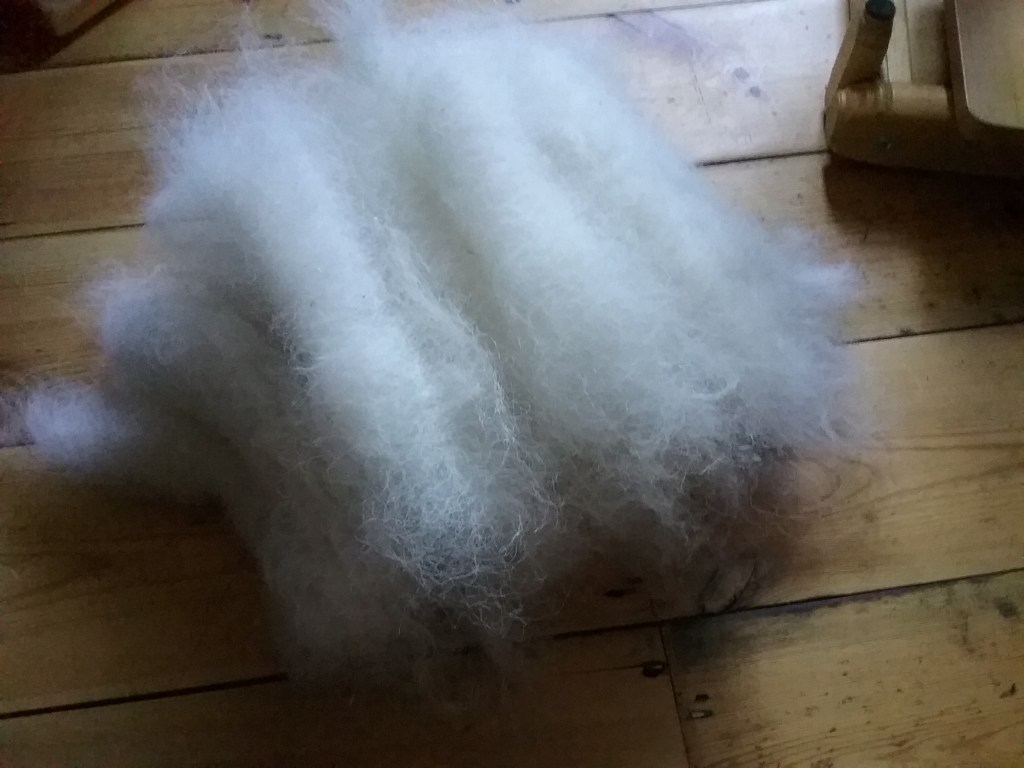
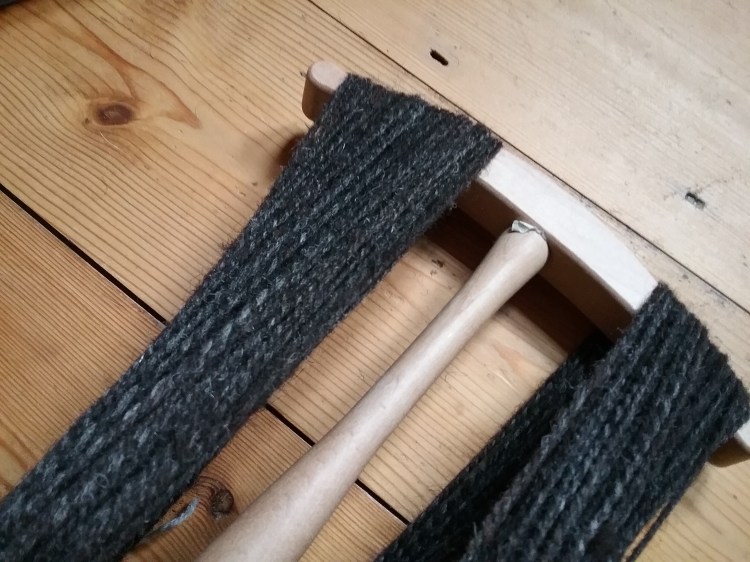
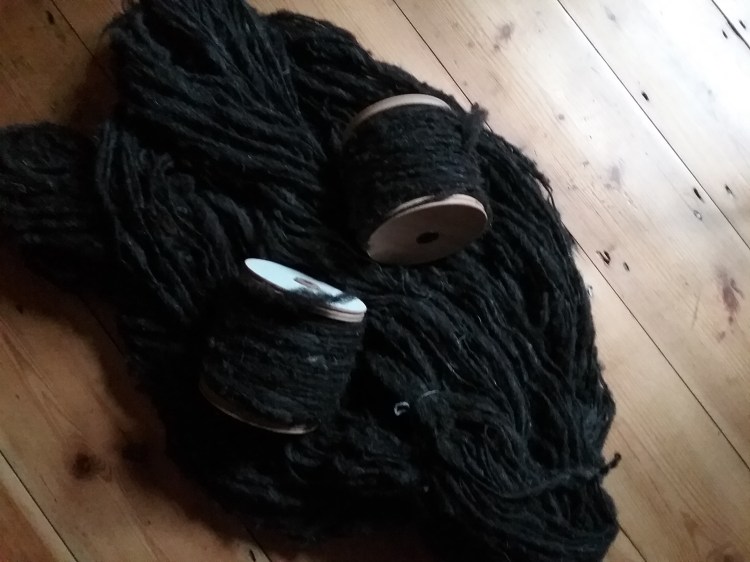
After my felting project fell through I opted to loosely spin the batts carded from the combing waste on my jumbo flyer. I utilised the same techniques I used when working with the Herdwick, however I did find that the combing waste was slightly trickier to work with as the longer fibres were all in the 2-ply, and due to the condition of this fleece some of the shorter fibres were more inclined to snap, so the yarn was more susceptible to breakages, particularly in the slubbiest sections. To combat this decided to spin a slightly thinner yarn than I initially planned so more fleece was caught in the twist. It wasn’t my favourite art yarn when I took it off the bobbin, but I love how it looked after weaving, and do have a couple of spare skeins which are inspiring me to use them into a mixed textile piece in the future.
Art yarn singles on and off the bobbins
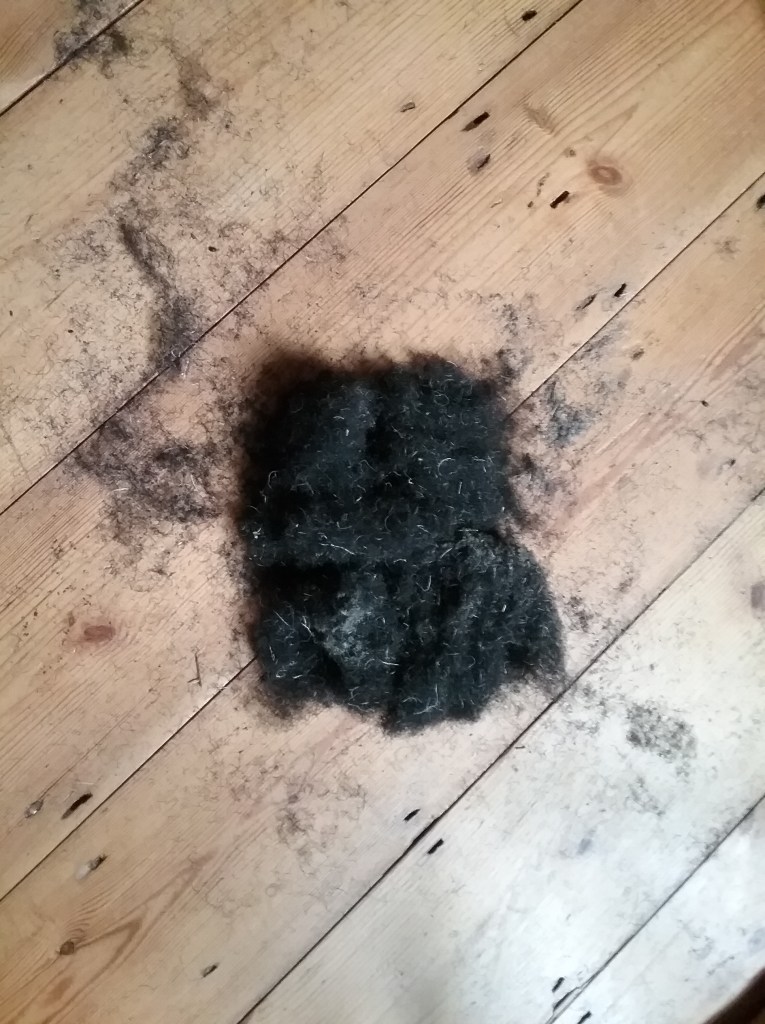
Overall, the spinning process was relatively straightforward, considering the quality of the fleece and produced some really beautiful yarn, however, what I was least prepared for was the sheer amount of shedding. I usually have an apron to hand so as not to spread wool around the house on my clothes after spinning (though most dust etc. falls out during fibre prep), but no matter how well prepared this fibre was, or how far along the process, my floor, apron and socks were covered in a layer of second cuts and broken fibres (understandably worst with the combing waste).
Dust and broken fibres post-drum carding
My goal was to see what was possible to produce from a poorer quality fleece and I’ve definitely achieved more than I expected; so if you also have a dodgy fleece lingering in your stash I highly recommend experimenting with it – but maybe prep it outside to save yourself the clean-up!