Today marks the end of both Britspin and British Wool Week. I’ve had to put my fibre play on hold while I try and get ahead making Christmas presents in my spare time. I’ve been very productive, but unfortunately I can’t show any completed gifts, as the people who will receive them follow this blog. However, in order to celebrate the fibre week I thought I would share a couple of recent projects.
Power Cut Spinning
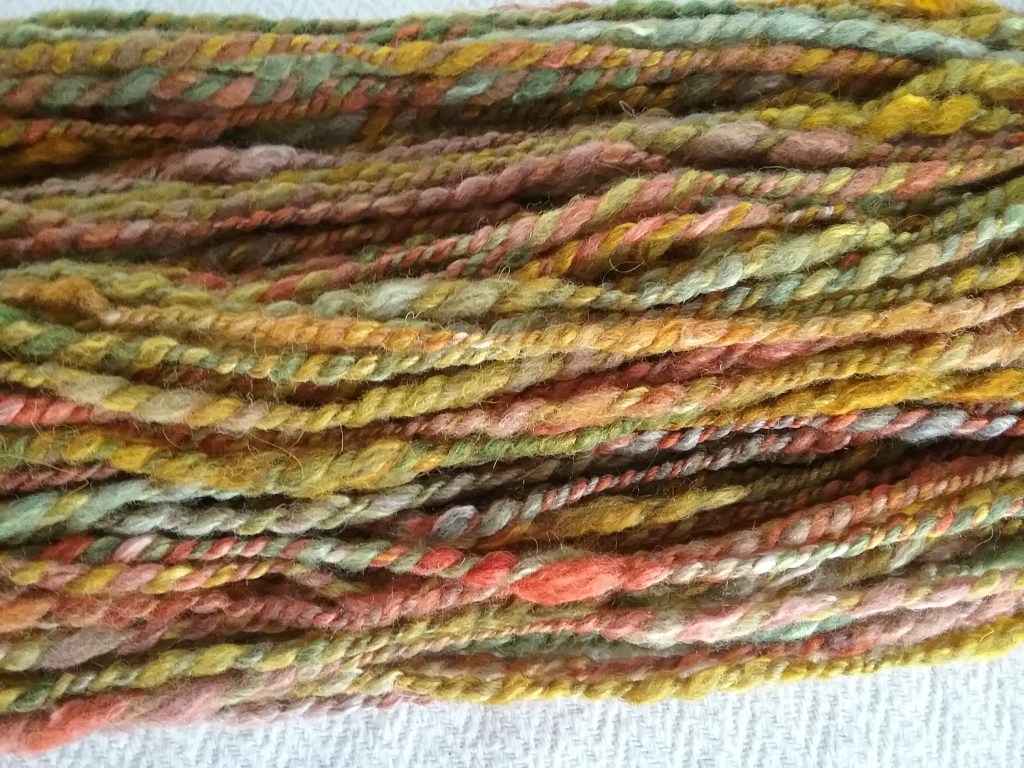
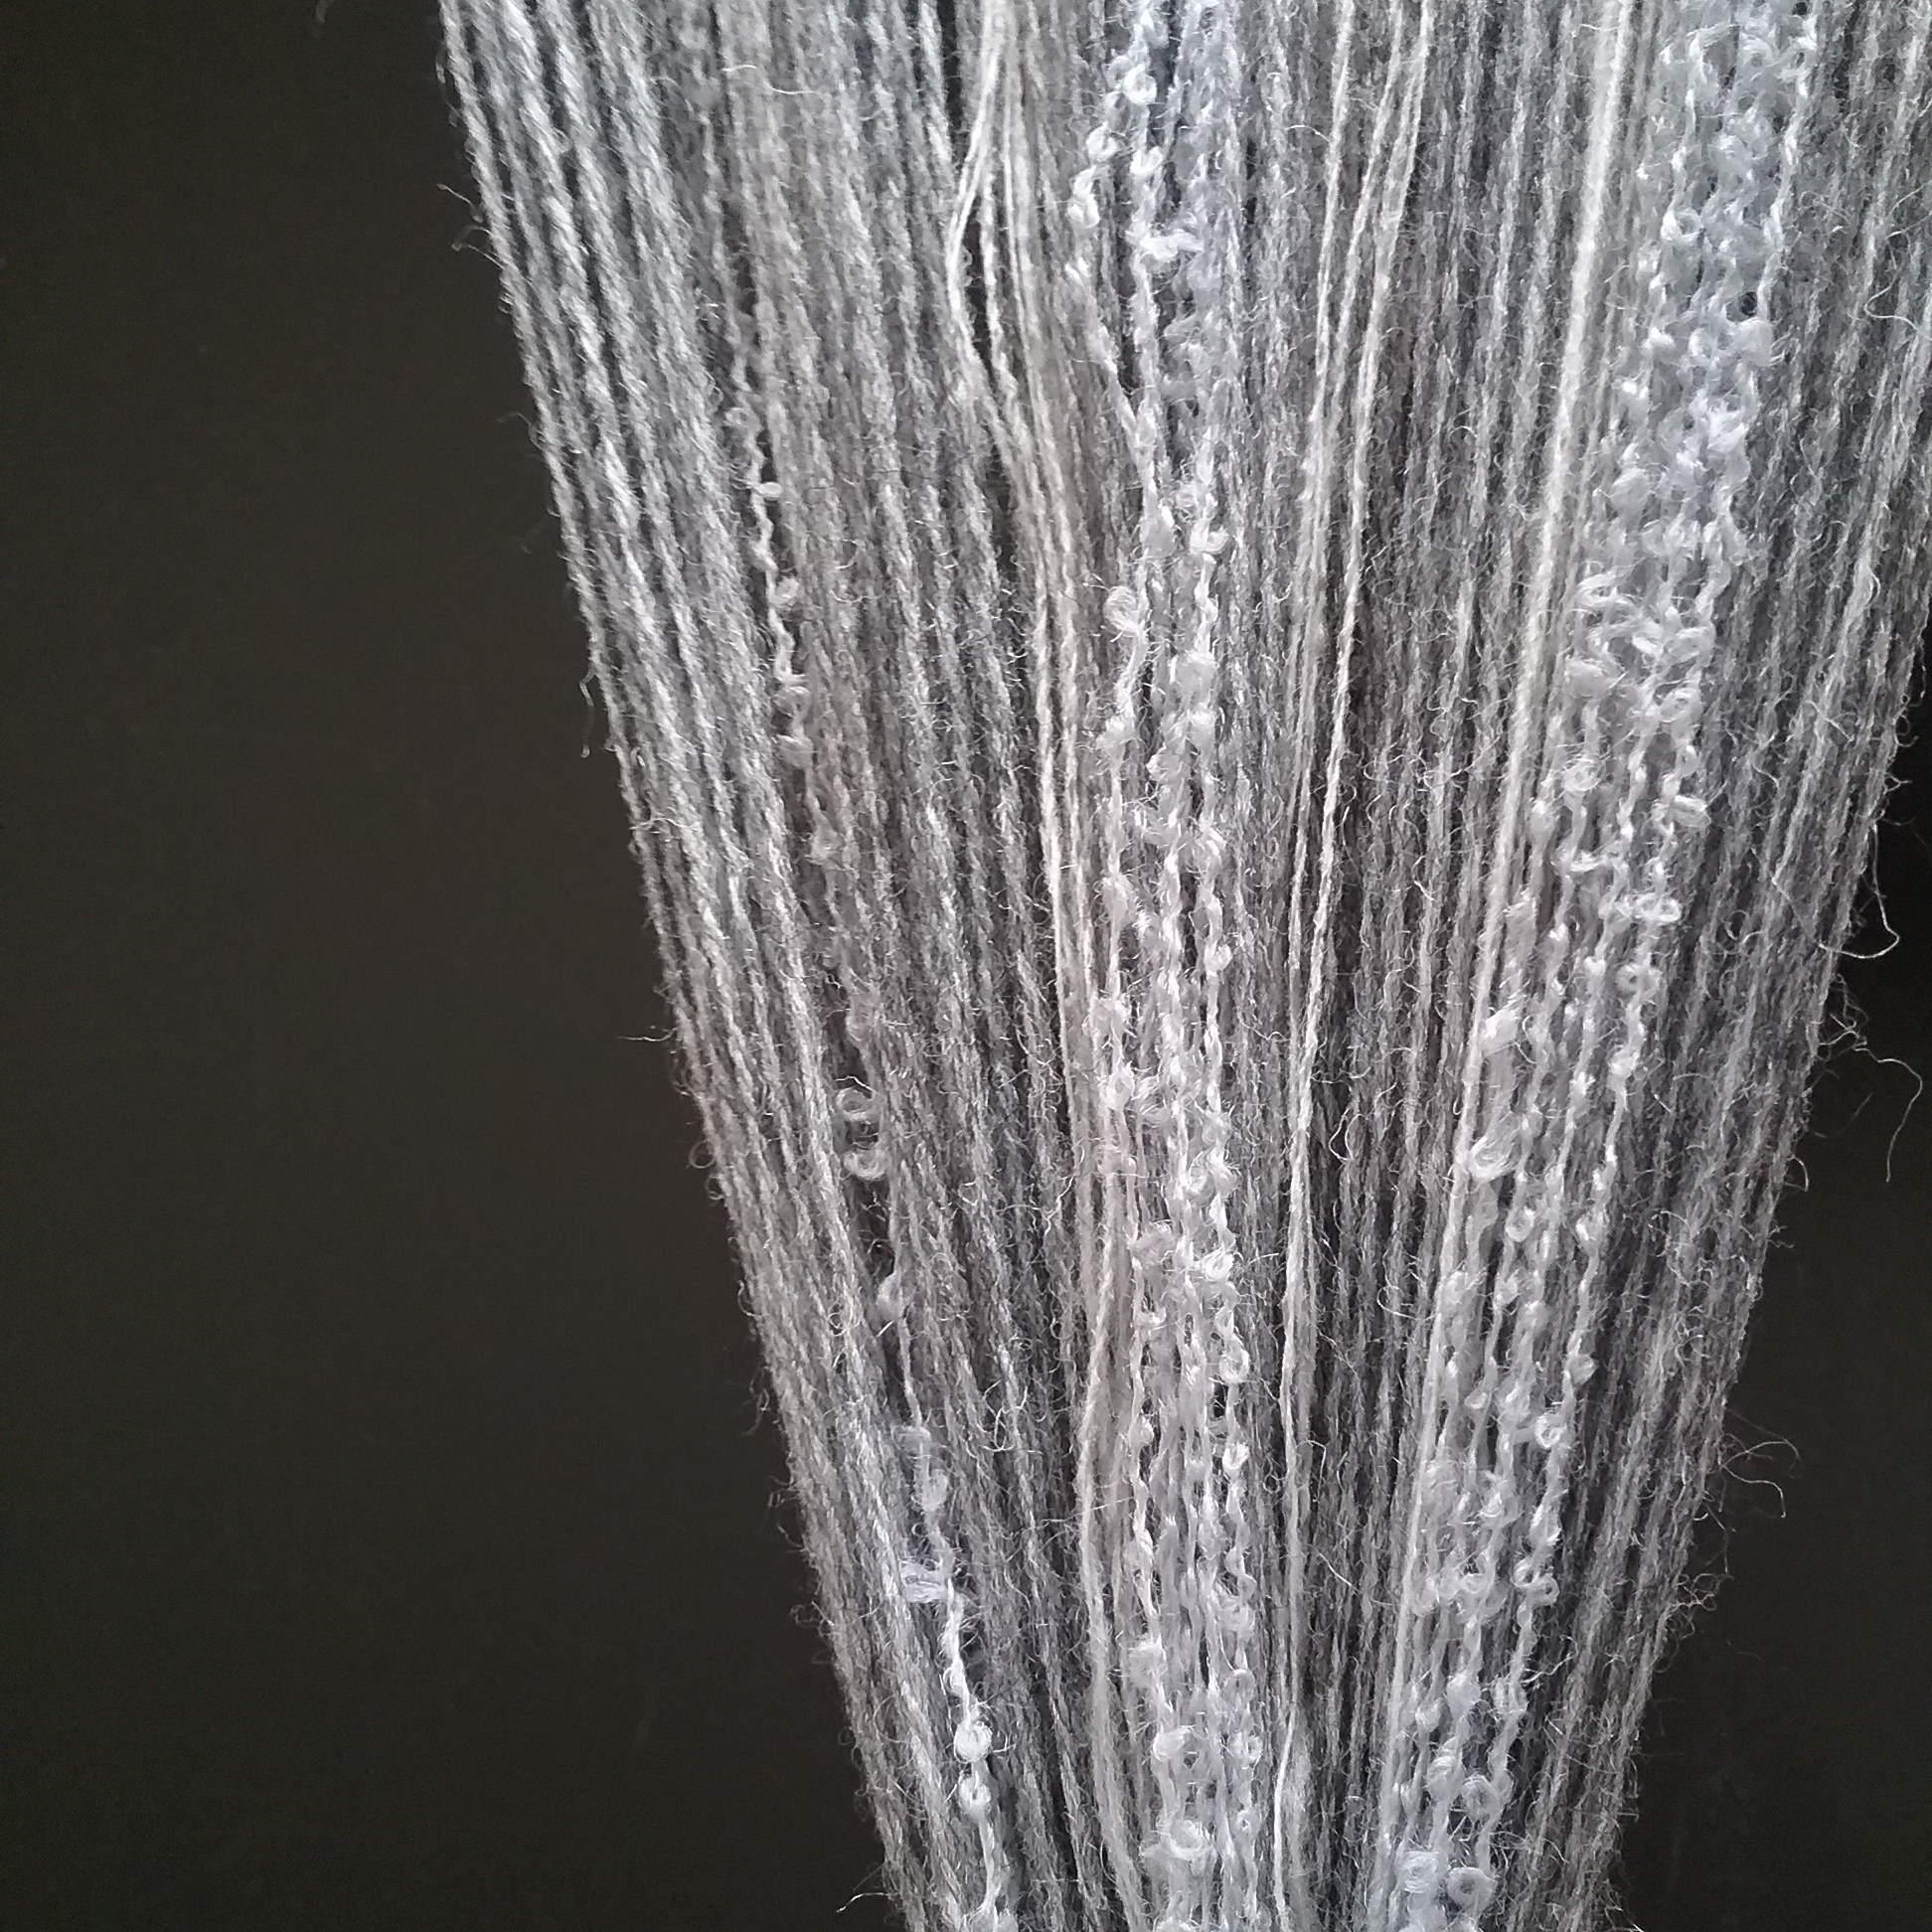
A few weeks ago there was a long power cut in my area, so I decided to spin up the ‘underwater treasures’ and ‘forest treasures’ rovings I purchased from Yarns from the Plain during Fibre East.
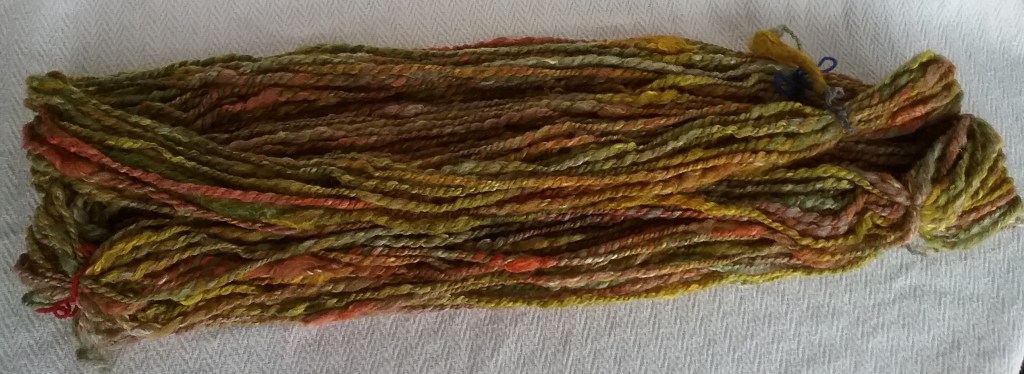
‘Underwater Treasures’
It was the first time I’d spun roving (I’m used to spinning from rolags) and have never spun anything with silk in it, so I think they turned out rather well even though I couldn’t really see what I was doing in the dark!
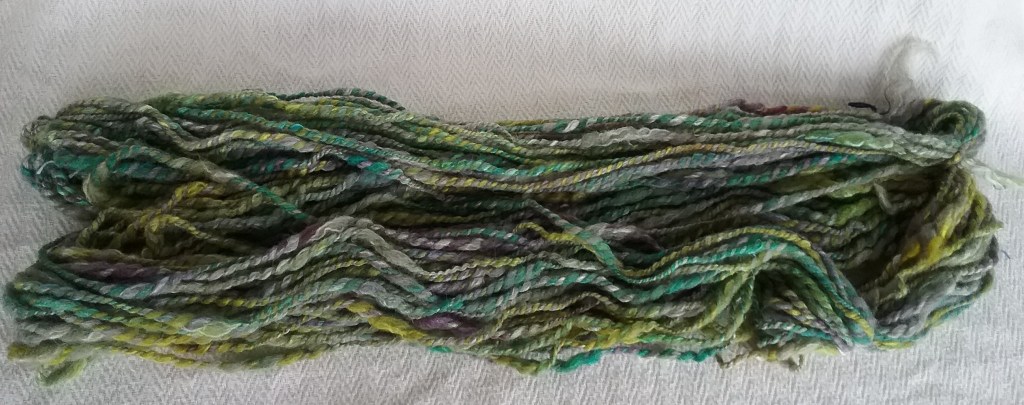
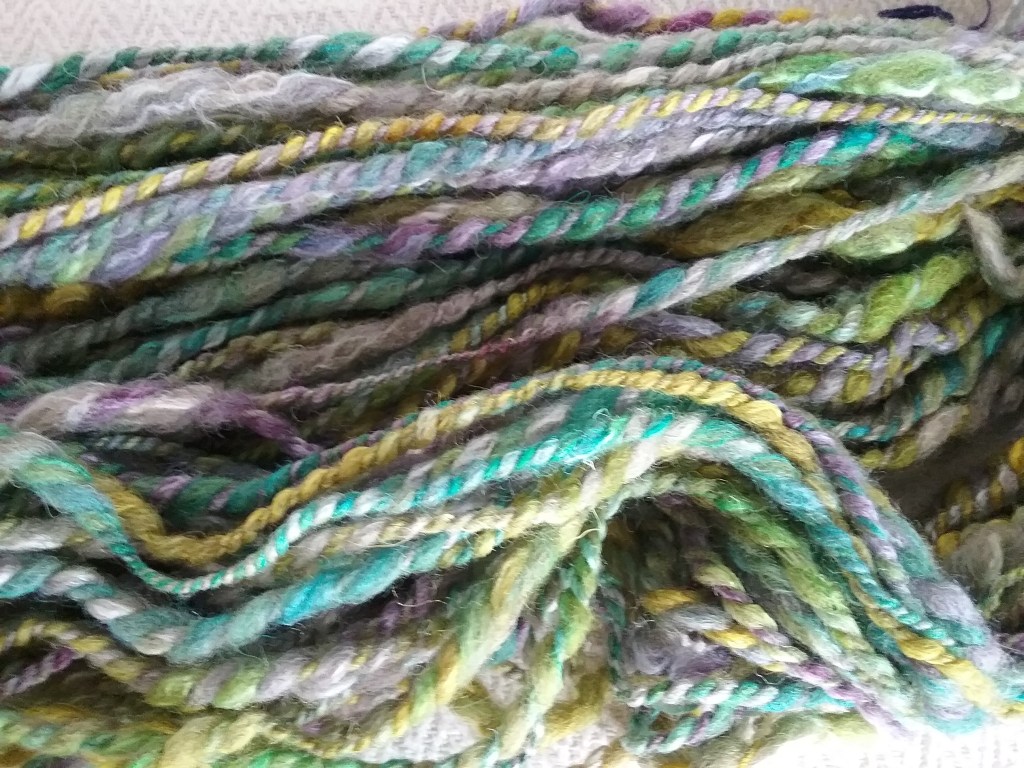
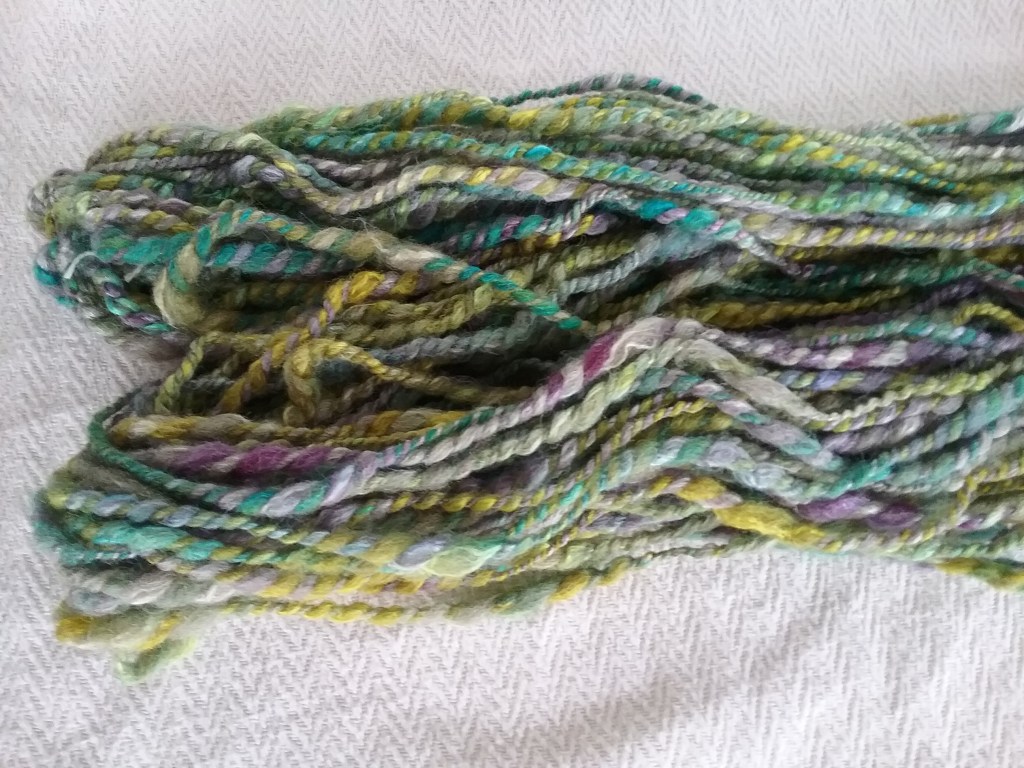
‘Forest Treasures’
I was initially going to use them in some weaving, but the skeins of the forest colourway have been sitting next to the rest of my Ryeland fleece and the colours go together so well, I may knit myself another pair of fingerless gloves with an arty cuff instead. Decisions, decisions!
Weaving
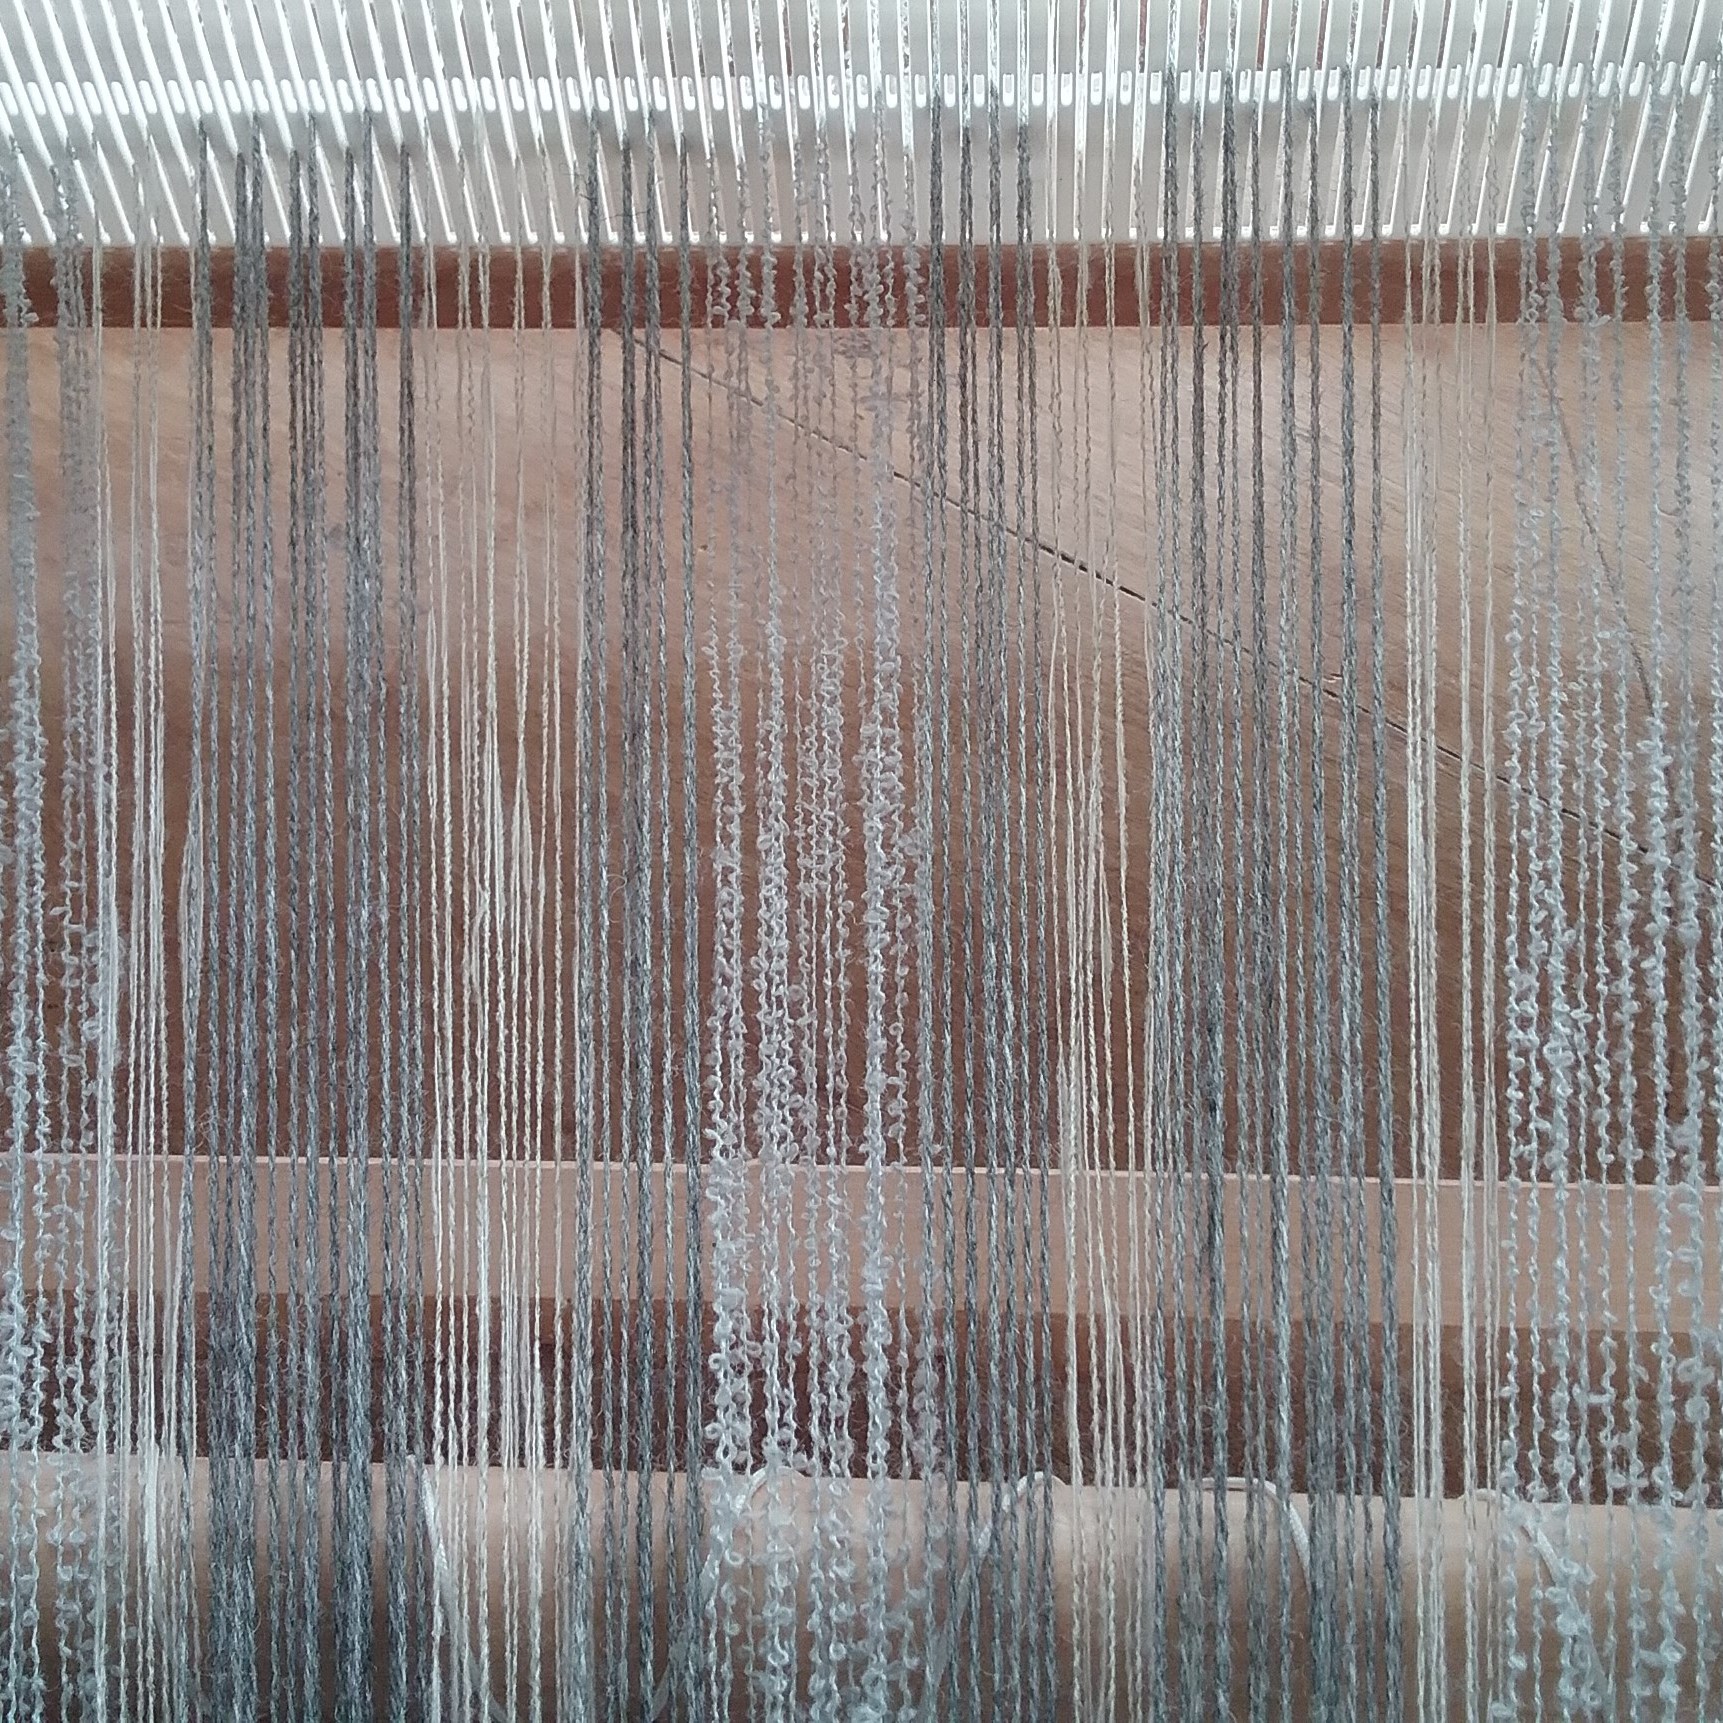
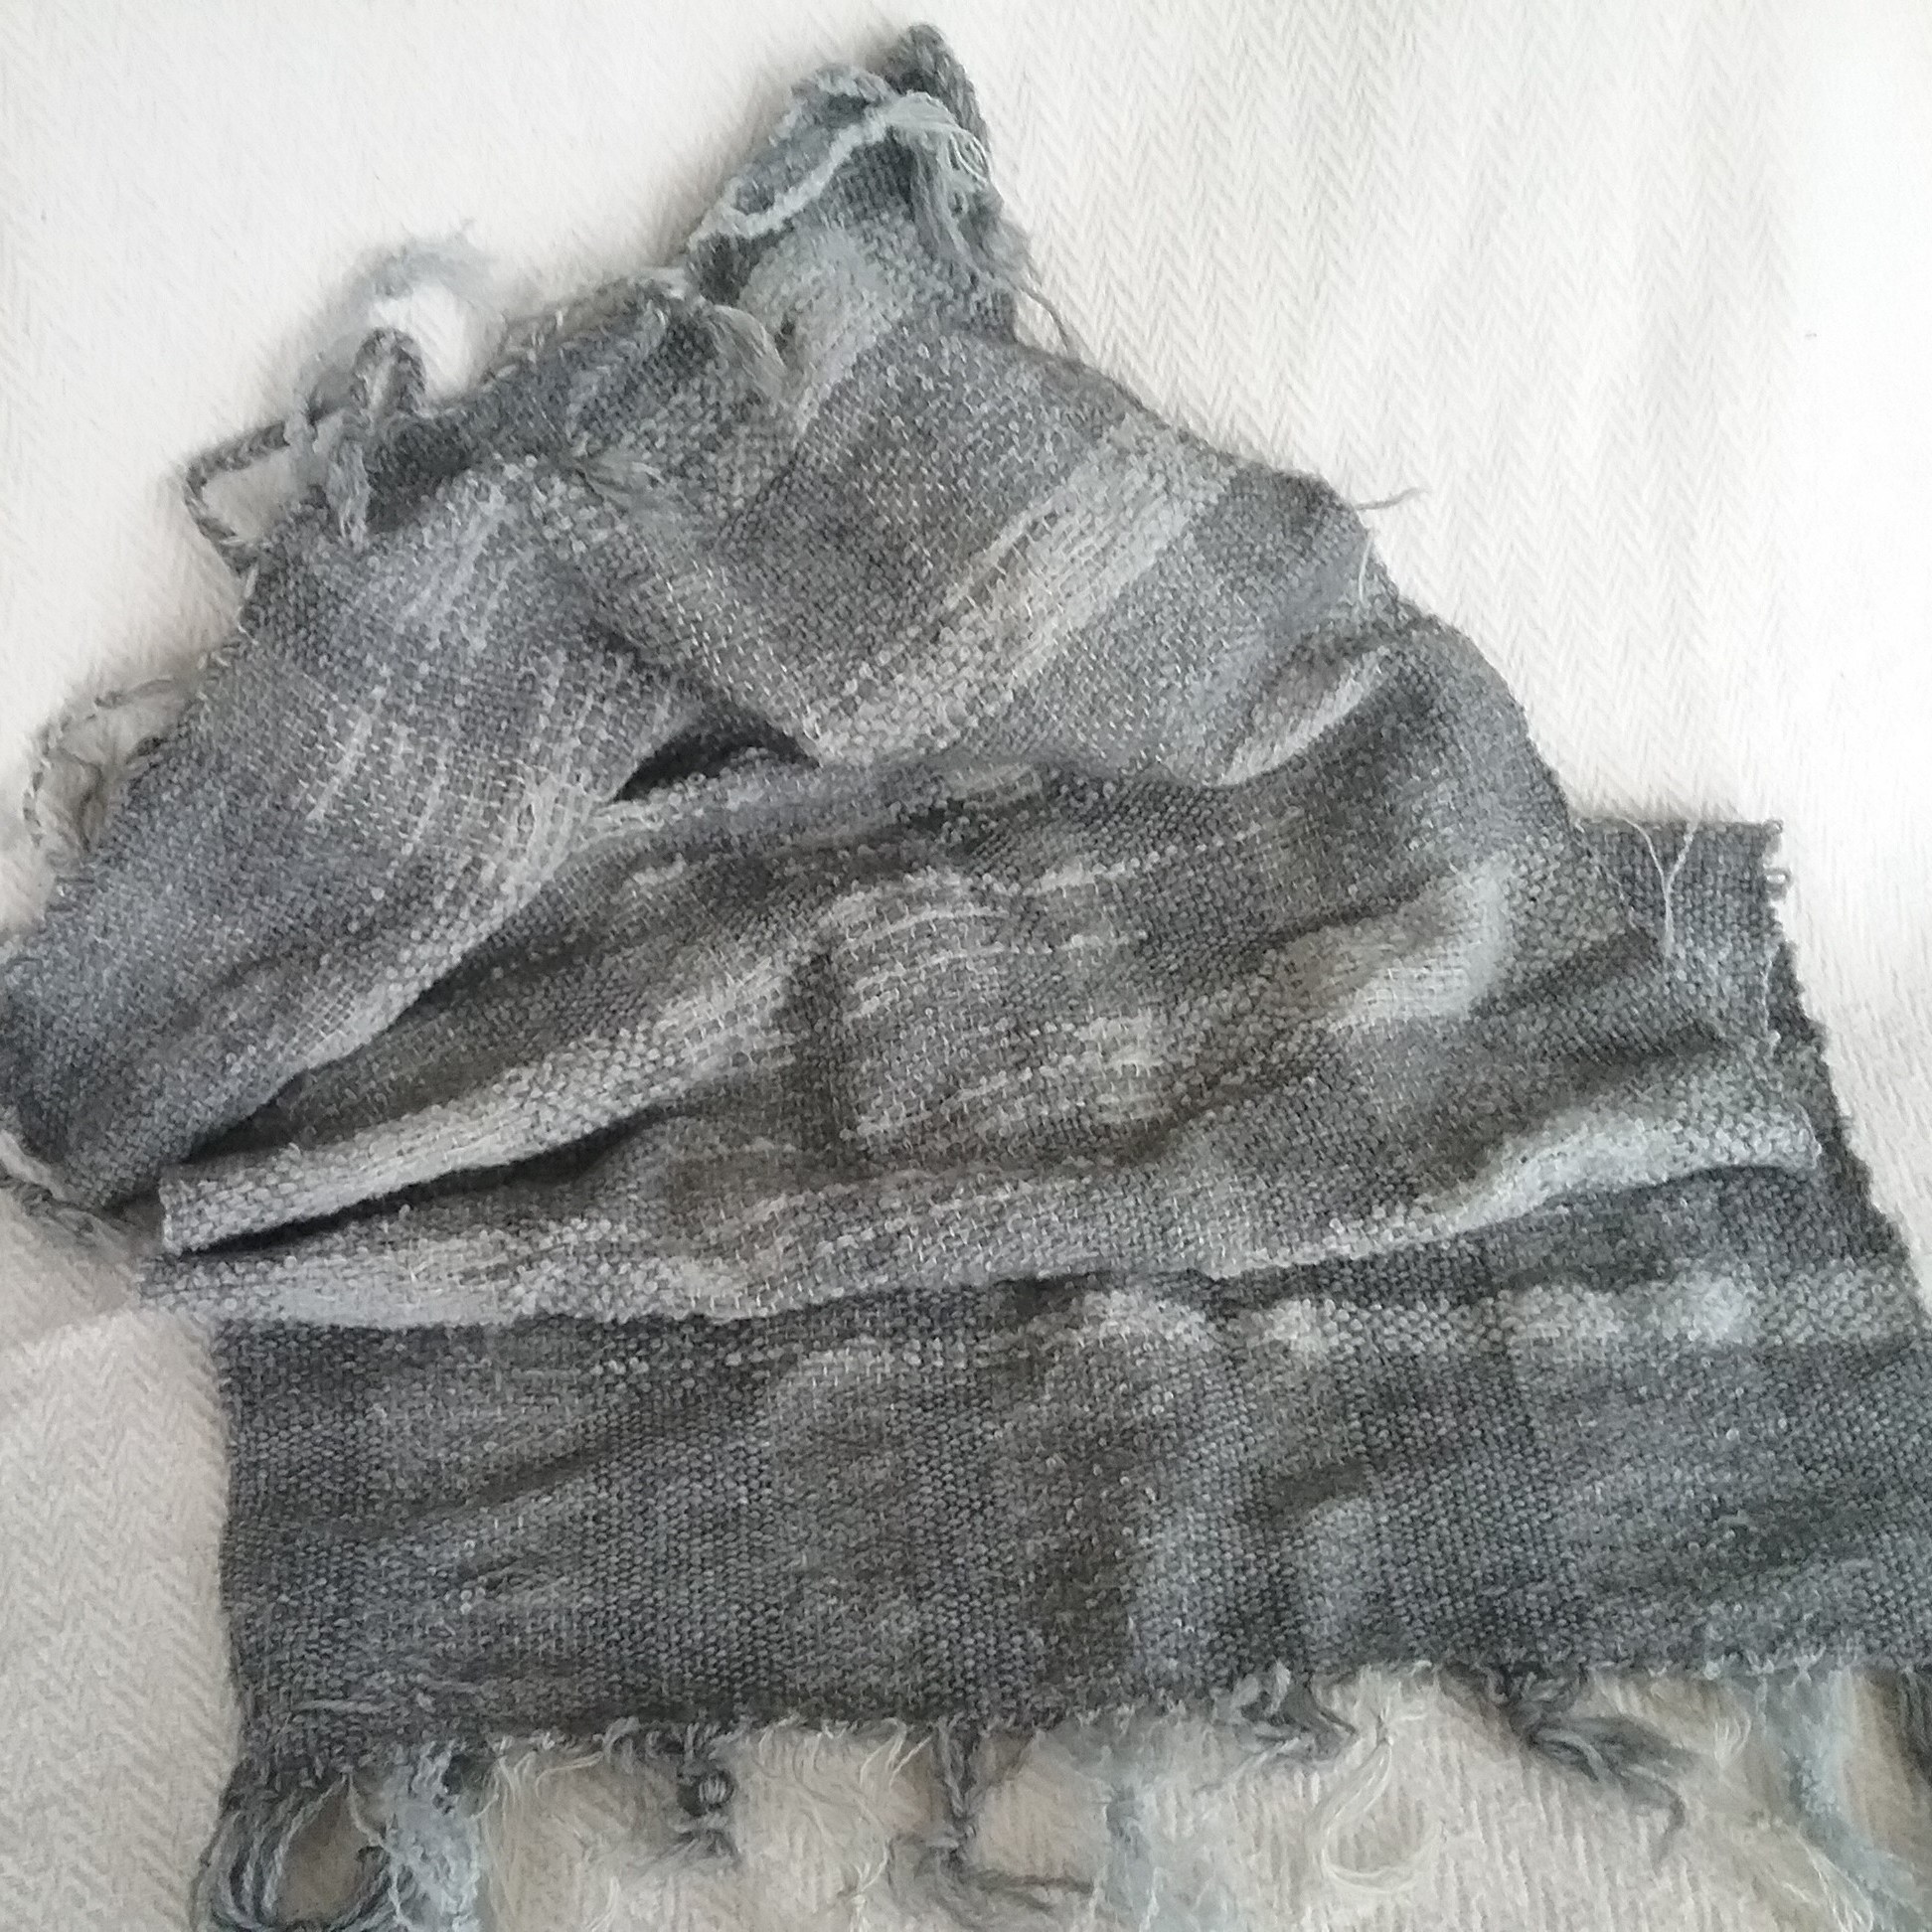
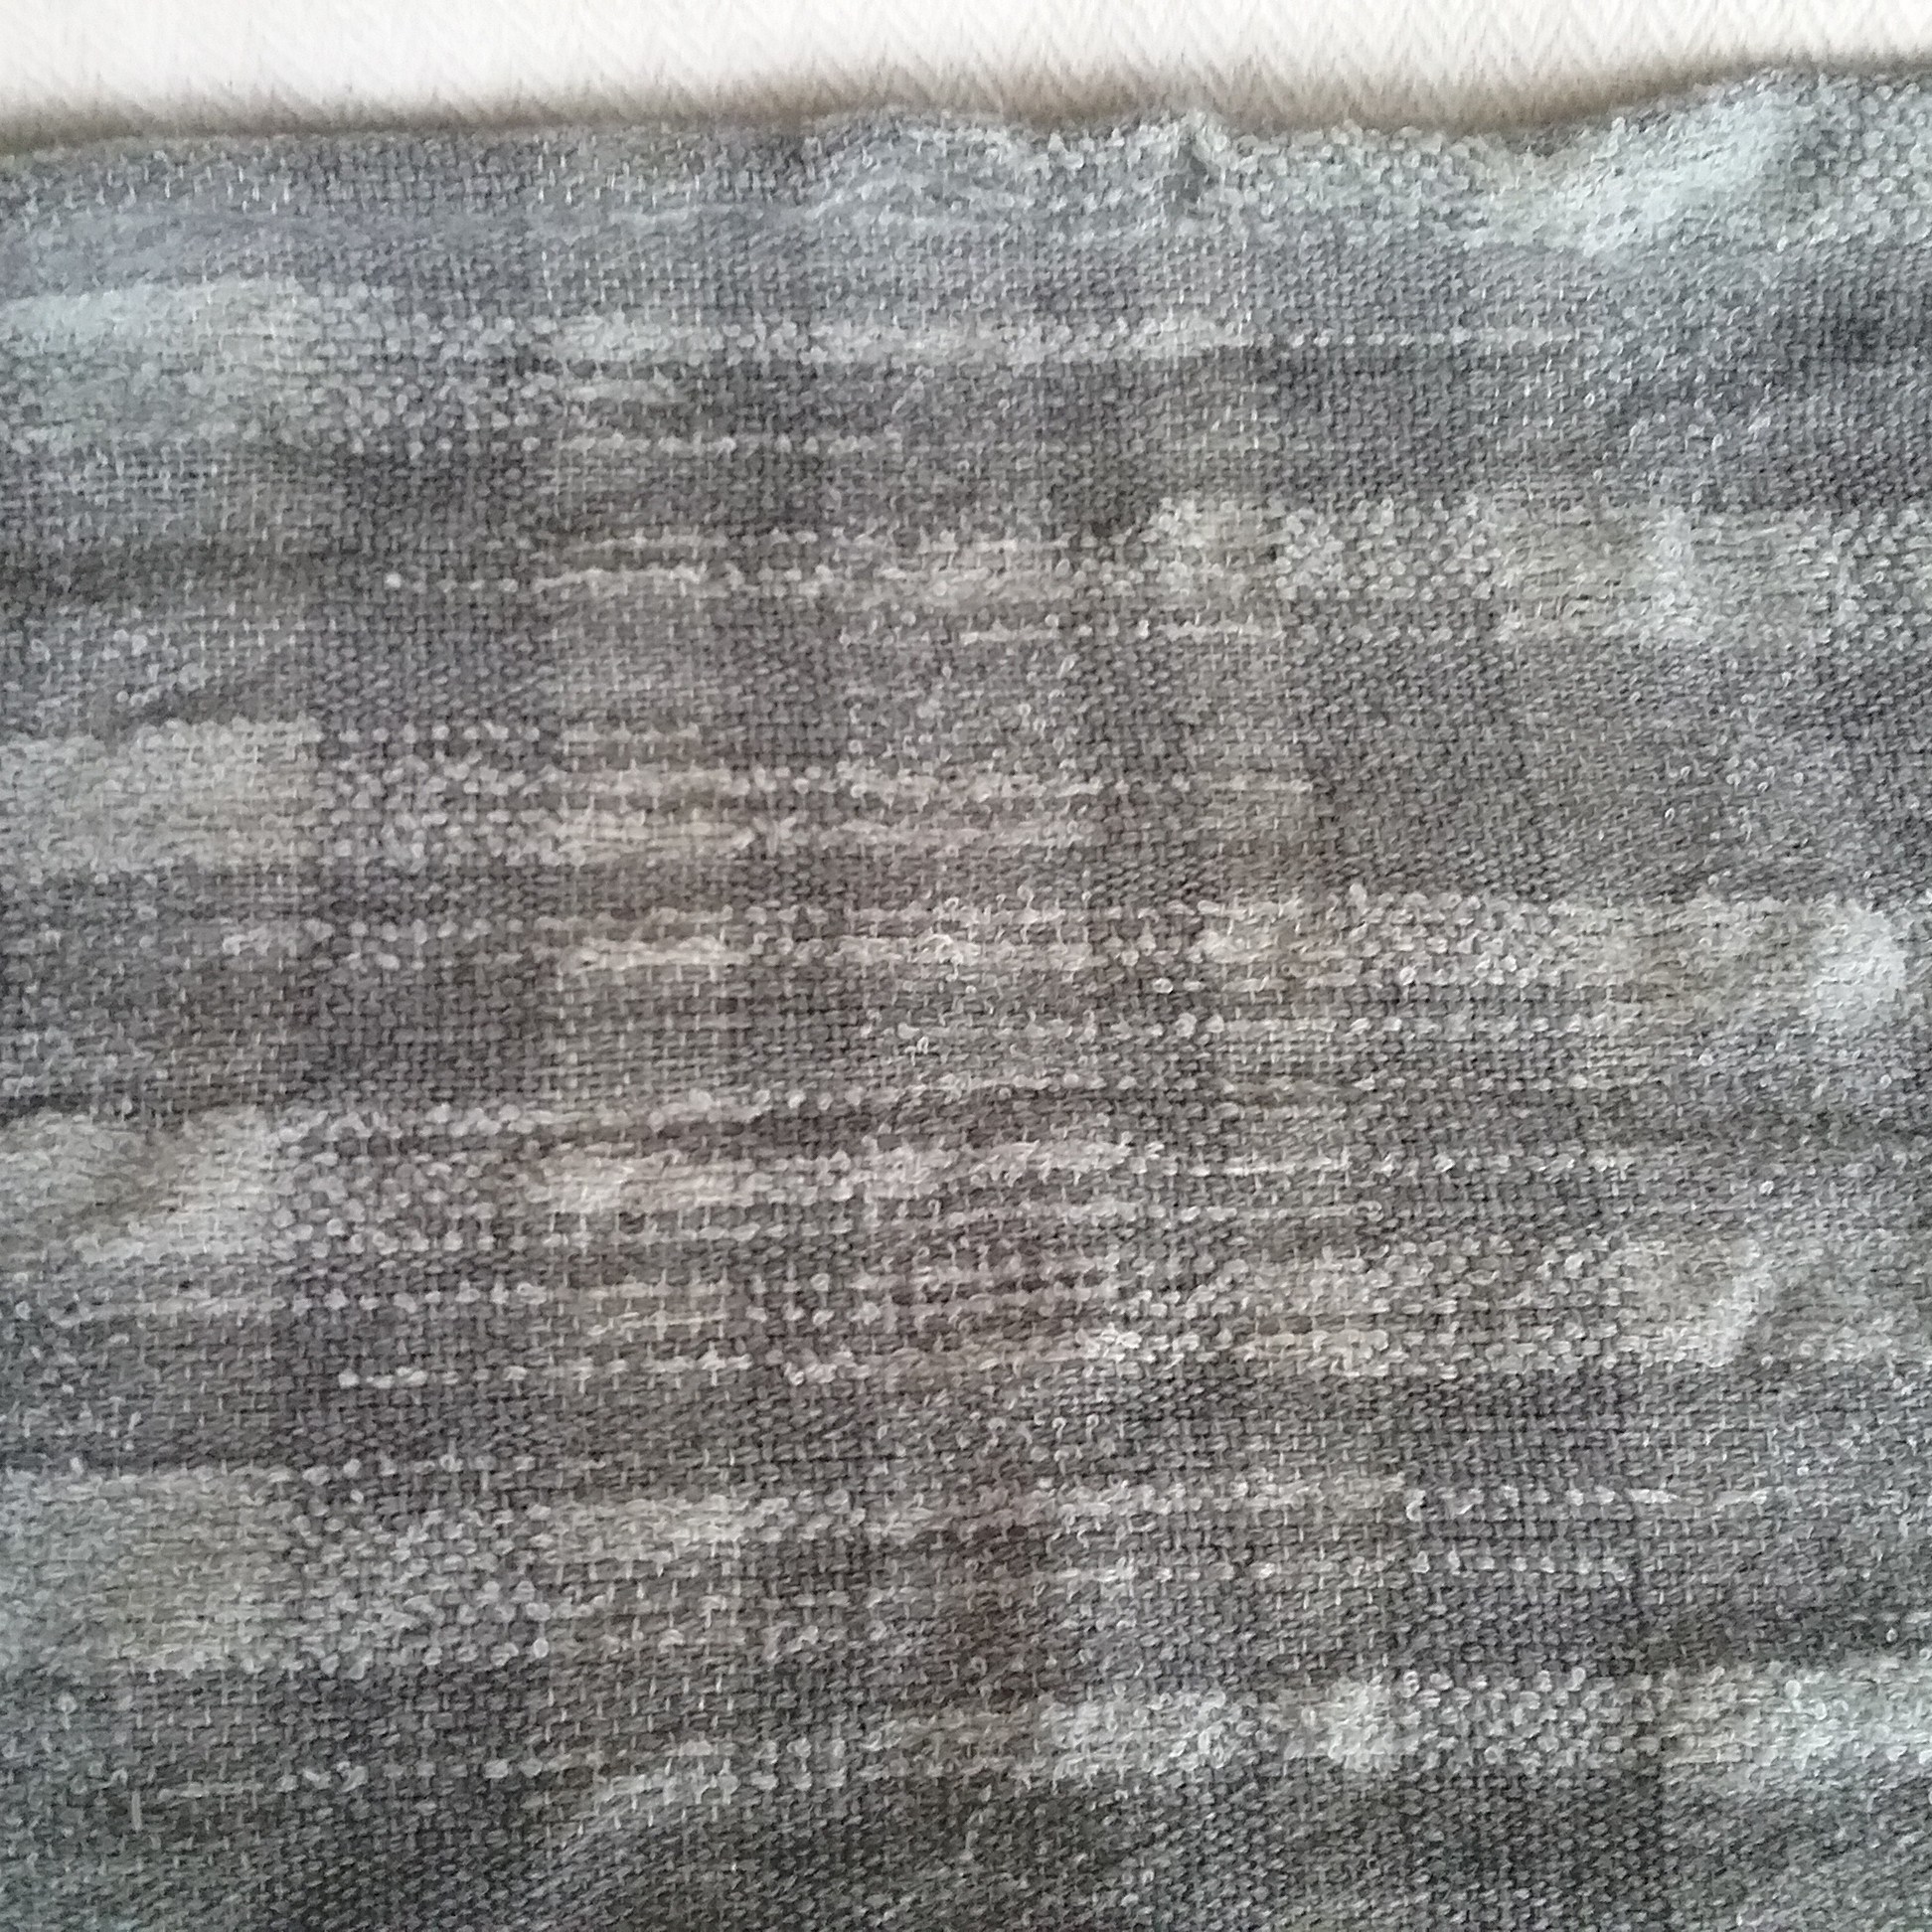
I recently finished weaving a length of fabric that will get turned into a cushion cover. This was a bit of an experiment as it was my first project on the rigid heddle loom I got myself over the summer – my Saori loom is great for big projects and long warps, but I can’t just put it in a bag and take it with me (plus I can now have 2 warps on the go at once!).
I’ve just got to tidy up the ends at the back and sew it together.
Hello everyone, it’s been a while since I last wrote a blog post – I haven’t had much spare time to play with fibre and I’ve been trying to wash as many fleeces as possible while the weather is still dry (I have been optimising my suint method, but that’s a post for another time). Anyway, without further ado, onto a finished project!
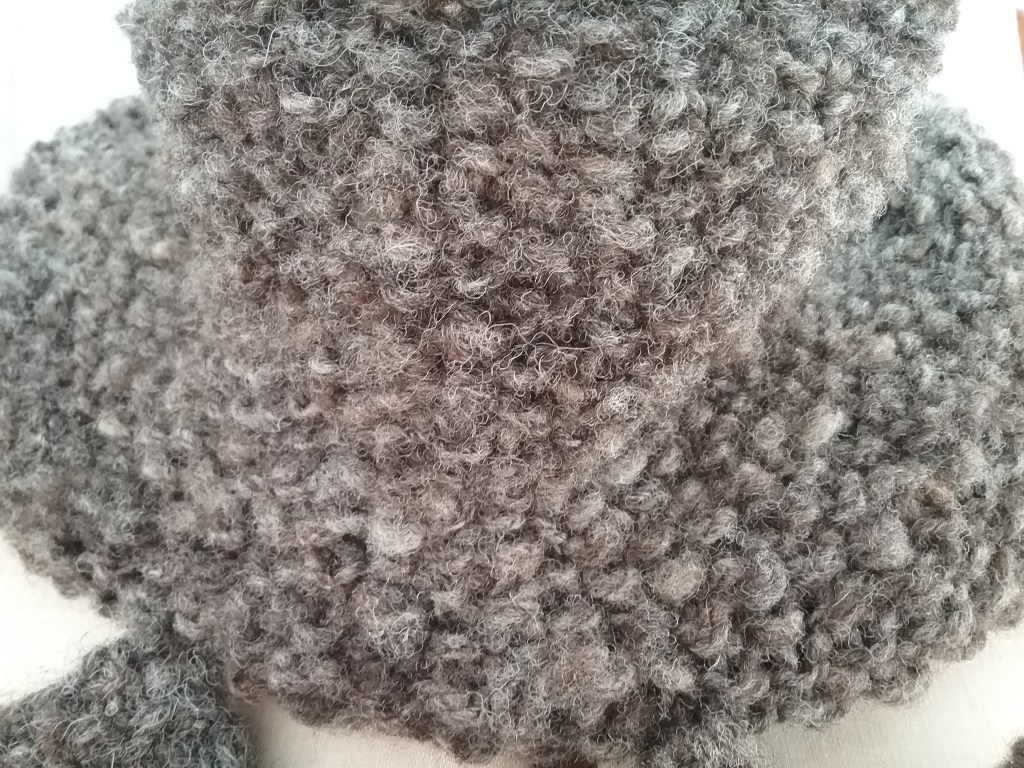
Since this was my first attempt at knitting with my handspun yarn, I decided to use small simple patterns, but wanted to see how the wool behaved on different needle sizes. I’m certainly not a very experienced knitter and for some reason I find calculating tension gauges confusing, so unfortunately I have no such data for these projects, just my experiments. Happily, my handspun yarn doesn’t fall into any standard size/weight category as I spun it with the intention of making it uneven (some sections are about 3x the size of others). For both projects I decided to use moss stitch to accentuate the uneven squishy nature of the yarn, which I think it did perfectly.
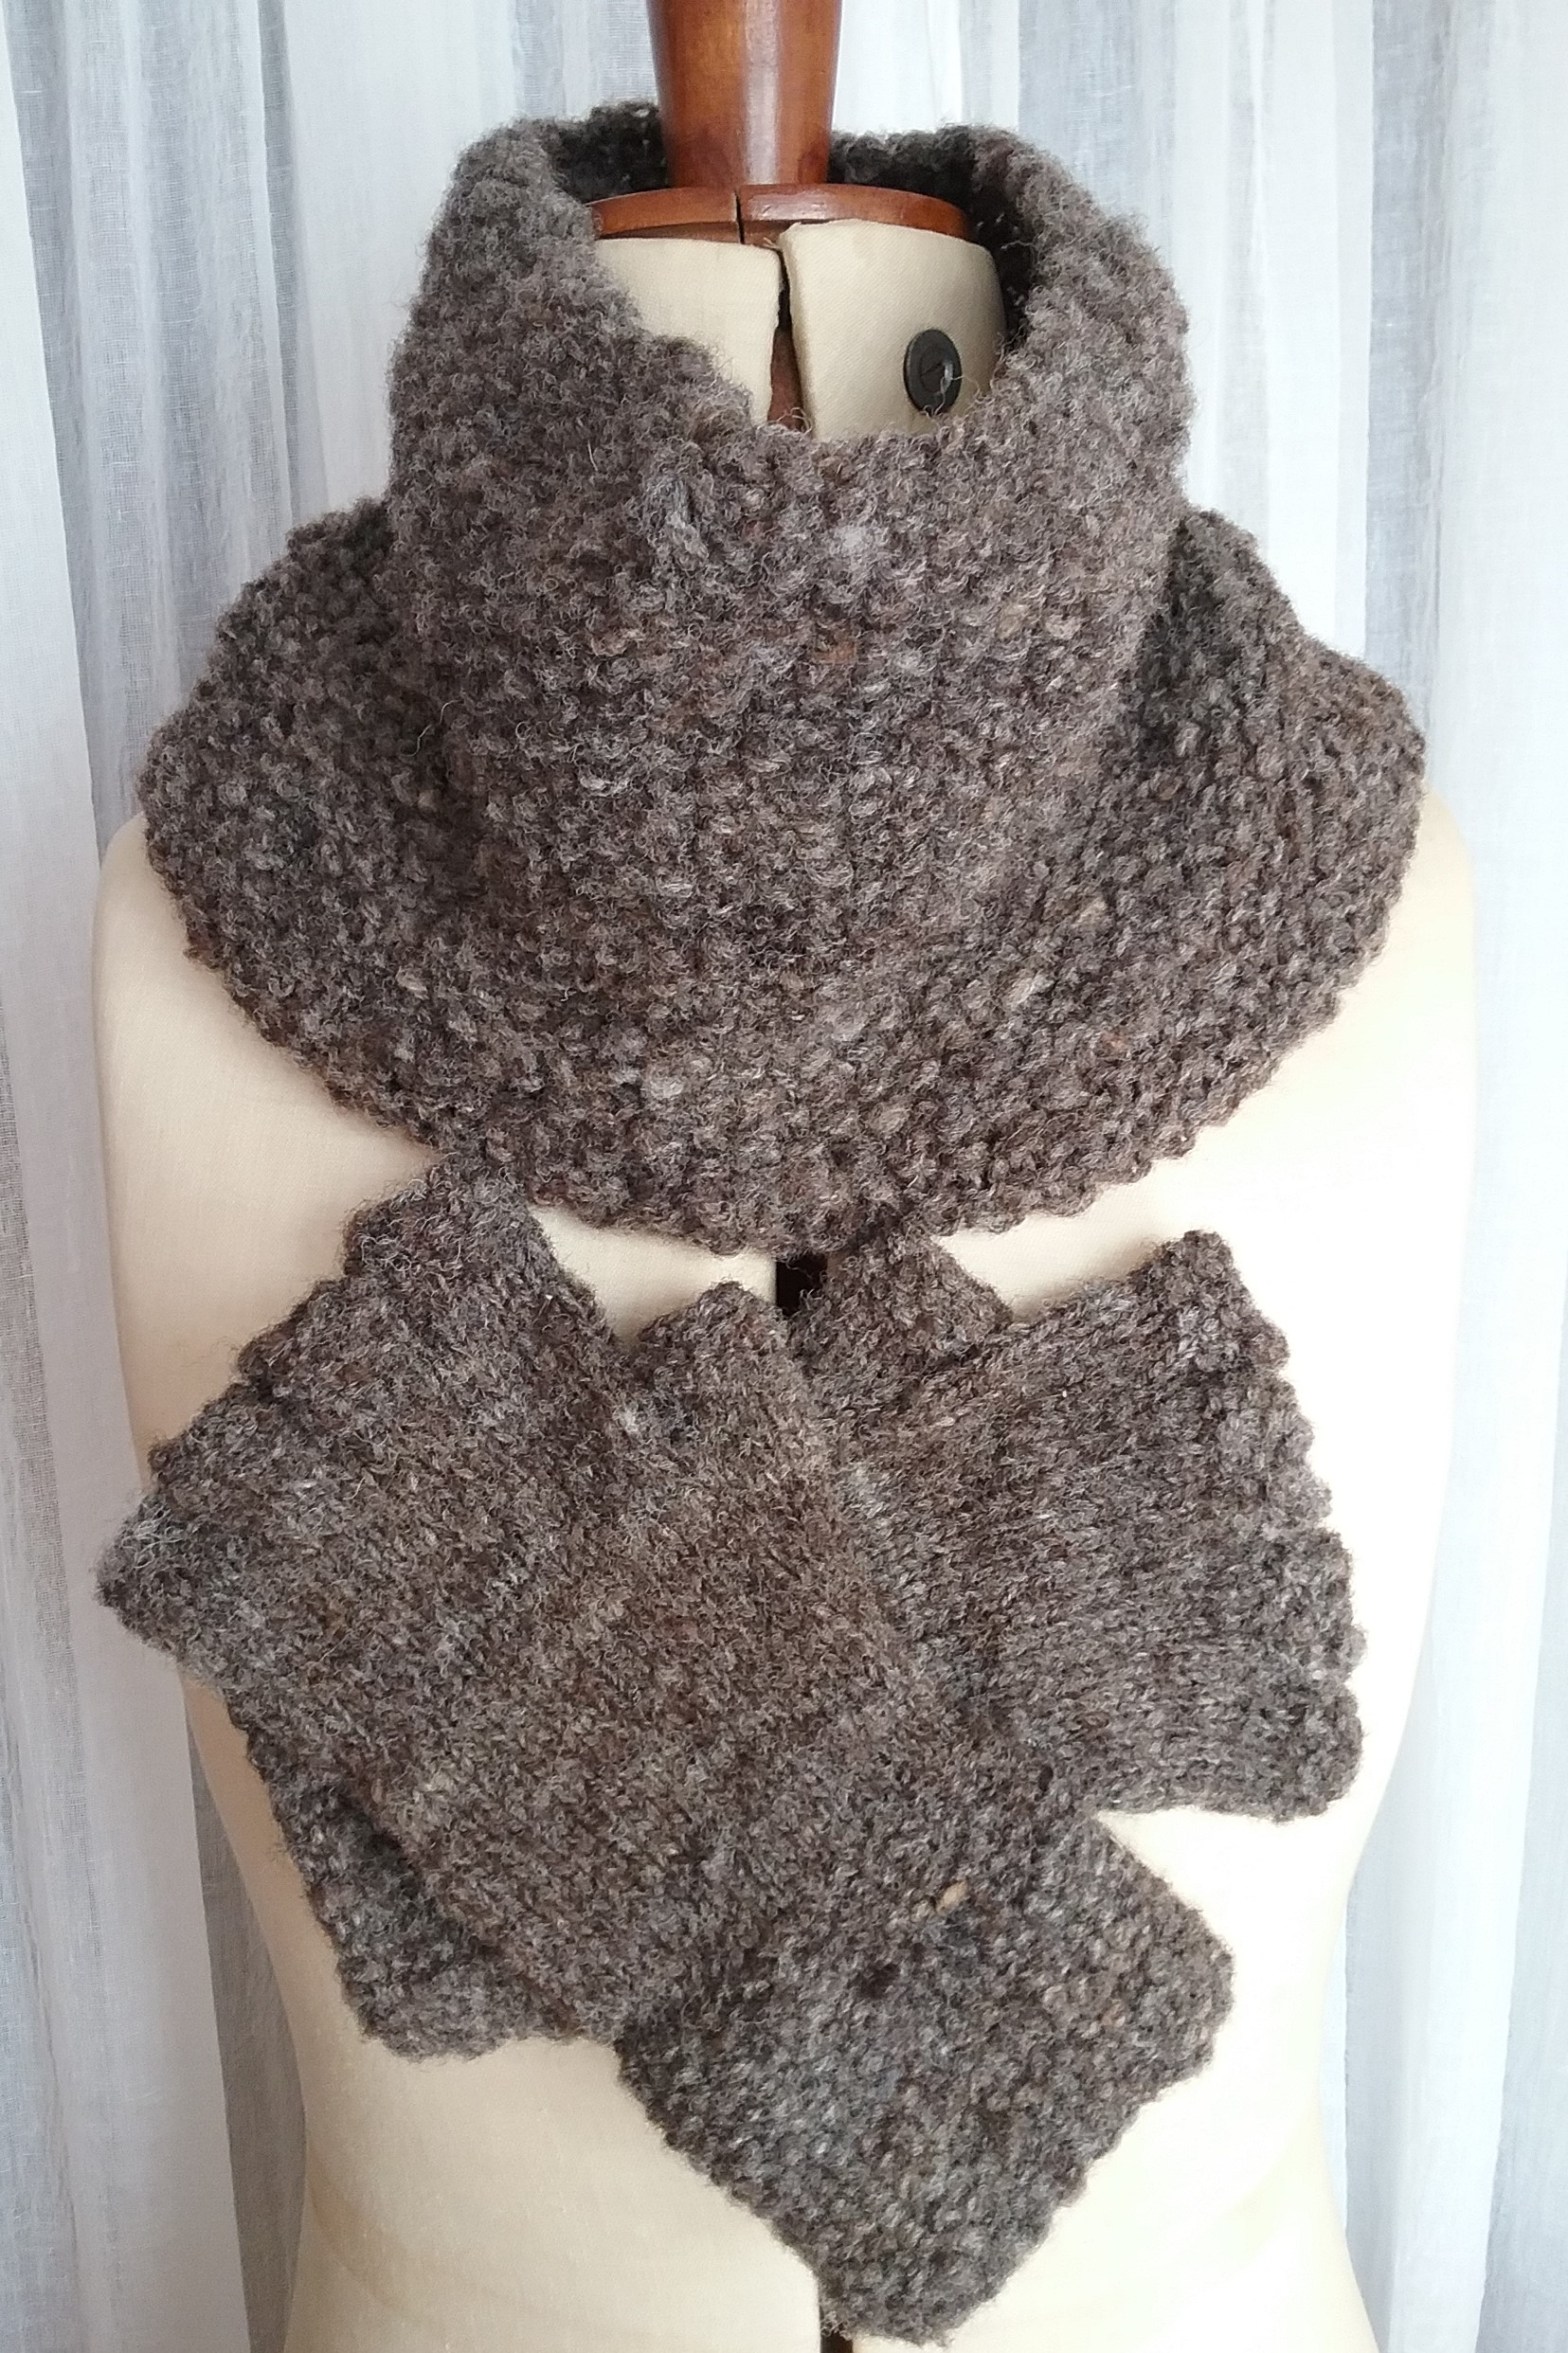
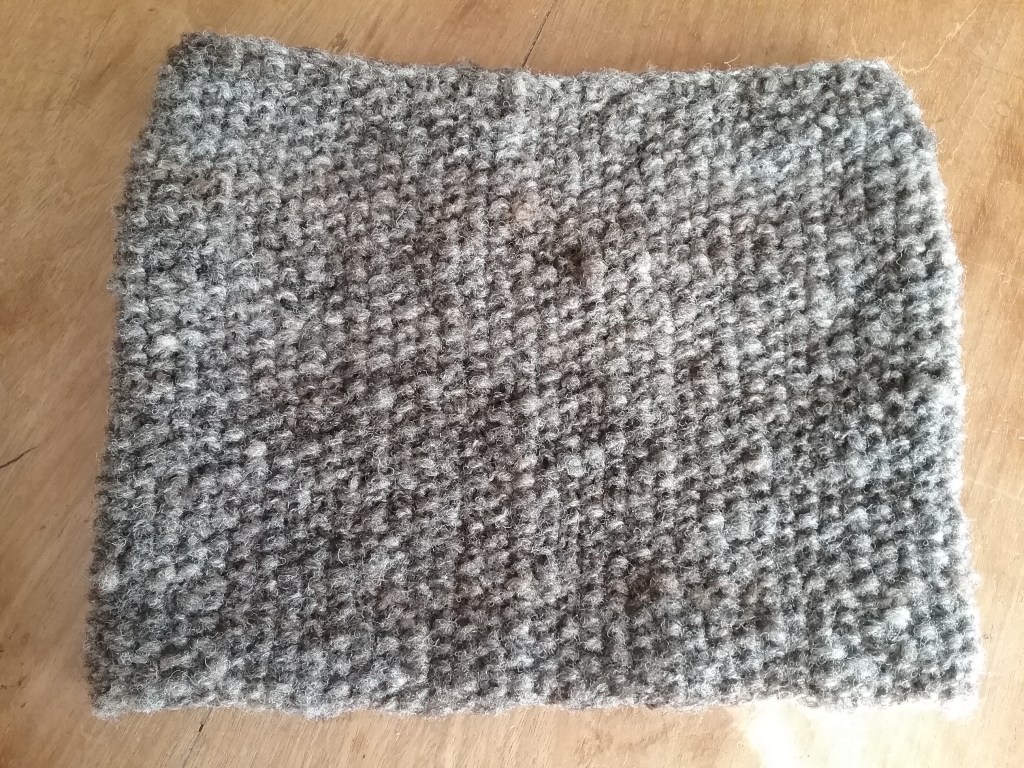
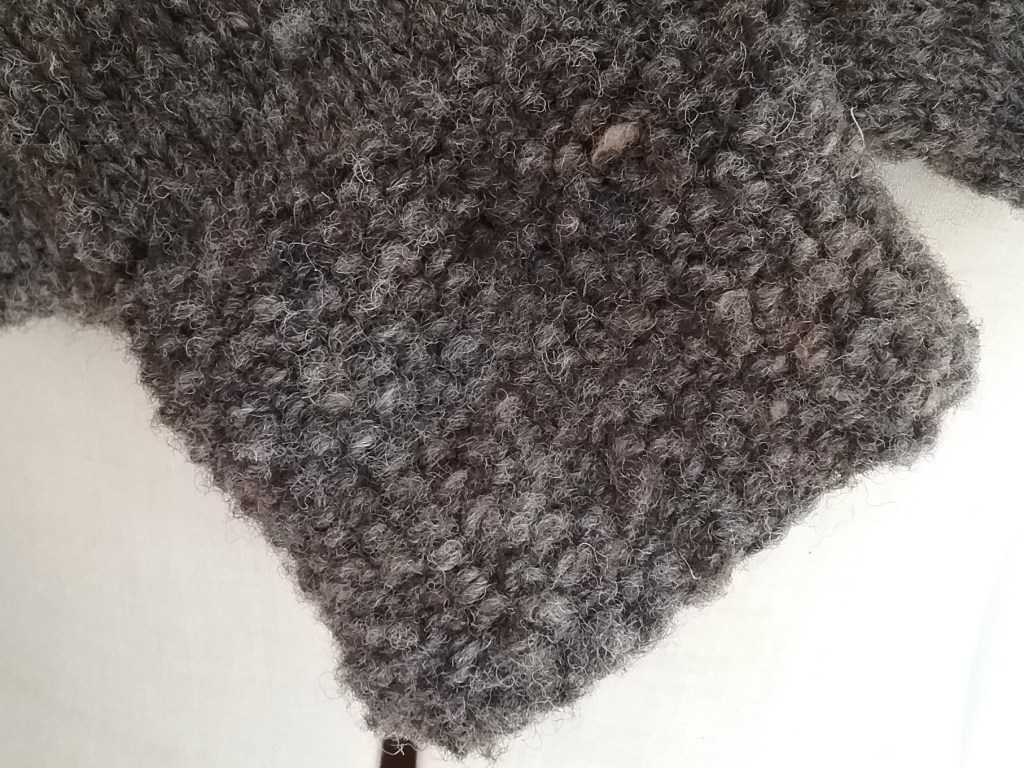
The Cowl
This was the first of the two projects and my first time using circular needles. I cast on an uneven number of stitches onto 6mm circular needles (the only size I have) and just continued knitting rounds of moss stitch until it reached a length I was happy with. In my enthusiasm to use the circular needles, I confess I did forget the importance of checking the stitches don’t get twisted at the start and I knitted about 4 rows before noticing something was wrong!
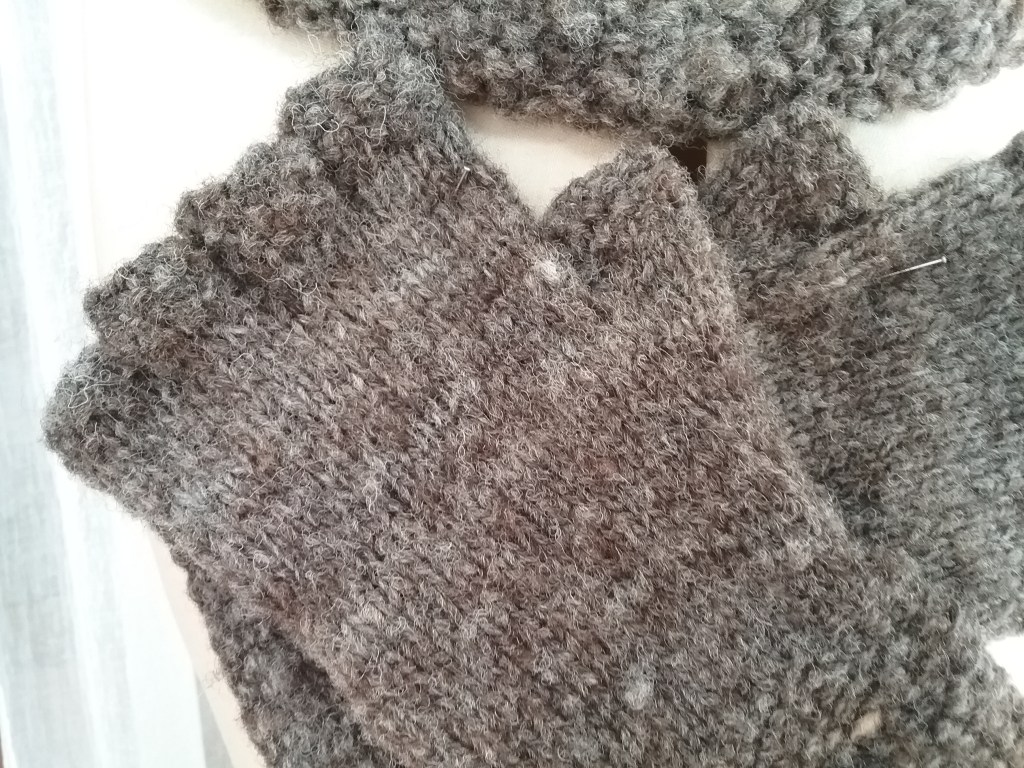
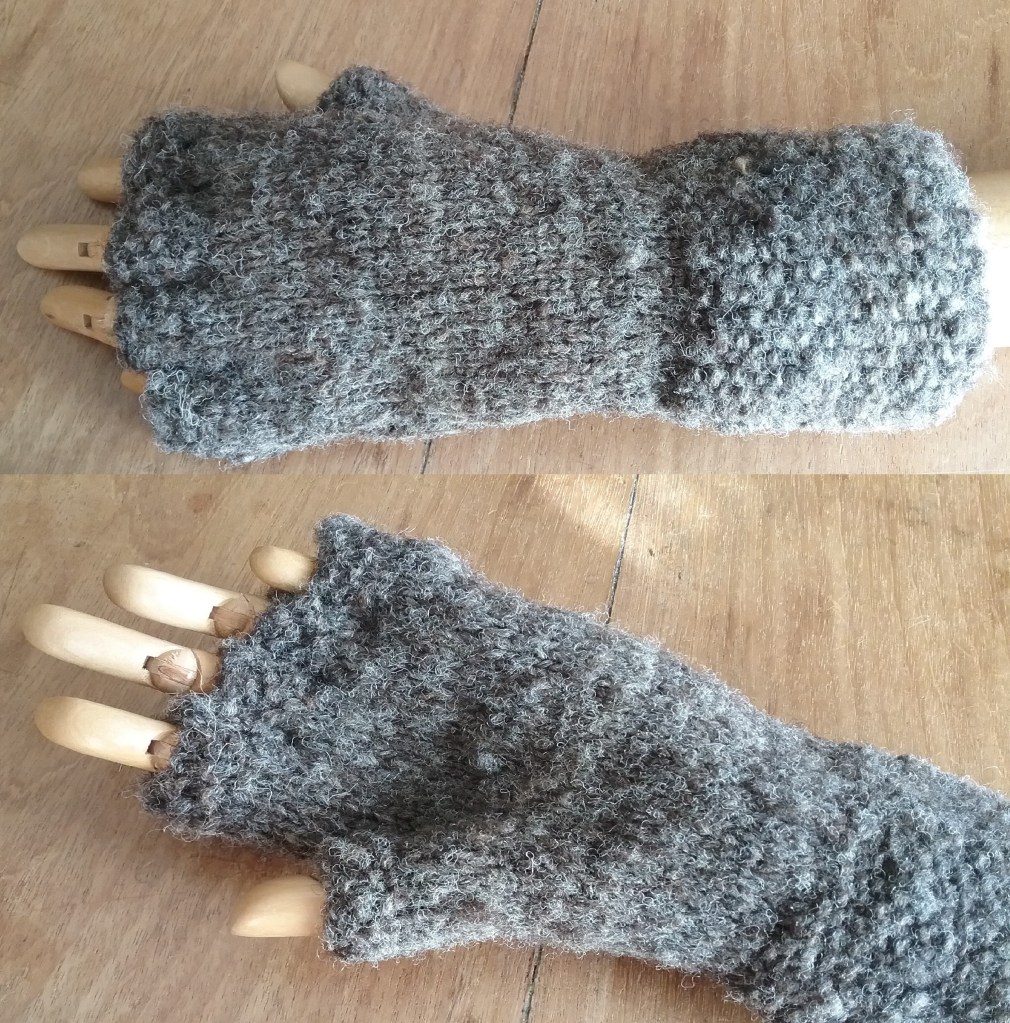
The Fingerless Gloves
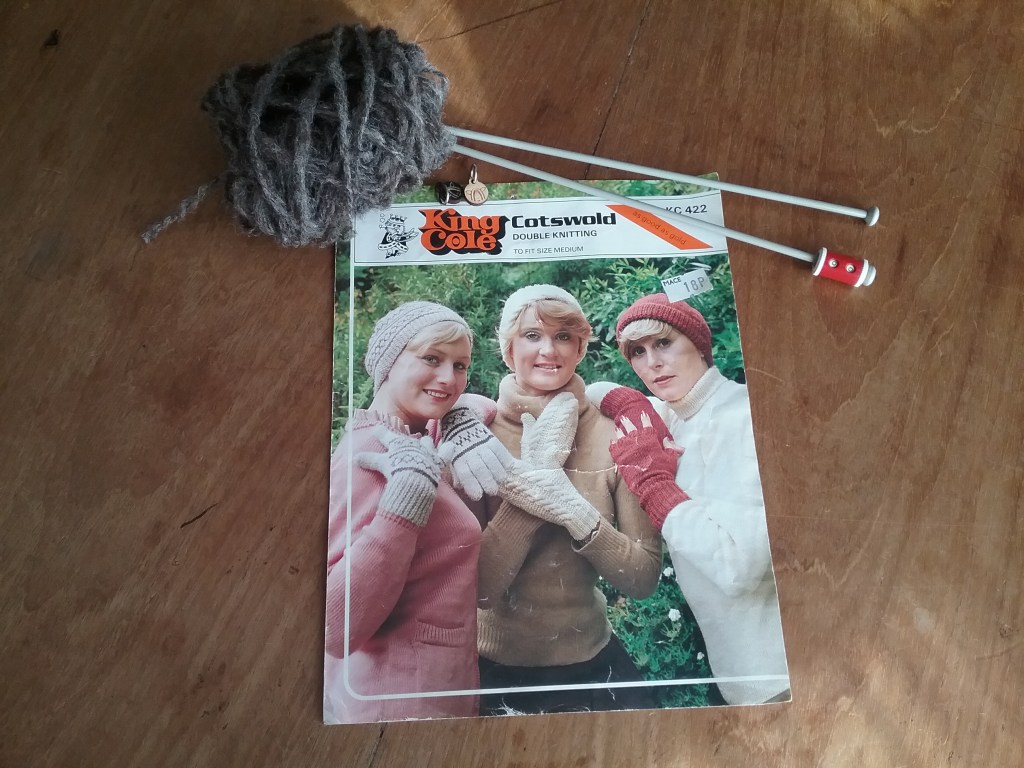
For the gloves I adapted a vintage pattern (pictured left) that I had used before to make a present for a family member. It uses size 11 & 9 needles. I didn’t change much, just knitted the cuff and finger tops in moss stitch instead of 1x1rib. I was surprised how versatile my handspun was as it was just as easy to knit on smaller 3mm needles as on the 6mm and didn’t distort the shape of the gloves.
I love the design of these gloves, they are very comfortable, the cuff goes well over your wrist and the fingers are a bit longer than standard.
I was very pleased with how these projects turned out; I only used about 3 balls/bobbins full of wool on both projects collectively. They are extremely warm, very soft and a beautiful colour (matt brown and grey tones with a subtle pearly lustre). They also have the added advantage of making me feel like I’m about to journey through Middle Earth when I put them on!
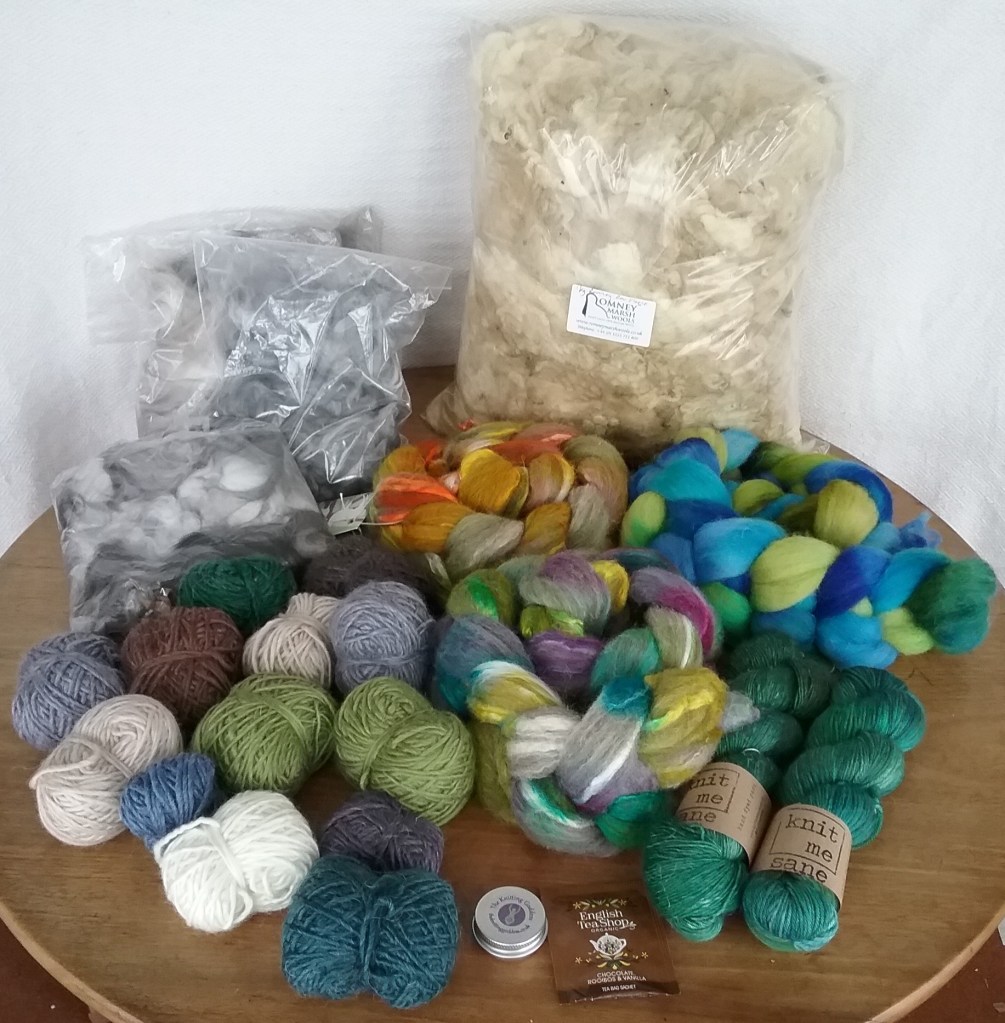
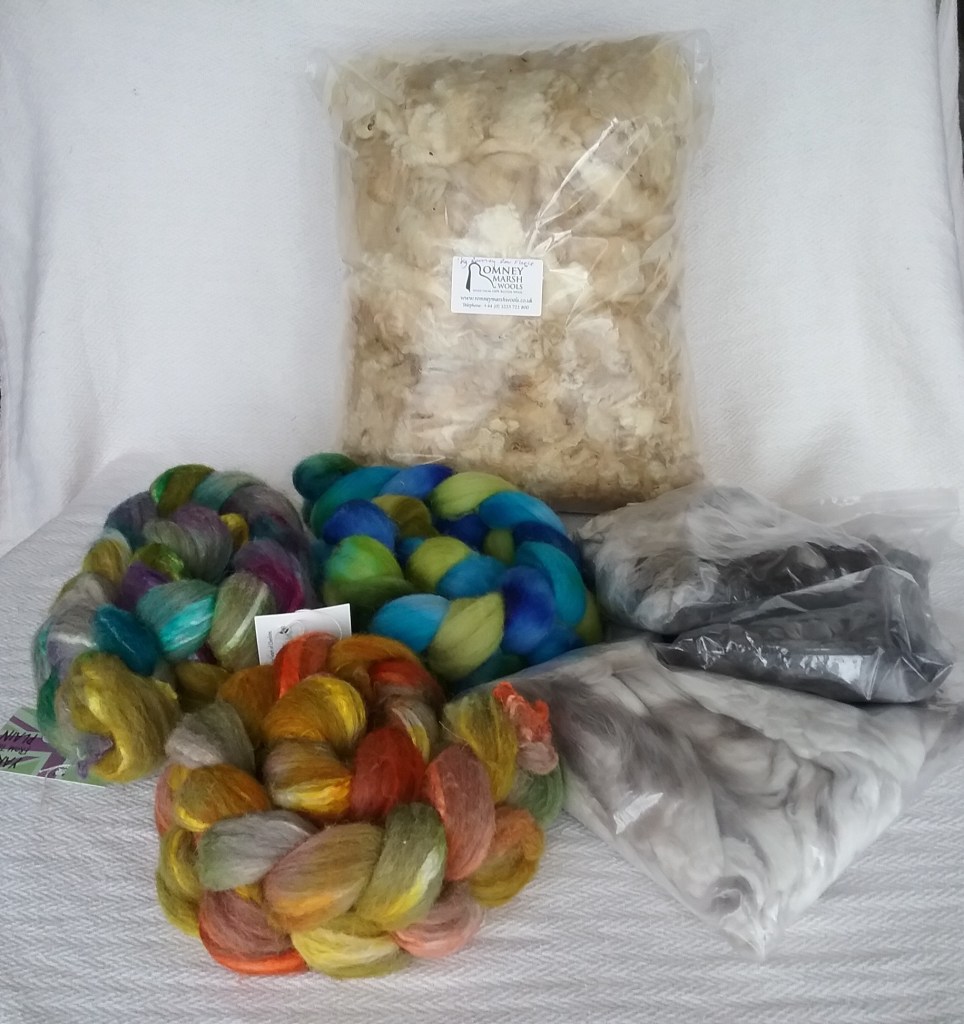
I had never been to Fibre East before, but last weekend I attended their virtual event (for those of you who may not know, Fibre East is a fibre festival in the East of England dedicated to promoting wool and textiles). I’m all for supporting small businesses and I get very inspired by other people’s fibre finds, so I thought this week I would do a little fibre haul, as everything was dispatched so quickly it all arrived within the week!
Disclaimer – I am not in any way affiliated with any of the companies mentioned in this post- just very happy with the experience they gave. Links to websites are provided for reference.
Yarn
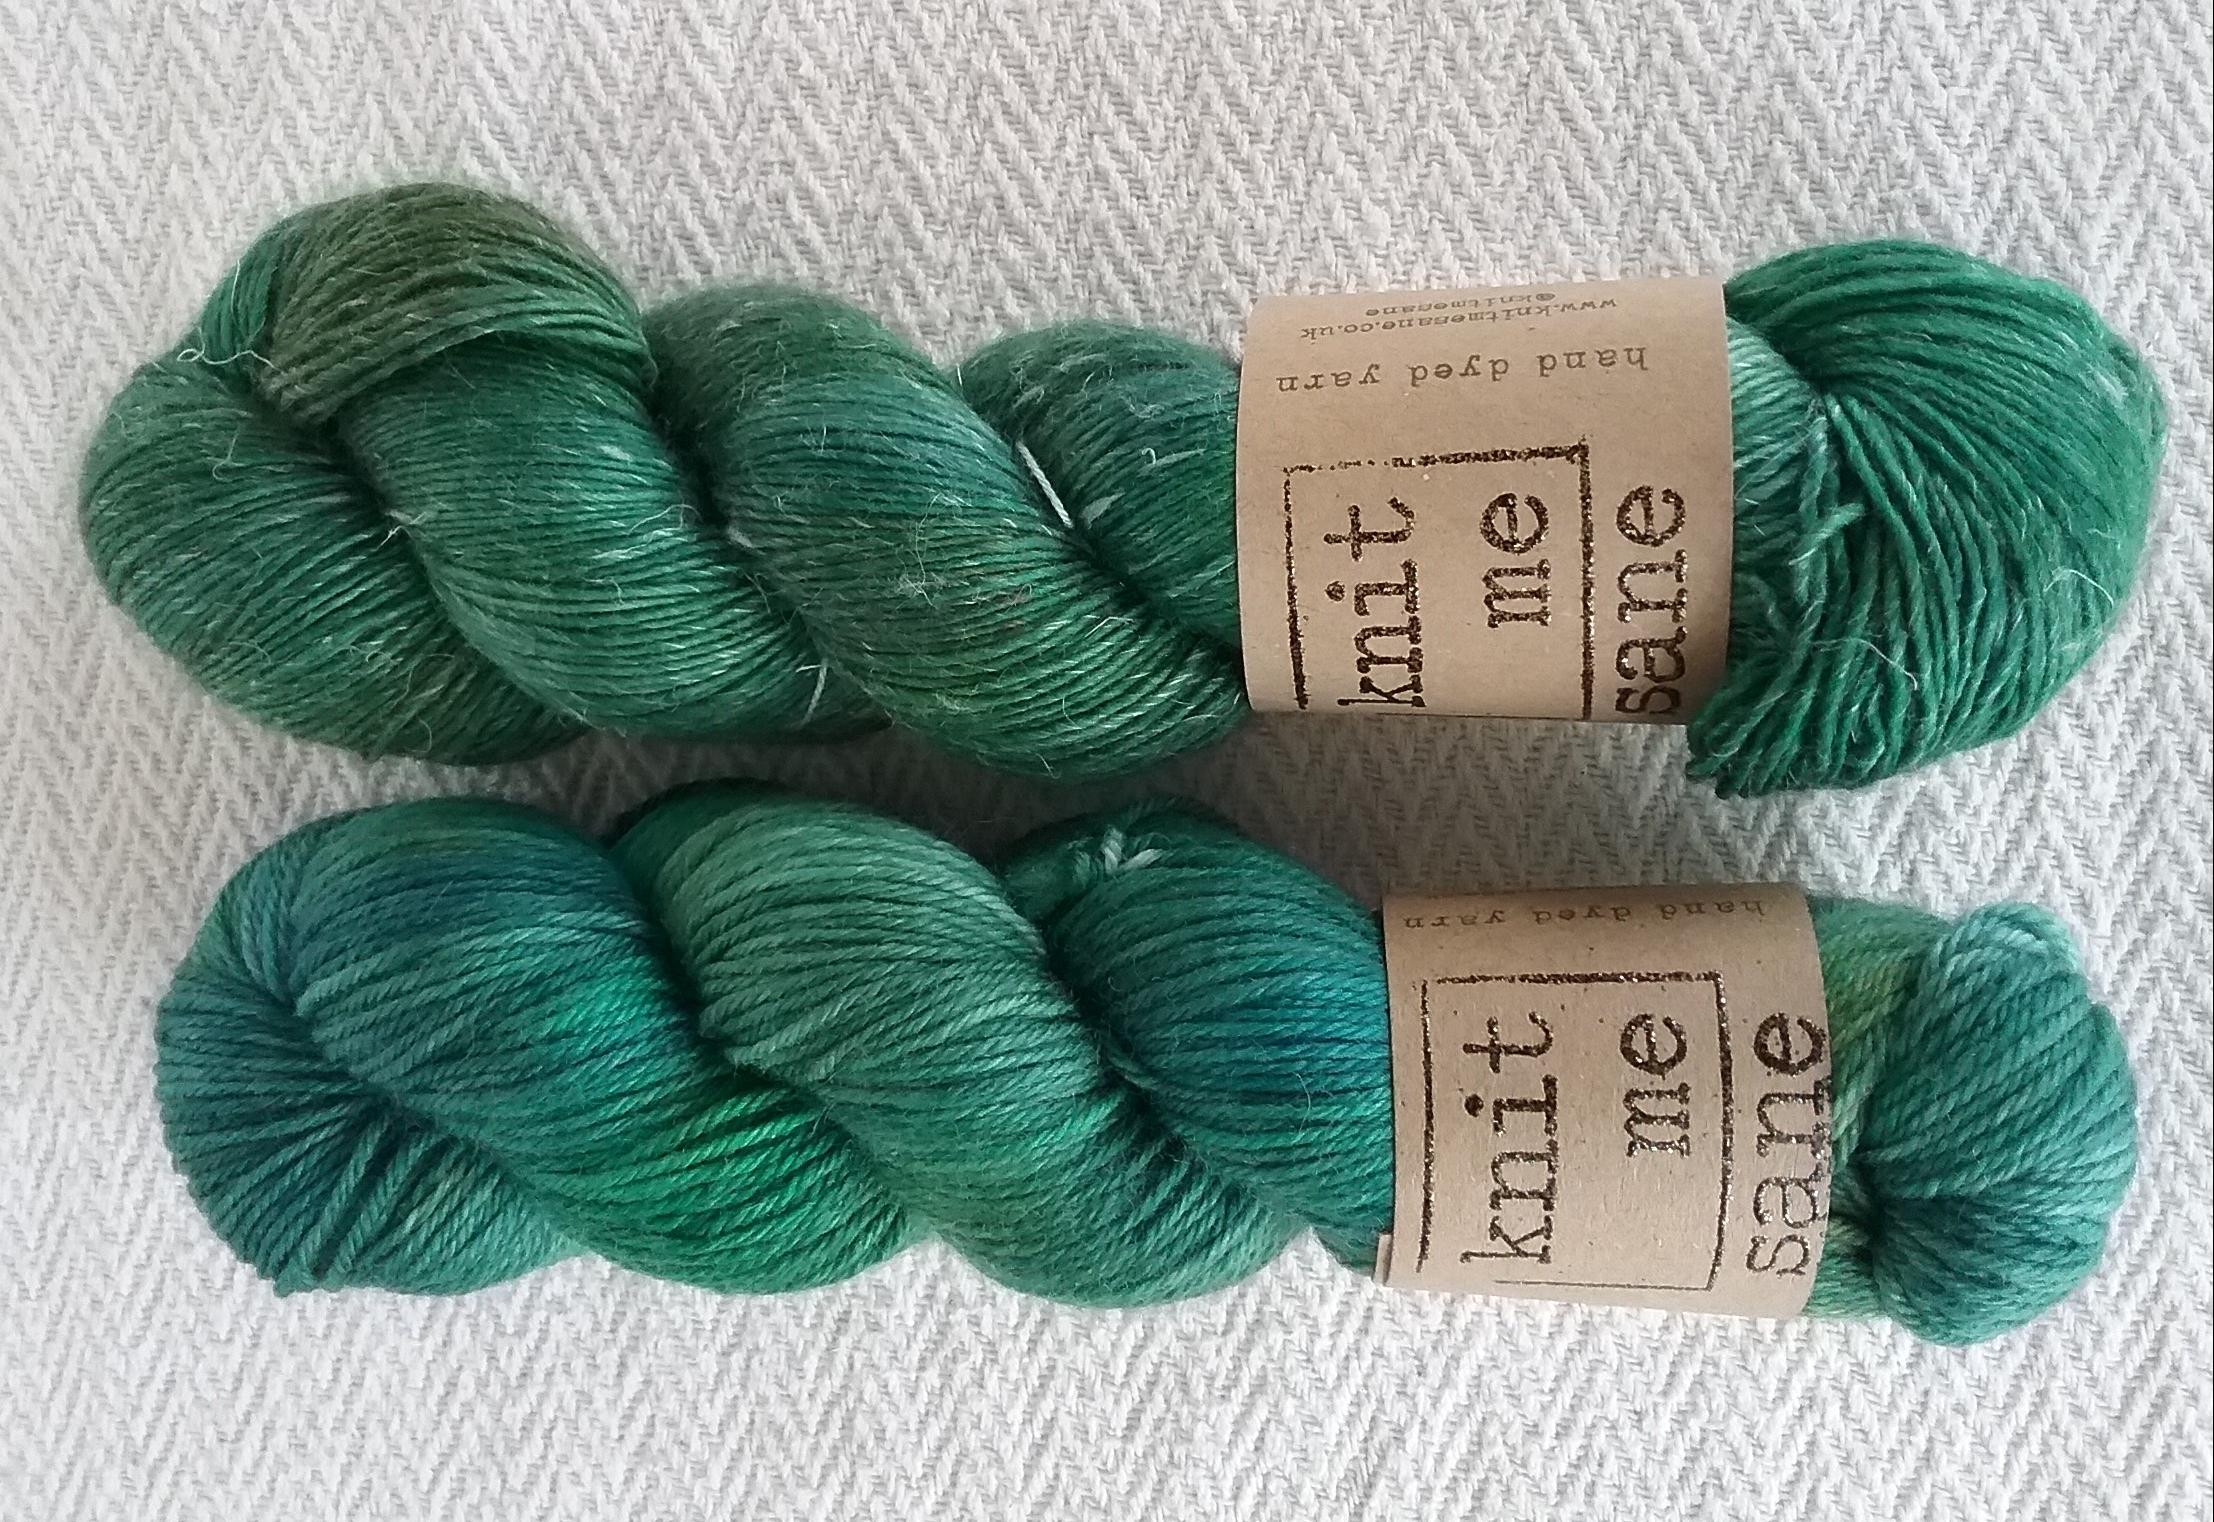
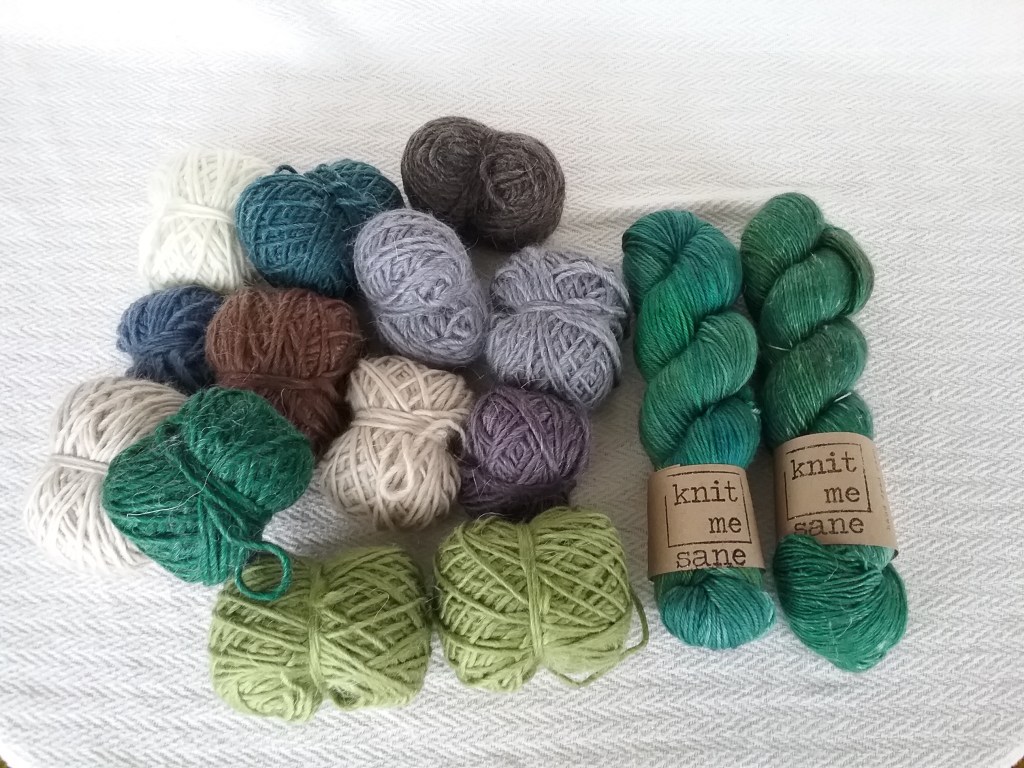
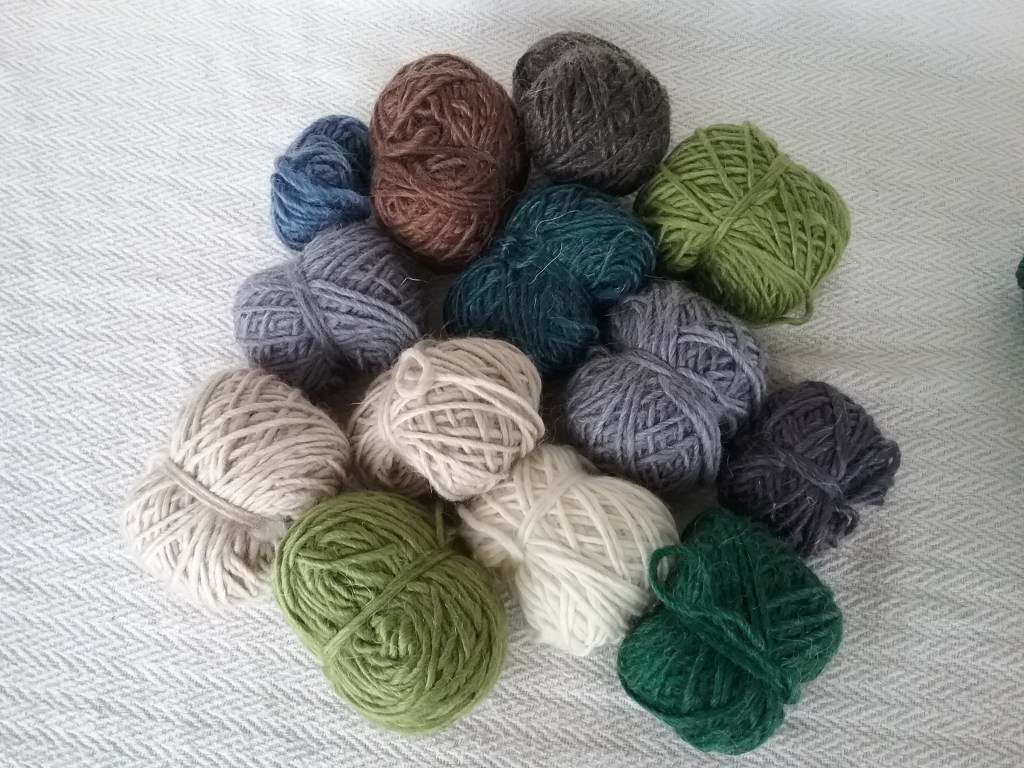
I try to be very selective when it comes to buying yarn as I have a stash of fleeces waiting to be spun, so it has to be different to justify me buying it! The beautiful green skeins (and complementary teabag!) are from Knit Me Sane, one is a Merino/Linen blend which I’m excited to work with and the other is made from Polworth wool. I also purchased a ‘scrappy bag’ of merino/mohair wool in various colours to experiment with from the Wensleydale Sheep Shop.
Fibre
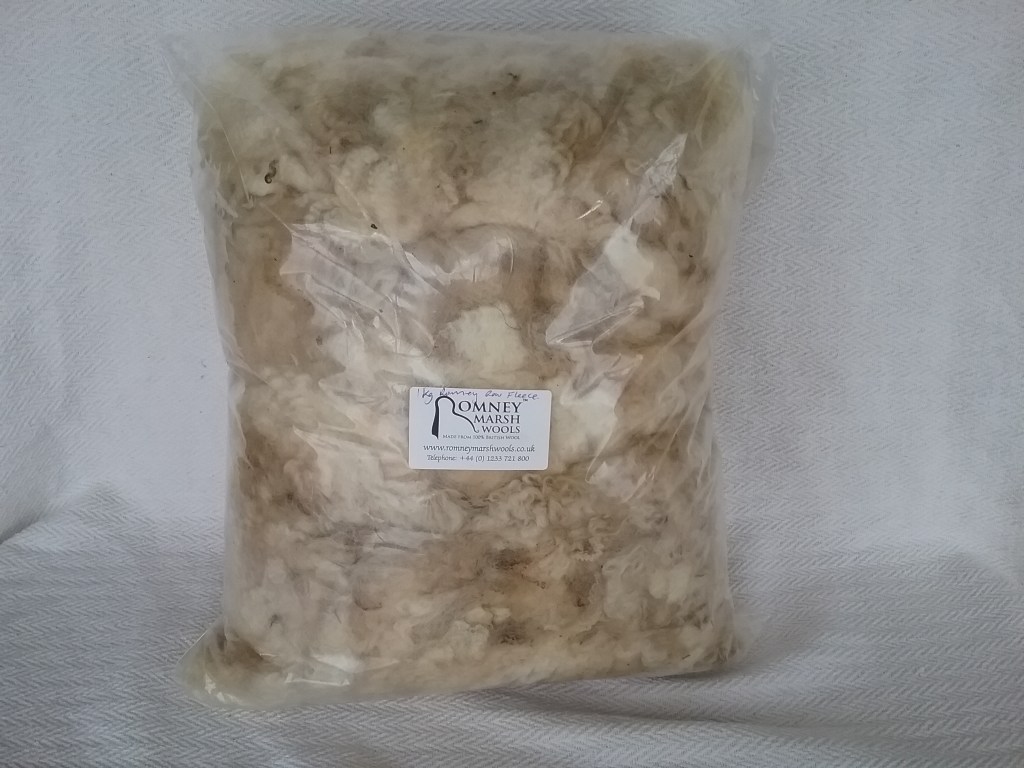
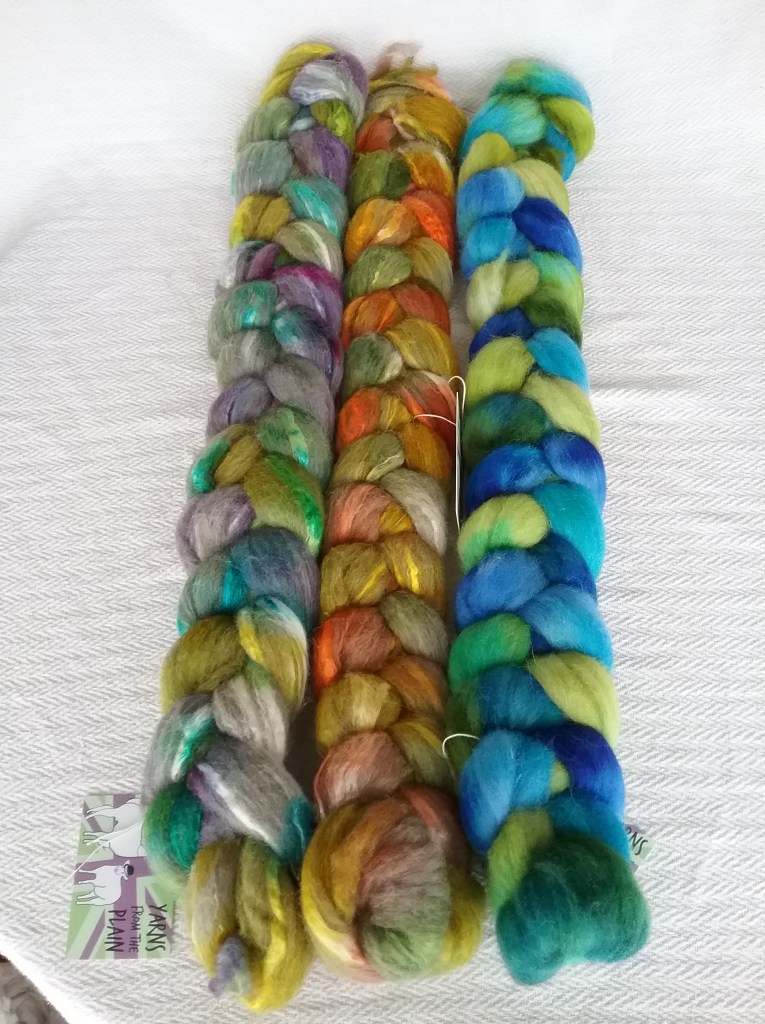
I tried to be strict with myself when it came to fibre, but couldn’t resist buying a raw Romney fleece from Romney Marsh Wools (it’s so soft I can’t wait to work with it!). I also bought some lovely fibre blends from Yarns from the Plain – 2 are shetland/tussah silk blends (I’ve not tried spinning silk blends before) and the other is a Hill Radnor, a rare British breed that I’ve not yet explored.
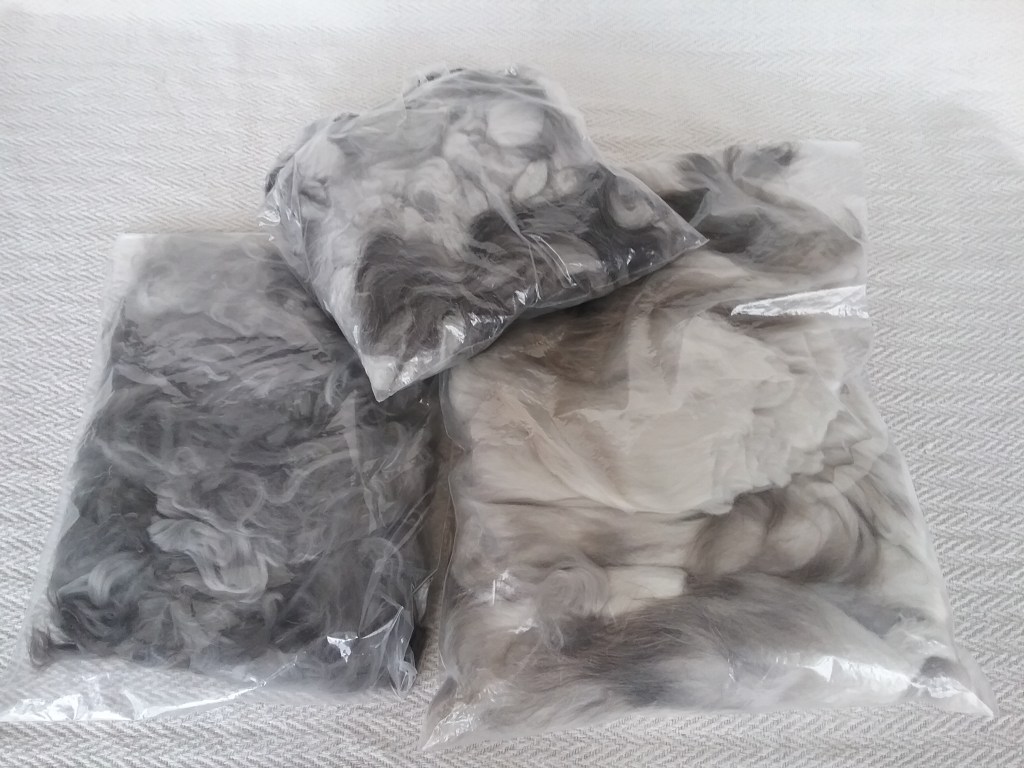
I also decided to buy some Angora fibre to try spinning from the National Angora Bunny Club. I’m a big believer in animal welfare, so it was important to me that I purchased Angora that was traceable and had been shorn ethically. The proceeds the club recieves from selling the fibre are used to pay for food and vaccinations for the rabbits.
Miscellaneous Items
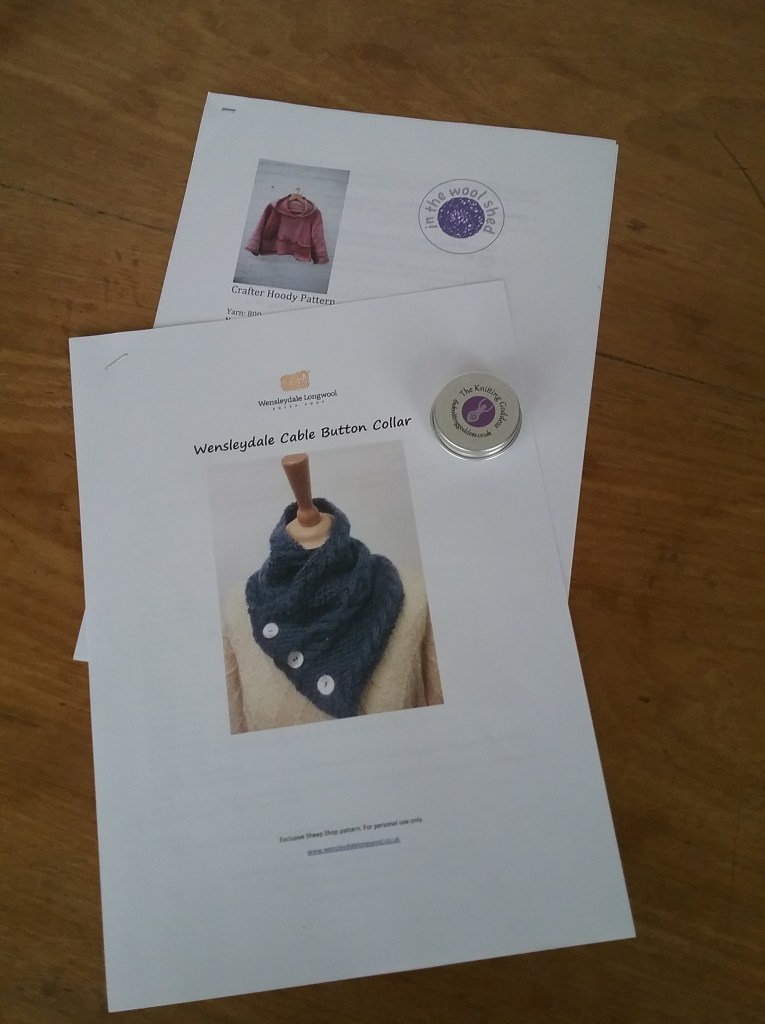
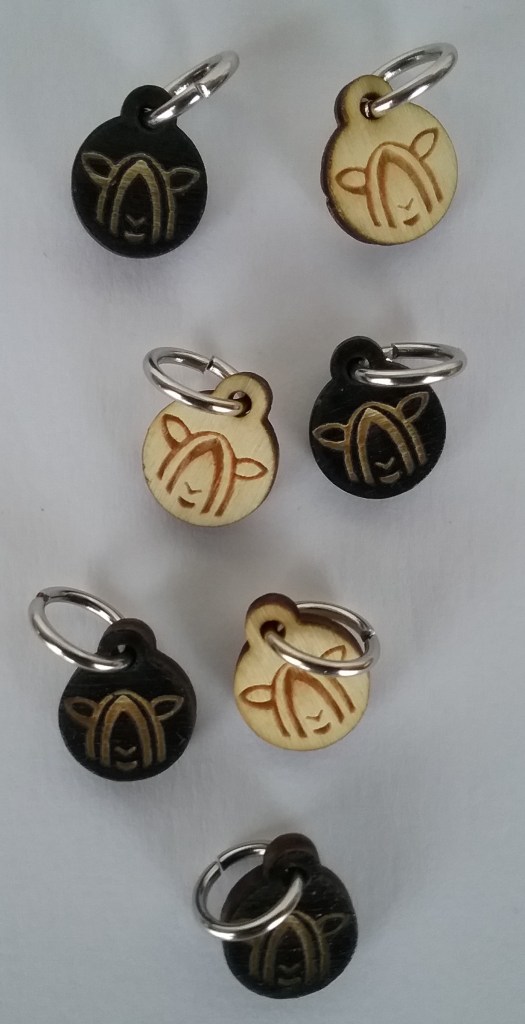
I purchased a couple of simple knitting patterns to try – ‘Crafter Hoody’ from In The Wool Shed and a cable collar pattern from the Wensleydale sheep shop (I’ve never attempted cable before and this looked like a good starter project). Whilst on their website I thought it was high time I got myself some proper stitch markers instead of using paperclips, so bought some little wooden ones with Wensleydale Sheep on.
That’s the end of my little Fibre East haul, I ‘came away’ with lots of inspiration (now I’ve just got to find the time to fit everything in!). At the time of writing this, Fibre East still has a full list of previous exhibitors with links to their websites, so I definitely recommend browsing if you’re looking for some creative inspiration or need to add to your stash and want to support small independent businesses.
It’s been a few weeks since my last post – I’ve got quite a backlog of spinning, weaving and fibreprep, so whilst I catch up with all that, I thought I would share a tutorial for some simple braid weaving that uses very little equipment. It can be used as embelishment for other projects or have a practical use. I was taught this many years ago and have not researched how far back the method dates, although lots of braiding appears in the medieval era, so other braids may have been developed around the same time.
Materials
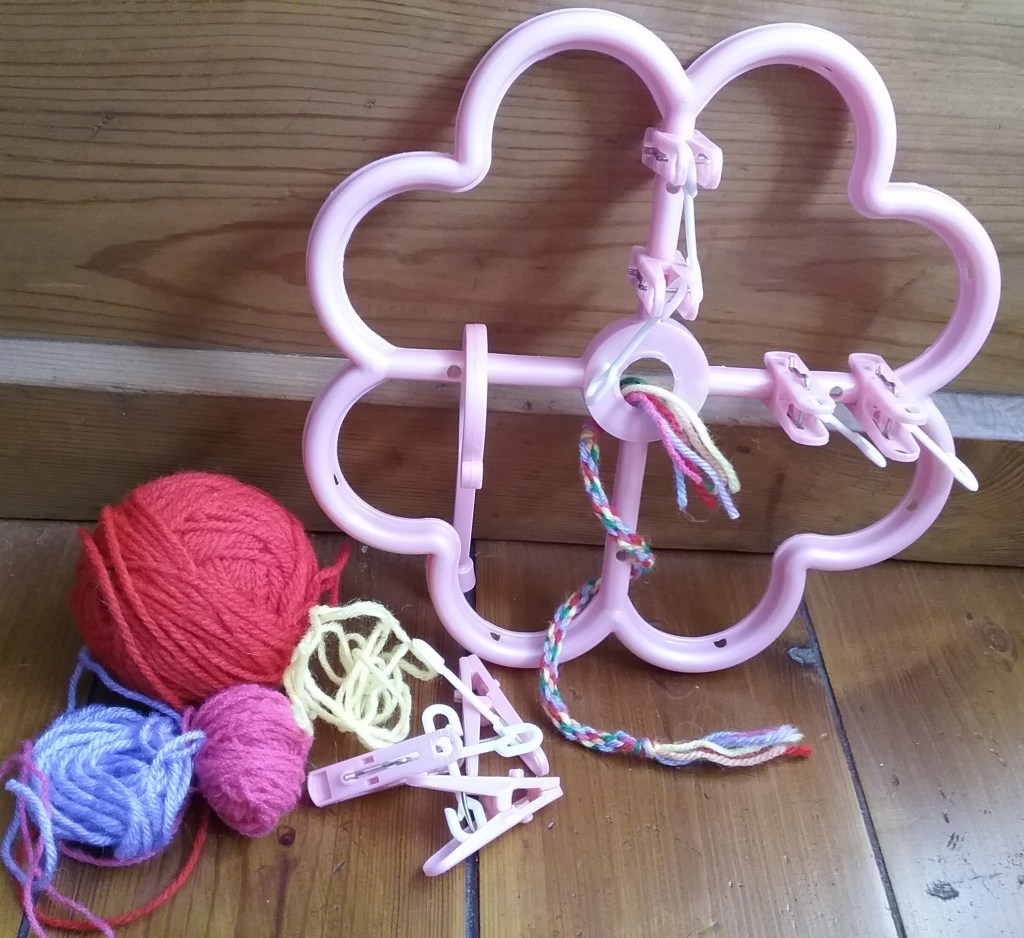
‘Flower’ shaped sock airer (for this technique it needs to have 8 grooves)
Wool
Preparation
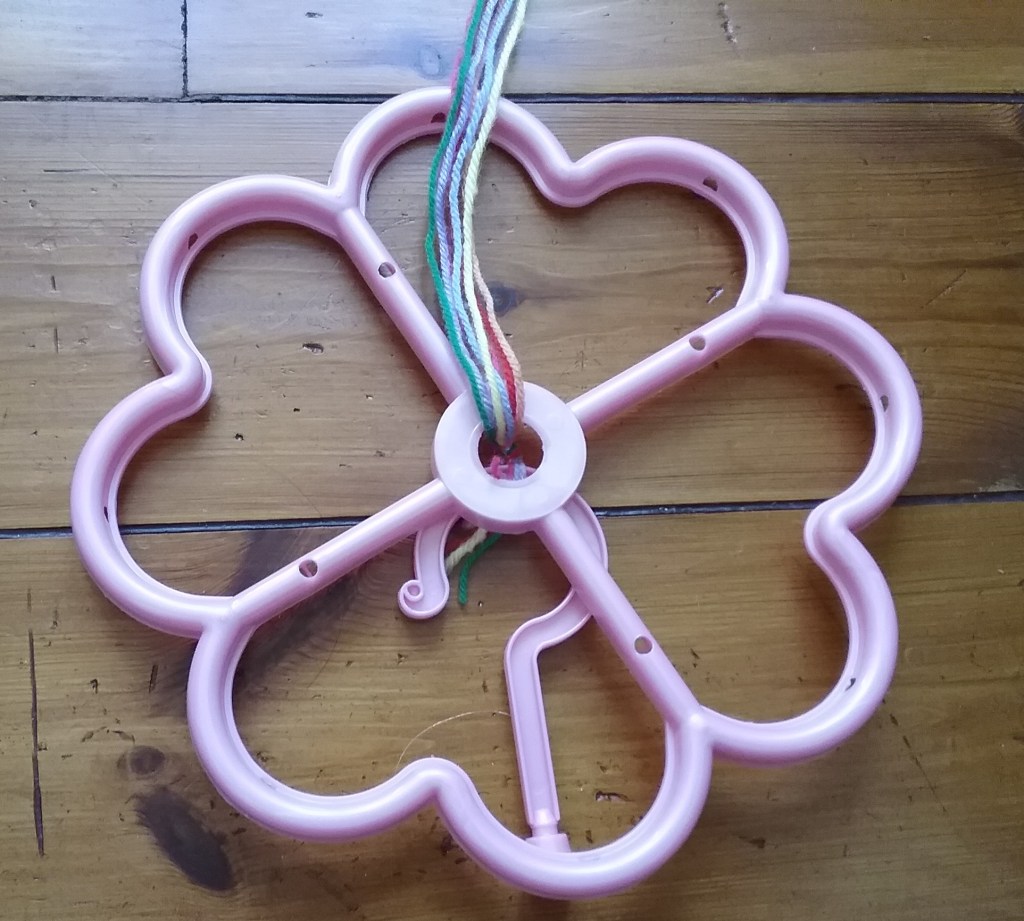
Before starting to weave the airer has to be de-constructed. The hook in the centre needs to be removed and the pegs unhooked – don’t discard these as you will use them as weights (you can remove the plastic bits hanging from the pegs if you feel like it). This should leave you with a setup seen below:
Next you need to prepare your yarn. As a rough guide for length use 1.4x the length of wool than you want you finished cord to be (so if you wanted 1m of cord, use 140cm of wool) plus a bit extra for the knots at the ends.
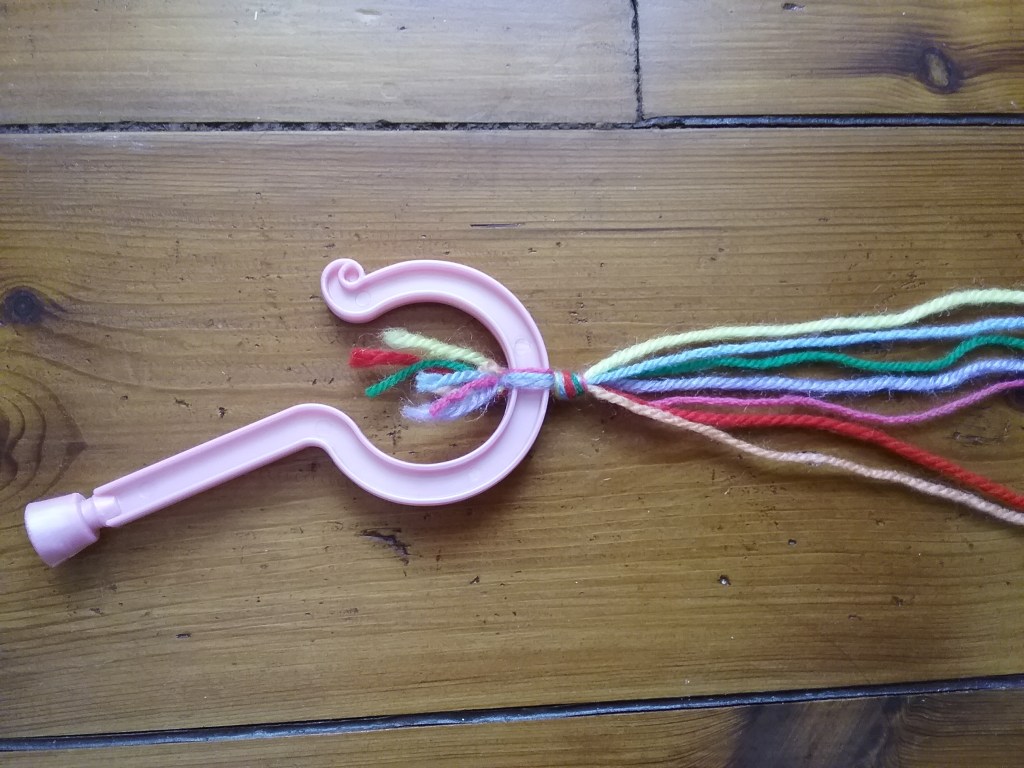
Cut out 7 of lengths of wool, tie a knot at one end leaving enough tail to tie this end to the hook as seen opposite
Then thread the hook through the centre hole. You might want to lay it on a table at this point ready for the next step.
Spread out the lengths of wool laying them into the grooves (there’s no particular order to this, just lay them where they naturally fall). You should be left with one empty groove.
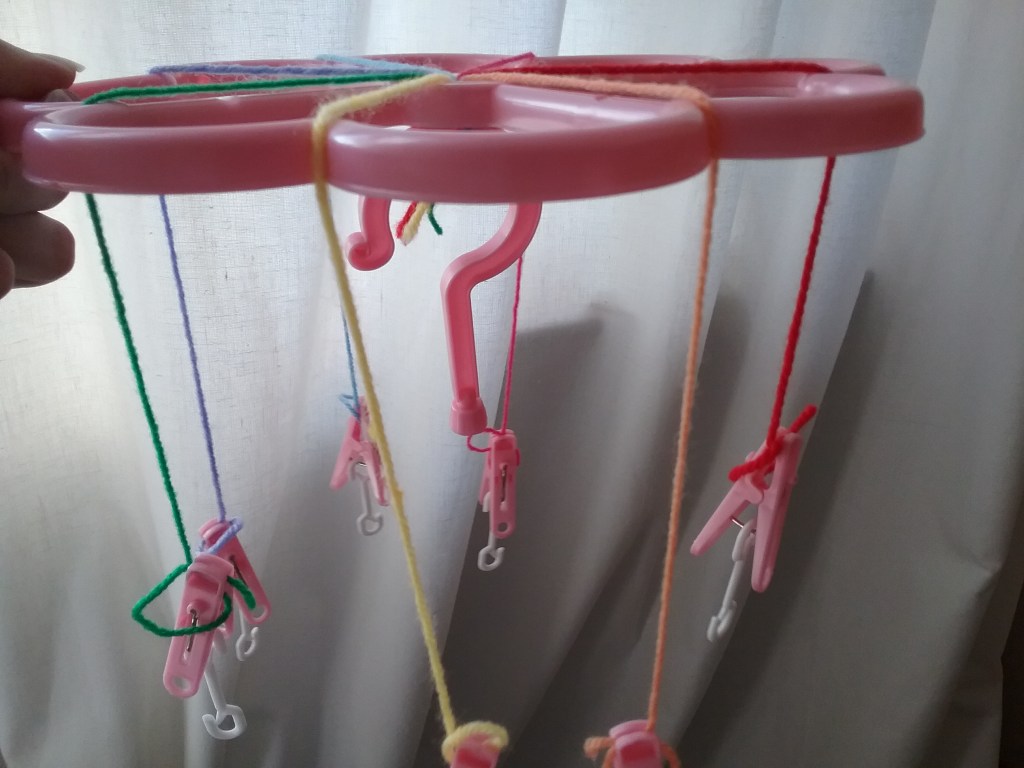
Finally, wind the extra lengths of each strand into a ball and clip a peg to it – the pegs will serve as weights so you can lift the ‘loom’ off the table and the hook won’t pull the wool straight through. You should have something that looks like this.
Weaving
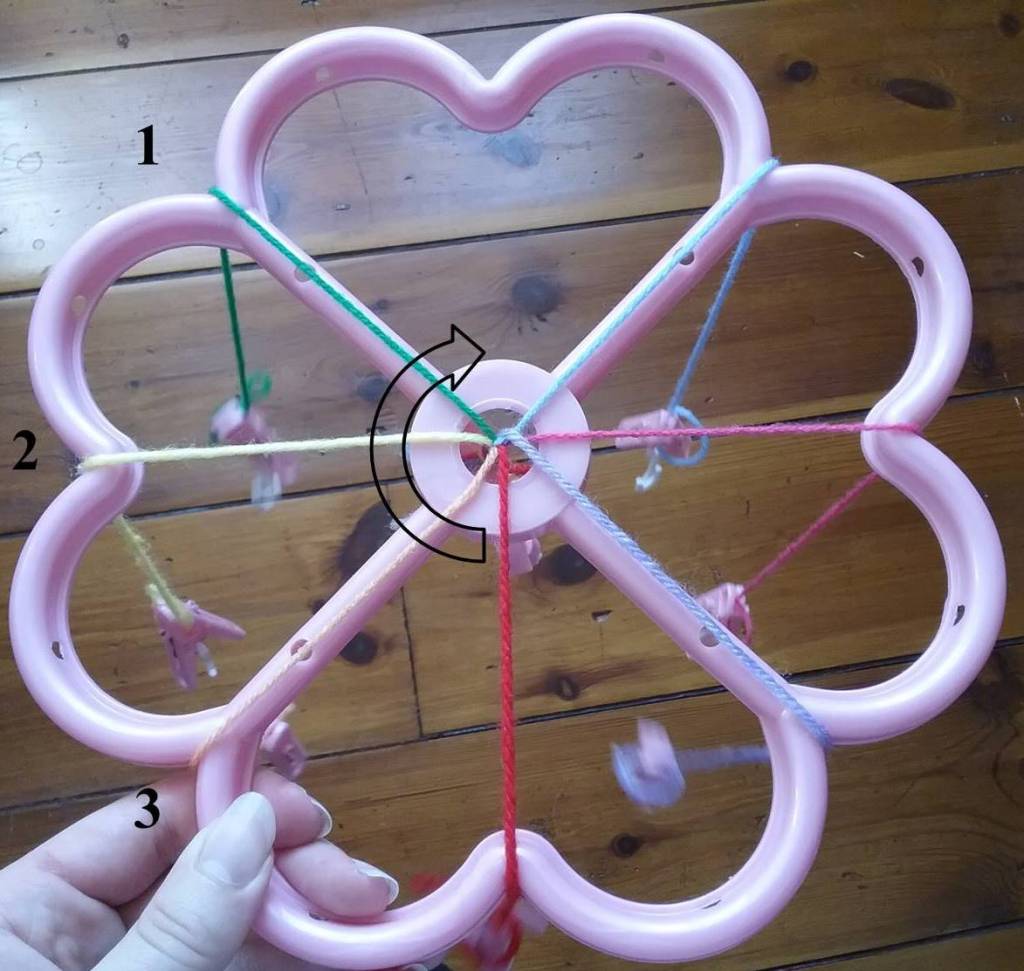
Now that the ‘loom’ is prepared you can being to weave. This pattern is made up of 3 simple steps that repeat until you reach the desired length of cord. For the purposes of this tutorial I’ve used scraps of different coloured wool in an attempt to illustrate the steps more clearly.
Step One
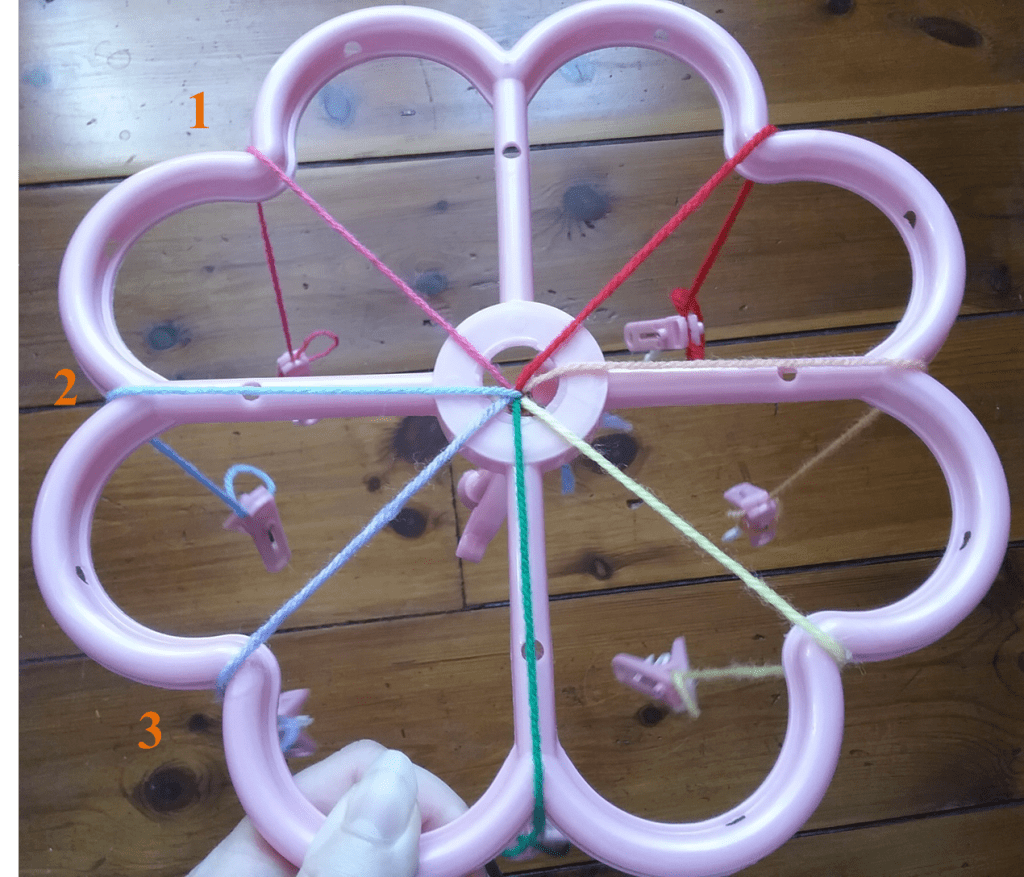
Start with the empty groove facing away from you. Then count three strands to the left (anticlockwise) from this groove. I’ve numbered the strands on the opposite photo.
Step Two
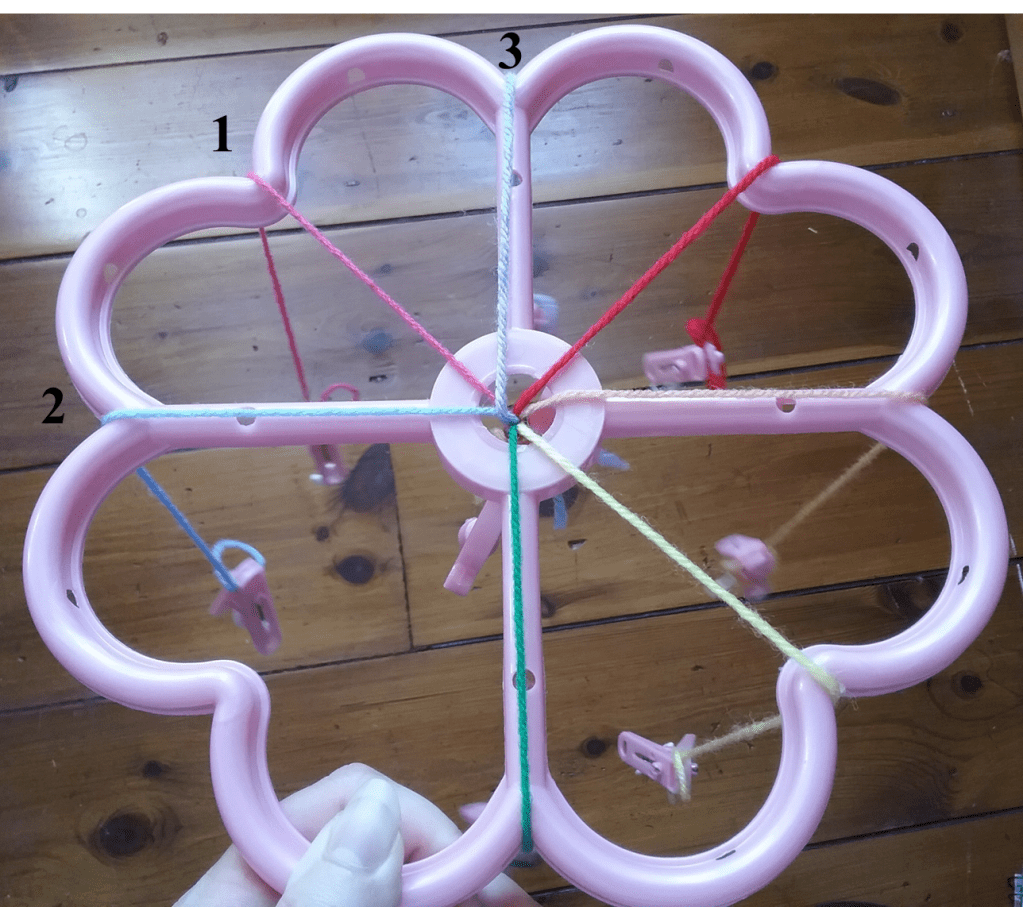
Take the third strand you just counted and place it in the empty groove.
Step Three
Turn the loom clockwise about 90 degrees to reset. The groove the third strand came from now becomes the empty groove and the pattern starts again from step 1.
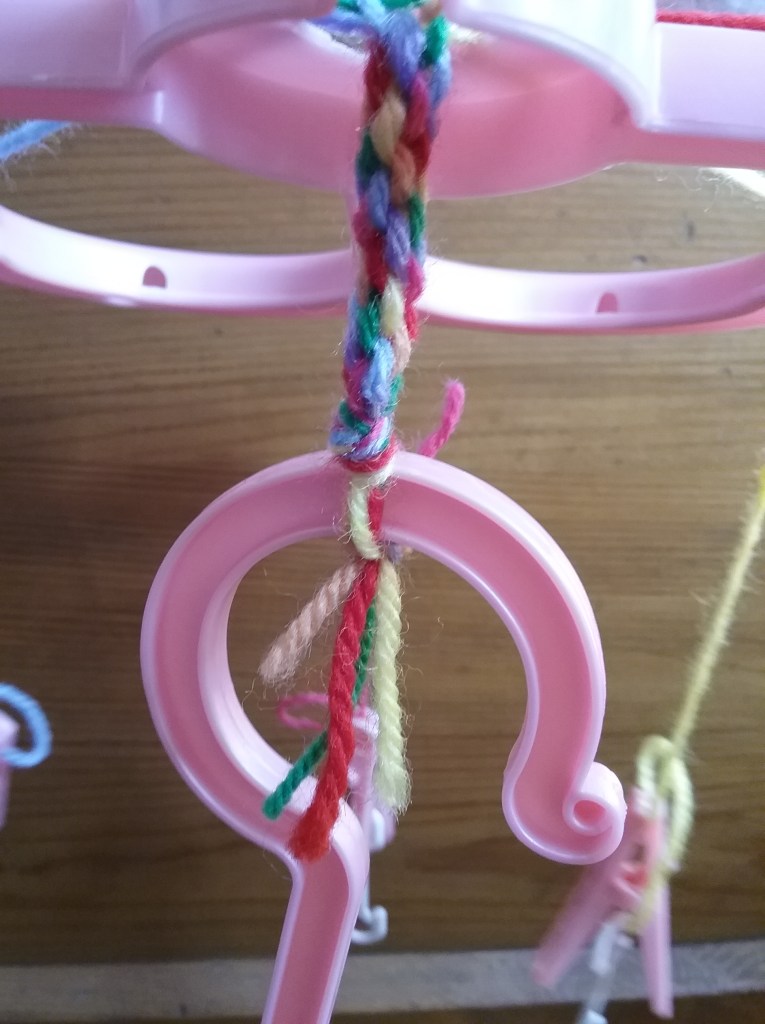
And that’s it! The cord will take a little while to start moving down through the centre, but if it seems stuck at top of the loom after a few rounds, give it a gentle pull. As the pegs move closer to the loom, release some of the wound on wool.
The cord coming through the loom
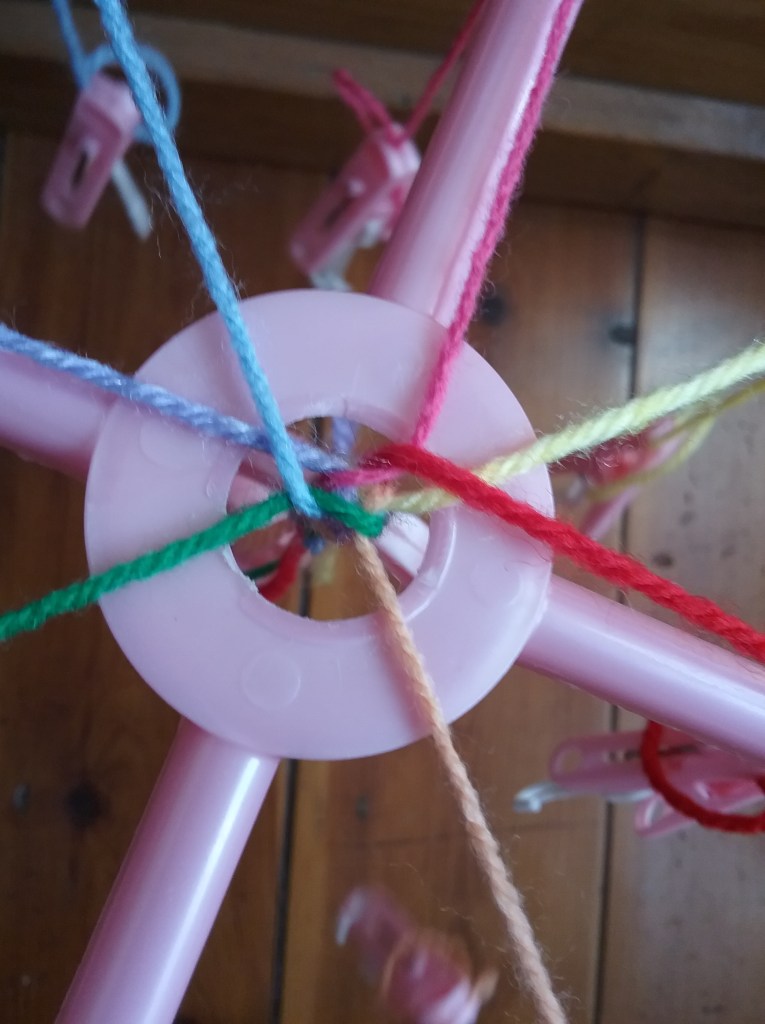
The cord as it’s being made
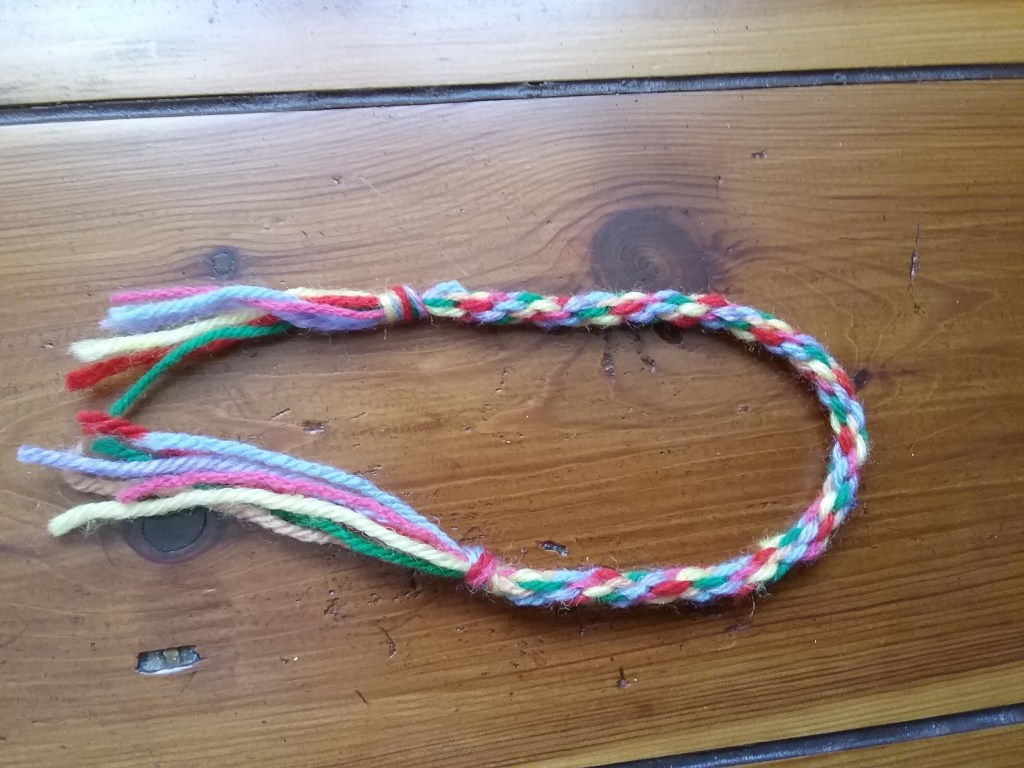
Keep going until the cord is the desired length, then unclip the pegs, tie a knot in that end and untie the hook at the other end.
For a different design, play around with changing the number of strands and the pattern, there are many other variations that could be achieved on a sock airer loom.
If you are going to give this a go, let me know in the comments, tag me on your blog, or share with me on Pinterest – I would love to see your creations!
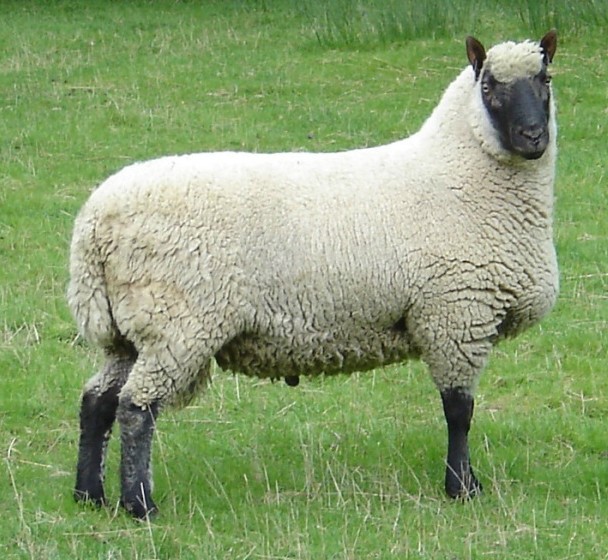
Clun Forest sheep resided on the hills near Clun, a small town in the South of Shropshire from the 19th century, however it is thought the breed originated in the 10 centuries before and were descended from ancient local breeds. At the start of the 19th century the Clun Forest was described as being white faced and hornless, but over time was crossed with other breeds in the area causing the face to darken until it reached the dark grey/brown it is today. By the end of the 1800’s the breed had become more dispersed across the UK and became popular commercial flocks due to their hardiness. Over time Clun Forest sheep were exported to Europe and North America where they became very popular. Although their popularity in the UK has declined in recent times, many flocks are still well established.
Fleece Research
Clun Forest fleece is not commonly used by fibre enthusiasts, yet is reportedly excellent to work with. The British wool board classify the fibre as fine – the same category as the Dorset horn, so I anticipate that Clun Forest will have very similar qualities and behave in a similar way. The fleece is reported to have very little kemp, which will make fibre prep much quicker and has lots of crimp, so will be ideal for woolen spinning. As the fleece is coloured white, I can use it to experiment with some natural dyeing and hopefully achieve bright clear results. My research stated that ‘industrial felts’ were amongst it’s many typical uses, suggesting that the fibres might be willing to felt, so I may need to experiment to find the ‘felting point’ before attempting to wash it or dye it it hot water.
Further Reading
The following sources have been used for reference
Several weeks ago whilst browing the internet, I came across a mention of a wool picker and being curious, decided to do some research. A wool picker is a device that can be used to separate out fibre before carding to make the task easier (as far as I can tell, it is primarily used before drum carding). At the time, I was halfway through hand carding my ryeland fleece, which was proving quite time consuming, as there was a lot of VM and dust. I felt like this would be the perfect opportunity to experiment with this tool and see if it made the job any easier, so I turned to the internet to see if anyone had DIYed one.
Lo and behold, multiple blog posts emerged and it seems that two types of wool picker exist, these being a box picker and a swinging picker (the latter is generally just known as a wool picker). I watched a few videos on youtube of wool pickers and although the box picker appeared simplest in construction, I felt the swinging picker seemed more efficient for larger quantities of fleece. I discovered several good blog posts with instructions for making DIY Box Pickers that I will link below:
I couldn’t find very much information for making a swinging wool picker, however I did find a very informative blog post by Fleecewood, which contained measurements that would form the basis for my own (if you are thinking of making your own swinging picker, please do have a look at it).
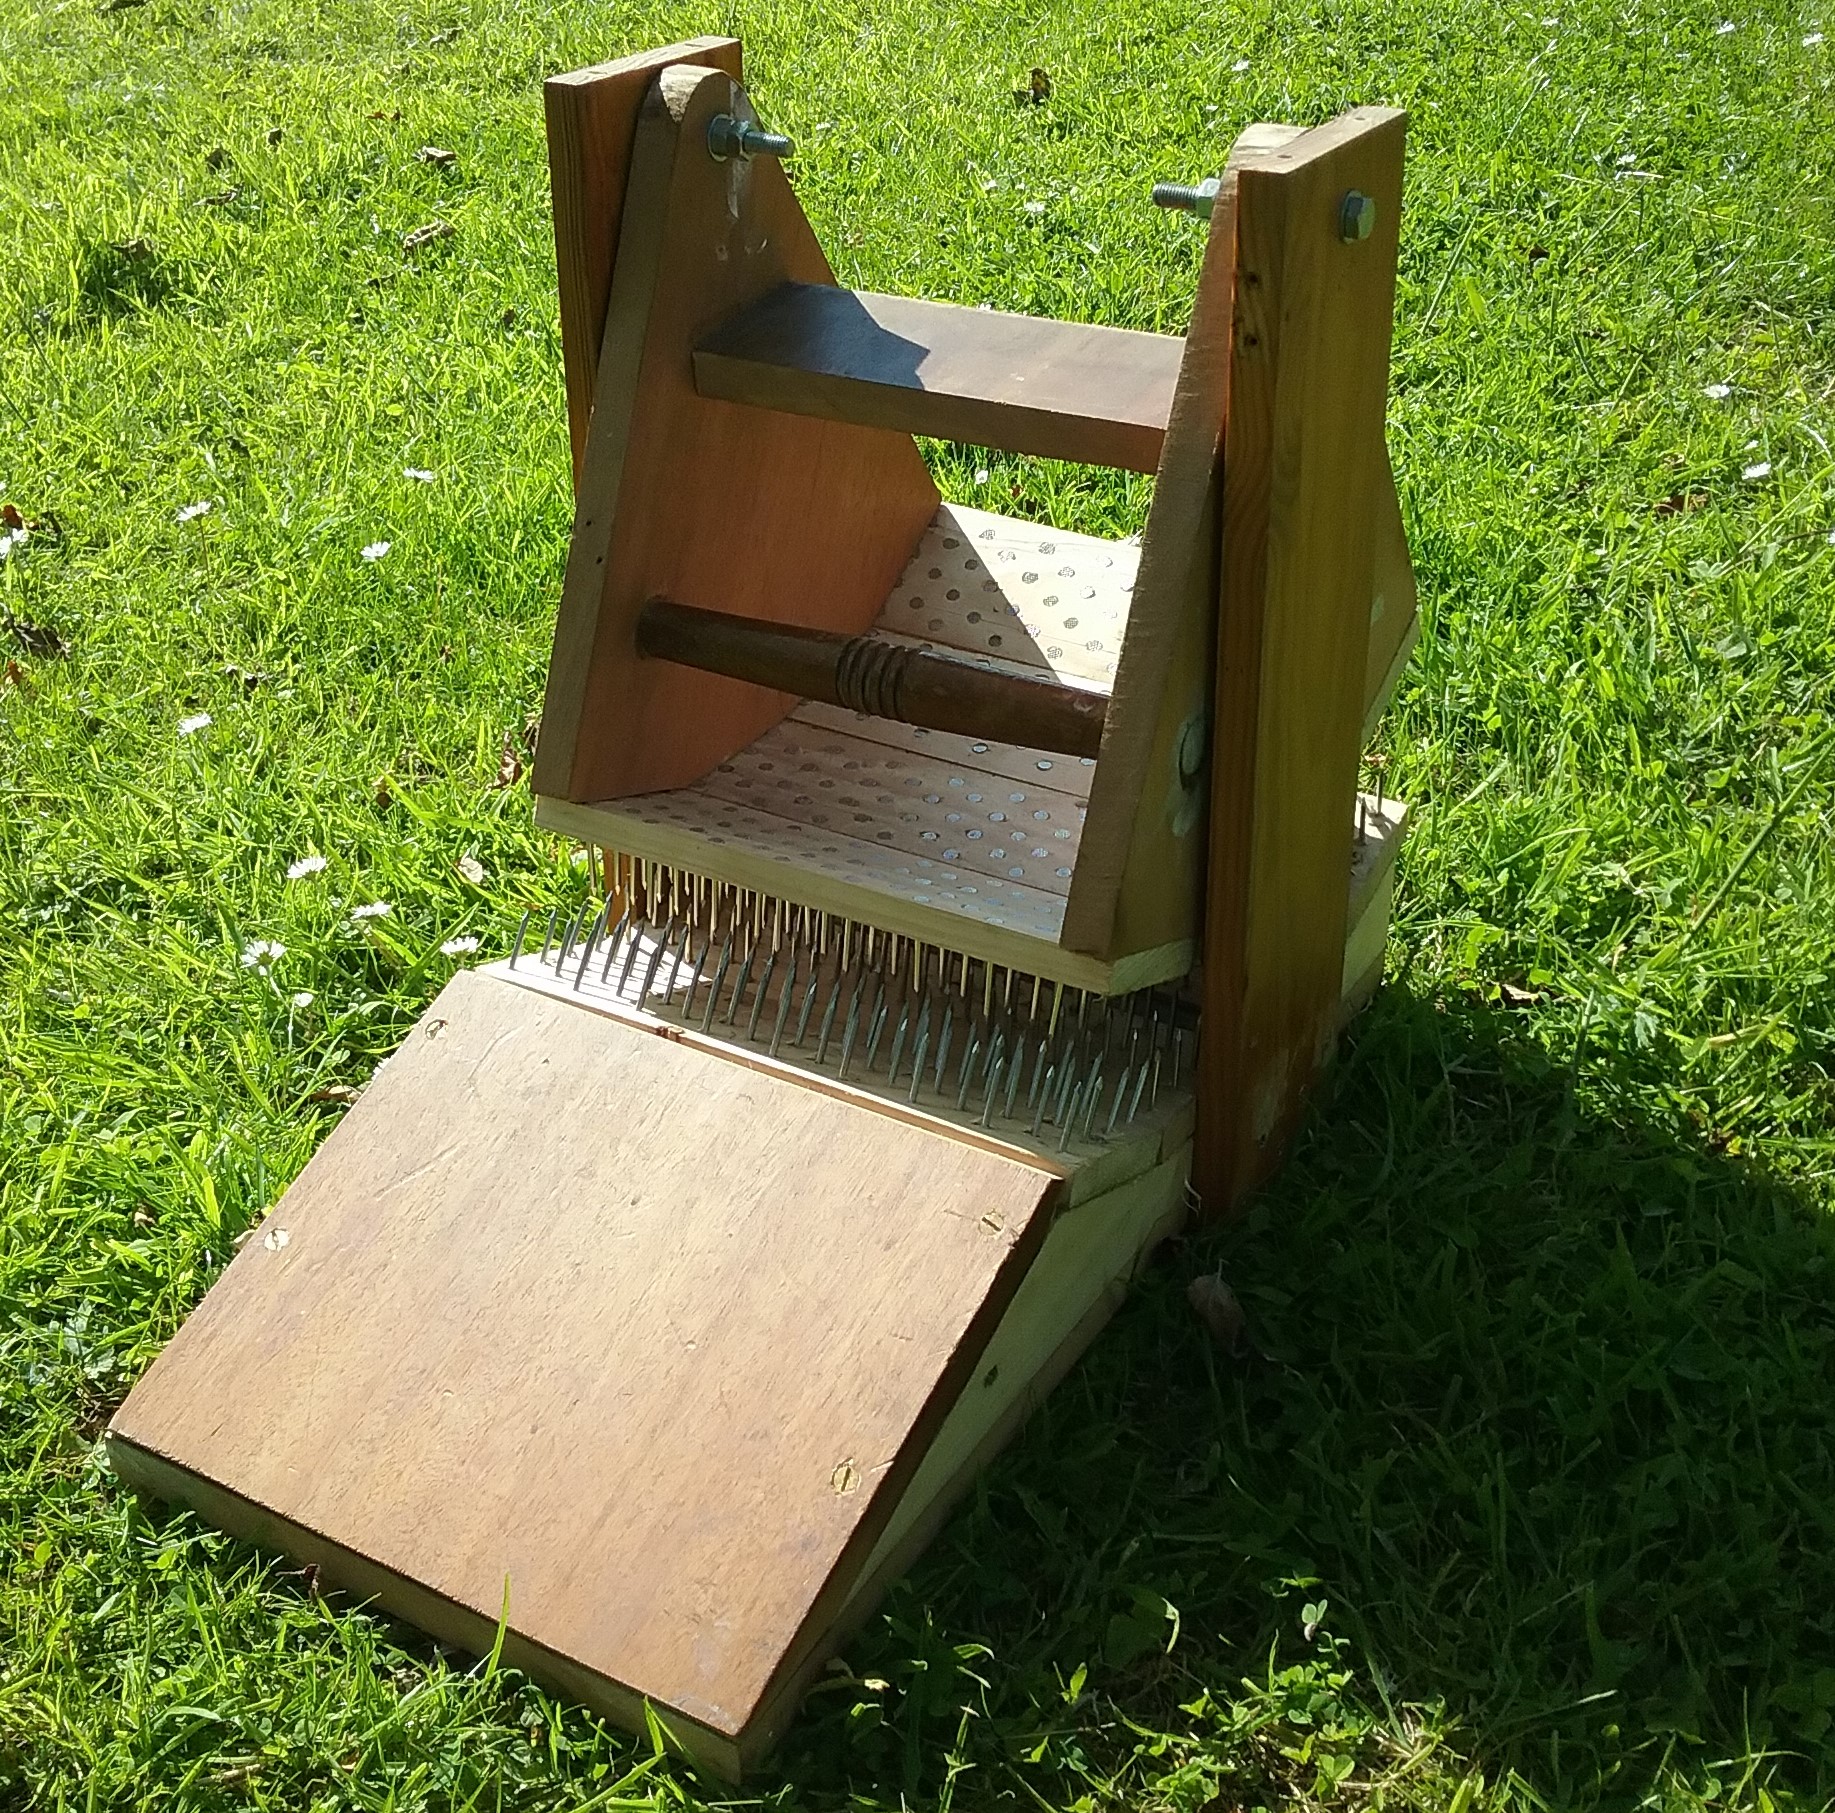
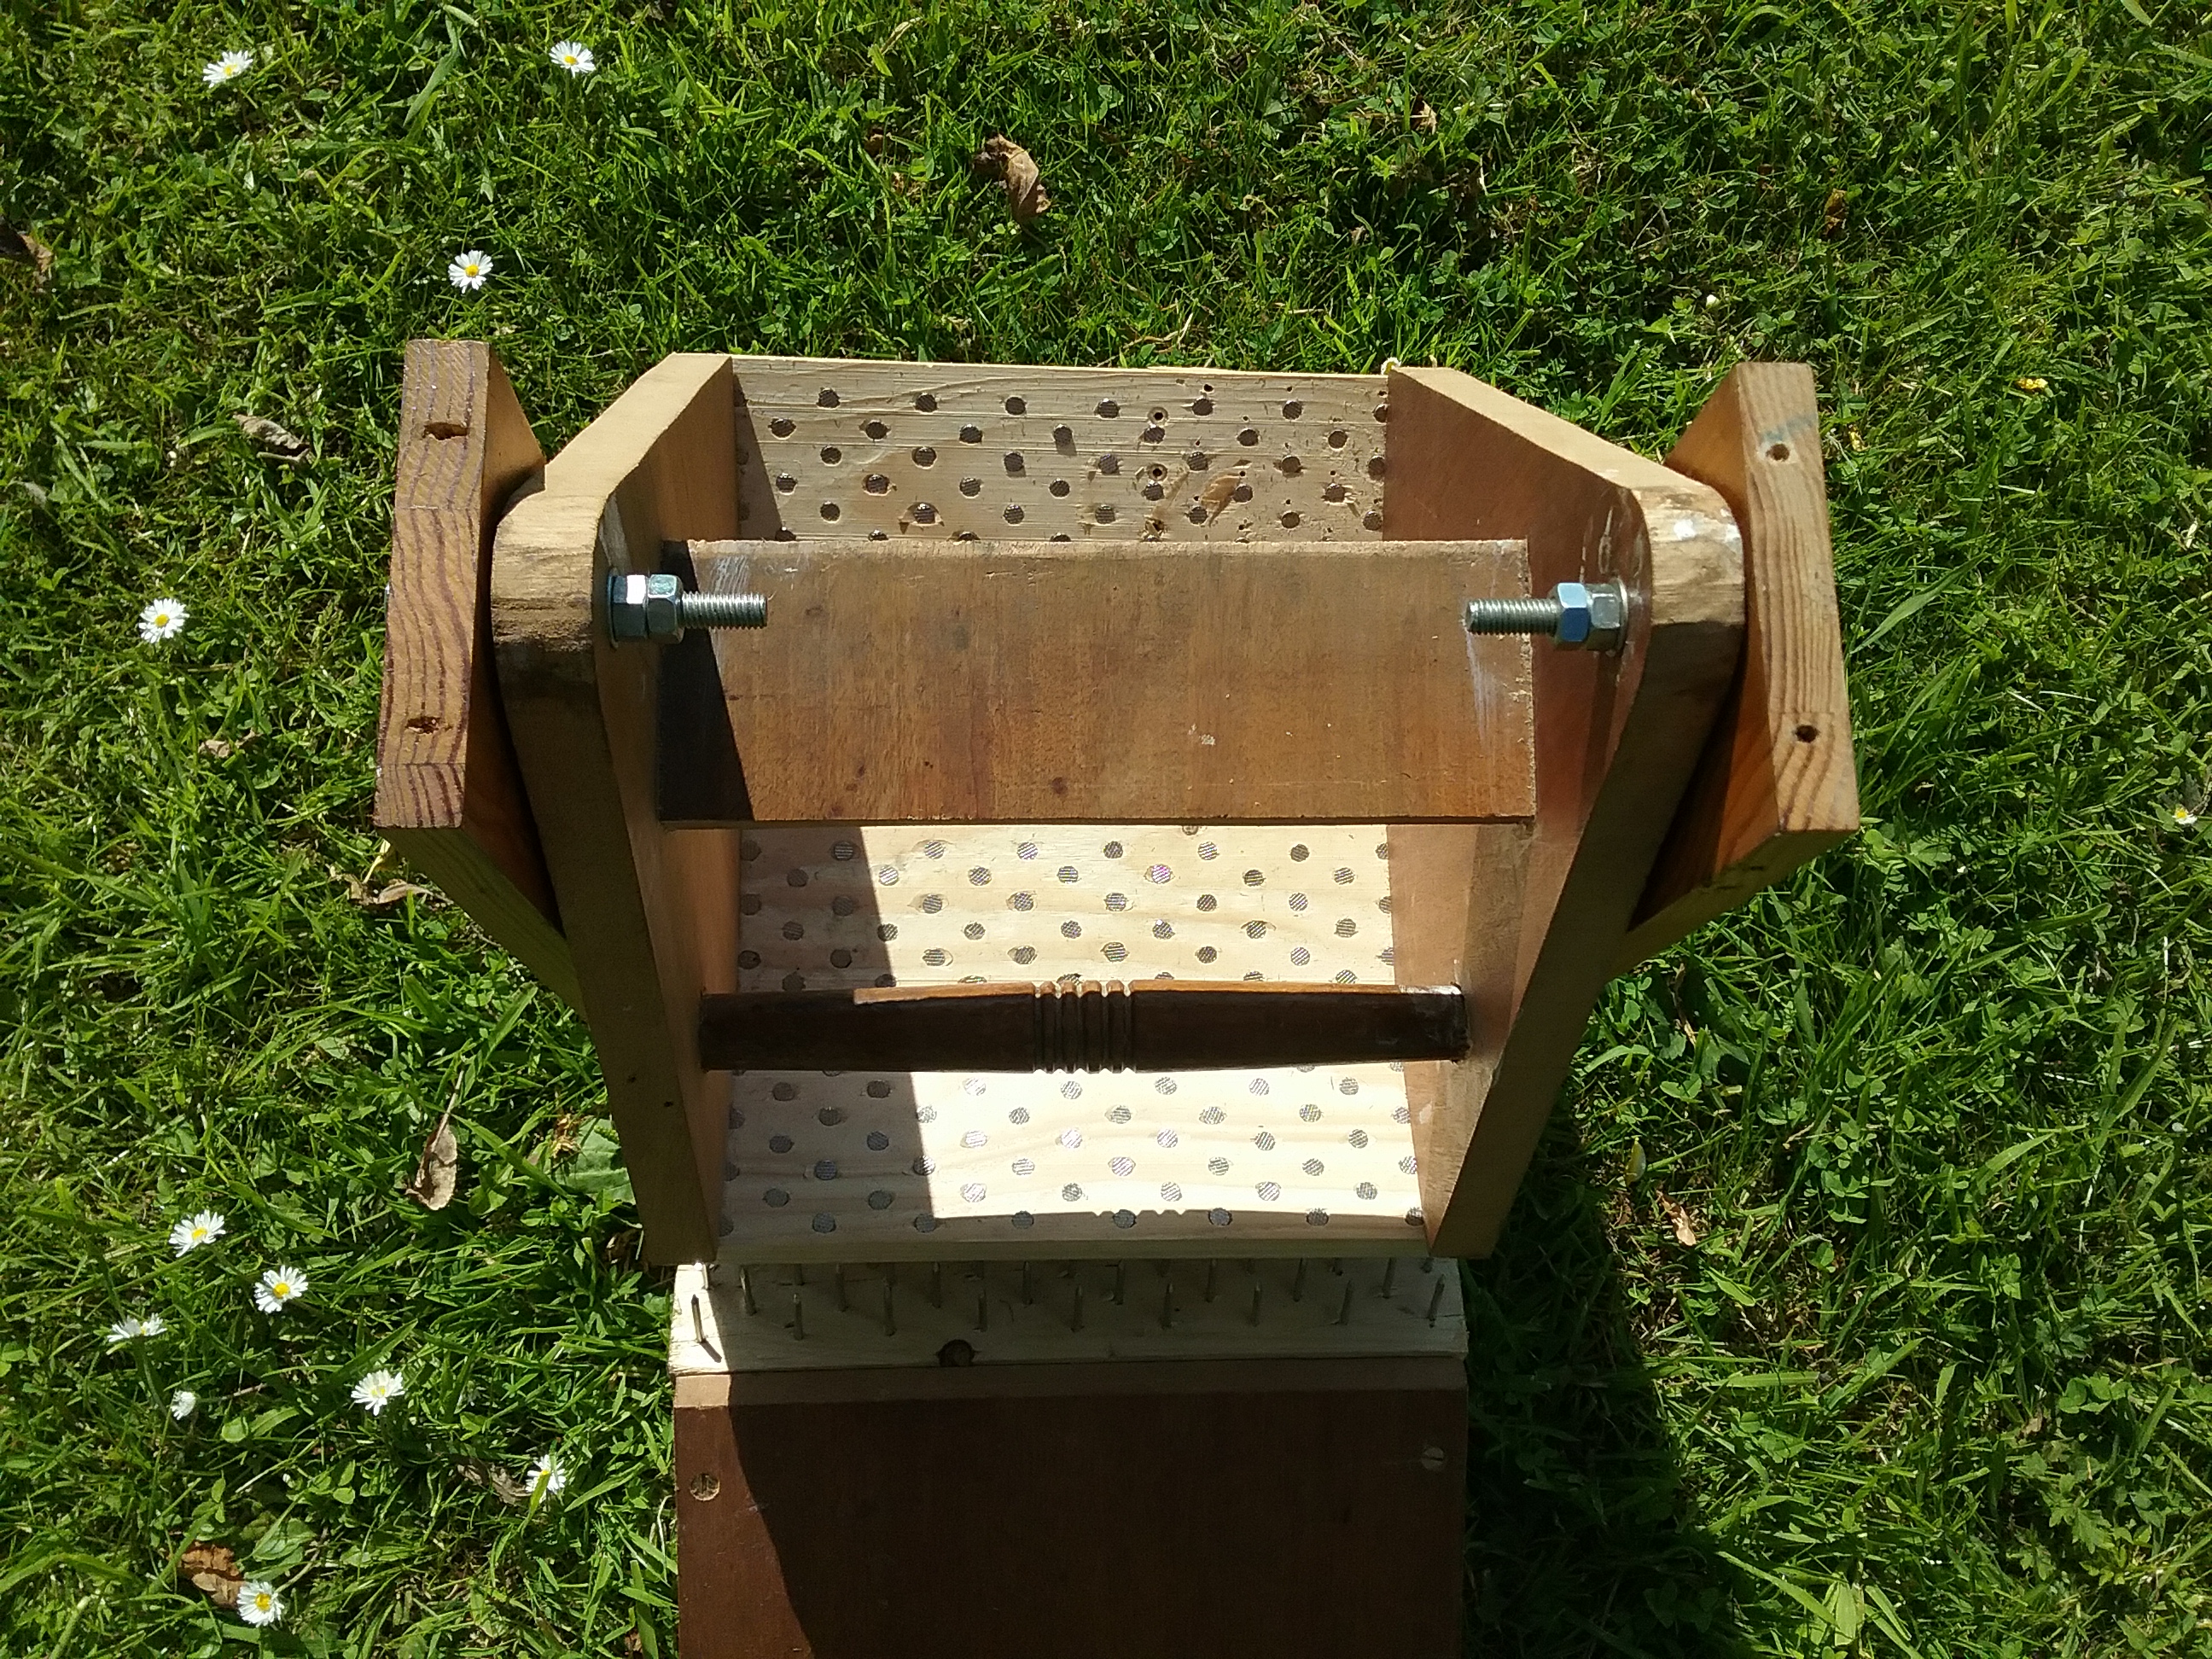
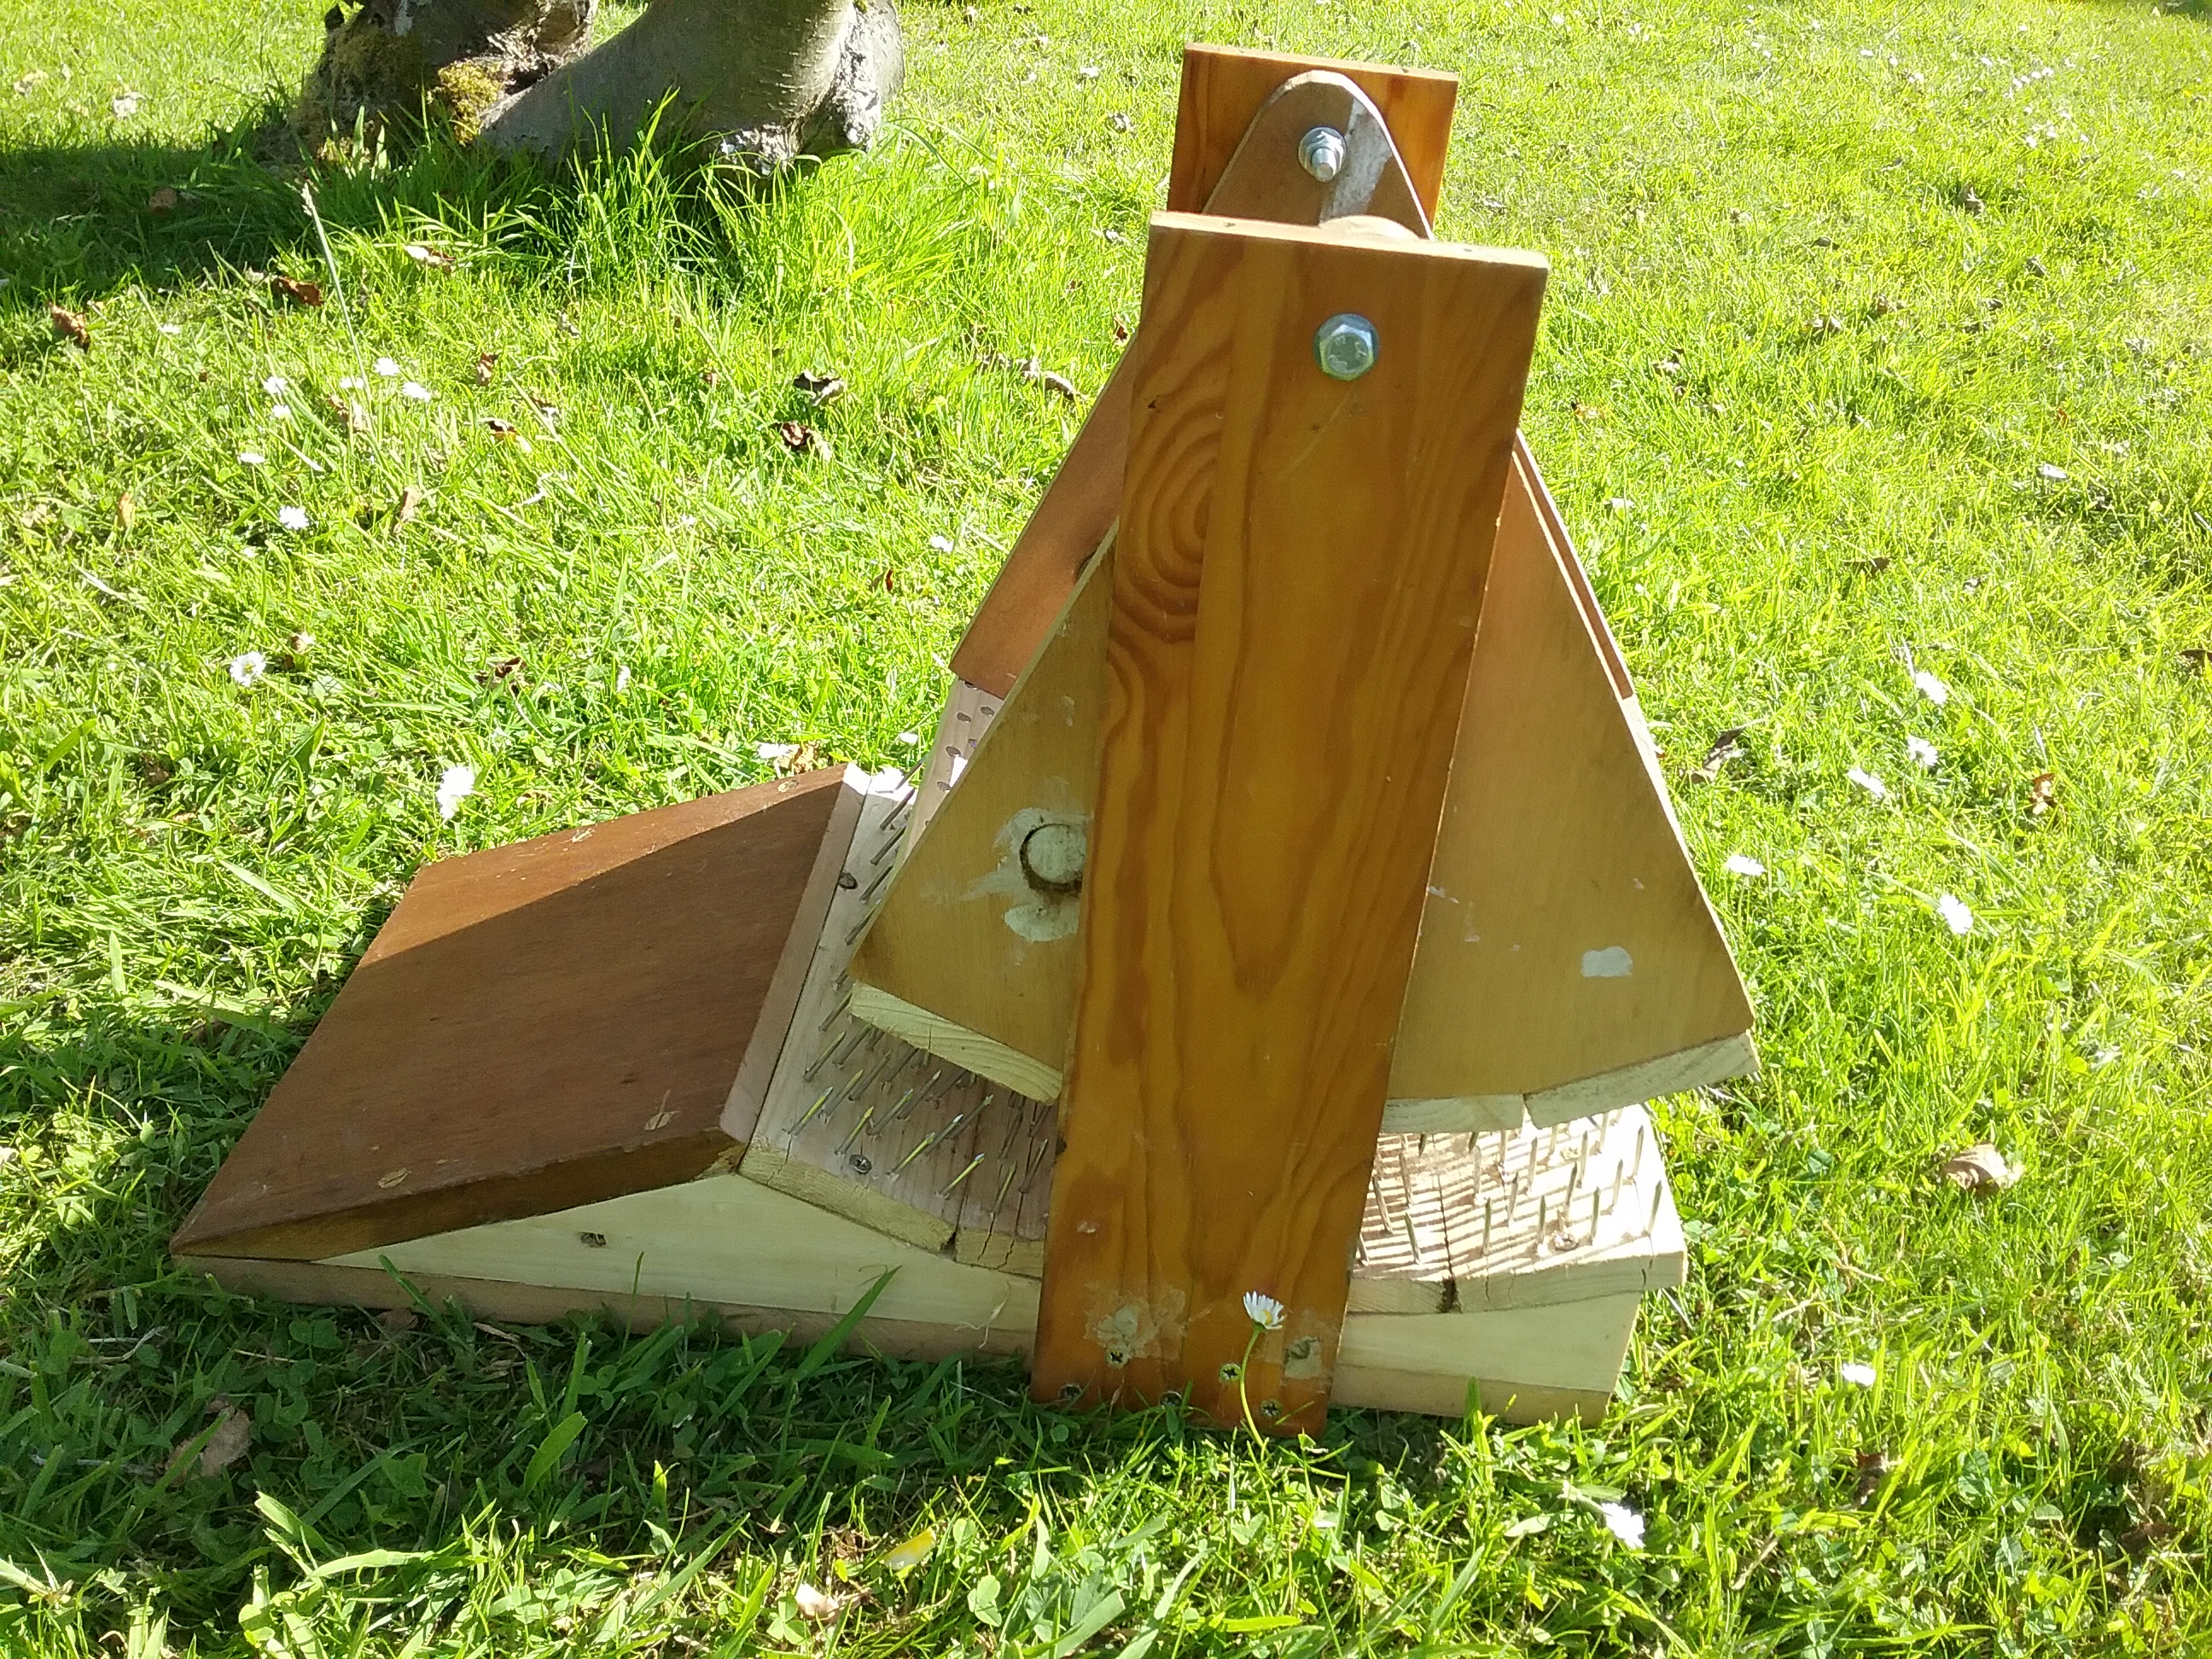
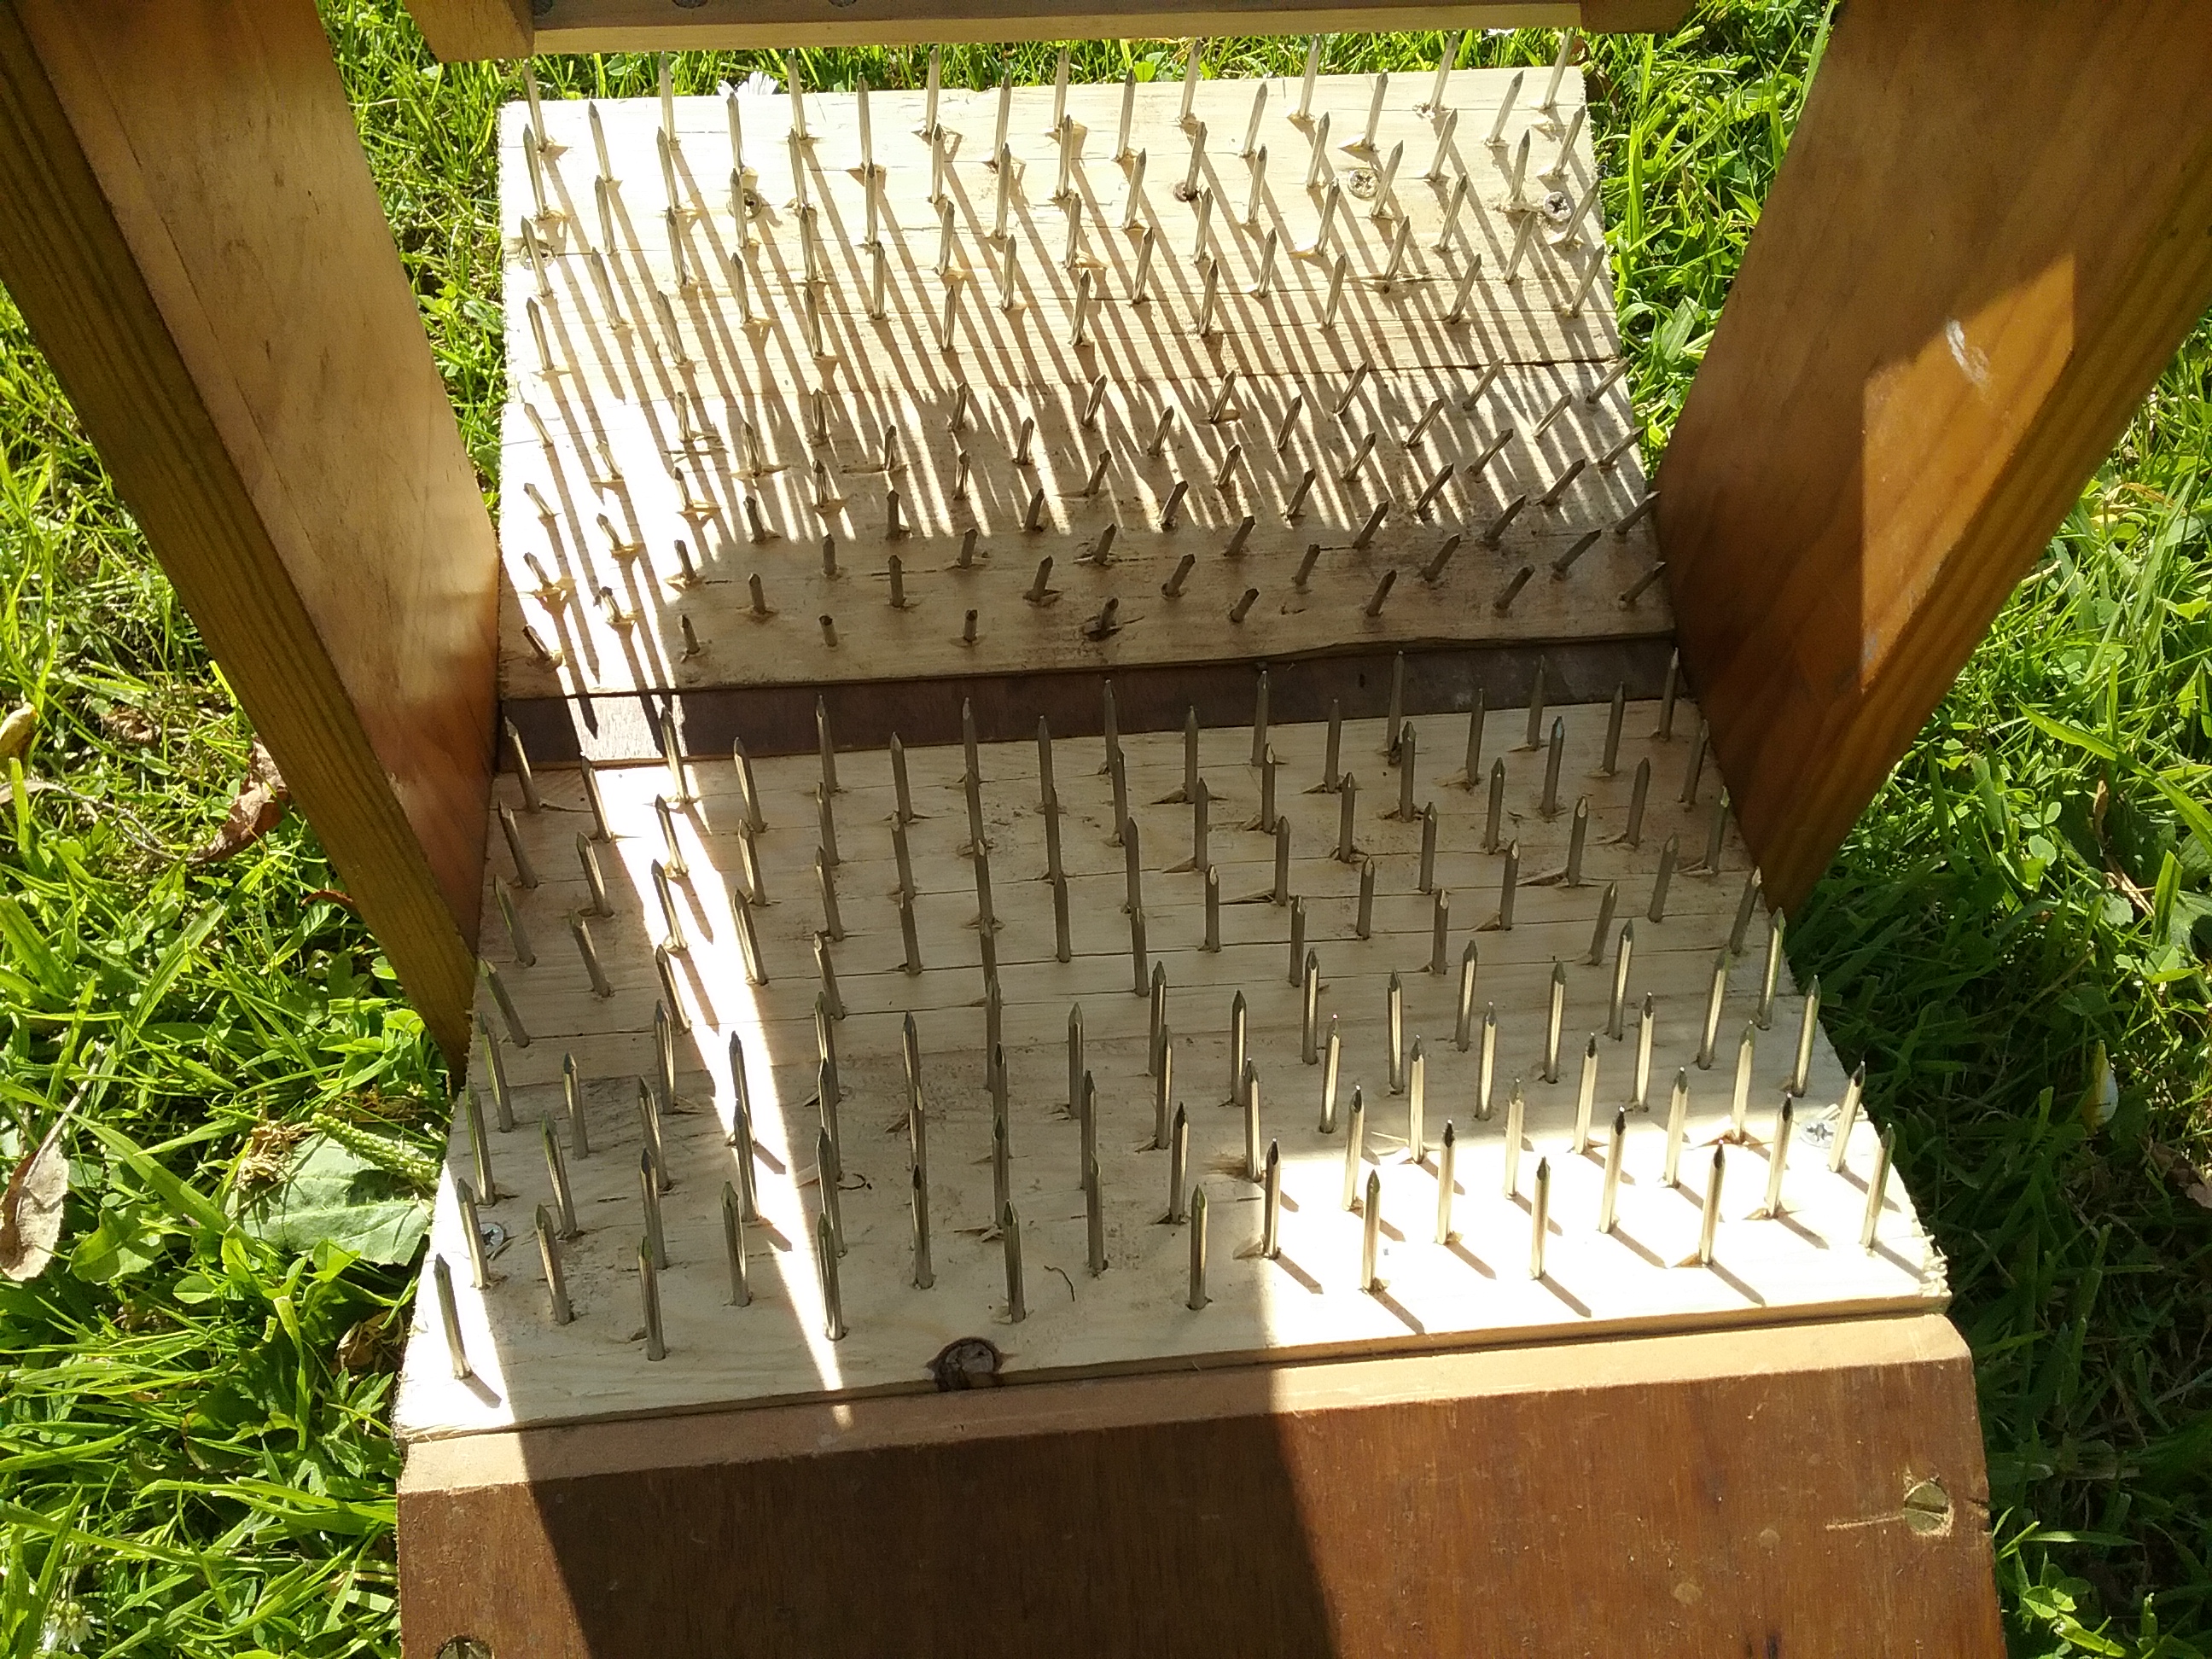
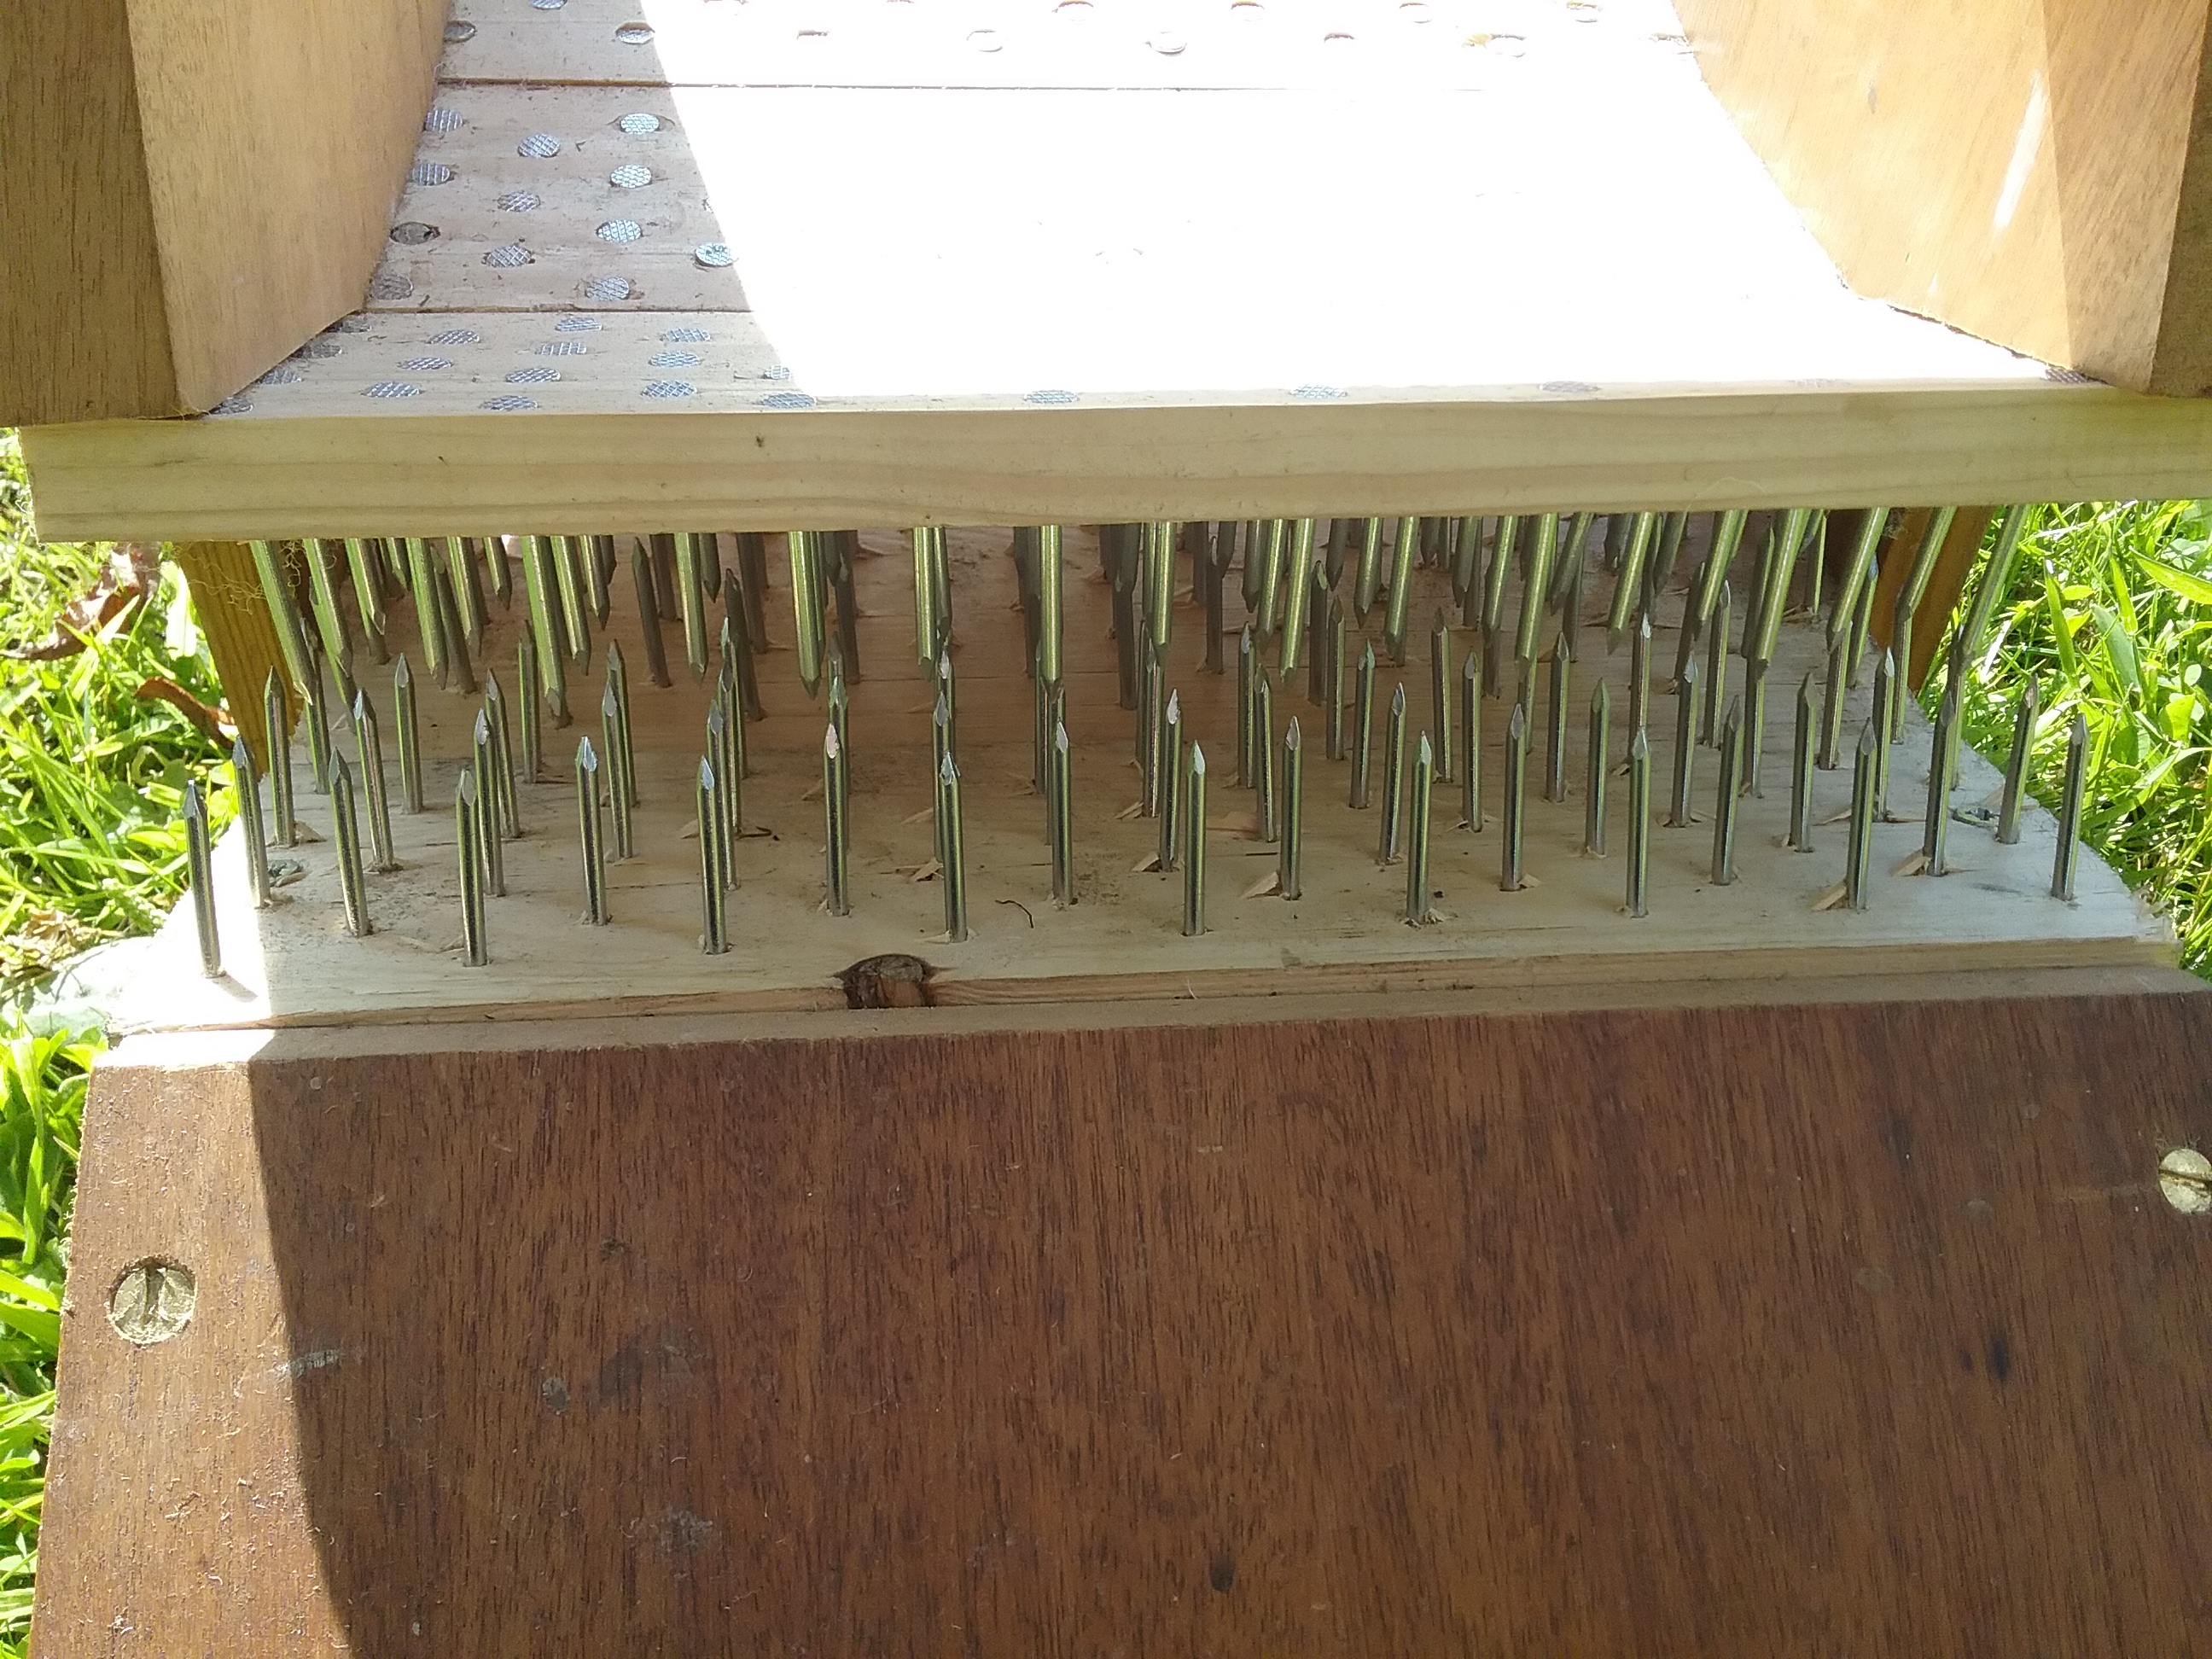
That being said, this is in no way a tutorial, as it’s heavily based on the aforementioned post and I cannot take the credit for making the picker, as this was kindly done by my father. As I had no idea if a picker would actually make my fibre prep any easier, I didn’t want it to be expensive, so used materials already to hand. This means my picker does not look very uniform and has very few safety features, but it does the job!
Disclaimer – Please consider your safety and use common sense when making/using wool pickers DIY or otherwise. Nails are sharp and I have come close to getting caught, despite being careful. It is recommended to wear a thick apron, use your picker on a flat surface and clamp it down to reduce the chance of accidents. Wool pickers should definitely not be used by/near children or pets.
Making
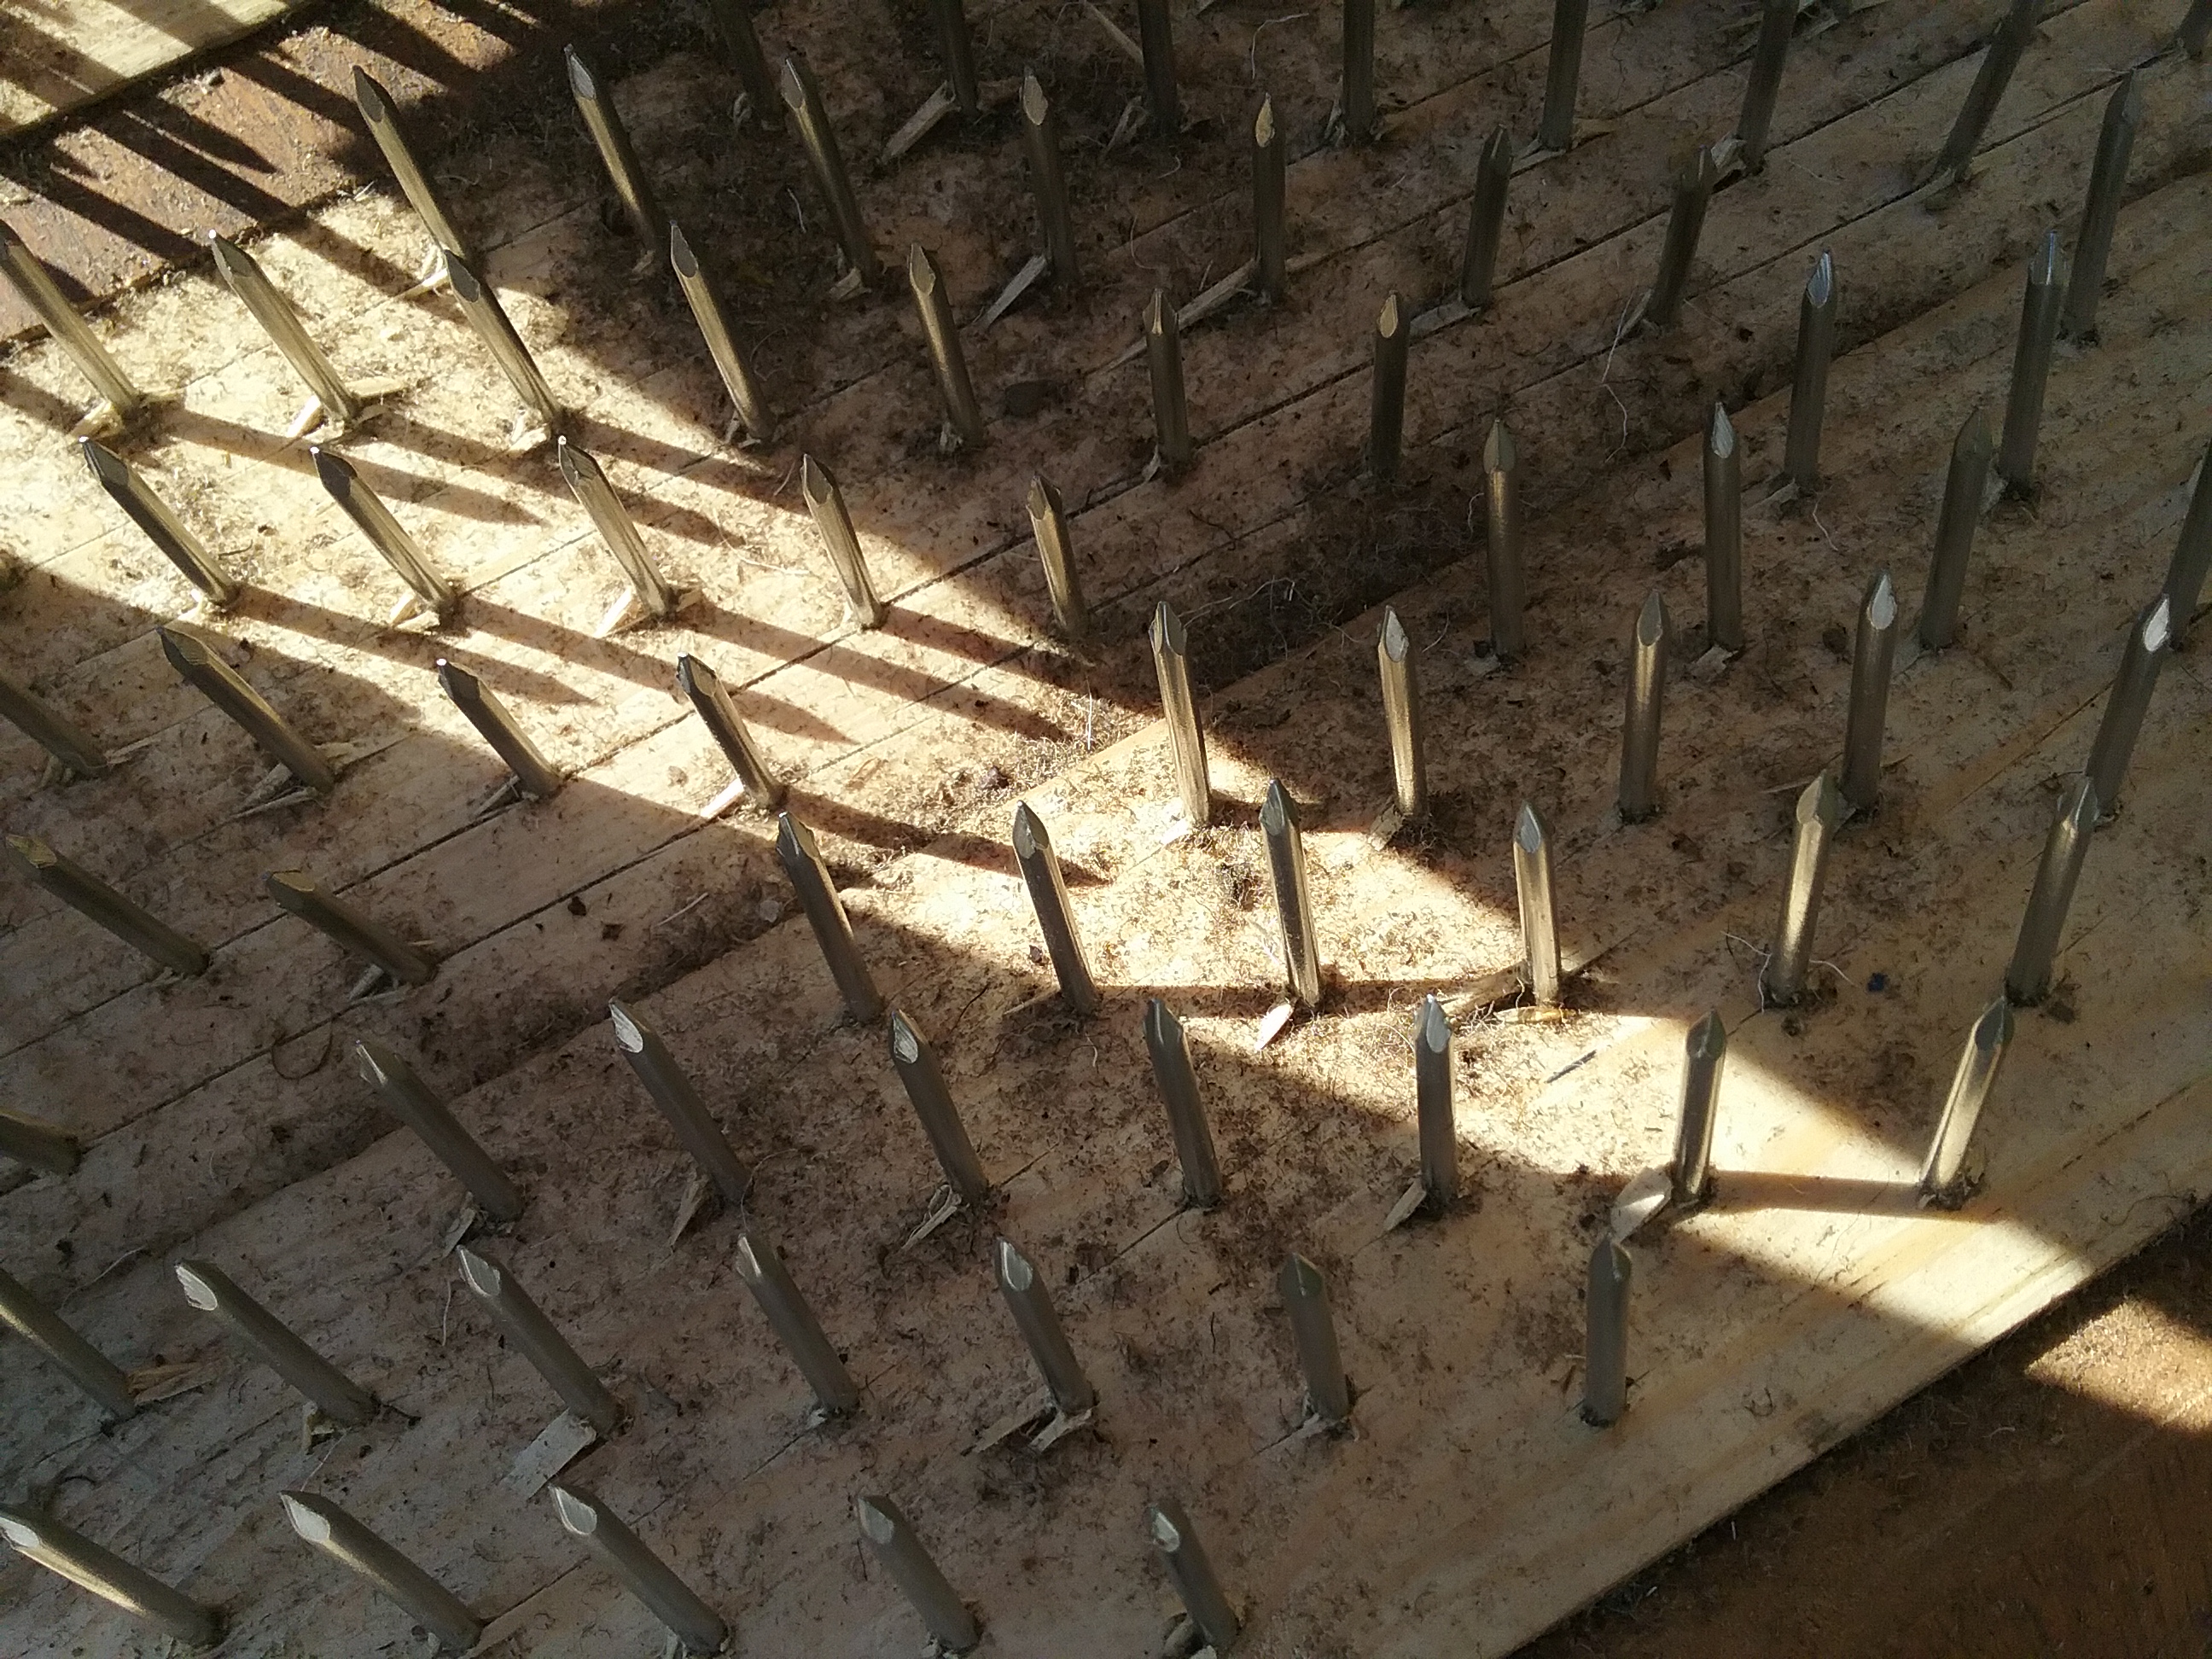
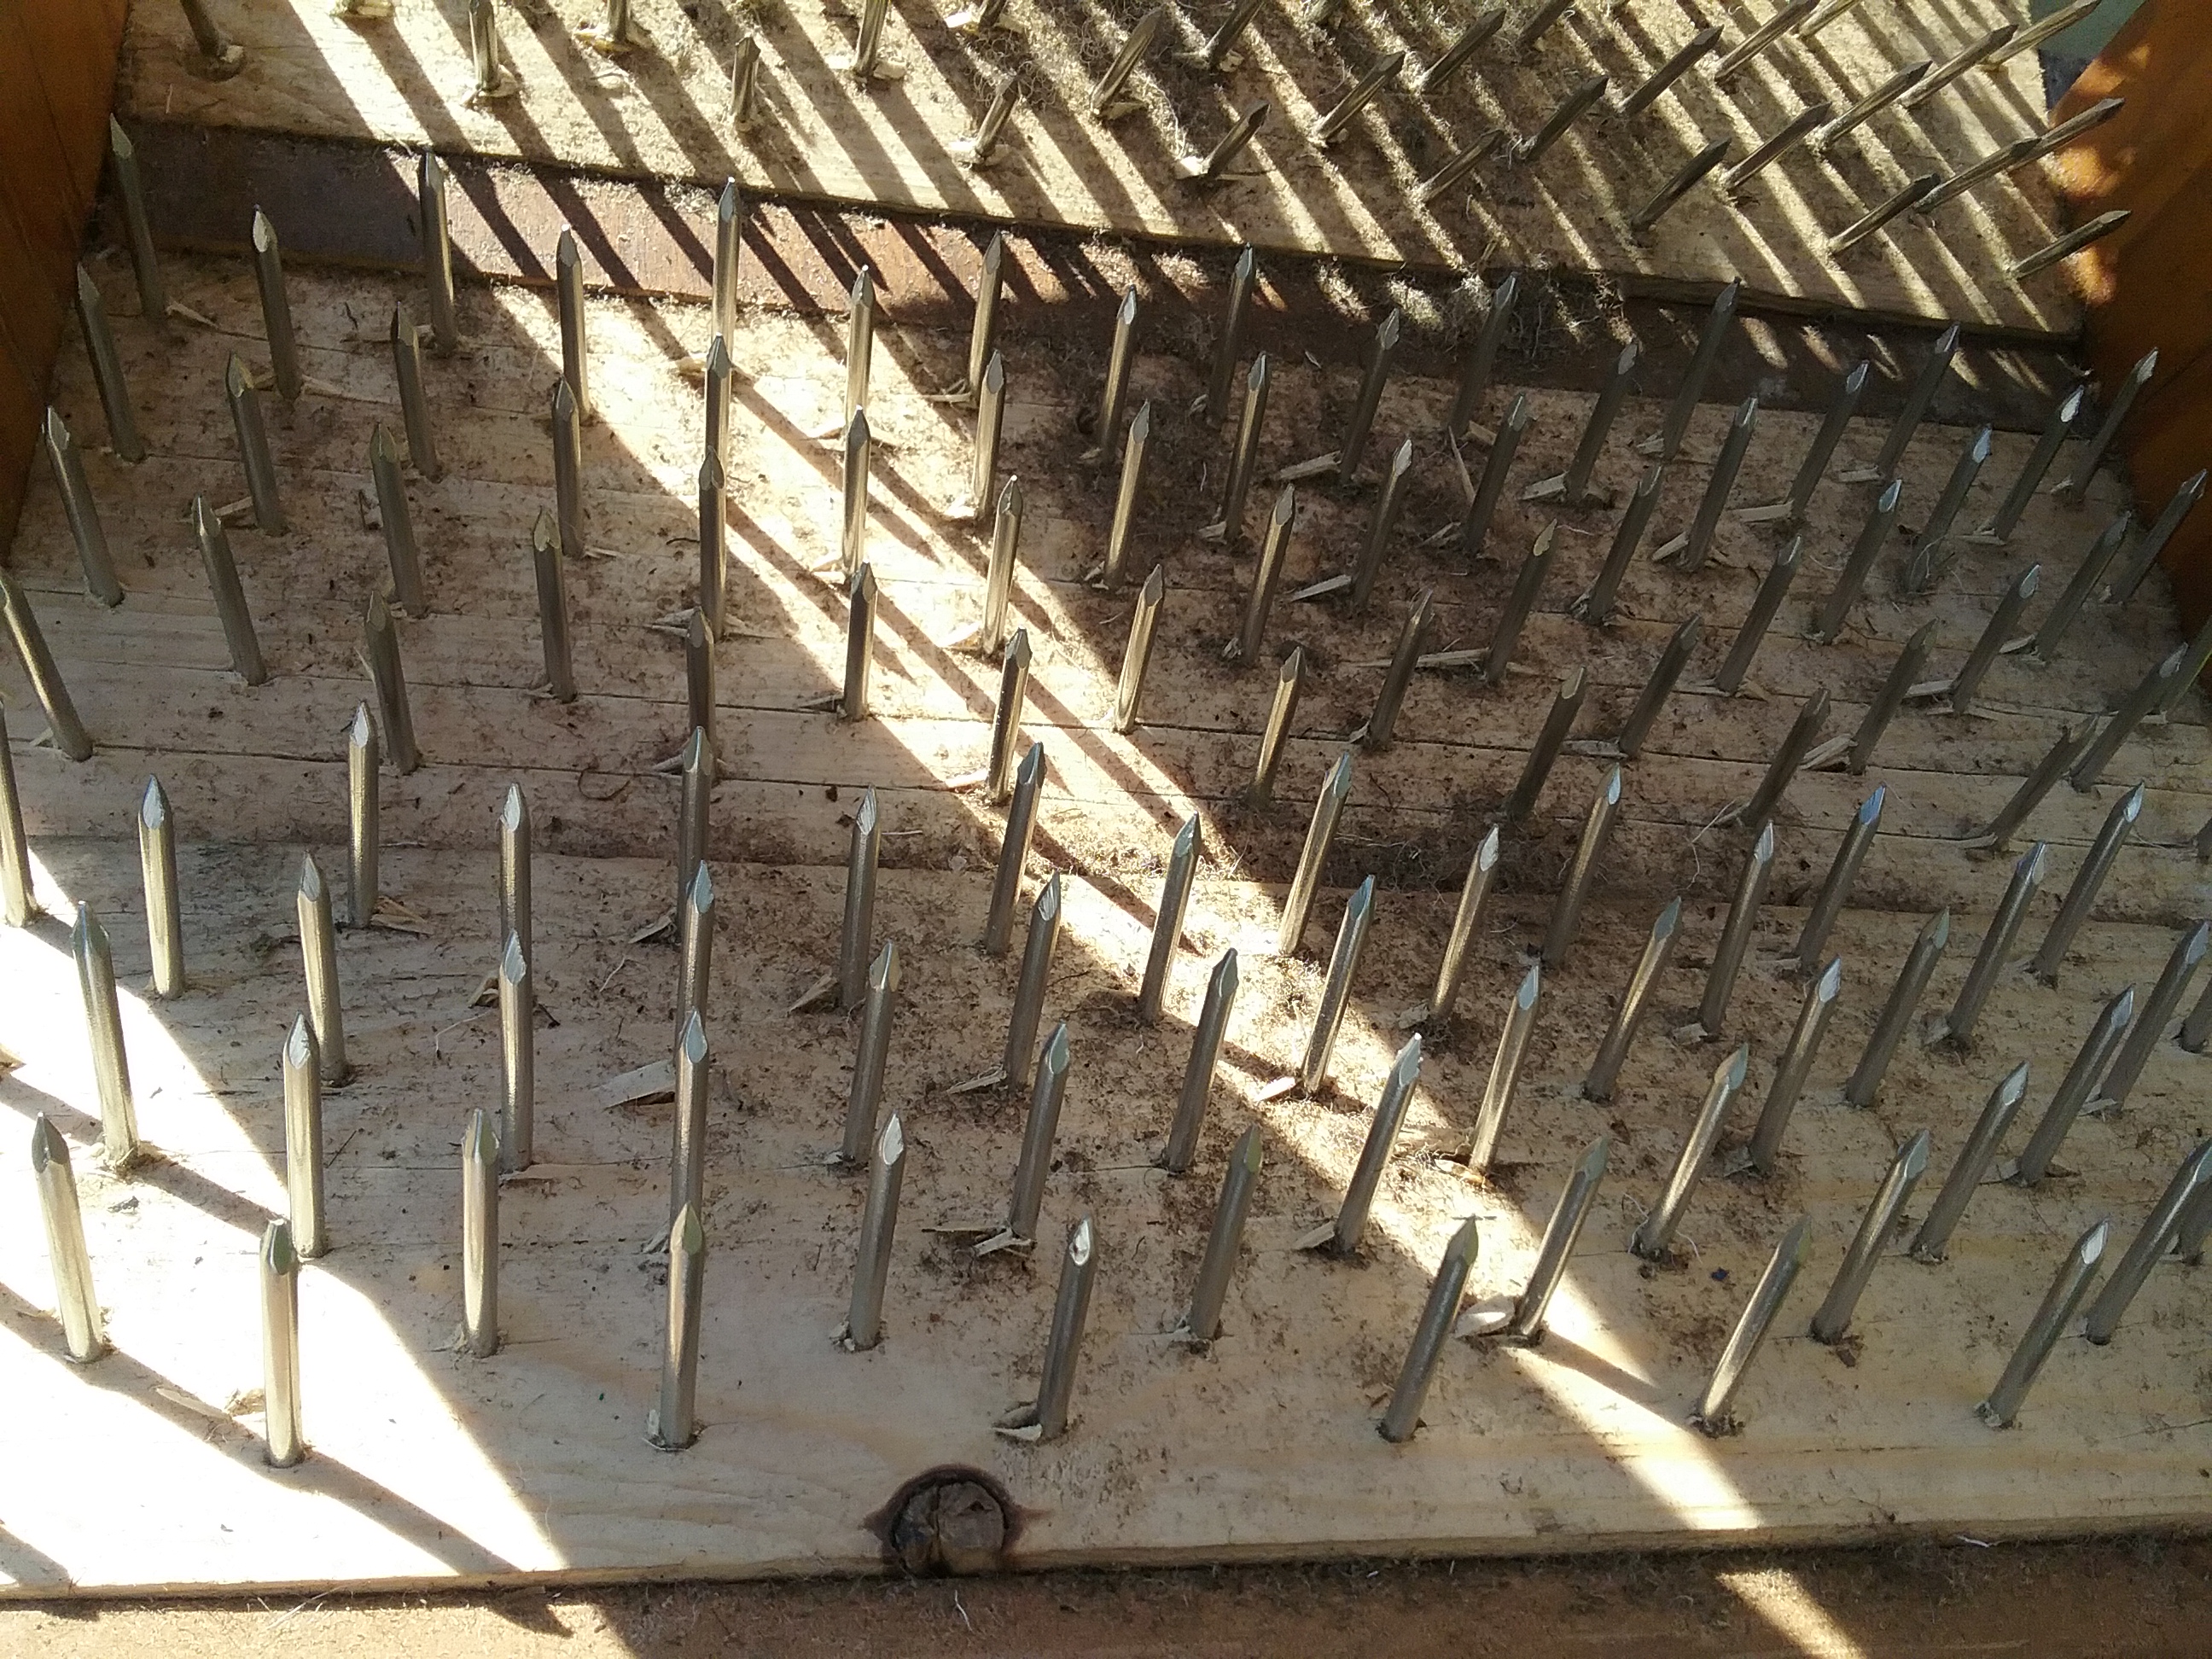
The bulk of the structure was made from pallet wood and some wood from a cabinet made by my late grandfather that had been broken down for firewood. The handle (which is not shown on the left) is part of a broken chair and the metal bolts came from my father’s sheds. The nails were purchased as they needed to be the right length and ideally rust resistant so they would last longer and wouldn’t colour the fleece. Below is a slideshow of images after it’s construction.
Does it Work?
I’ve found it’s best function is to open up fibres to remove any dust and debris. The Ryeland fleece had been covering me with dust during carding and it was difficult to identify dark VM against dark fleece. By opening up the fibres, the wool picker allows most of this to fall out and that which doesn’t is easier to identify when carding, speeding up the process considerably (below are some photos of the dirt after picking a handful of fleece). It doesn’t work with fleeces that are very short stapled as the fleece gets stuck to the nails and doesn’t move through. I am yet to try it with longer fleeces, but I will update this post when I’ve tested it.
If your fleece is not dusty and doesn’t contain much VM, then it probably isn’t necessary to put it through a wool picker first. If you’ve got a fleece that has more VM than you expected that you’re struggling to get out before you spin it, or it is very tangled, then a wool picker does make the job easier.
With the weather getting warmer I decided I needed to find a way of washing fleece that was kinder on the environment and didn’t require as much water and washing powders/detergents, as greasy fleeces can use a surprising amount. I read about suint fermentation a long time ago and thought it too good to be true, but decided to have a play around and see what happened to try and make my wool processing more eco friendly.
What is Suint Fermentation?
Suint is the name given to the sweat and mineral deposits that build up on a sheep’s fleece, this is different from lanolin which is the greasy part. Finer fleeces with shorter staple lengths tend to have more suint and lanolin. By soaking a raw fleece in rainwater, these components and the bacteria on the fleece form a natural ‘soap’ which cleans the fleece when left in the sun to warm up. This suint bath can be re-used again and again, getting stronger after each new fleece. If you’re like me and enjoy a sciencey explanation of the chemical reactions that occur, I recommend reading this post by Blue Barn Fiber.
What did I do?
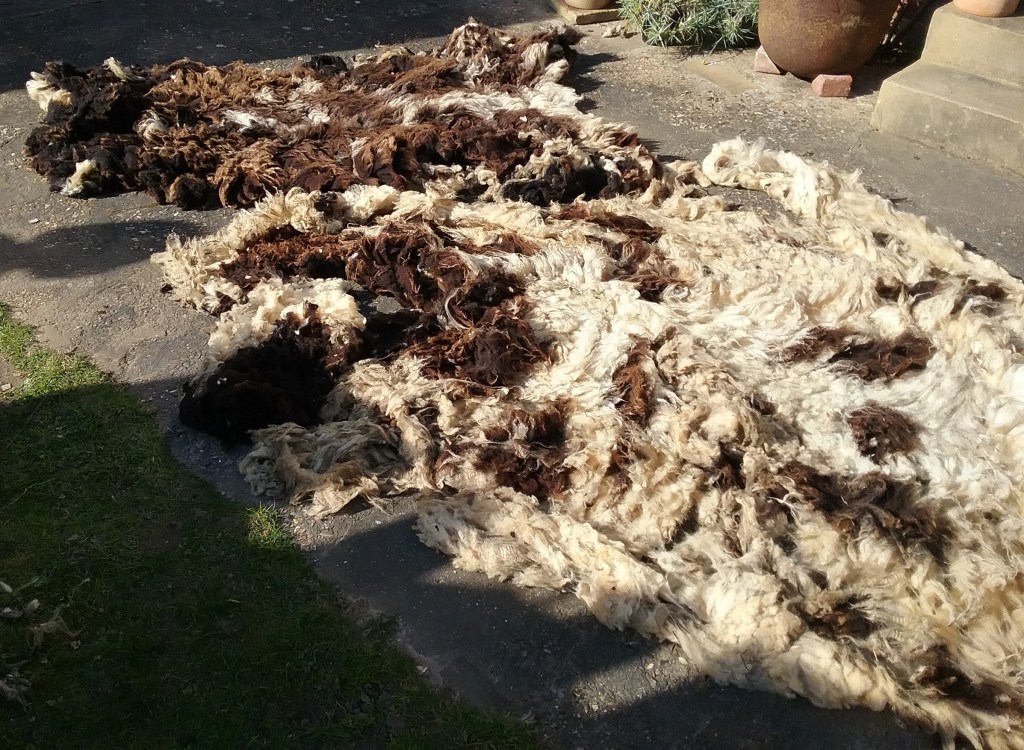
I recently had two raw Jacob fleeces arrive in the post (yes, my postman thinks I’m slightly mad!) and since the largest of the two would require a lot of water I decided to try suint fermentation (I’ll talk more about the fleece in a Jacob fibre prep post).
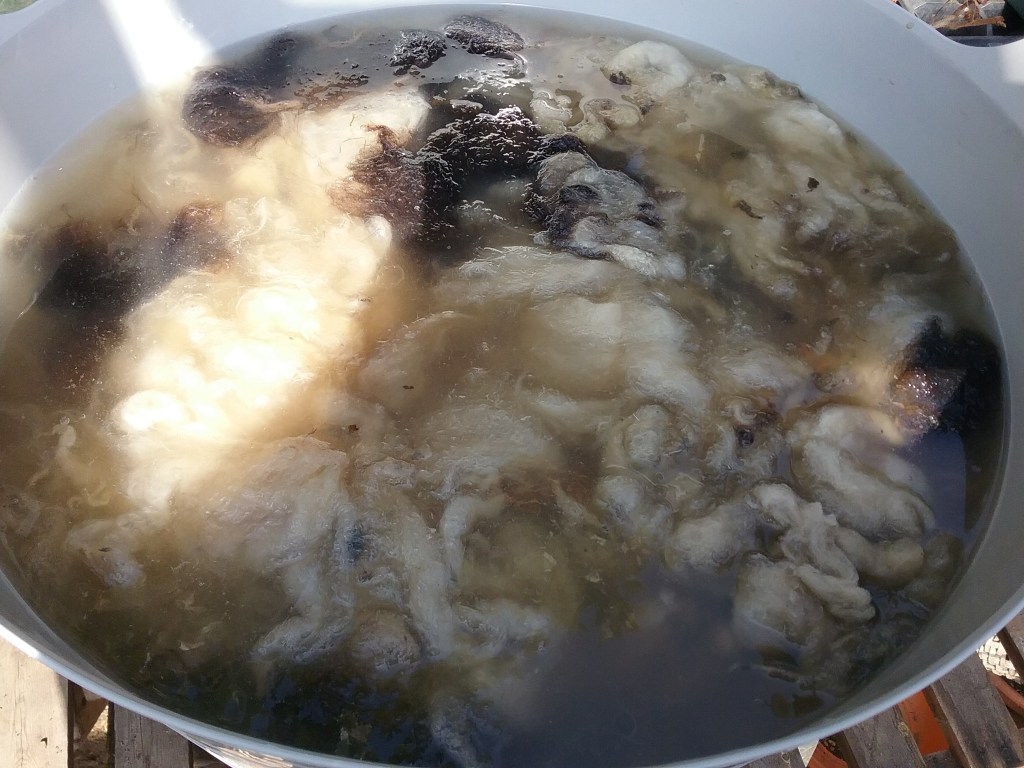
I filled a large plastic bucket with rainwater from a water butt and left it outside for a while to warm in the sun. Unfortunately when I came back it was just as cold as I left it, so I moved it into the greenhouse to get it to a more optimum temperature (I read that around 20 degrees celcius is good). I split the fleece in half and fully submerged the first half in the rainwater and left it (others using this method say it takes a week).
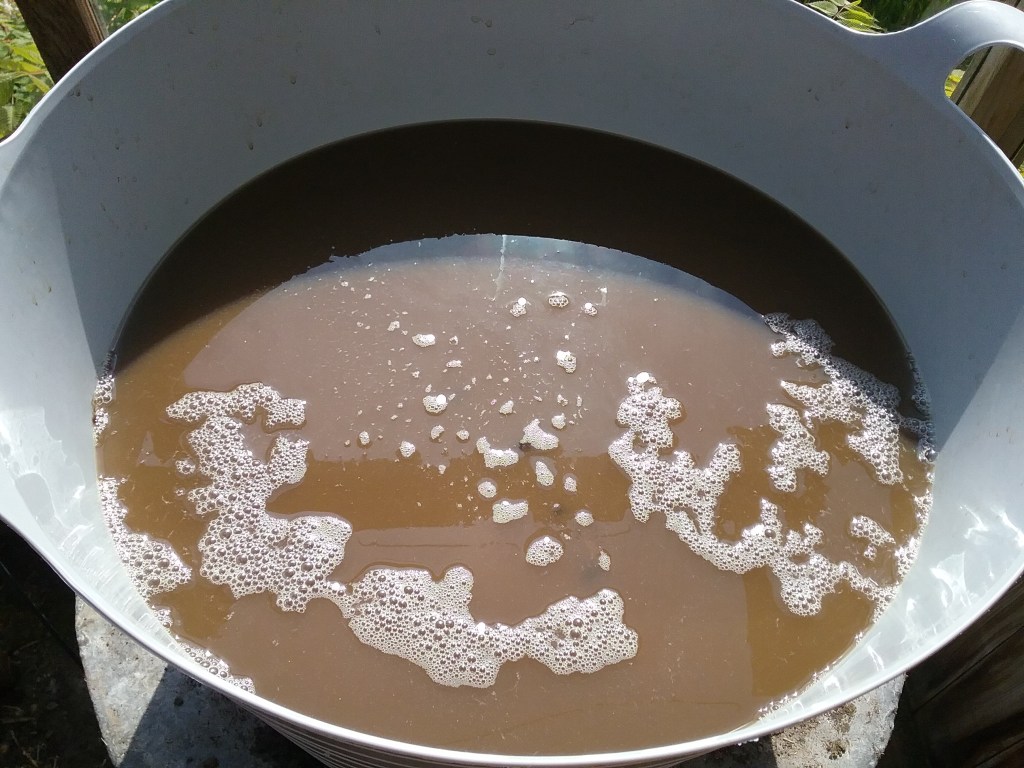
The water very quickly went grey/brown in colour and I checked it each day for any sign of bubbles on the surface and a potent farmyard smell that should mean it’s working, but didn’t notice either until after about 8 days. At this point I removed the fleece, draining the suint water back into the bucket before transferring the fleece to another bucket of fresh rainwater to rinse overnight.
Fleece submerged in suint bath
Suint water after removing the fleece
I then put the second half of the fleece in the suint water and topped it up slightly with more rainwater (most people recommend using a lidded container to reduce evaporation, as topping it up dilutes the suint bath, but I’m working with what I already have). The weather then got warmer so I saw bubbles on the second half in about 4-5 days and the smell was much more potent when I removed it for its rinse.
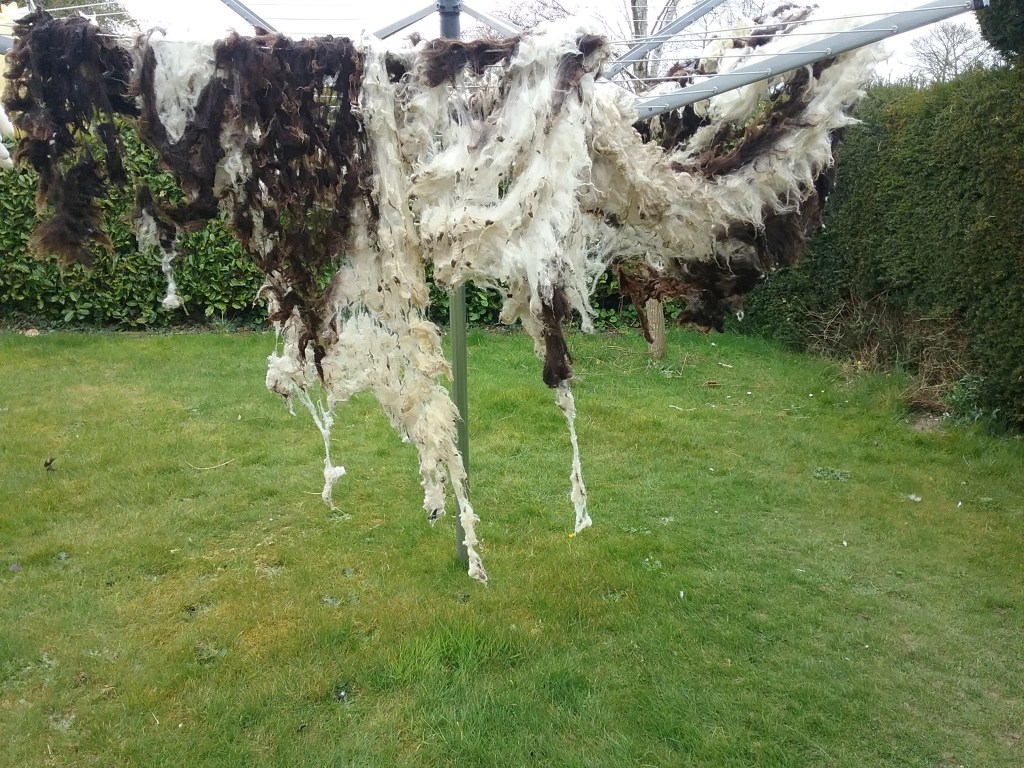
After rinsing, I put the fleece out on the washing line to dry. The smell of the suint bath is supposed to vanish when the fleece is completely dry as the bacteria in the process are anaerobic, so only function in water.
Jacob fleece drying
After it dried I was surprised to find the smell had mostly gone, the fleece wasn’t greasy and it was wonderfully soft after it’s suint bath. Normally when I use washing powder, although the fleece is still soft, it has a slight stiffness to it that I hadn’t noticed before (most likely because it’s been stripped of all it’s lanolin in a short space of time and tap water is generally hard). There was still some dirt at the very tips of the fleece, so I washed it once through with some delicate wool wash to make sure the smell had completely gone and any remaining dirt was washed off, but one wash with tap water compared to my usual 2-4 used much less water.
There was another benefit to the suint bath, as although it will never remove any VM from the fleece, the soak does open up the fibres so small plant matter and any neps tend to fall out. Oh, and the rinse rainwater is amazing for watering plants!
I’m going to summarise this long post with a little pros and cons table of suint fermentation and some links to some good posts by other bloggers that I used in my research if you’re interested in any further reading.
Pros
It’s uses much less water and washing powder so is more environmentally friendly
If you already have a container it won’t cost you anything
It doesn’t require any hard work – you can leave it for at least a week, but if it’s left longer it won’t hurt
It leaves it softer than washing powders etc. and hard water.
Fleece is less likely to felt as it doesn’t require any agitation or dramatic temperature changes
Cons
It smells – Set it up it outside or in a greenhouse
For particularly greasy fleeces you may still need to wash them a few times with washing powders
The process takes longer than washing in a bowl
It’s weather dependent requiring both rain and a high temperature.
Update: A further blog post detailing improvements made to the suint fermentation process can be found here and I also have a YouTube video of the whole process including drying updates:
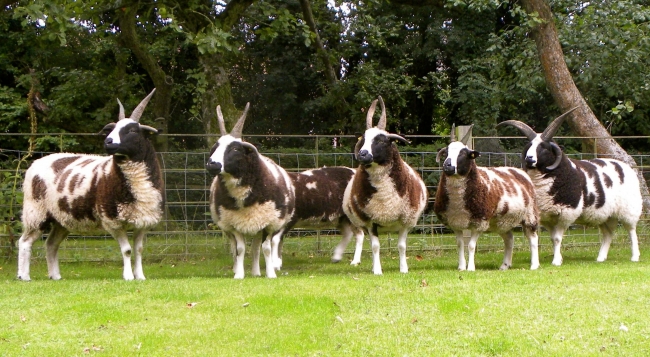
A Flock of Jacob Sheep Photo Credit to Lesley Partridge
History
Jacob sheep are believed to have originated in the Middle East during Biblical times and take their name from Jacob the shepherd in the Old Testament. Since then, it is said the breed travelled from the Middle East through Africa and finally to Europe before being imported into Britain during the 17th and 18th centuries. Their unique colouring and horns made them popular with the English gentry who kept them as ornamental sheep to graze their parklands. Jacob sheep were classed as a rare breed after WW1 when the number of flocks declined, but the work of the breed society and selective breeding to increase meat production of the Jacob has led to a significant increase in their popularity and number.
Fleece Research
The wool from Jacob sheep presents a diverse set of uses to crafters. The colours in one fleece range from browns to whites and blacks with varying staple lengths in the same fleece. The variation in fibres means that one fleece can undergo different preparation methods and while shorter fibres can be carded, longer fibres may take well to combing. There are also multiple colour options when it comes to spinning, from blending shades to spinning each colour as it comes. My trusty wool books provided very little information on the tendency of Jacob fleece to felt, but last year I attended a local wool fair, where I met a crafter using Jacob fleece to make woven rugs who informed me that it was quite resilient.
Commercially, Jacob fleeces are used to make anything from carpets to clothing so I am excited about the creative possibilities this fleece could present me with. So far the fleeces I have worked with have been short stapled, so the opportunity to improve my worstead spinning is exciting. The fibre preparation is slightly more daunting, as I don’t own wool combs so the longer staples could be harder to card, however any kemp should be easy to identify and separate with ease from the fleece.
Further Reading
The following sources have been used for reference
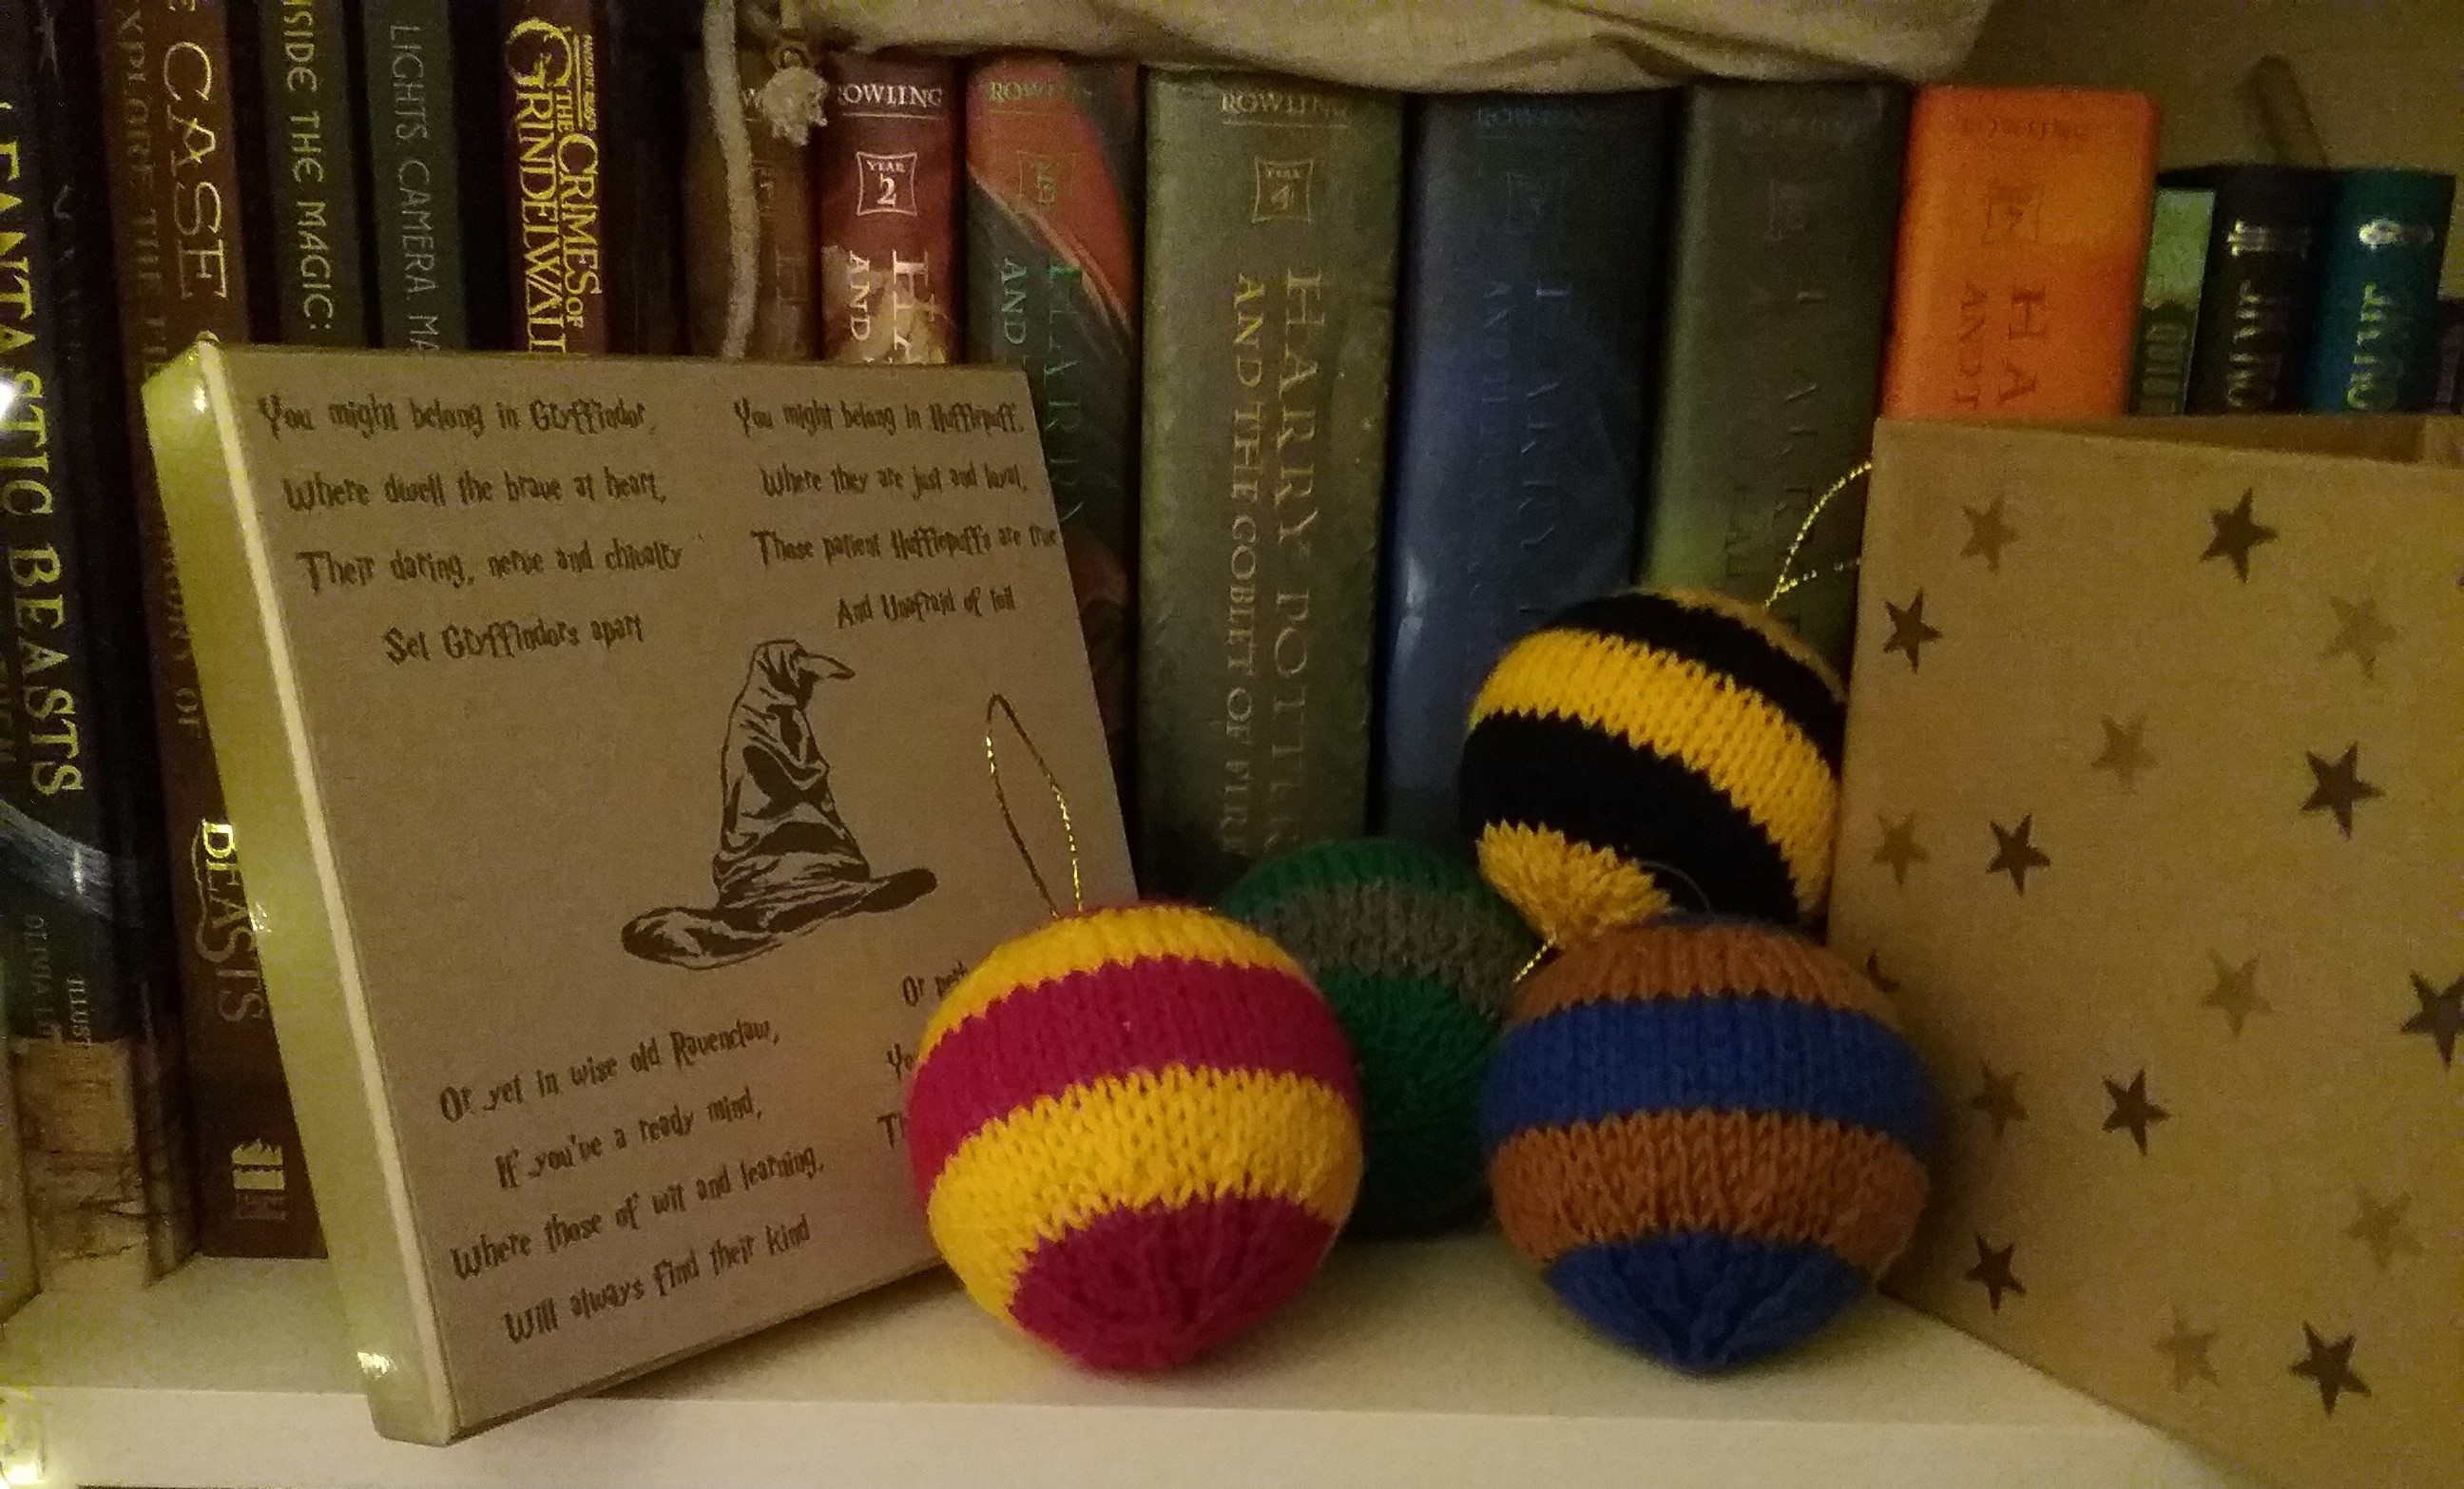
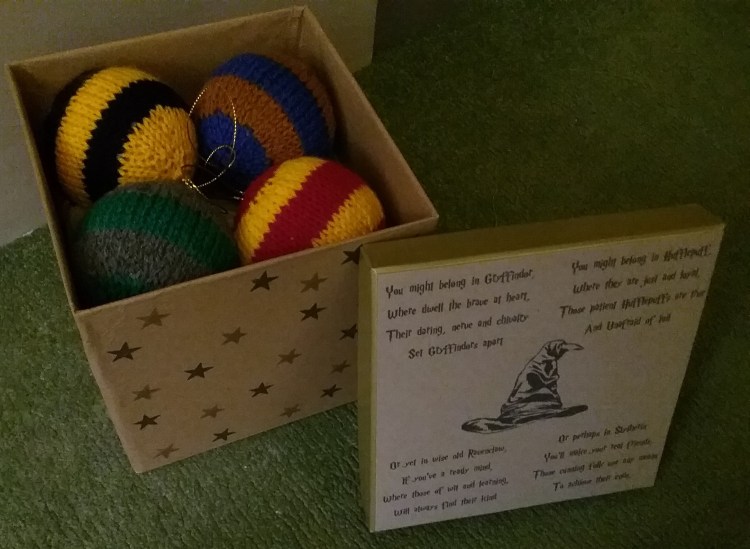
Whilst I’m still in the process of spinning my Ryeland fleece, I thought I would share a quick knitting pattern I bodged together last November to make Christmas presents for some friends (although they can be displayed at any time of the year). Whilst thinking of a way to combine Harry Potter, fibre and Christmas, I was inspired by the knitted house scarves and these baubles were the result. They are quick and easy to make and are a great way of using up ends of wool.
You will need:
A pair of knitting needles UK Size 6 (US 8, Metric 5mm)
4 x paper mache baubles with a 7cm diameter (I purchased mine from Hobbycraft)
A darning needle
Wool about standard DK weight in the following colours:
Red & Gold
Green & Silver
Black & Yellow
Blue & Bronze
I used up leftover bits of wool for this project, so unfortunately I don’t know the exact length it uses, but as the back isn’t visible I was able to neatly join several pieces of yarn without any lumps showingthrough.
I first attempted this pattern on Double Pointed Needles (DPN’s) so that there wouldn’t be a seam, but as the only DPN’s I own are made of vintage plastic and the pattern starts off quite tightly I managed to break one (oops!) so I decided to keep it simple. I found the seam wasn’t particularly noticeable, but for a cleaner finish, this pattern could easily be adapted for DPN’s.
The Pattern
With UK Size 6 Knitting needles cast on 5 sts
Row 1: Knit front and back in every stitch
Row 2: Purl
Row 3: Knit in front and back in every stitch
Row 4: Purl
Row 5: *Knit 2, Knit in front & back of next stitch* Repeat to end of row
Row 6: Purl
Rows 7-10: Repeat rows 5&6 twice more
Rows 11-20: Stocking stitch starting with a knit row
Row 21: *Knit 2, Knit 2 together* Repeat to end of row
Row 22: Purl
Row 23: *Knit 2, Knit 2 together* Repeat to end of row
Row 24: Purl
Row 25: Knit 2 together to end
Row 26: Purl
Row 27: Knit 2 together to end
Row 28: Purl
Cast off leaving a tail for sewing.
My colour pattern was as follows, but you can easily use other combinations to change the size of the stripes:
Rows 1-6: Colour 1
Rows 7-11: Colour 2
Rows 12-16: Colour 1
Rows 17-21: Colour 2
Rows 22-28: Colour 1
Making up the baubles
Once you have cast off, thread your tail of yarn onto a darning needle. Insert the needle through the opposite end of your cast off row and pull so the two ends meet to form a closed circle – this makes the bottom of the bauble. Then with the right side facing out towards you, begin to sew the two edges together using mattress stitch until you get about 1/3 of the way up. At this point you need to put your mache bauble into the cover and then continue to mattress stitch the seam. At the top of the bauble sew the two cast on ends together to complete the seam, making sure the hanging loop is threaded through the middle. Finally weave in your end neatly to the back of the work.
Since I was giving them as gifts, I decorated a cardboard gift box to display them in and tied it up with string.
Let me know if you have a go at making them in the comments below or feel free to send your pictures to me on Pinterest – I’d love to see them!
My initial approach to Ryeland was to draft short draw (worstead) until I had got a feel for the fibre and my tension was right, then I could experiment from there. Starting this way however proved challenging since Ryeland fibre is short and worstead spinning is primarily used with mid-longer staple fleeces, so once I had sorted my tension out, I quickly moved onto supported long draw which was much easier. My wheel has a Scotch tension and I found that I needed it to be quite tight to spin the Ryeland singles, with a reasonably strong uptake onto the bobbin (although not so strong that it snaps). I found drafting long draw easiest when the uptake on the bobbin felt like someone was holding the other end securely as I drafted back on the rolag.
With regards to any odd bits of VM and Kemp that were left in the fibre after carding, I found they did fall out during spinning as long as I kept my singles quite thin. Having said that, I believe all wool, like the sheep it comes from has a personality and a way it wants to be used, so although my singles were on the thinner side, I left in any soft neps and locks that had stayed together to add a bit of soft playful texture as I felt this fitted the look of the Ryeland sheep.
I am also hopeful that the other half of the fleece will contain less VM, as I lost track of which bit of the fleece was which after washing, so I think I have started with the rear and side areas which are more likely to have bits in.
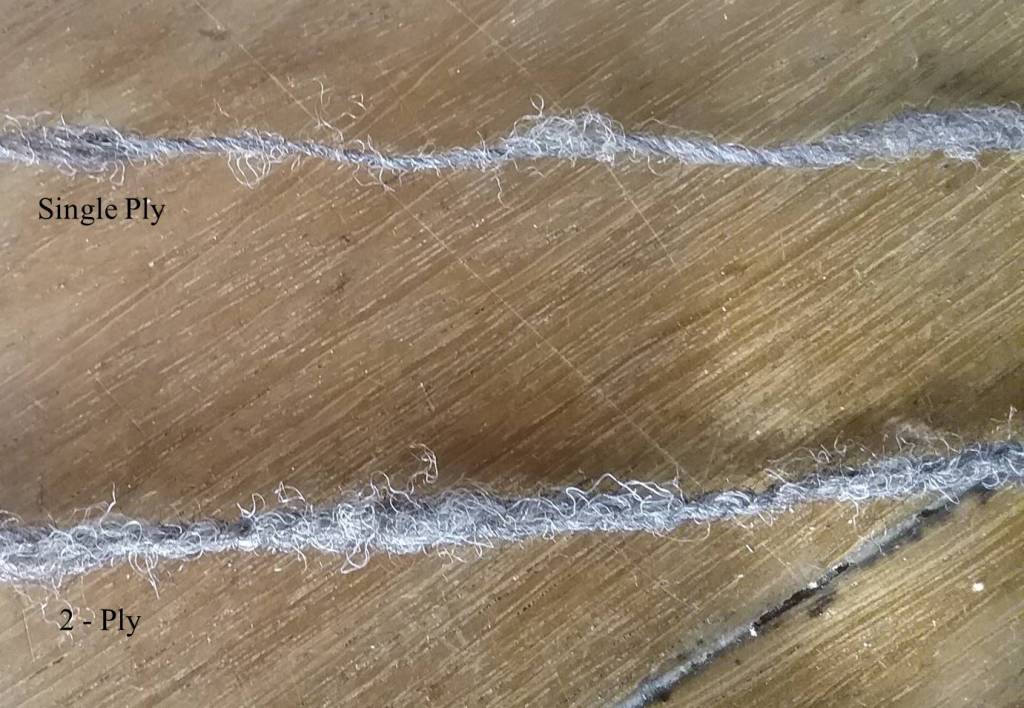
Plying
Surprisingly the Ryeland singles weren’t particularly energised, so kinks in the wool weren’t really a problem. I went for a 2-ply as I only have 3 bobbins at the moment, and anything else requires lots of centre pull ball wrapping! Plying was therefore straightforward and very quick. I’ll update this post when I’ve done an experiment with chain (navajo) plying at a later date to see what the result is. I also decided to measure the stretch in my plied yarn to help decide what my final project would be. When I measured it there was a difference of 4cm in length between ‘relaxed’ and stretched yarn.
Setting the Twist
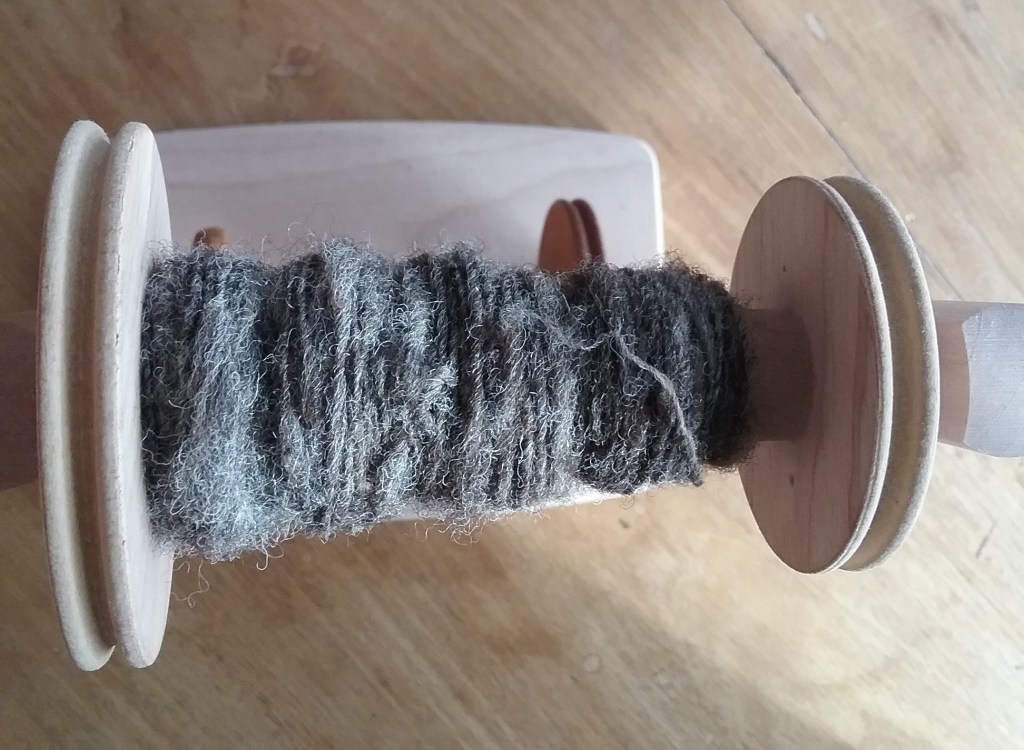
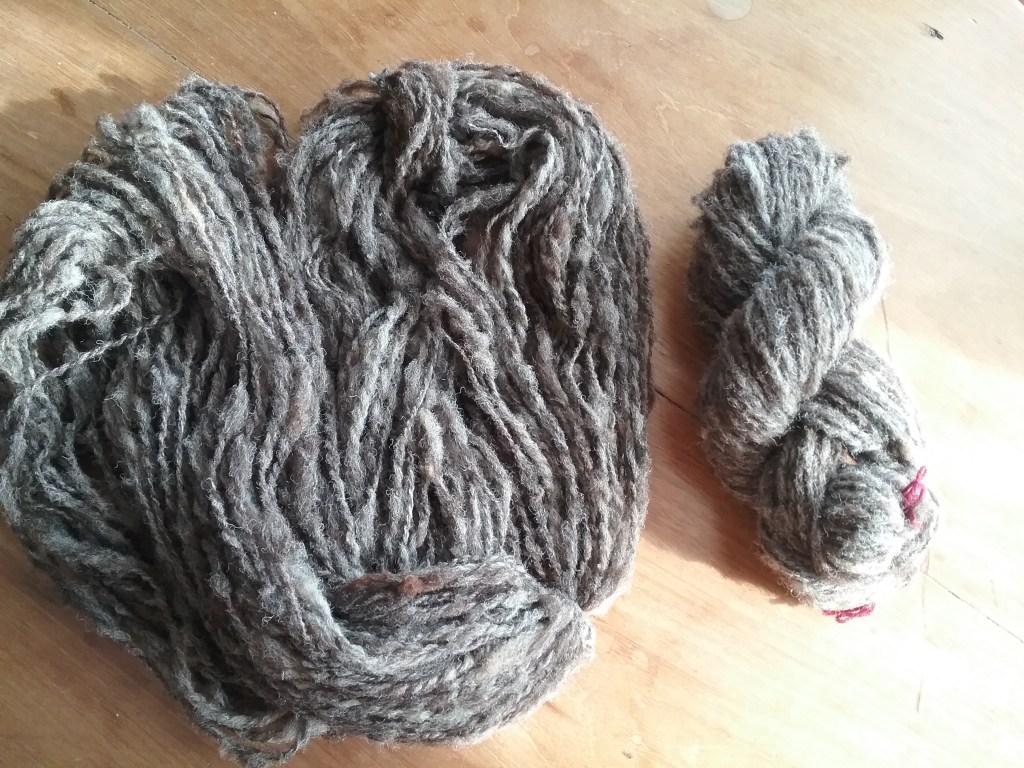
Initially I was quite disappointed with how the Ryeland looked when I wound it onto the niddy noddy. It wasn’t fluffy or soft and it seemed a bit stiff (when I took it off the niddy noddy it retained the shape at the ends), so I wasn’t sure what had gone wrong as it seemed so different from my research. I washed it once with washing powder to remove any remaining lanolin and rinsed it before hanging it out to dry. Normally yarn would twist up a little during drying and you need to hang something to weight it down (I normally make do with a chain of pegs), but since the Ryeland didn’t twist, I left it alone.
When it dried, the wool fluffed up as I had expected it to originally, so it seems the singles just needed to be washed to fall into place, similar to when knitting is fulled. The resulting yarn is soft and very squishy, but has a surprising worstead style drape despite it’s woolen qualities, which I’m excited to make use of in the final project.
Ryeland just off the niddy noddy on the left, much fluffier Ryeland skeined after washing on the right
I found the Ryeland was reasonably easy to work with, but had I started my fibre journey with this fleece, I would have probably struggled spinning it since the fibres are quite short. The colours in it are gorgeous and I’ve loved being able to experiment with blending techniques on the carders. I will play around with some on the drop spindle at a later date and update this post with the results as I think it may be harder on the spindle. My project in mind for this fleece is some sort of knitted cowl, so I can attempt something simple as a first project on a circular needle.