Background
I have a small stash of vintage belt buckles and clasps picked up from various charity and vintage shops over the years, and I’ve been meaning to get them fixed up with new straps so they’re functional again. I’d been thinking of sewing some from fabric or ribbon, but I also thought it would be fun to have a go at weaving one with my handspun yarn. A Google image search for initial inspiration for handwoven belts returned lots of brightly coloured tablet woven straps and plenty of bead weaving, neither of which were quite what I was looking for, so I decided to look for historical examples. Unfortunately, the nature of natural fibres means historic textiles often don’t survive, however there is belt from a Bronze Age outfit found in Borum Eshøj (image here) and several artists have recreated it (this site has several good quality pictures). I wasn’t aiming to replicate the belt, but it gave me a good starting point and helped me to envisage what my handspun might look like once woven into a thin strip of fabric.
I had some coarser zwartbles yarn left over from my gothic hood warp, so decided this would be a perfect project to use it up (and would also help with some stash-busting ahead of this years TDF). I hadn’t put away all my purchases from EAYF, so was looking at the yak and silk blend I bought from Yarntings thinking how similar the colour was to the verdigris in some of my buckles, and was inspired to create a belt that incorporated it.
The Making
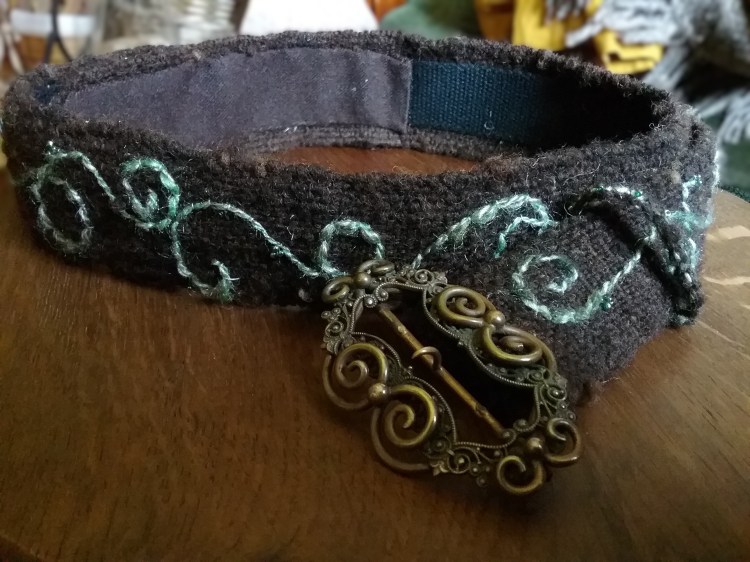
I began by spinning half of the yak/silk into a 2-ply yarn roughly matching the thickness to the Zwartbles; I didn’t know how much yarn I would need, so erred on the side of caution. I then set up a small sample on my pin loom with a Zwartbles warp and yak/silk weft so I could place buckles against it to choose my favourite (I forgot to take any photos at this stage!). I settled on a buckle that is quite Georgian in style with a prominent swirl pattern and some background filigree motifs. I’m not sure if this was originally a belt buckle, it seems too tall to have been a shoe buckle – either way, it’s an interesting design and deserved to be worn again.
I then measured the fastening slot that the strap would need to fit around, before setting this up in dpi on my rigid heddle loom. I opted for using a 10dpi reed, since this would give me the dense weave I was looking for, but in hindsight I think my warp yarn was more suited to 8dpi as I ended up with a few broken warp threads through repeated rubbing against the reed, which I’ll come back to later. I set up my weaving width on my weaver’s choice heddle and added some extra larger pieces to either side to help with stability (I find these interchangeable heddles so helpful for experimenting with mixed thickness warps, but it also saves me from having to buy /store lots of regular heddles).
I measured my warp to fit around my waist with some overlap where it would fit through the buckle, then added a little over 20% to account for shrinkage and loom waste. My loom threaded, I set about weaving. I started by replicating my pin loom sample using the yak/silk as the weft, however found myself not liking the effect (my sample warp was spread slightly wider), as it looked a little too like a checkerboard for what I envisioned. I tried a double clasped weft so the yak/silk would have been woven in the centre, but felt this made the weft too muted. I probably could have incorporated the yak/silk into the warp to have made the weft pop a bit more, but rather than re-threading everything, I decided I would make the belt with a plain weave in the zwartbles and embellish it with the yak/silk.
Decision made, I un-wove my experiments and started to weave with the zwartbles, being careful to keep my selvedge’s as straight as possible. Since I wanted a dense fabric, I beat down with the reed and then with the shuttle on the next pass, however I found that some of my handspun was slightly thicker in places, and repeated passing through the narrow reed caused one of my warp threads to separate. I repaired this rather unconventionally by knotting an extra piece of thread between the breaks and rigging a pick-up stick to help with tensioning, as I had a limited quantity of the matching warp thread and knew the knots would be covered and supported on the back. To mitigate it happening again, I decided to move the heddle between sheds and beat only with the shuttle, which worked well. I did have a few more warp thread breaks as I went along, but these were easily repaired.
Weaving complete, I removed it from the loom and washed it. While I’d been careful to keep my selvedge straight, I did notice that due to the slight variations in yarn diameter, there was a very gradual difference in fabric width, which is only really apparent when the fabric is folded over itself. Interestingly, perhaps because of the handspun variation or the repaired warp threads, there is also a slight curve to the fabric, which is a happy accident since it will follow the curve of my waist when worn.
Embelishment
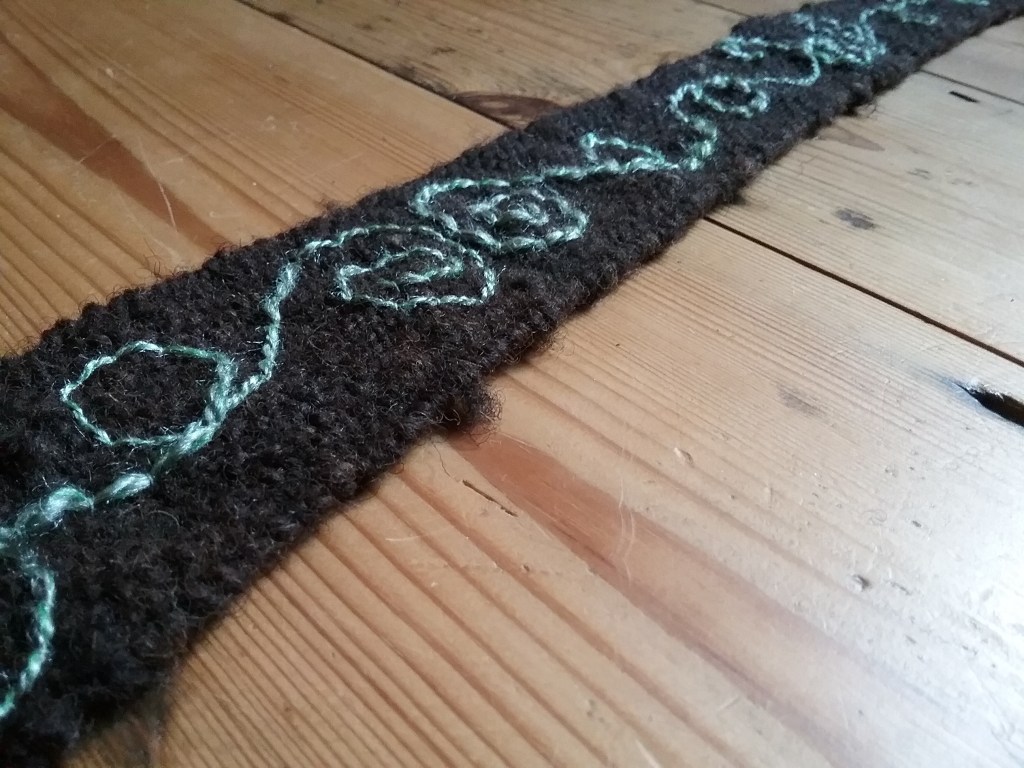
I imagined Celtic style patterns for the embellishment, but also wanted to highlight the swirled pattern on the buckle itself. To keep the yarn smooth and emphasize the colour I decided to couch it into position on the belt, letting the yarn follow the swirling path that seemed natural, guiding it at the start and end of a section into a swirl similar to those on the belt buckle.
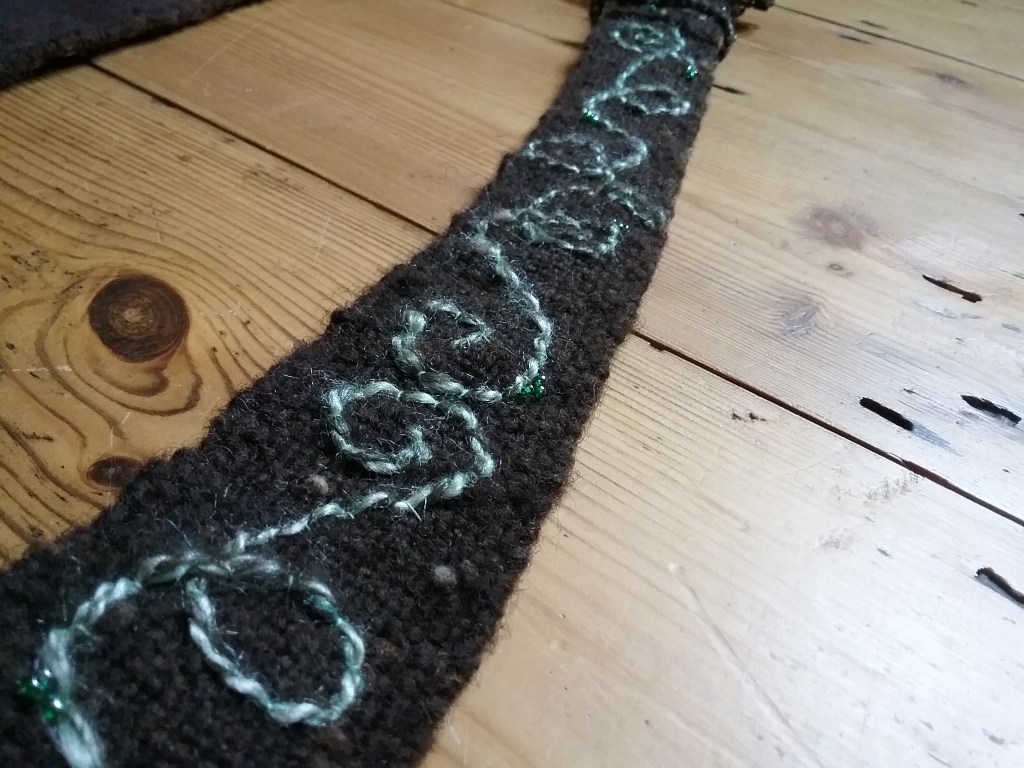
I felt it was missing something mystical so decided to experiment with some beading in places to evoke the little berries on the buckle. I left the area that would be pulled through the buckle without any beads to avoid them catching and fashioned the end into a point to make it easier to thread through.
I then added some cotton webbing to the back of the belt, both to give it some structure, and to protect the back of the embroidery, however I stopped short of the part that would slide through the buckle since it was too thick. To cover the back of that area I used a scrap of brown wool fabric, which also allowed the catch to pass through gaps in the weave without the need for setting in grommets (which means the sizing is much more adjustable).
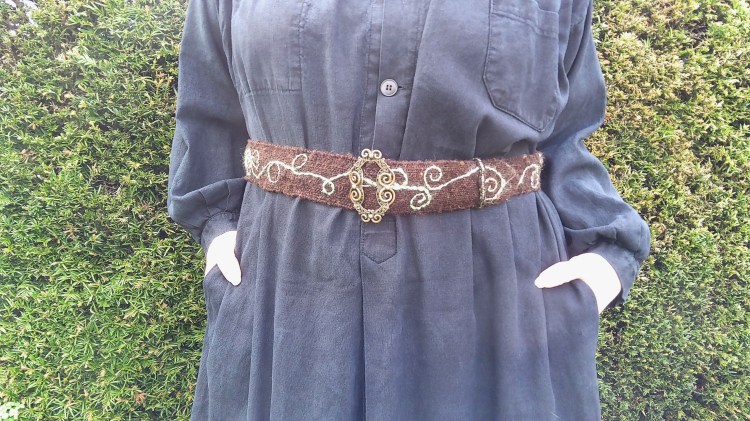
Finally, I made a braided belt loop so the overlap didn’t flop downwards (this was done in a cobra stitch I remember using to make scoubidou’s at primary school!), and with that the belt was complete:
Overall, I’m pretty happy with how the belt turned out – it’s really comfortable, holds good structure, and since I have nearly infinite fastening options I can wear it over everything from tunics to coats without the fit being compromised (I might even be able to fit a distaff in the side of it to spin from!). My one slight grievance is the catch being a bit fiddly to get through the fabric, however you may be able to see in the very first picture that the buckle originally had 3 clasps on the centre bar, but only the middle one remains, so I think this is more to do with the centre bar twist and the catch angle than the belt strap itself (having said that, once fastened it doesn’t readily unhook, so I can’t have it both ways!).
Happy Weaving!

This is such a fun project using materials you had on hand! Very creative and also functional.
LikeLiked by 1 person
I find sometimes the best projects come out of working with things you already have in your stash. I’m definitely going to experiment with making some more woven belts in the future as it was good fun!
LikeLiked by 1 person