This is my 5th year taking part in Wovember – a month celebrating everything wool. If you’re curious about how Wovember started you can visit the original website here and also the newer Love Wovember website. In previous years I’ve explored what wool is, given book recommendations, investigated the connections between wool and fairytales/mythology and released some Wovember Wind Down videos (I have a new Wovember’s Past page should you want to explore the archive).
This year I’ll be exploring how accurately spinning & weaving are represented in film and literature, sharing academic contemplations and tackling some projects using the Black Welsh Mountain fleece I’ve recently been processing (if all goes to plan, by the end of Wovember I’ll be looking more like the wool witch I’ve been affectionately termed!). There’s no word prompt challenge on Instagram this year, (though I’m sure Wovemberists will still be sharing woolly gems of information throughout the month), but I thought it would be fun to share some woolly knowledge in the comments section too; so do feel free to share any fun and interesting wool facts, references/bloggers/woolly people you recommend, or questions you have about wool on any posts throughout the month!
I look forward to joining you over the coming weeks – and if you or anyone you know is also running with Wovember in their own way do let me know!
I purchased this fleece from an online marketplace several years ago when I was just starting out and hadn’t heard of yarn shows, made connections with local flock owners, or discovered breed societies selling fleece online. I also didn’t know that when buying fleece, it’s always good to check for weaknesses in the yarn by tensioning a lock in your hands as any snapped fibres indicate a poorer quality fleece. The seller contacted me apologising that the fleece had got unexpectedly damp in storage and that they could dry it out before sending it to me, or refund me, and I opted for the former as I was happy to take a chance and the fleece wasn’t pricey.
I’ve since read several spinning books which suggest that any fleece that isn’t up to standard is only good for compost, and while wool contains a lot of nutrients, I’m of the opinion that all but the most dirty, tangled fleeces can be used for something – it just takes a bit more preparation and thinking outside the box, so hopefully these BWM posts will serve as inspiration for anyone wondering what to do with an imperfect fleece.
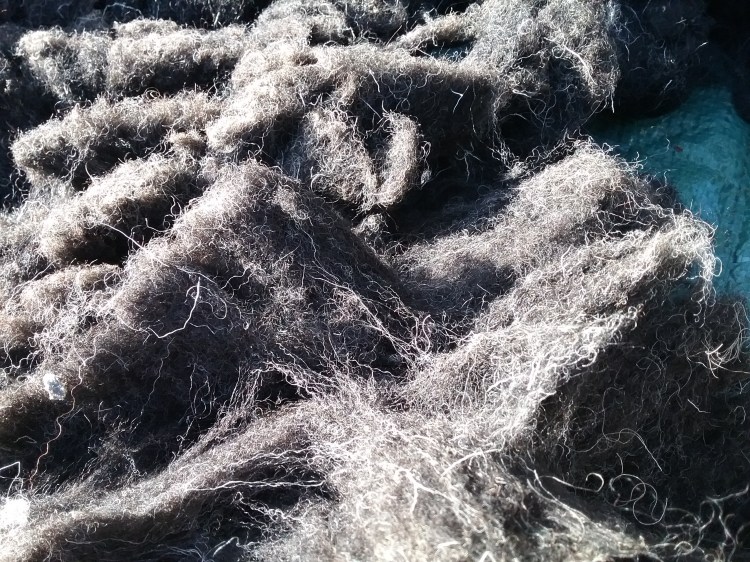
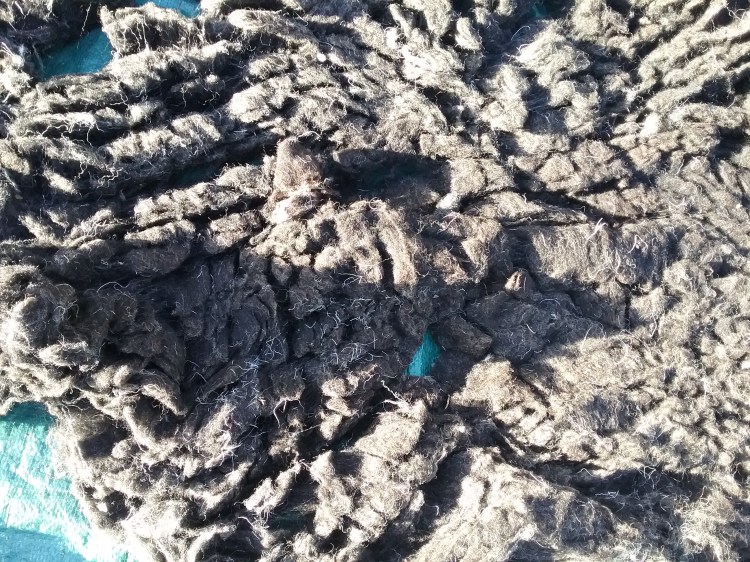
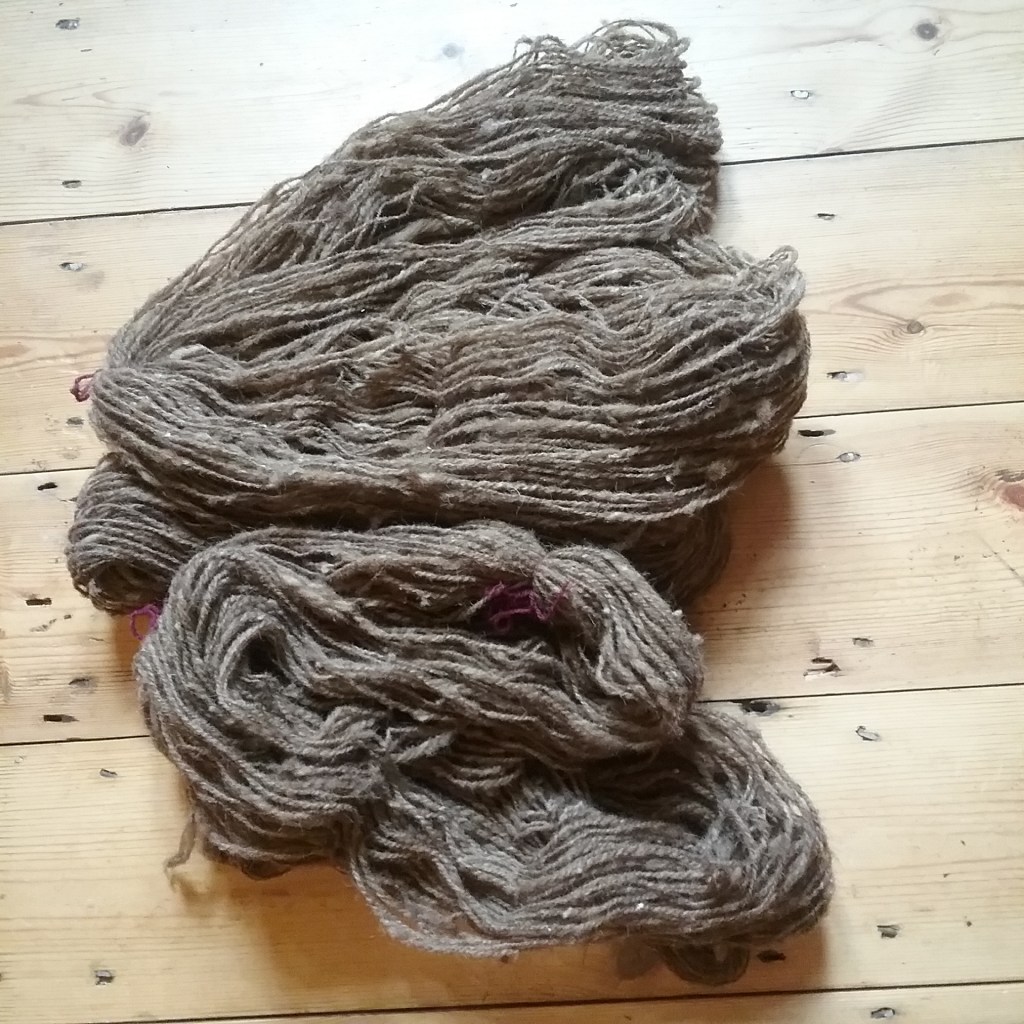
Close up of the BWM fleece
Washing
Once the fleece arrived I inspected it (there was very little VM or particularly dirty areas), washed it in the suint bath and then detergent, dried it thoroughly and stored it in a cloth sack indoors until I had time to process it. Unfortunately I don’t have any photos of the washing as I didn’t record as much in my early days of blogging!
Combing
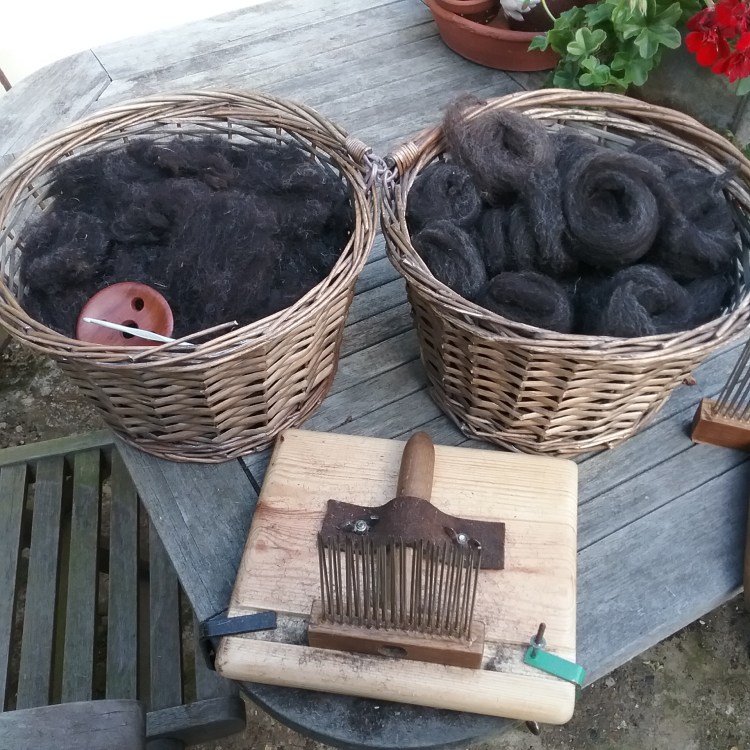
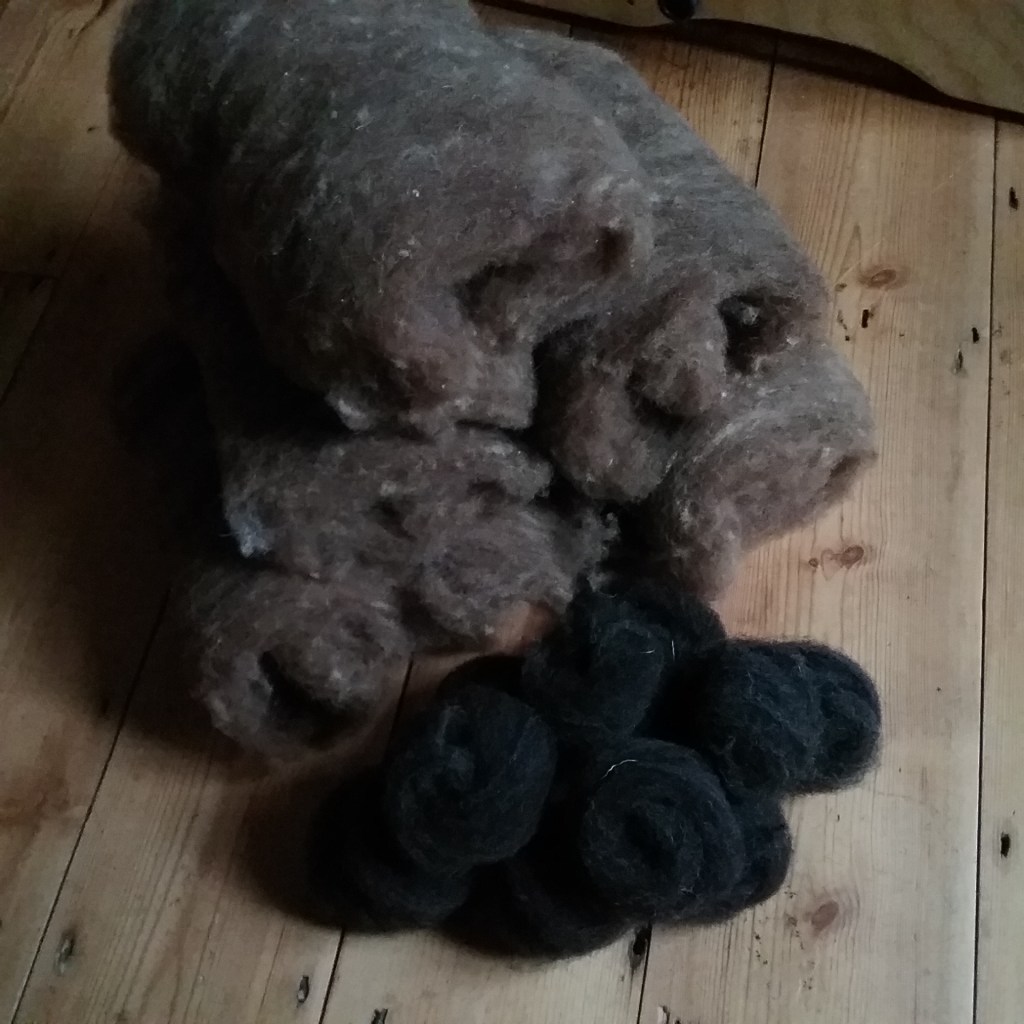
When I got the fleece out ahead of this year’s TDF I tested to see if the fibres snapped in my hands – some did, but most of the fleece seemed ok. I decided to comb rather than card as combing separates out the longer and shorter fibres and would also separate out any broken fibres from the combed tops. This would give me the best fleece to spin with and mean that I could use the combing ‘waste’ to felt with, as any broken fibres wouldn’t matter.
Baskets of combing waste, combed nests and some very dusty wool combs
Combing was fairly straightforward, although some areas had a shorter staple length, which made combing a little more challenging. It produced more combing waste than I was expecting, which is good for the felting project, not so good for spinning, but happily the project I have planned for that shouldn’t require too much yarn!
Since my experience with this fleece is likely to be different to working with better quality BWM fleeces, do feel free to share your experiences in the comments below!
Black Welsh Mountain sheep are some of the only sheep in the UK to produce a purely black fleece as opposed to a very dark brown (although sun bleaching over time causes the tips to become shades of brown as seen in the photo). The breed is referred to in writing dating back to the medieval period when the fleece colouring was highly desirable, but has since undergone selective breeding to create a more pure black colour1. As the name suggests, the sheep originate from Wales and although this remains the primary location of Black Welsh Mountain flocks, in 1972 three rams and thirteen ewes were imported to North America, from which North American flocks today derive2 .
Fleece Research
This fleece has a gorgeous natural colour, so there’s no need to dye it (although overdying dark fleeces can produce interesting results). It reportedly has little to no kemp with easy to separate locks, therefore fibre preparation should be quite straightforward. Although not the softest of fleeces, it has historically been used in Welsh woollen clothing, but it is durable enough to be used in rugs and blankets; a good all rounder. I should note at this stage that the fleece I will be working with over the coming BWM posts was an online marketplace purchase gone awry from my early days of spinning, so my experience with BWM is very unlikely to be typical of all fleeces of the breed (but I’ll talk more about that in the fibre prep post).
Photo permission kindly provided by the British Coloured Sheep Breeders Association who have a directory of breeders who sell coloured fleeces so you don’t have to take a gamble on online marketplaces – https://www.bcsba.org.uk/
British Wool Marketing Board (ed.) (2010) British sheep & wool: a guide to British sheep breeds and their unique wool. Oak Mills, West Yorkshire: British Wool Marketing Board. ↩︎
Robson, D. and Ekarius, C. (2013) The field guide to fleece: 100 sheep breeds and how to use their fibers. North Adams, MA: Storey Publishing. ↩︎
Back in 2020 I wrote about my experience washing fleece using suint fermentation and somehow that blog post about a bucket of dirty water has gone on to be the most viewed thing on my blog and something I get asked the most questions about. One year later I wrote about some of my updates to optimise the suint method, including bagging the fleece and having a lidded container, but something I have still struggled with is getting fleece dry in the unpredictable UK weather.
A wet fleece fresh out of either the suint bath (or a tub if you’ve opted to wash it with detergent) can take around 2-4 days to drip dry completely depending on temperature and wind (wool can absorb around 30% of it’s weight in water). If you’re in the midst of a heatwave you can leave the fleece outside for as long as you need, but if rain is forecast, or it’s nearing the end of the summer and you still have one last fleece to dry, you might find yourself as I did, in a cycle of moving partially dried fleece undercover and then laying it out again. It can be quite tricky to squeeze all the water out of a fleece by hand (and depending on the fleece, handling it too much might risk felting). I’ve spoken to some people who use electric spin dryers on low/no heat, but I’m not sure how it would cope with suint water, and it’s not the most sustainable option.
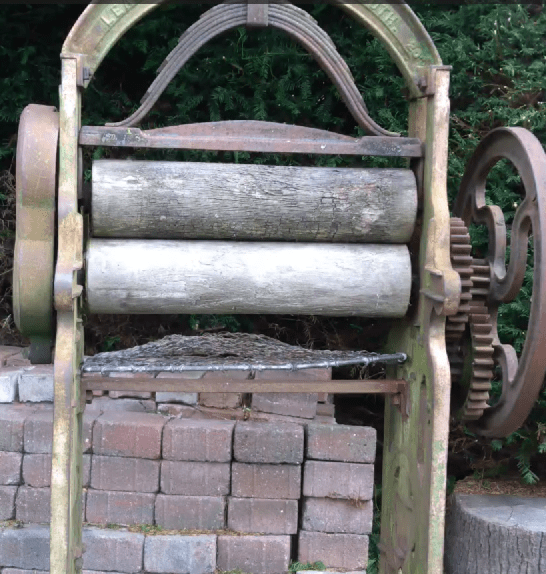
But, thinking along the lines of laundry drying did give me a good idea – why not use a mangle? It can be tricky to find working mangles nowadays with many people using them as decorative garden ornaments, however I was lucky to come across one on Gumtree that had been well looked after, despite being outside. The rollers could do with a sand, the wooden handle is falling to pieces and it’s missing it’s wooden shelves (something on my to-make list), but the moving parts all work and since I planned to put the fleece through the mangle in it’s sack, it wouldn’t get caught on the rollers. Thankfully it worked (I tried two passes through the mangle, but the second didn’t really make much difference) and my drying time was decreased to a day, though I did opt to put the fleece out again the following day just to be on the safe side before storing it away. So, I’m hopeful that next year with the help of my mangle, I’ll be able to get a lot more use out of my suint bath.
Since I’ve been delving into the realm of video making I thought it was about time for another update to my suint process (mangling included):
As ever, let me know in the comments if you have any questions or suint bath tips and tricks of your own to share!
(or an ode to the projects you think will ‘only take a day’)
Falling down the fibre rabbit hole has led me to explore sustainability, particularly of clothing. There are many problems with fast fashion; environmental pollution from synthetic materials and dyes, overconsumption, and worker exploitation to name but a few. Working with and researching wool over the years has made me acutely aware of this and I’ve found myself becoming a bit of a fibre snob, checking labels and avoiding fast fashion to slowly curate a more sustainable wardrobe. I also have a fascination with historical clothing, which has given me a good excuse to try my hand at sewing my own garments. My foray into sewn garment making has been relatively recent and I never thought to document the first few garments I made (hence this is my first blog post that isn’t about wool), however after my deluge of wool posts during Tour de Fleece, I thought this little side quest might provide some alternative reading!
The Plan
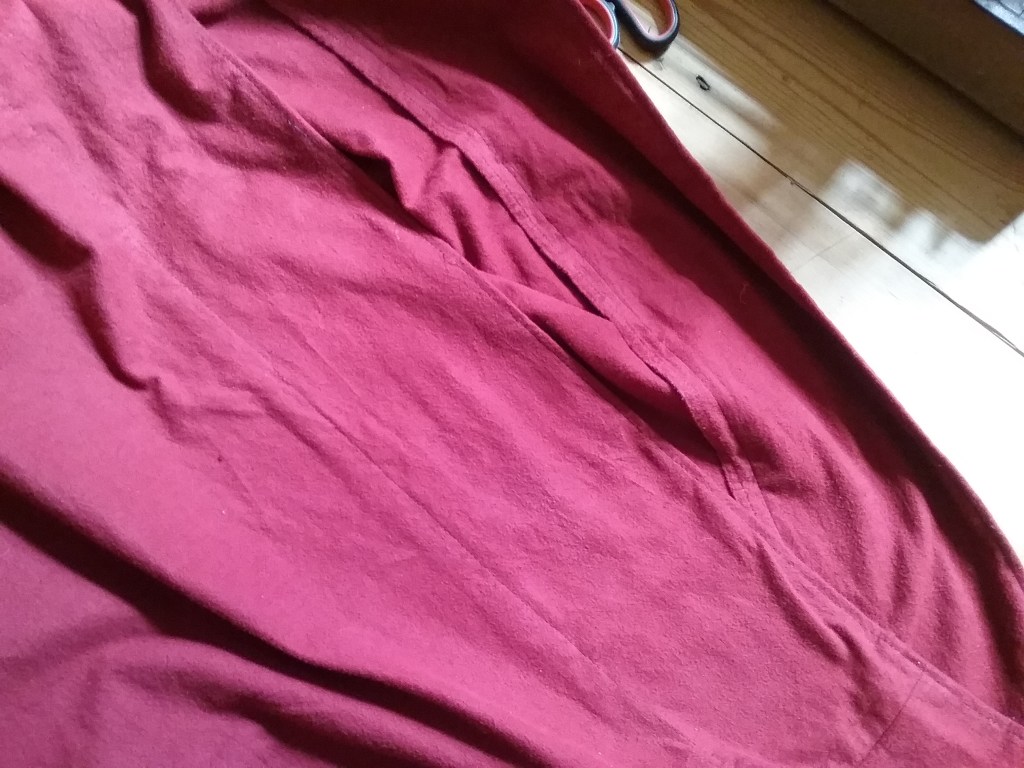
A few months ago I acquired some red brushed cotton fabric that used to be curtain linings, thought them too nice a fabric to use for making clothing mock-ups, and thought they would work well as a cosy autumnal skirt. I wasn’t sure how the fabric would behave as a skirt, so wanted to avoid cutting the fabric as much as possible, should I change my mind later in the process. Happily one of the easiest (and zero fabric waste) skirts to make is an 18th Century petticoat; 2 rectangles, 2 seams and a waistband that is adjustable, so while my red brushed cotton was not the most historically accurate of fabrics, I proceeded, naively thinking this project would only take a day…
Making Pockets
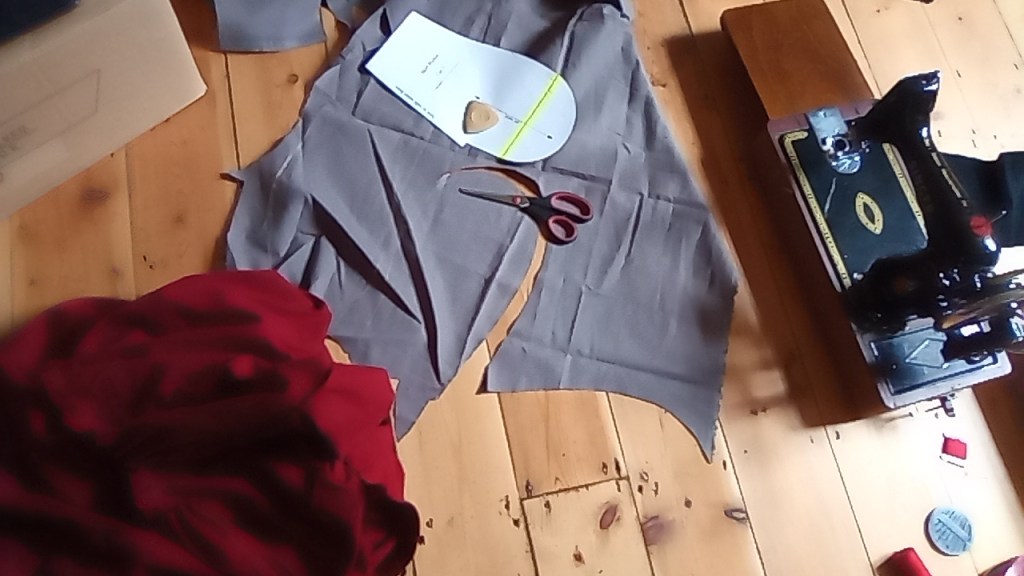
Before starting on the skirt I had to make some pockets. Unlike modern pockets, historical pockets can fit all manner of objects from books to spindles and fibre, being either sewn into the waistband (directly as I did here, or with a support), or tied around the waist as a separate ‘garment’ (hence pockets could be ‘picked’). You can easily make a pattern for these, however I already had the free pattern printed from Truly Victorian, so opted to adapt this instead.
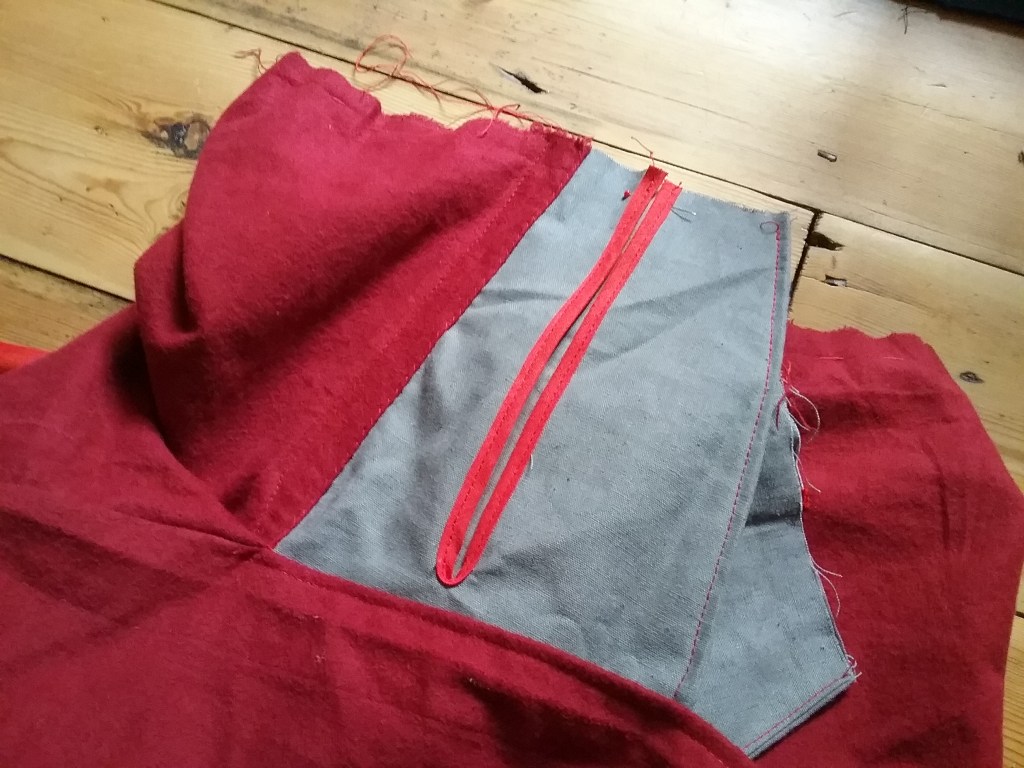
Since the pockets won’t be seen when wearing the skirt, I cut them out of some grey cotton/linen blend fabric and French seamed them around the entire edge leaving the top edge free. I then cut a slit long enough to get my hand in on one side so they opened at the ‘front’ rather than in the seam. I then covered the raw edges in bias binding from my stash, which by happy coincidence was red! In hindsight, it would have been easier to bind the edges before French seaming the pockets together, but my sewing machine is quite well behaved when it comes to fiddly corners.
The Skirt Body
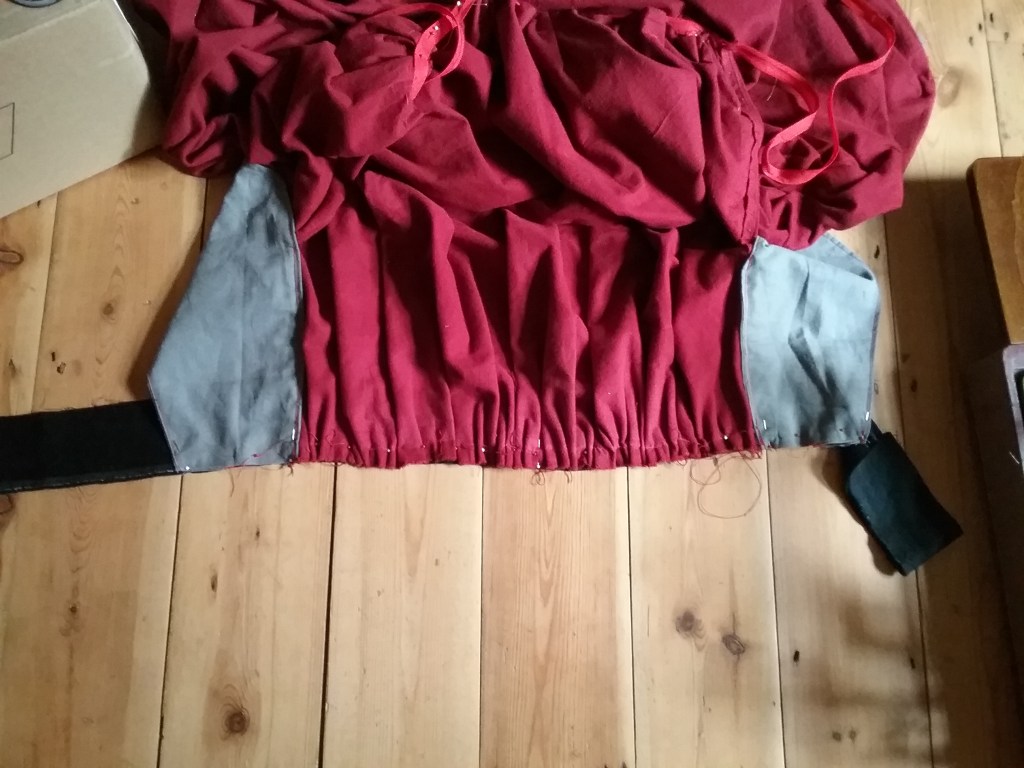
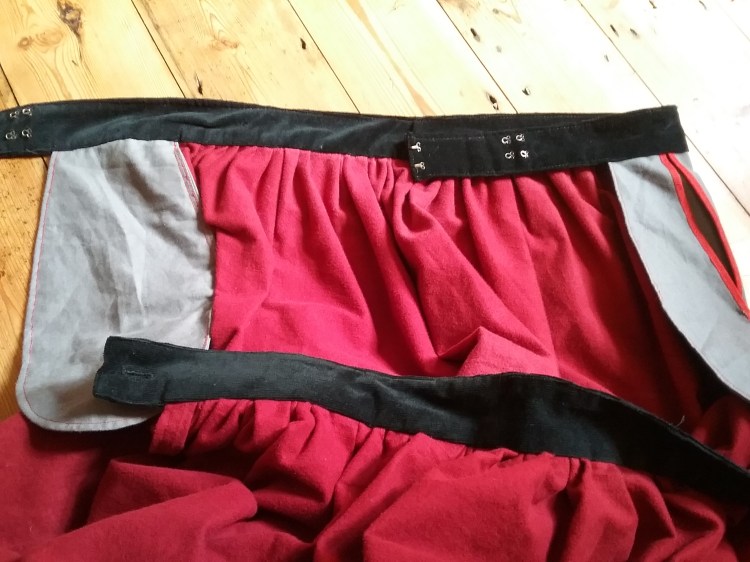
I then stitched both brushed cotton rectangles together at the short ends leaving around 3″-3.5″ open at the top. The idea is that the front and back panels each get gathered down into half the waist measurement and attached to separate waistbands; the back then ties around your front and the front ties around your back so the skirt overlaps at the sides where the pockets go, hiding the gap at the side seams and meaning the skirt is adjustable (this makes more sense in the photos towards the end of the post).
I finished the raw edge on the front panel and sewed the pockets onto the raw edge of the back panel after which it looked something like this:
The Waistband
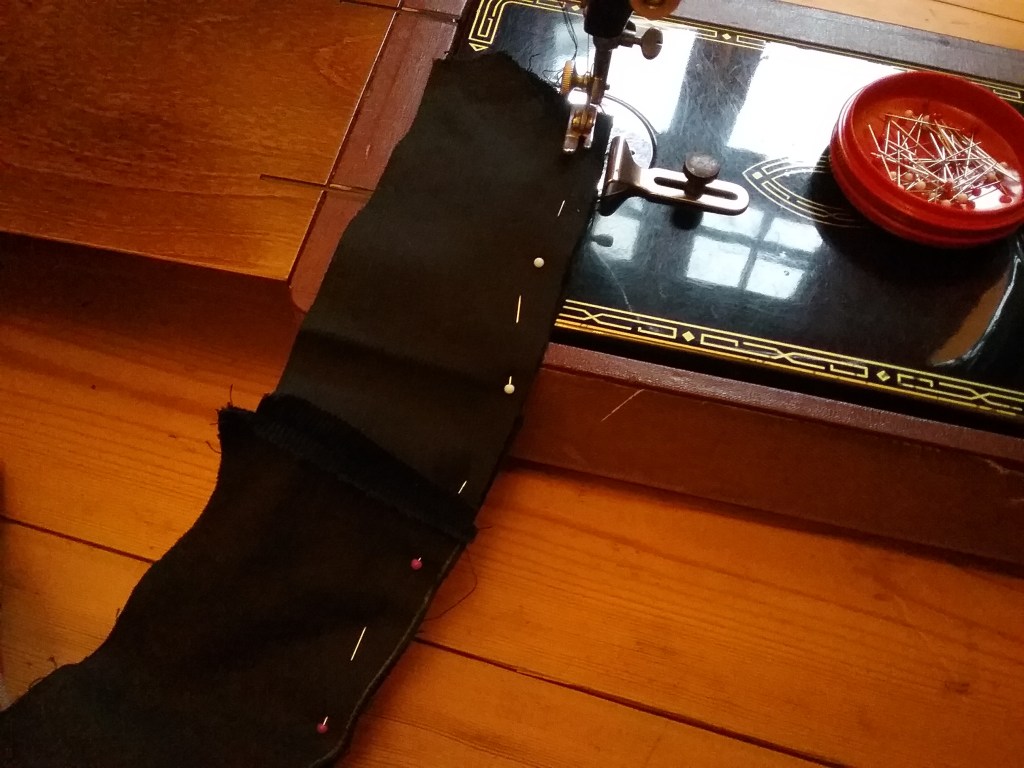
I dug out some ribbon and twill tape from my stash intending to make the waistband ties – once the waistband was gathered and sewn on, my final step would be finishing the hem and side seam edges – easy! However, the ties I had found either didn’t complement the red or were not sturdy enough to hold the weight of the brushed cotton. I delved back into my fabric stash and found some long scraps of black corduroy which contrasted nicely with the red fabric and were sturdy, but thick corduroy would have been too bulky to successfully tie around the waist front and back. Rather than go back to the drawing board I decided to get creative and overengineer it, so my simple one day project continued on and off for the rest of the week!
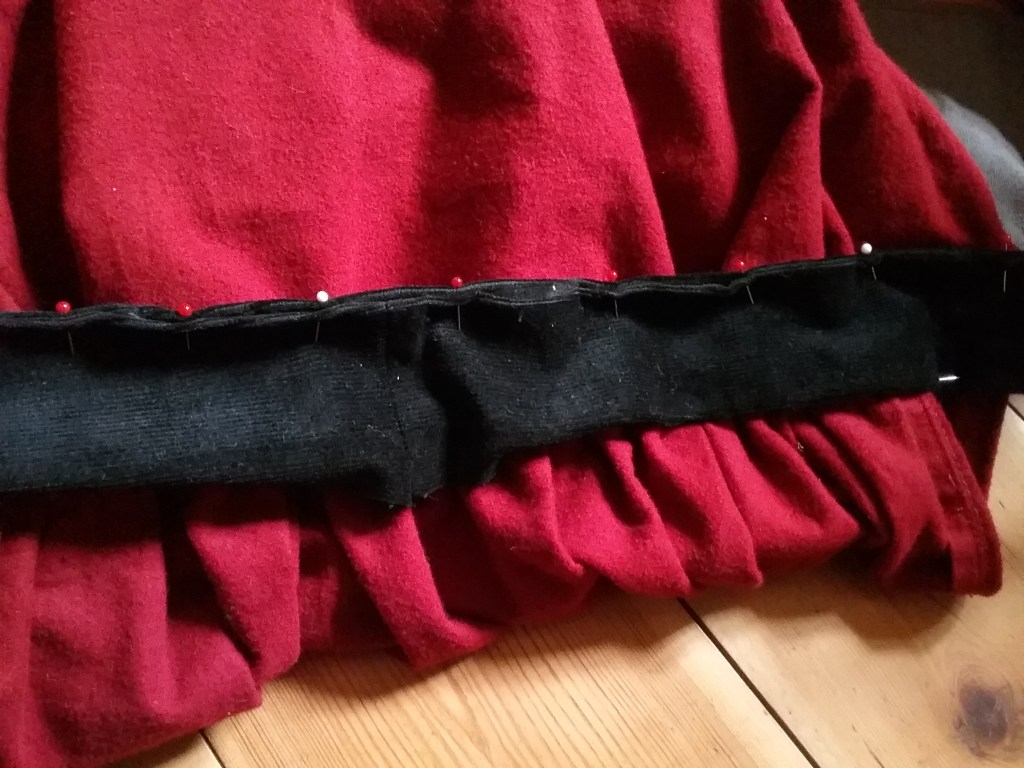
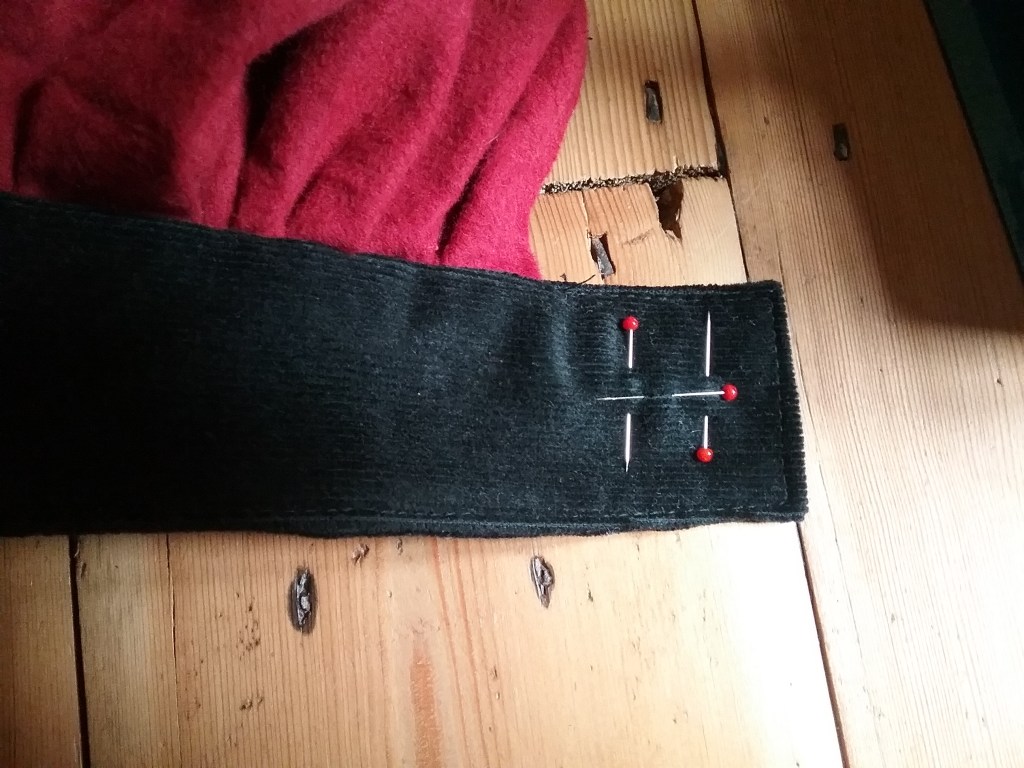
I focused first on the back waistband; I couldn’t tie it, so joined enough length in scraps to fit around the back of my waist and overlap slightly at the front where it would be fastened with hook and eye closures (retaining the adjustable nature of the waistband since I could install multiple closures). I ran a gathering thread through the skirt panel and pinned the centre back of the waistband to the centre back of the skirt panel right sides together. I then measured 1/4 of my waist either side from the centre back of the waistband and pinned this to the front pocket edges before gathering the fabric down by eye:
Skirt gathered into the waistband right sides together
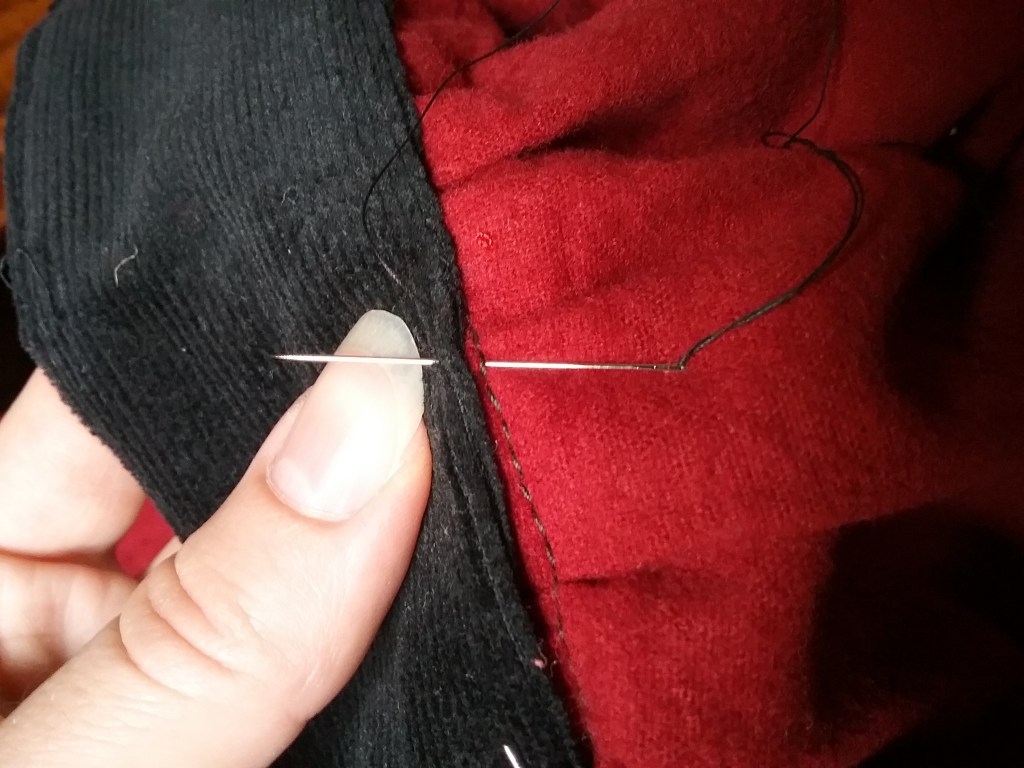
This was then stitched down, after which the waistband could be turned to conceal the raw edge. However, since I was working with scraps my waistband wasn’t wide enough to turn on it’s own, so I stitched another length of corduroy to the top of the waistband, pressed the seam and topstitched it to avoid puckering at the same time as I finished the other edges. I opted to finish the seam by hand felling along the back of the skirt panel to avoid a black stitching line showing at the front.
I then stitched hook and eye closures to secure the back waistband at the front.
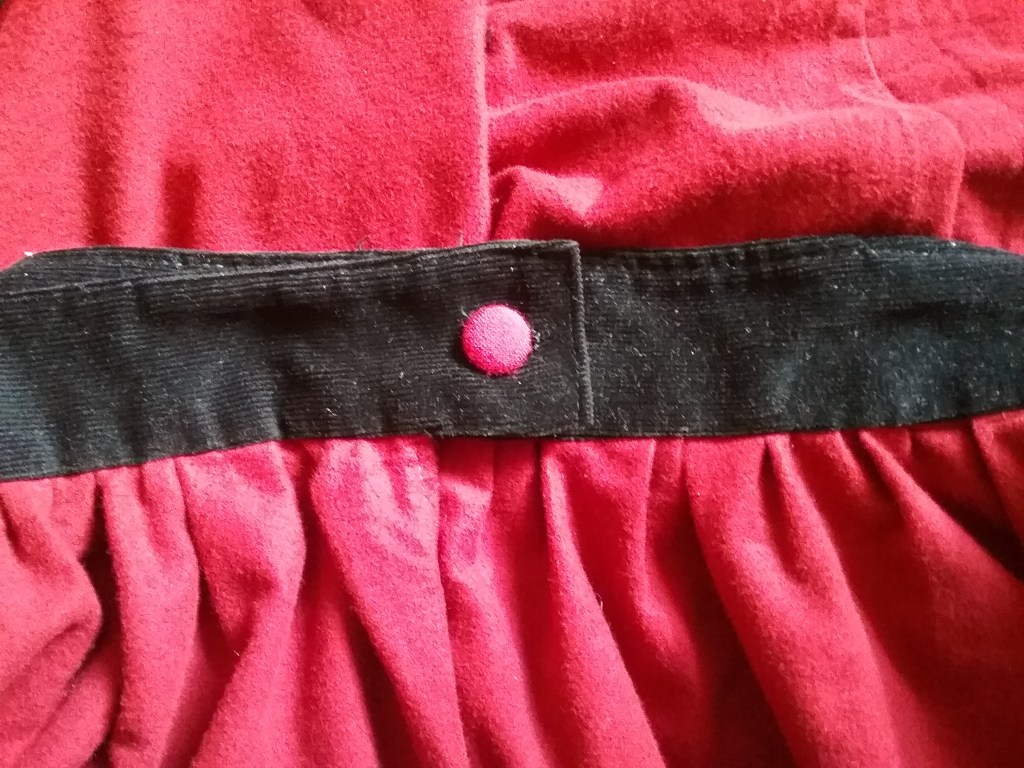
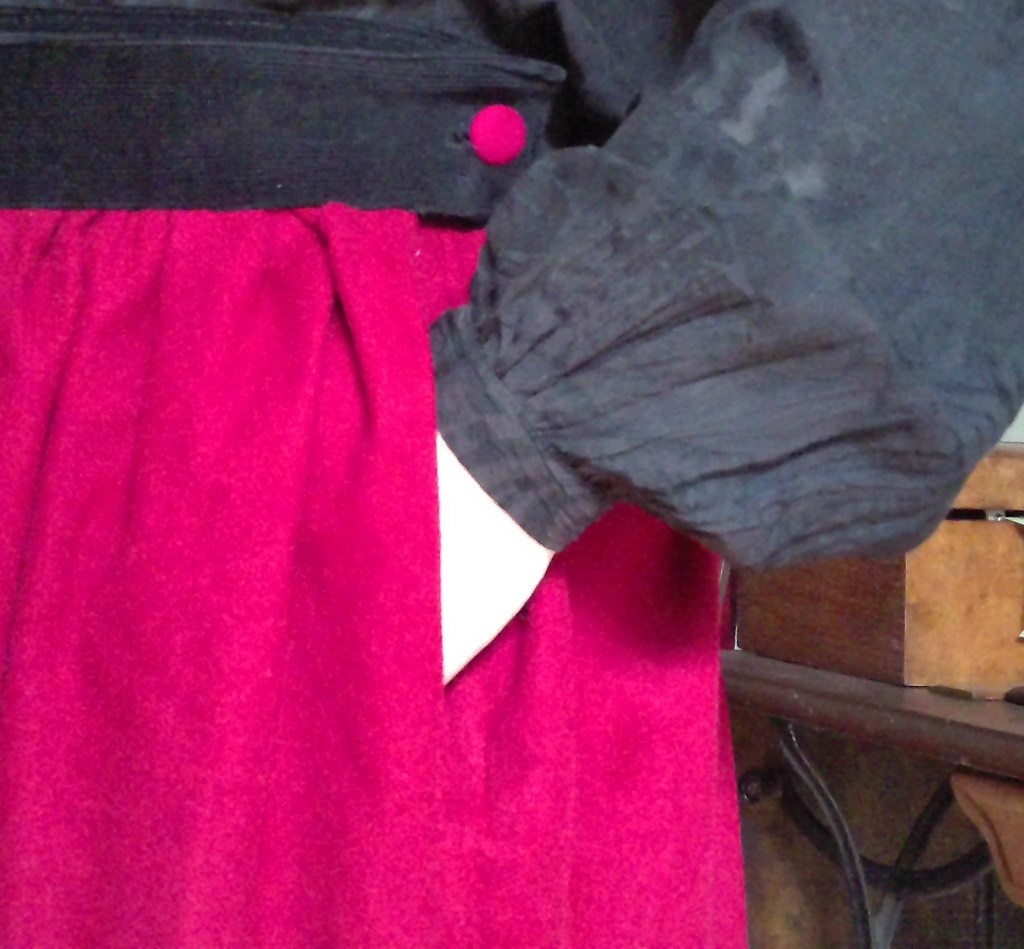
The process was much the same for the front waistband (I had to join several more scraps of fabric on the inside of the waistband, but piecing fabric was very common historically); however rather than fastening all the way at the back, I decided to fasten the front waistband to the sides of the skirt. Originally I was going to use hooks and eyes again, but decided that the black and red was looking quite dramatic and I should make more of a feature of it. I dug out some red buttons which were a near perfect match to the fabric, and proceeded to mark out and hand stitch the buttons and buttonholes with silk twist.
The following slideshow illustrates the order in which the closures work:
Finishing Touches
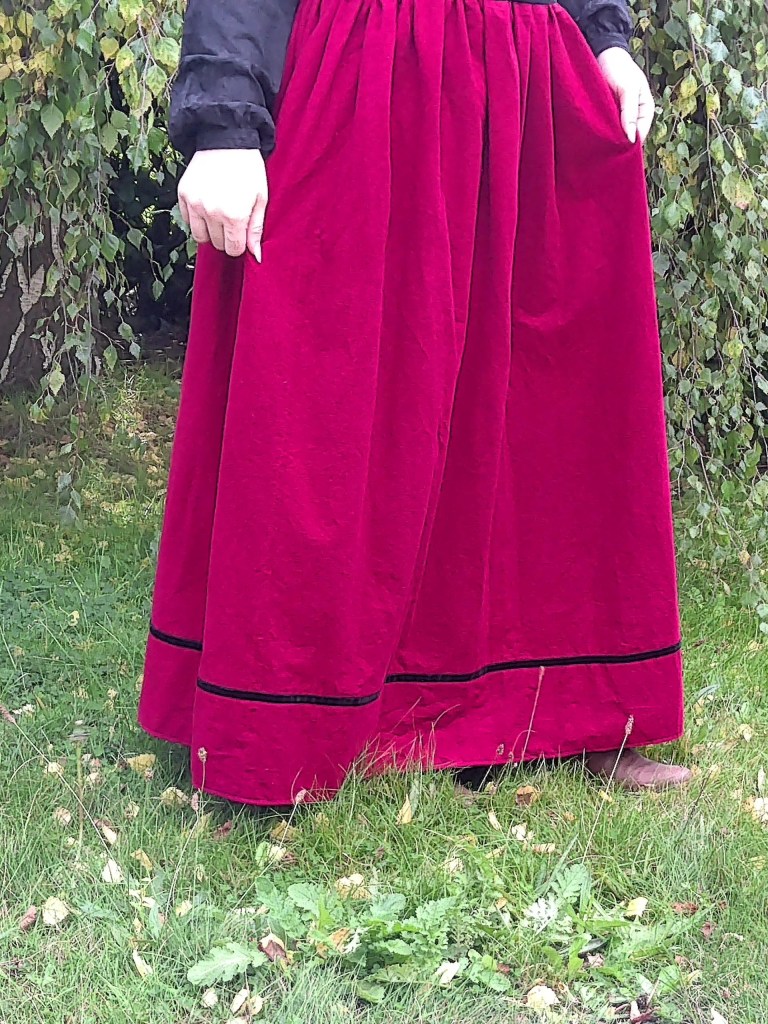
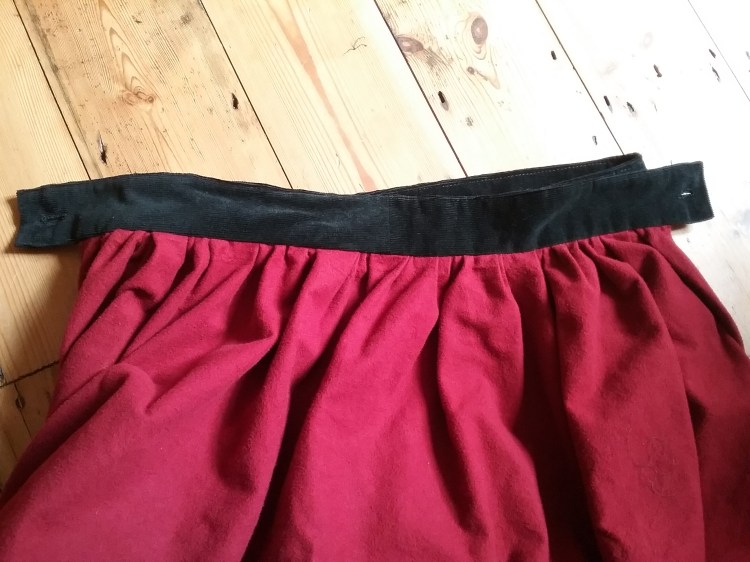
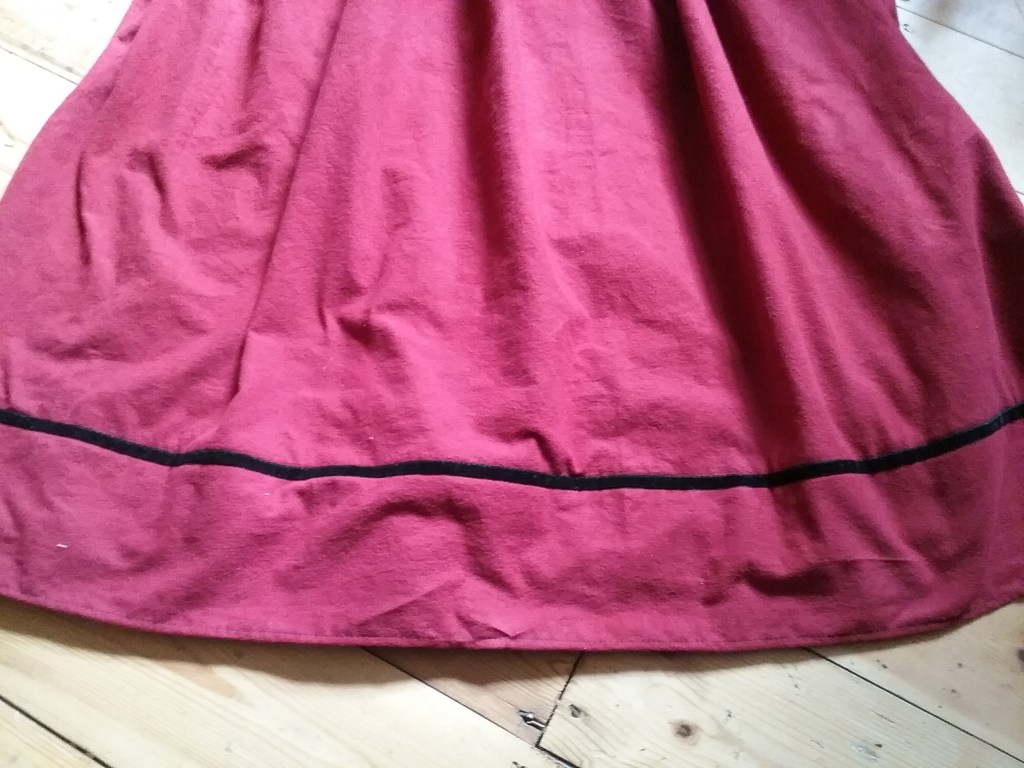
Waistband secure, I finished off the side seams with the red bias binding and then turned up the hem so it wasn’t dragging on the floor. There was quite a bit of seam allowance, but in the interests of not cutting my fabric, I treated it like a facing to give the skirt some body and it seems to work quite well.
With all the contrasting elements on the waistband the skirt itself was looking quite plain and I decided that since I’d gone to all that effort, I might as well add some decoration. I have a habit of accumulating vintage velvet trim, so decided to stitch a black stripe around the skirt hem that would strategically cover the hem line stitching.
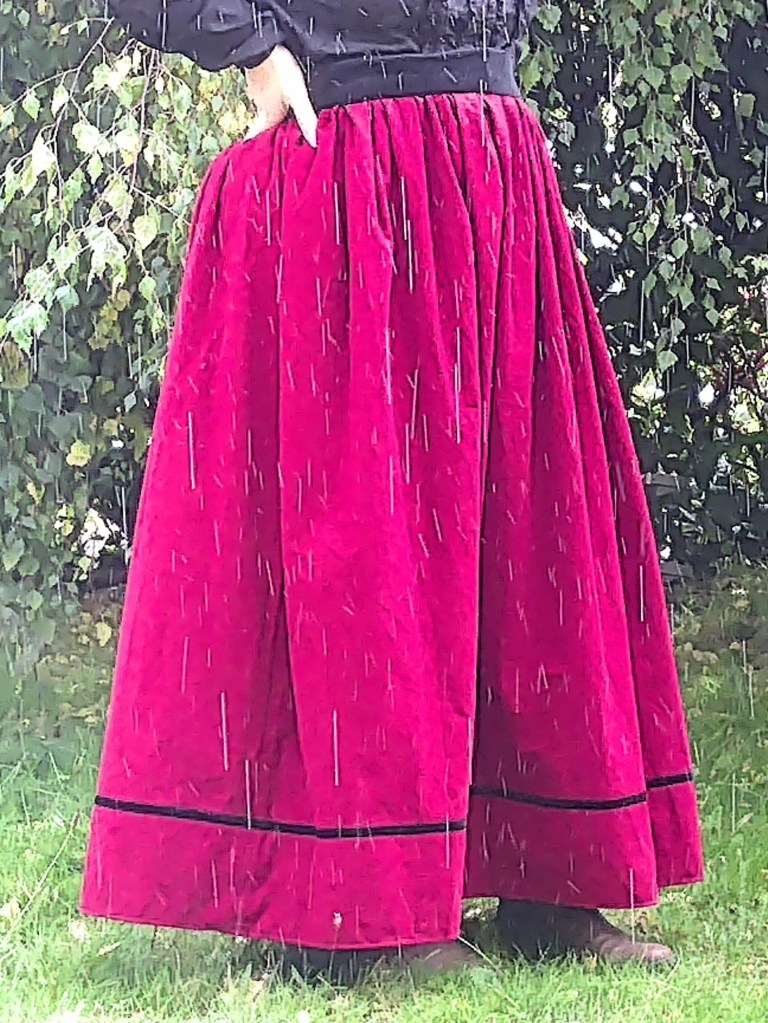
Final ‘Reveal’
Excuse the rain – the weather changed just as I was taking a photo!
Since it’s only secured at the sides the front waistband has a habit of slipping, so I may add some more buttons to the front (which opens up the possibility of adding braces too), and I’m not sure if I need to add some more decoration to the hem. But, on the whole, I’m pleased with how this project turned out – I used supplies that I already had, it fills the ‘cosy skirts’ gap in my wardrobe and is suitably dramatic (and slightly pirate-y)!
If you would like me to try and remember to document future sewing adventures (either by photo or video) do let me know in the comments. For anyone interested in making their own skirt, but completely confused by my ramblings – there’s a short Youtube tutorial here which might help clarify things!
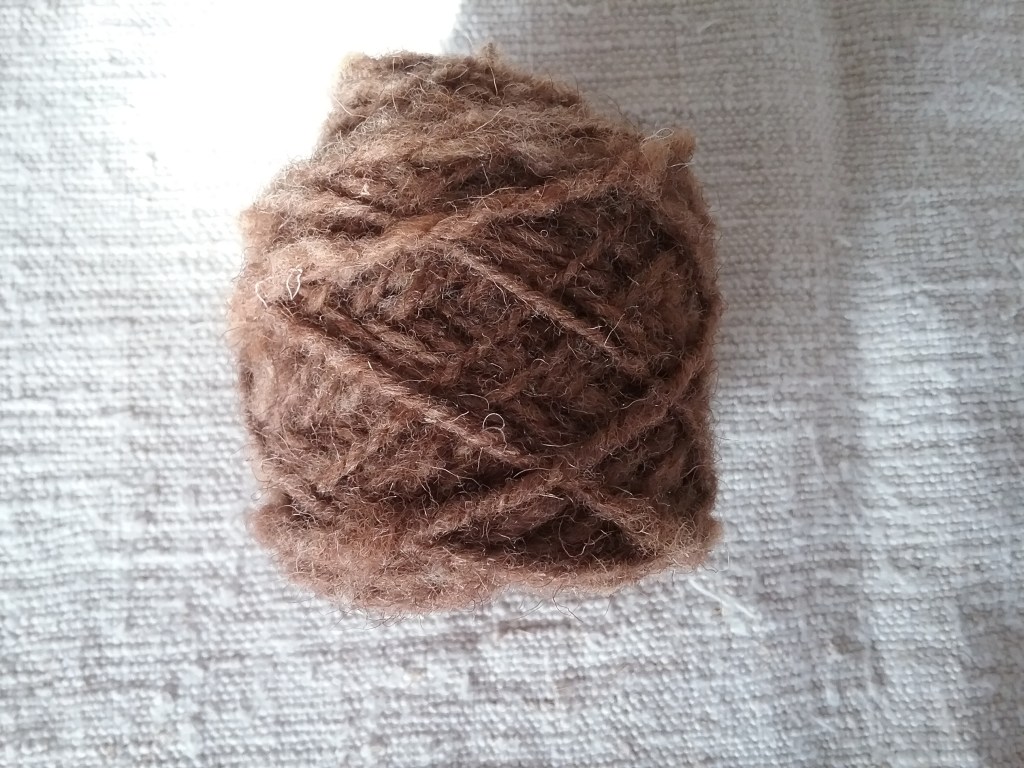
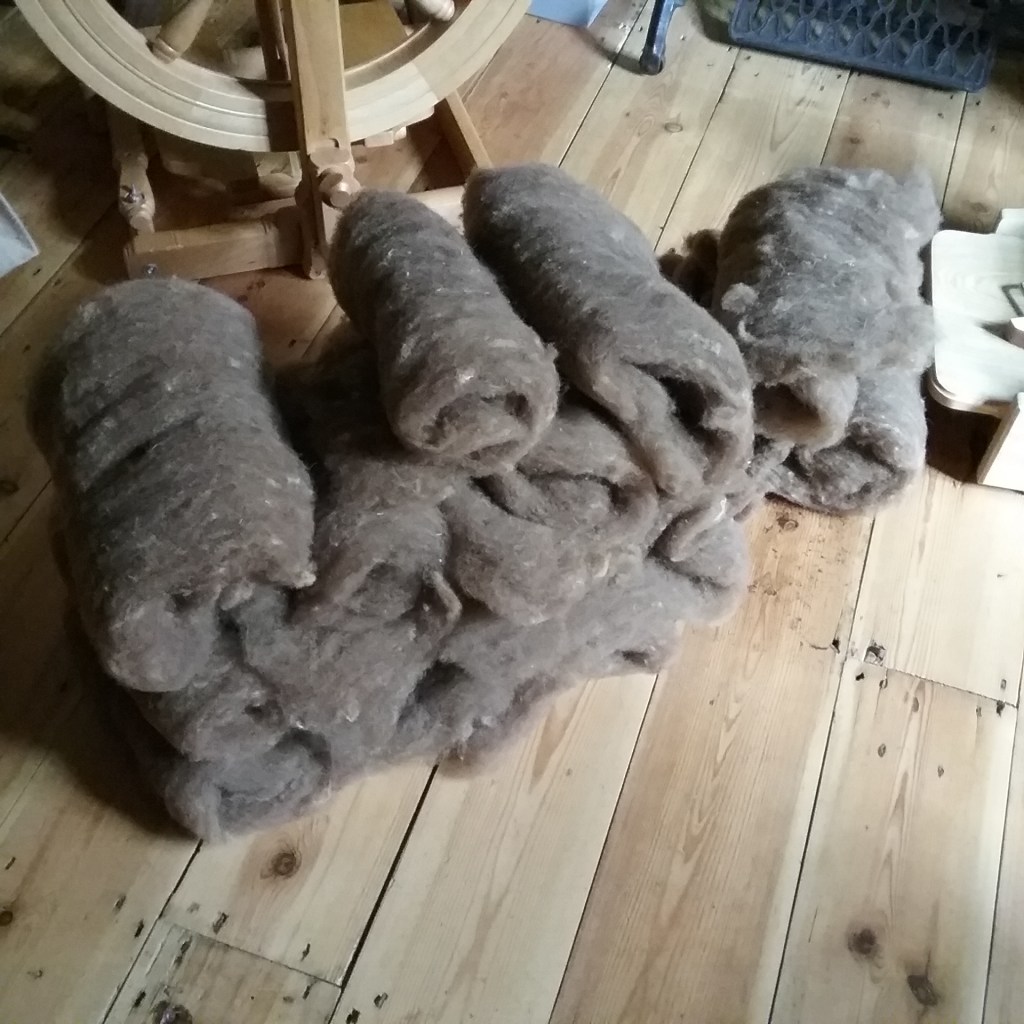
Way back when I did my initial research into this breed, I was forewarned that due to its short staple length, this fleece is usually blended with other longer fibres to make spinning easier. While I’m quite happy to experiment with blending, I’m keen to explore how each fleece works on it’s own where possible, so pressed on with spinning it ‘pure’ from the batts I carded during Tour de Fleece.
When working with a new fleece I’m often tempted to start spinning using a shorter draw until I’ve felt how the fibre behaves, but with such a short staple this proved more challenging. After some trial and error I found the best way for me to spin was tearing the batts into three sections and use a supported long draw (woollen) technique; as long as there was enough twist travelling up the yarn I could spin a relatively thin single. My biggest challenge was maintaining consistency. After two passes through the drum carder my batts looked pretty good, but small clumps where the tips were sun-bleached still managed to slip through, and as the strips I was spinning grew smaller the fibres weren’t held together as well so were prone to clumping up. Slubs aren’t an aesthetic problem for me, but with the short staple length any sudden changes in yarn thickness would risk fibres separating, and on several occasions I re-joined my fibre to give a more gradual variation in diameter and hopefully strengthen the yarn.
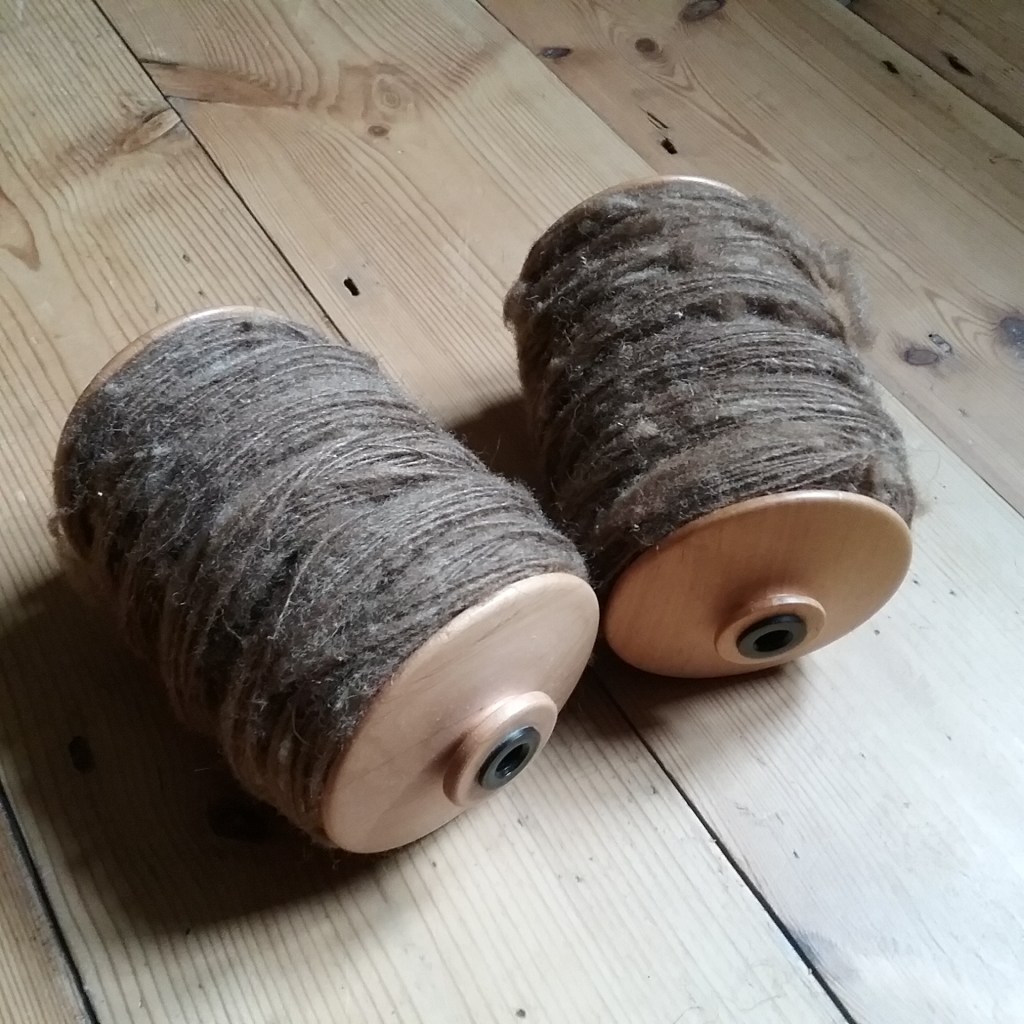
Plying & Setting the Twist
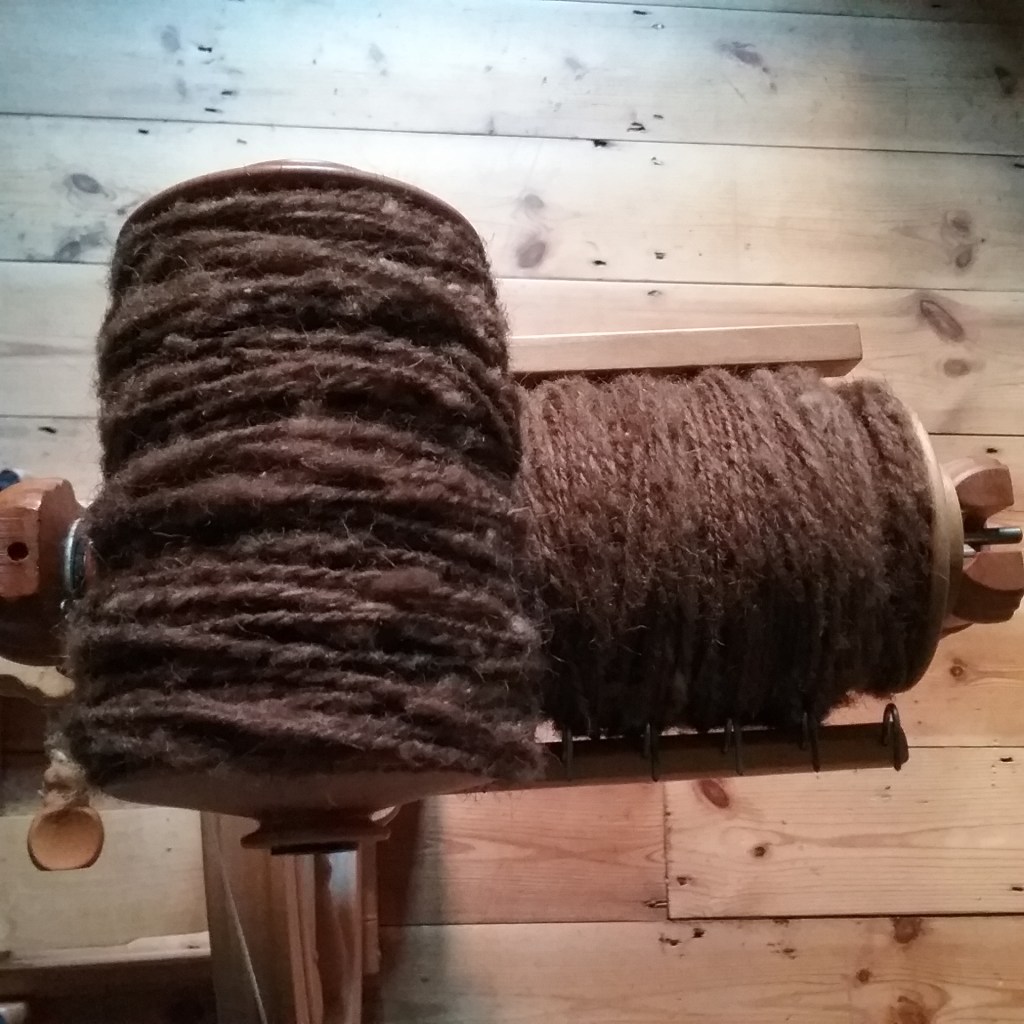
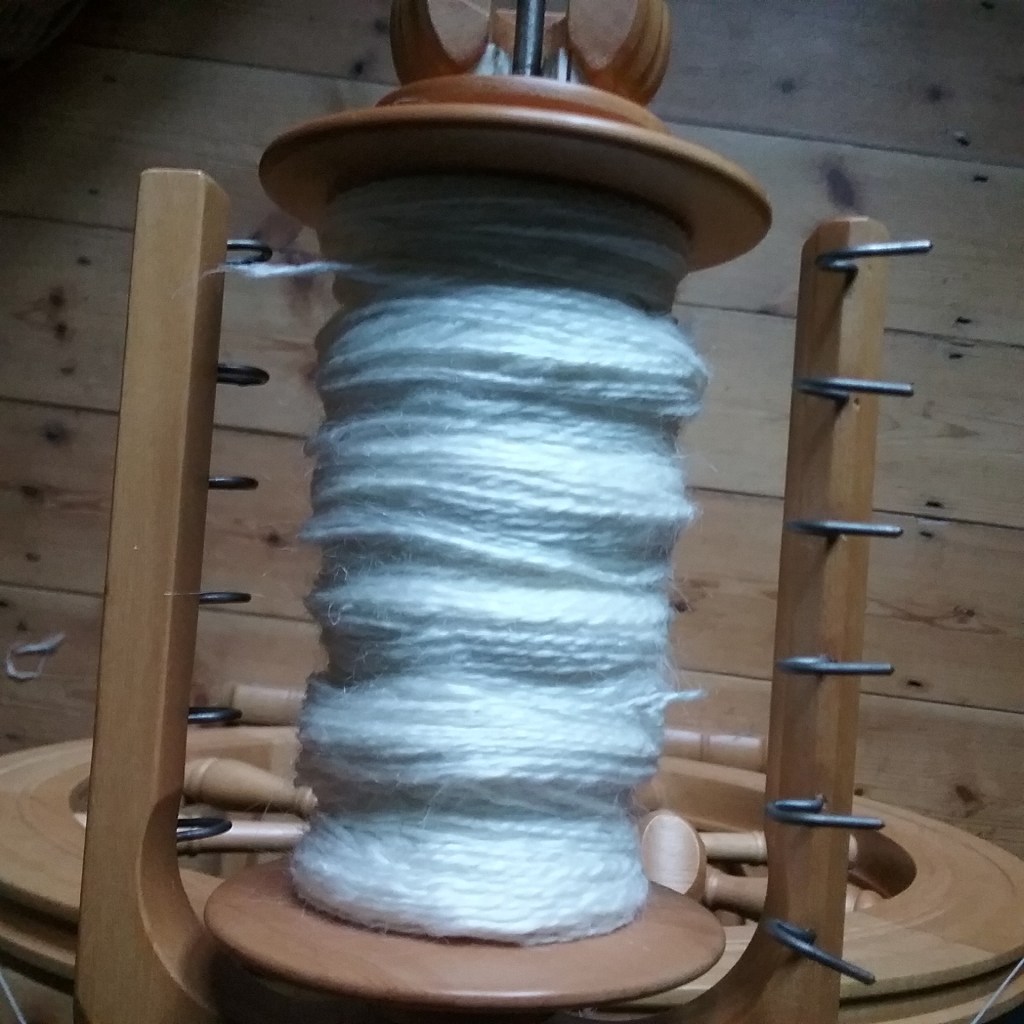
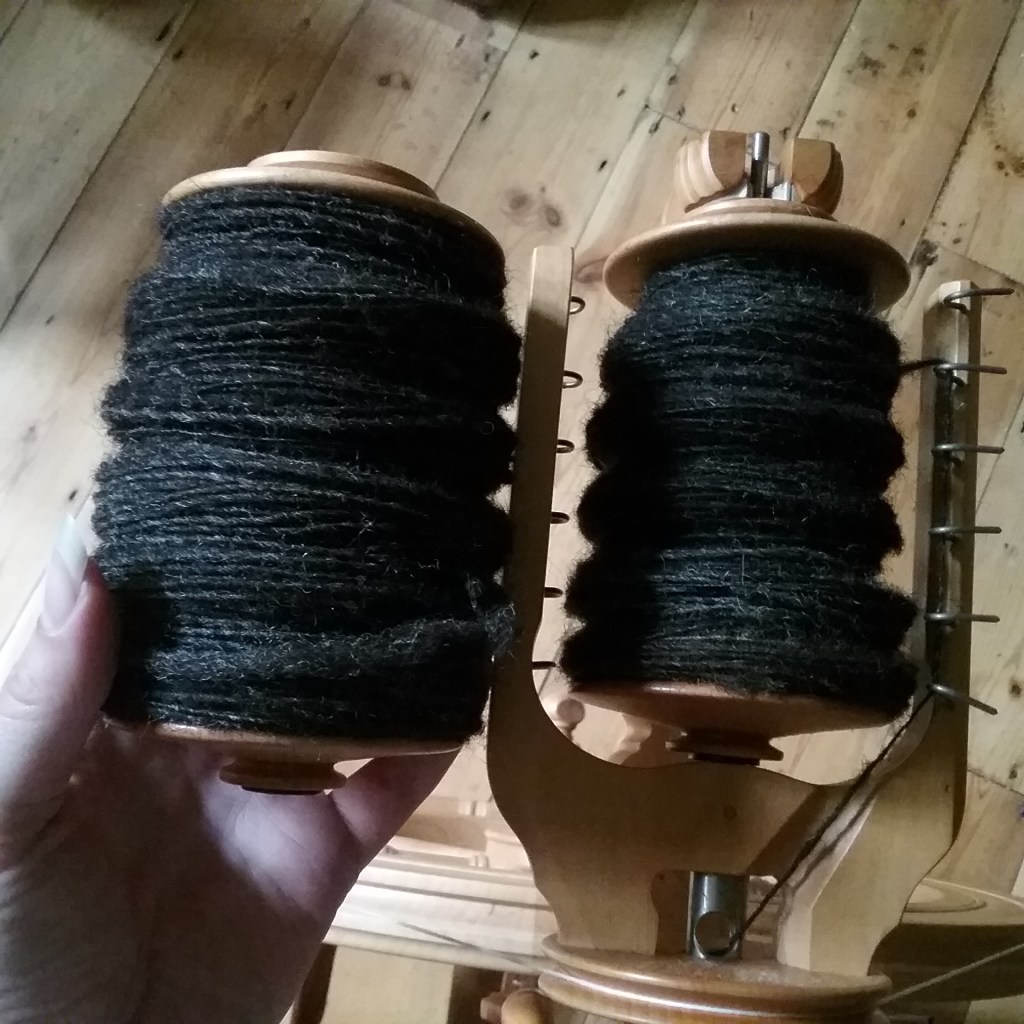
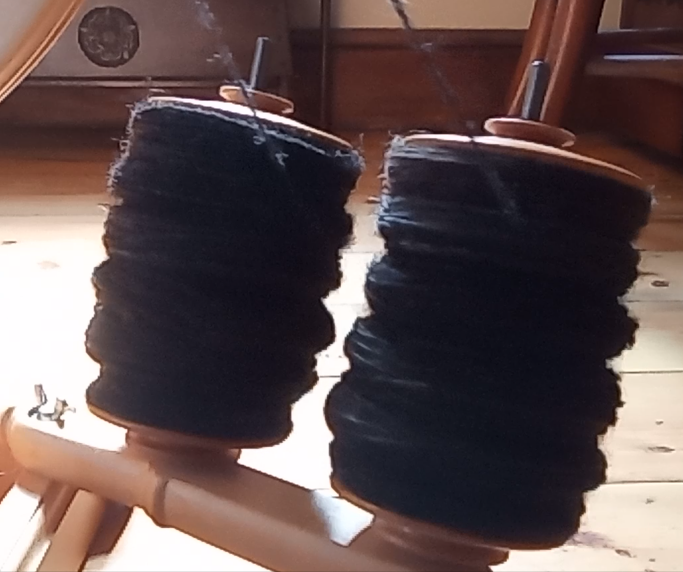
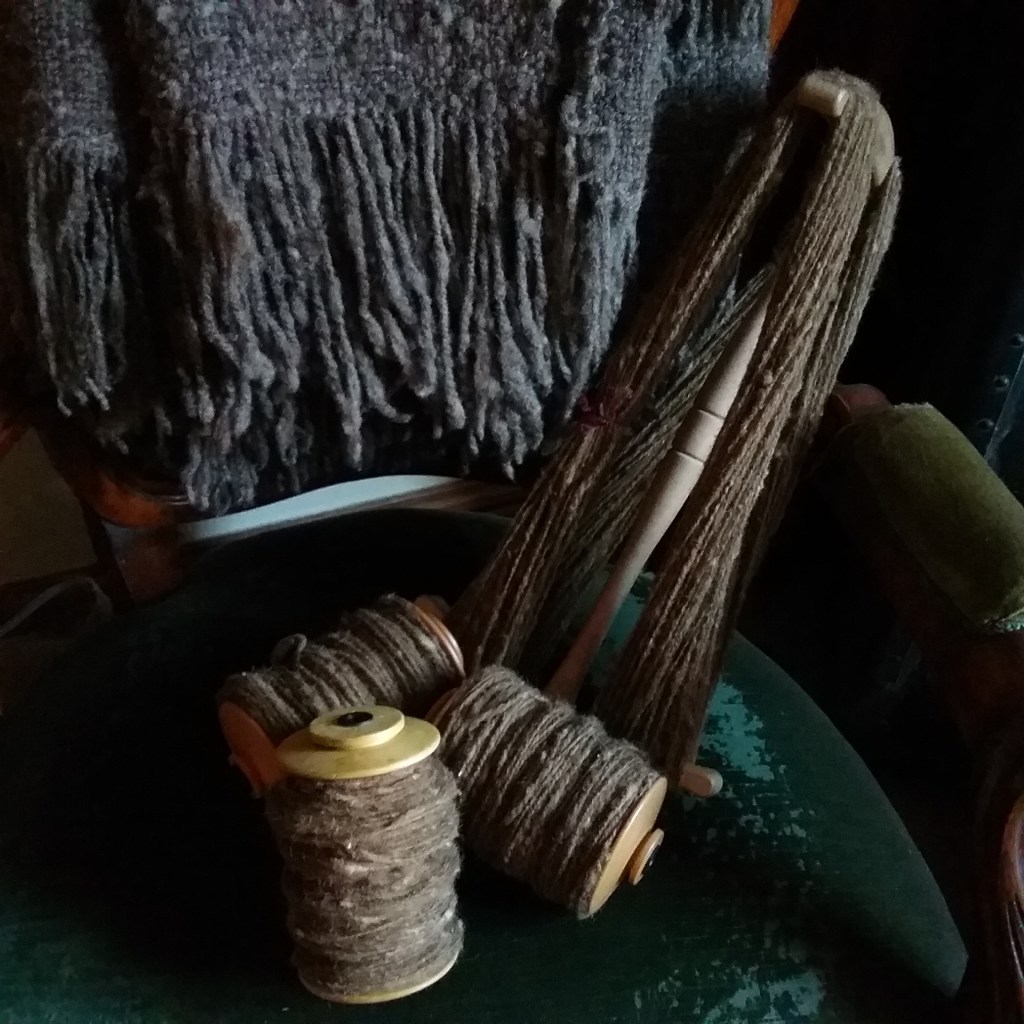
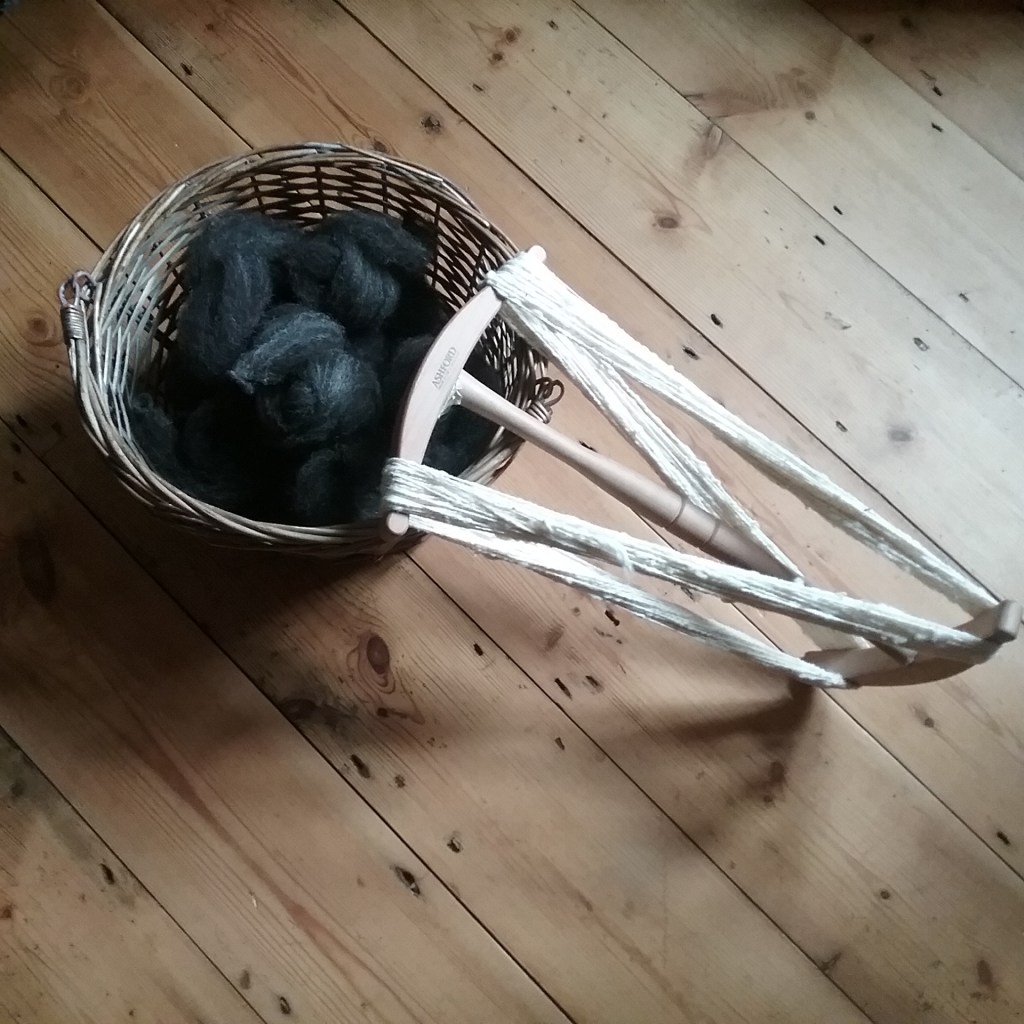
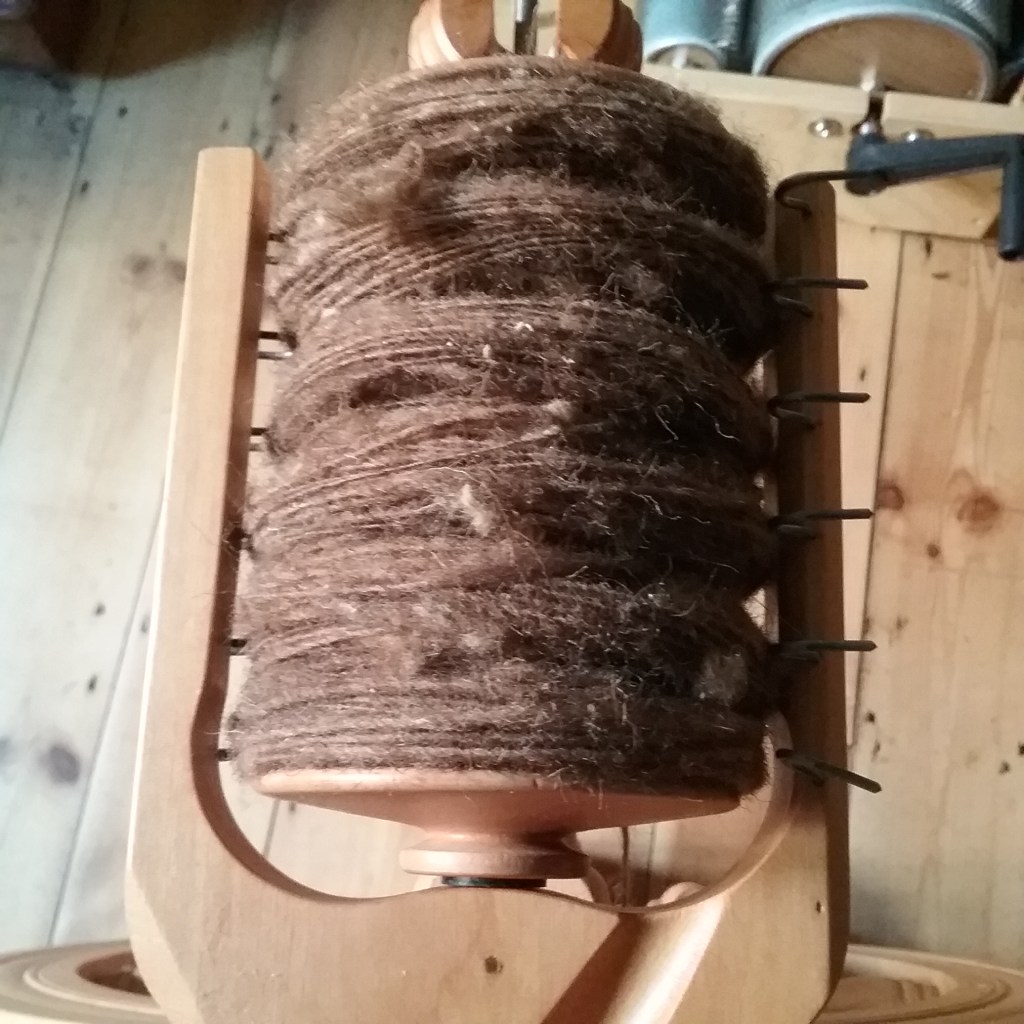
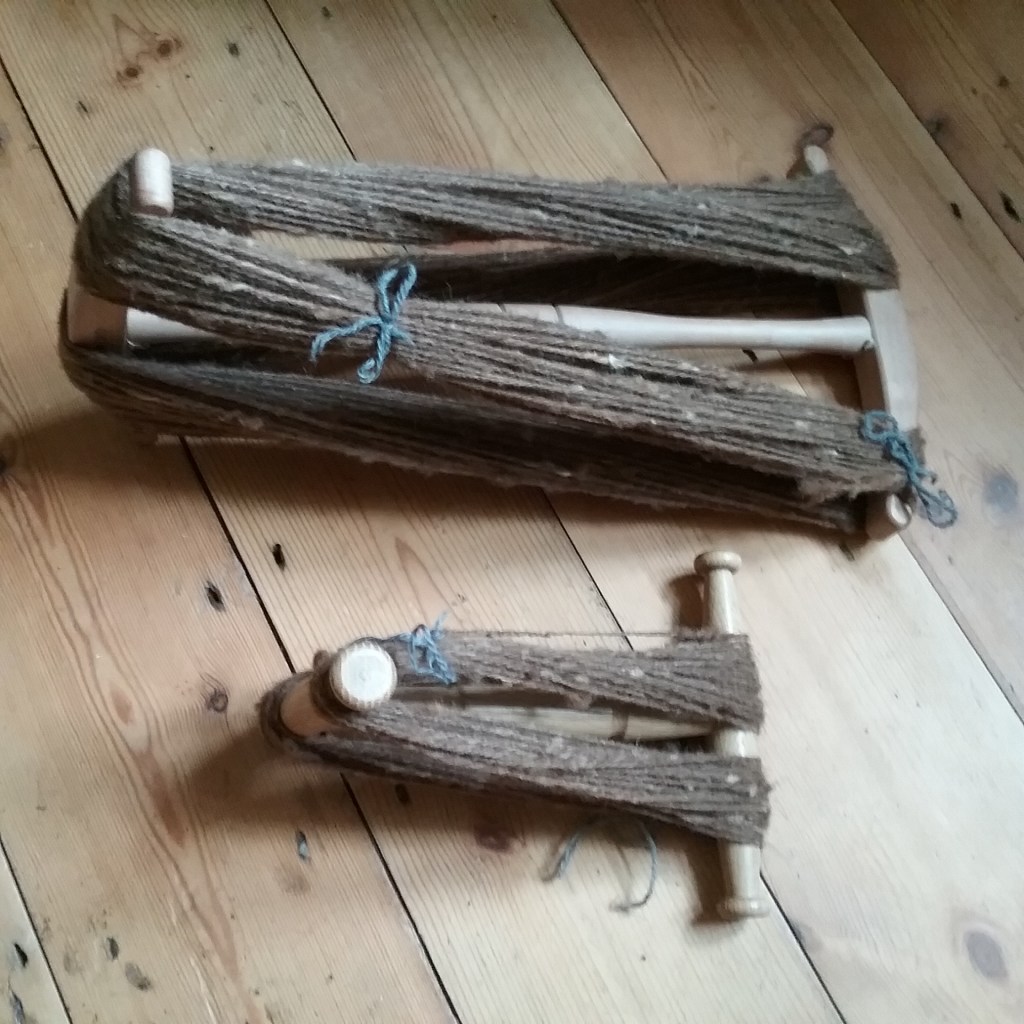
This was fairly straightforward and I opted for a simple 2 ply as this was a small fleece, so I wanted to maintain as much length as possible to ensure I had enough for a final project. Lots of the coarser fibres fell out during spinning, less so during plying and washing, and what’s left doesn’t seem to be poking out too much. Despite having carded it well, this was probably the dustiest fleece I’ve worked with so far – my carder, spinning wheel and floor were covered in a layer of dust and it was still coming out during winding!
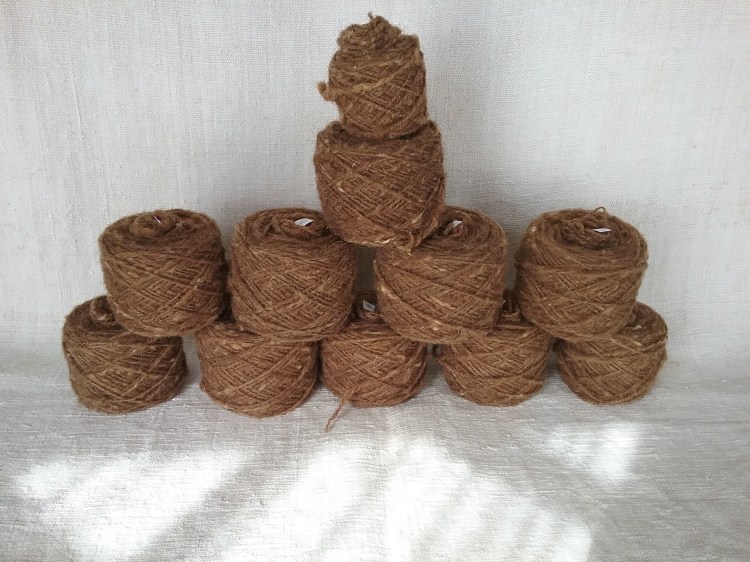
In all, this fleece gave me a total of 1,106m of 2-ply yarn, but around 1/4 of that is made up of yarn with more of the coarser fibres. I’d initially planned for this fleece to be turned into a jumper from a pattern I bought at EAYF, but I will need to swatch to see if it feels too scratchy for a next to skin garment. If the less coarse yarn will work then I could use it as the yoke and use another yarn as the base so I have enough, but if it’s too coarse, it is quite a stiff yarn (it sort of crunches when squished), so I reckon it would also work quite well being woven.
And that’s a wrap on another year of Tour de Fleece! I was going to start by reflecting on how the challenge has flown by, but looking back at last year’s post I think that’s a recurring theme! I try to pack a lot into TDF, so my challenge often feels quite fast paced, which is at odds since spinning is slow and mindful. It also means that it’s not until the final wrap-up that I slow down and see what I’ve managed to achieve; so if you’re also wondering where July has gone, I strongly encourage you to gather together everything you’ve spun during TDF, take a picture, measure it, compare with any initial to-do lists and give yourself a moment to properly take it in.
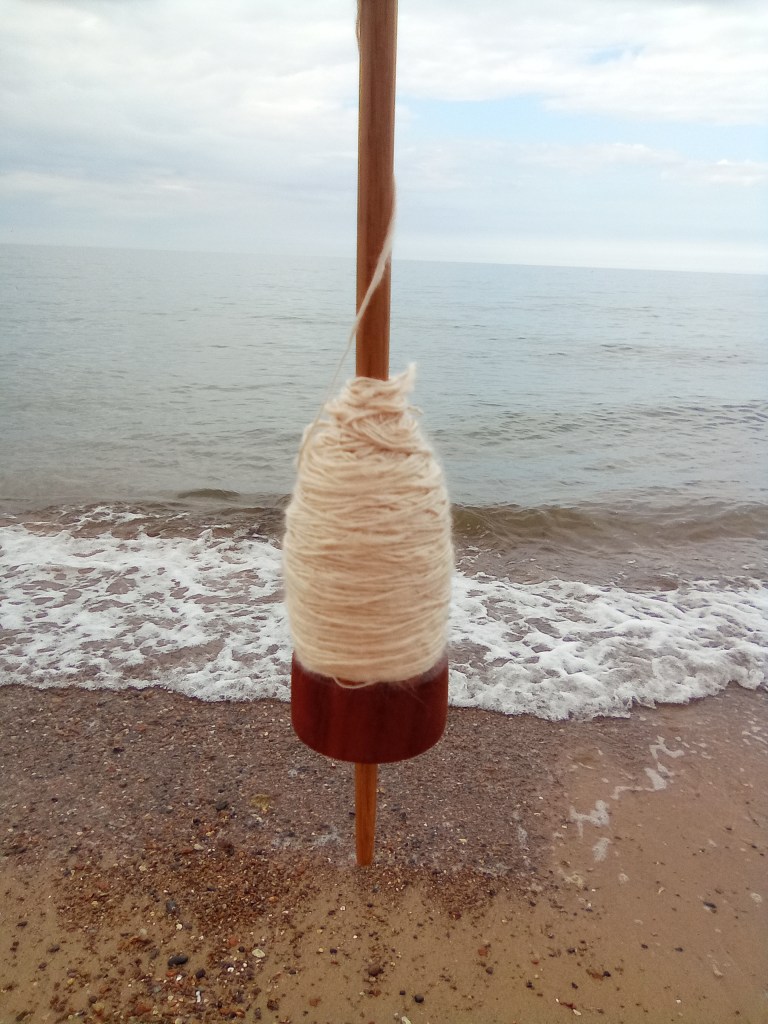
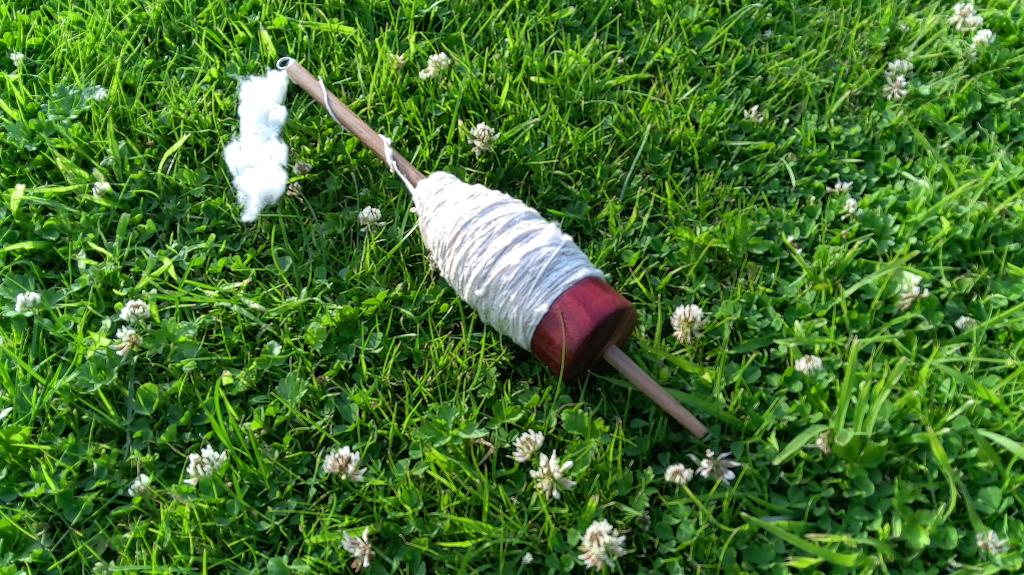
But before I get carried away reflecting on the whole challenge, I should first address week 3. I had to switch from the Black Welsh Mountain as the rain stopped me from combing outside and the fleece is too dusty to process indoors, but it did give me the opportunity to experiment with mint & ramie fibres. Halfway through spinning cotton on my wheel I decided to card it (my carders are only 72tpi so I wasn’t sure it would work, but it did make drafting easier), so the mint fibre roving replaced the cotton as my portable project. I also completed my final Tuesday Challenge, which was perhaps the trickiest – spinning with my hands behind my back (the full attempt is in the video below)
Day 16: Black Welsh Mountain spinningDay 17: Spinning cotton on the wheelDay 18: Tuesday Challenge – Spinning behind my back & some mint fibre spindle spinning at the beachDay 19: Finished the mint fibre spin and plied the cotton on the wheelDay 20: Too wet for wool combing outside, so I found some ramie (nettle) fibre to experiment withDay 21: Finished spinning and plying the ramieDay 22: More Black Welsh Mountain spinning – I was about 2 combed nests short of a full 2nd bobbinDay 23: Plying the Black Welsh Mountain & measuring my TDF spins
Final Reflections
This year I spun for 5.62km (that’s the length x3 to account for any plying) which is the longest total yarn distance I’ve managed during a TDF, and I’ve kept on top of my daily and weekly posting. I’ve also made weekly videos which has been a learning curve and probably contributed to how quickly my challenge passed as I’ve spent a lot of time editing too. The videos are a little different to the project videos I’ve made previously, so do let me know if you’ve enjoyed them or not and feel free to leave any suggestions for the future. I wrote a to-do list out at the start of the challenge, so let’s see how I did:
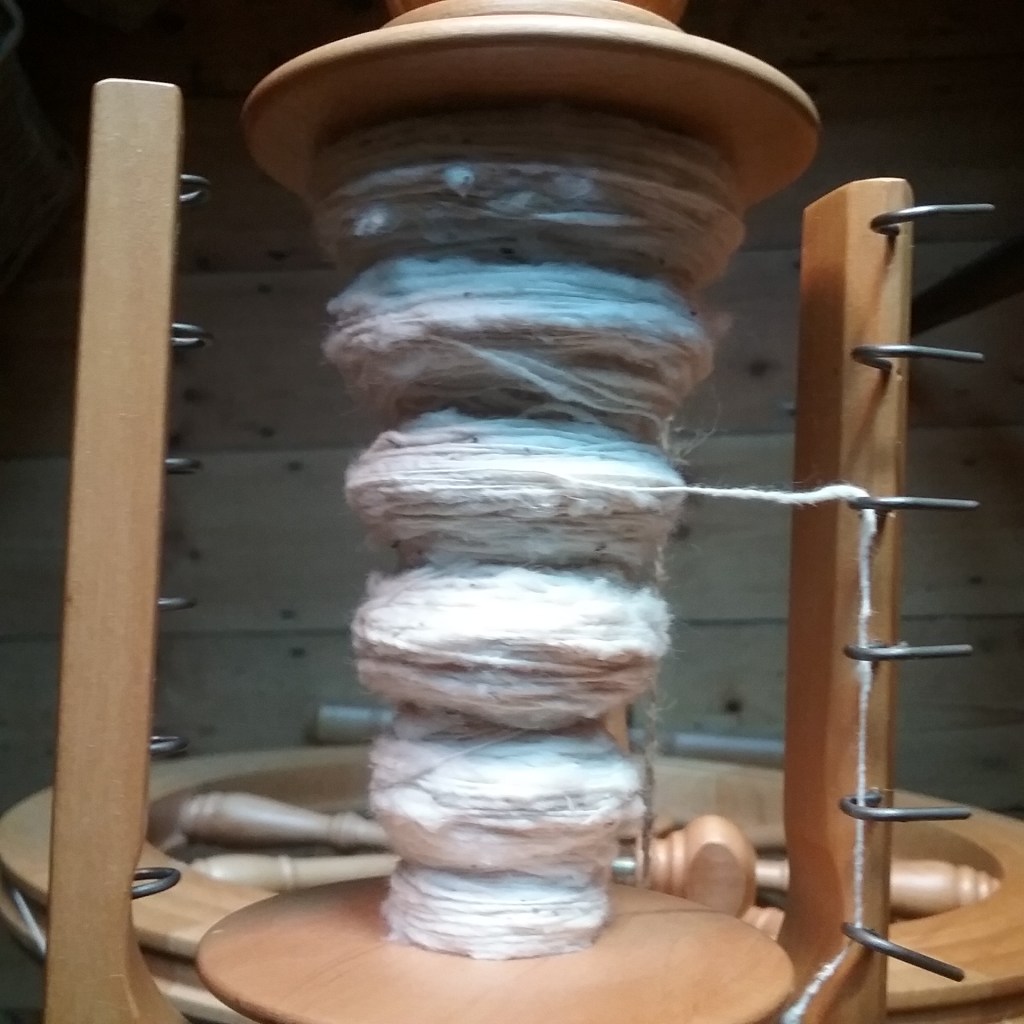
Castlemilk Moorit – For the first time in a TDF I carded, spun & plied a whole fleece! Castlemilk Moorit are one of the smaller sheep breeds and their fleece has a very short staple, but this one has been waiting to be processed for a long time, so it’s satisfying to see it finished. I can now write up the spinning post for it and think on the final project (which might differ from what I planned now it’s spun).
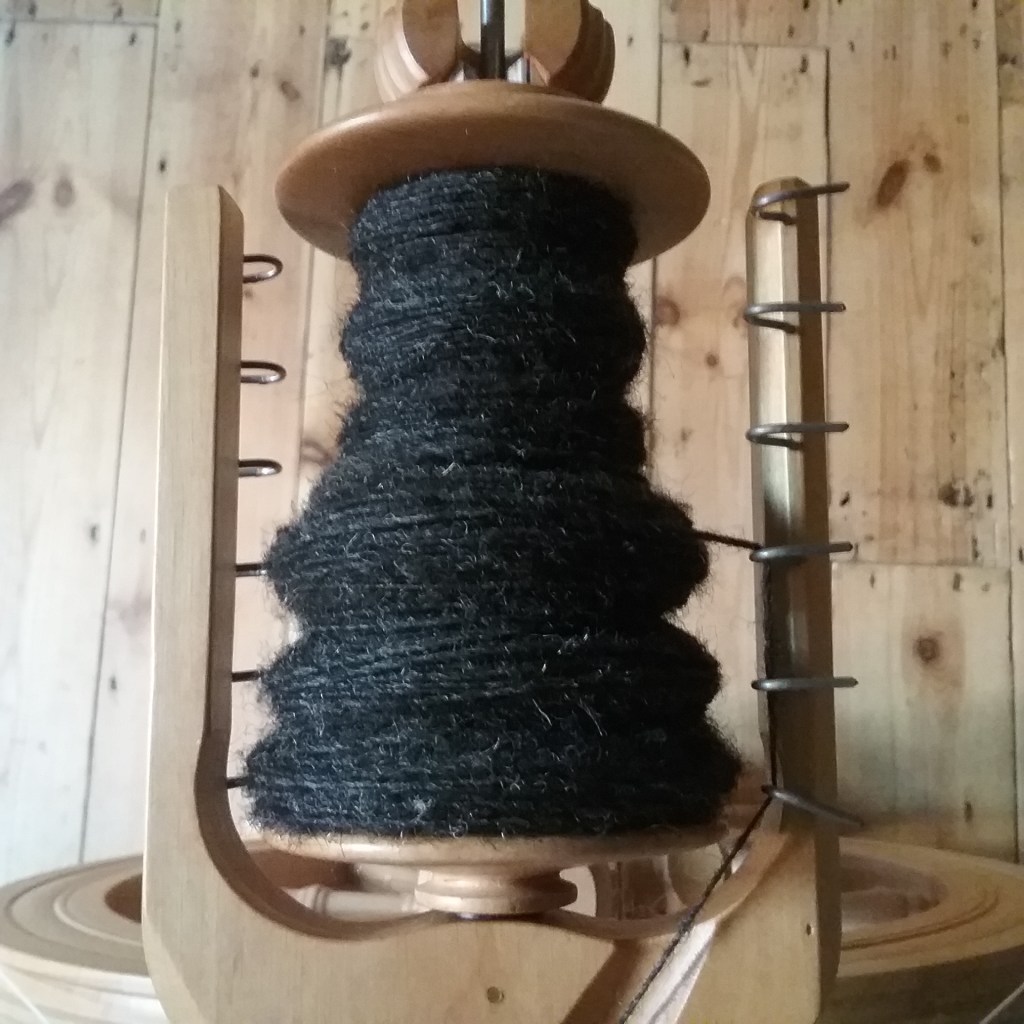
Black Welsh Mountain – I’ve made a start on this one – I’ve probably combed through about 1/4 of the fleece (but spun less since there’s a lot of combing waste ready to be carded up later). This one has been fun to work with and I have exciting projects lined up for both the yarn and combing waste, so this should give me motivation to continue gradually working on it over the coming months.
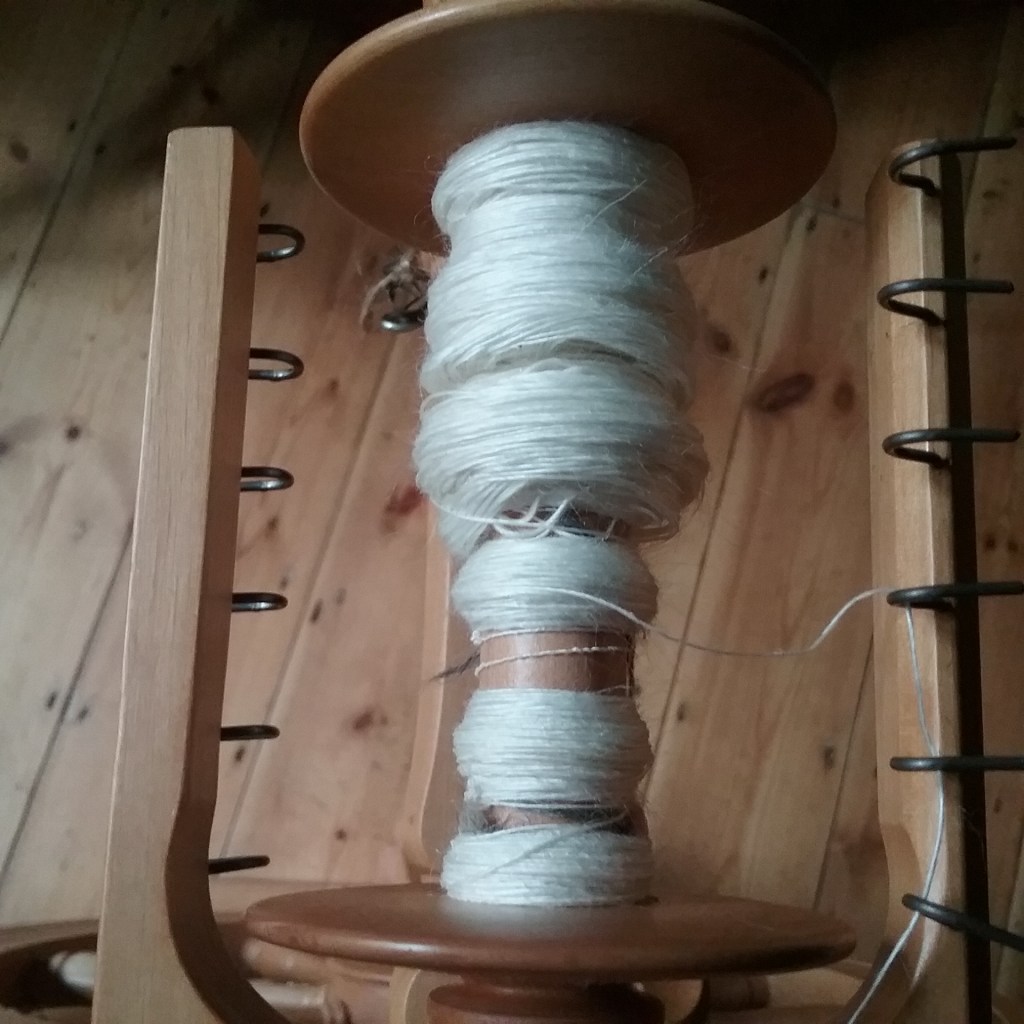
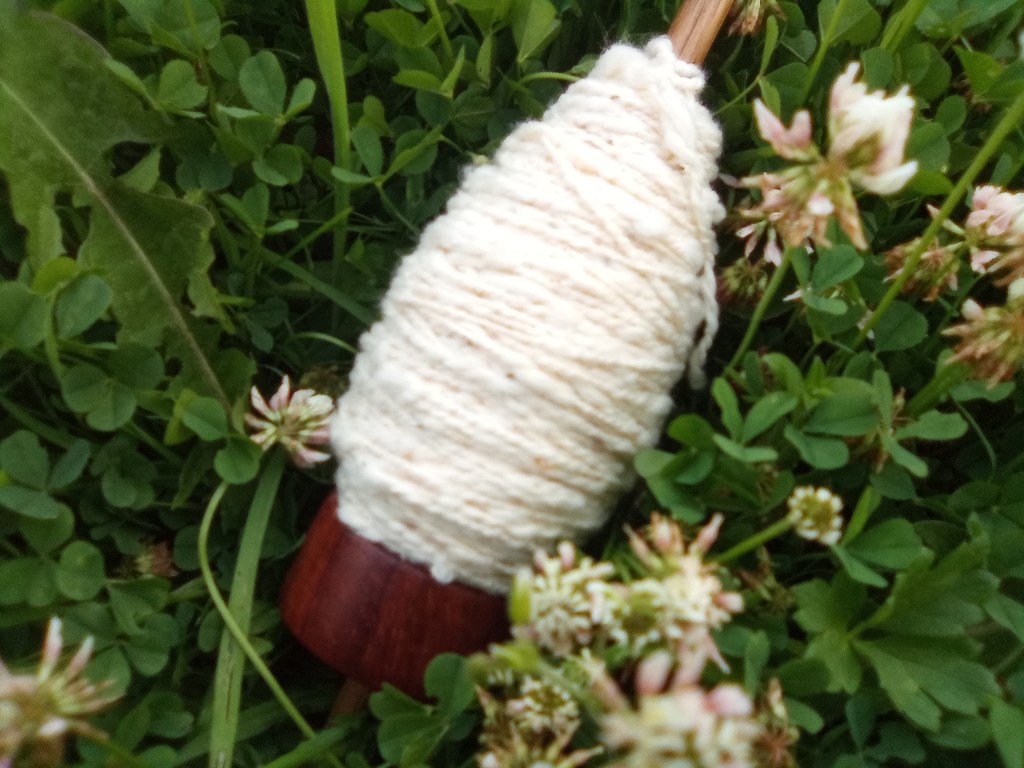
Cotton – My first attempts at cotton spinning went well considering the fibres were purchased secondhand and probably meant for blending, coupled with the fact that my carders aren’t the right size for fine fibres. I swapped from the spindle to the wheel to give me a bit more control as I had both hands free to manage the twist and reduce slubs (but I love cotton fabrics that show imperfections in the weave, so it worked out quite well!).
Challenges – I completed three Tuesday Challenges and don’t think any were a total failure, and hopefully they’ve helped improve my spindle control.
Things not on my list – I also managed to spindle spin some mint fibre I had been ‘commissioned’ to turn into embroidery thread and experiment with a 50g sample of ramie fibre I’d forgotten was in my stash. I have some other plant fibres from last year’s TDF which I’m planning to turn into a project, so the ramie may be able to join them.
Thank you to everyone who has followed along with my challenge this year – my next task will be thinking up some projects to use all the spun yarn! I’m currently knitting a jumper in gorgeous Zwartbles which I’m hoping will be ready to share in the next few months and also have some plans for upgrading my suint bath set-up, so stay tuned for future blog posts (albeit more sporadically!). If you’ve completed TDF this year, do let me know how your ‘wrap-up’ has gone in the comments below!
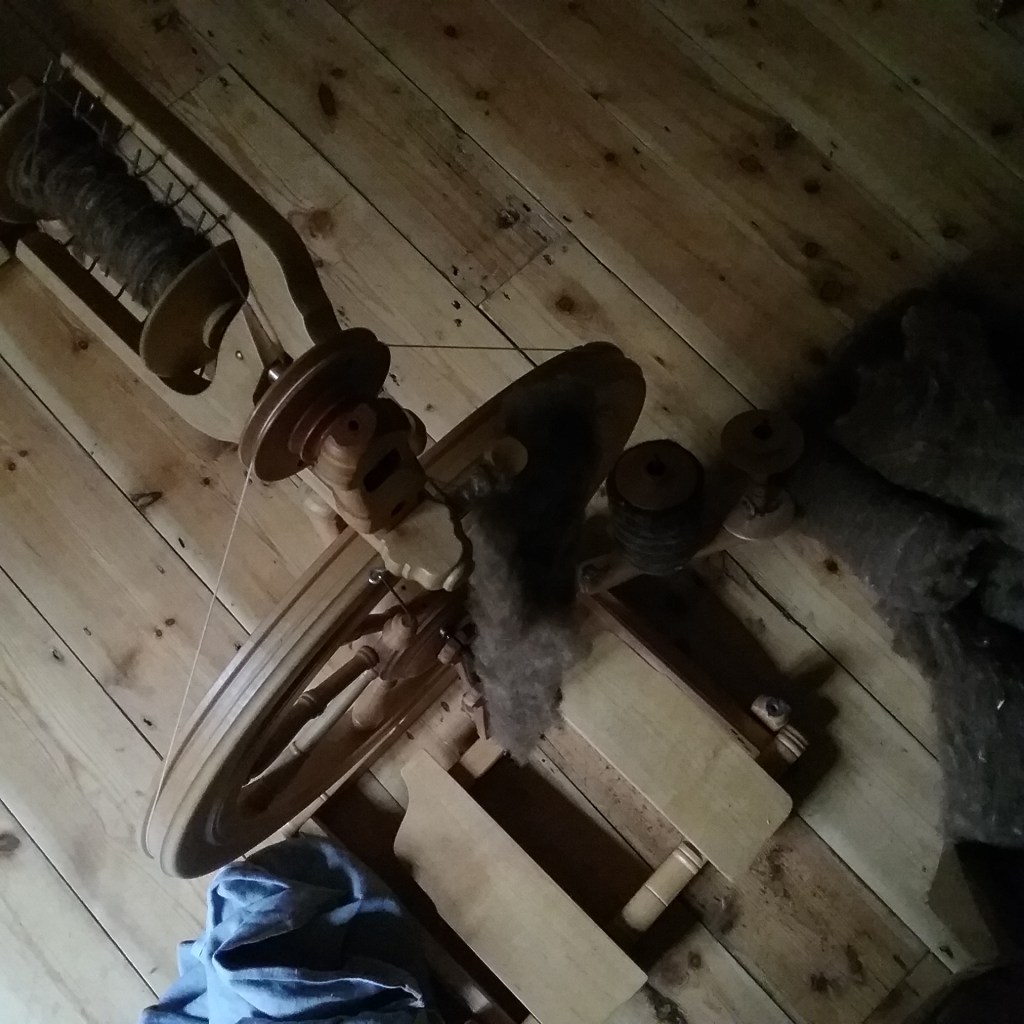
My fibre processing has been quite repetitive this week with my focus on getting the rest of the Castlemilk Moorit processed, spun and plied. It’s the first time I’ve processed a whole fleece start to finish during TDF; the Castlemilk Moorit is one of my smaller fleeces, but it has been in my stash since the early days of my blog so it’s satisfying to know it’s finally ready to be turned into something (but it doesn’t make for the most varied picture gallery!). I’ve made a start on the Black Welsh Mountain (BWM) too – combing is slow work, but quite meditative.
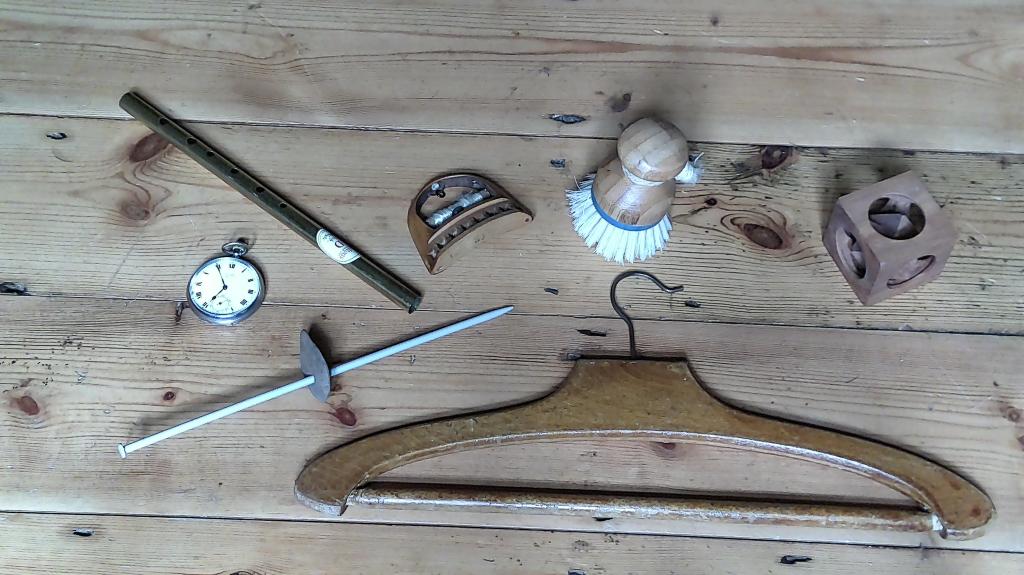
I also completed my second Tuesday Challenge – this week I attempted to spin using random household objects in lieu of a spindle (my favourite was the pocket watch!), with some interesting results which you can see in the video below the gallery. I plied the cotton spun last week on the spindle, and while I think my first attempt is quite good, there were some weaknesses in the singles, so I may experiment and see if using the wheel improves the strength and consistency as I can go a little more slowly without worrying about the weight of the spindle.
Day 9: More Castlemilk Moorit carding and some Black Welsh Mountain combingDay 10: Finished carding the Castlemilk Moorit and spun 1 1/4 bobbinsDay 11: Tuesday Challenge – Making spindles out of random household objectsDay 12: Nearly finished spinning and plying the Castlemilk MooritDay 13: Plied the cotton on the spindleDay 14: Finished plying the Castlemilk MooritDay 15: Skeining and clearing my bobbins & combing some more Black Welsh Mountain
Yesterday I took time to clear my bobbins, hoover (the Castlemilk Moorit had spread dust everywhere) ahead of the final week of TDF. I’ll continue with the BWM and the cotton, but do have a couple of other fibres that I might experiment with if I have time, to keep things interesting!
If you are also joining in with Tour de Fleece I’d love to hear how you’re getting on, let me know in the comments below! As next Sunday is the final day of TDF, my wrap-up will be out either at the end of the day, or on Monday depending on where I’m up to in my challenge alongside video editing.
Happy Spinning!
For more information about my tour de fleece challenge my introductory blog post is here. I’m also posting my progress photos daily on my instagram.
As usual, the first week of Tour de Fleece has flown by and I’ve found myself focusing on processing the Castlemilk Moorit. I had less spinning time in the latter half of the week and have felt progressively less productive as the current heatwave in the UK continues, but looking back over the past week’s photos I’ve managed more than I thought.
I started by separating the Castlemilk Moorit fleece into soft and coarser fibres and carding the soft fibres. I then spent the rest of the week gradually spinning and plying these, as well as taking on a Tuesday challenge (seeing what length of yarn I could spin with just one spin of the drop spindle) and experimenting with spinning cotton for the first time on a drop spindle. I’ve also been filming my progress and you can find this week’s video (including footage from my Tuesday Challenge as it was difficult to photograph) below the gallery.
Day 1: Managed to get around half of the Castlemilk Moorit drum carded ready for spinningDay 2: Spun 2 bobbins of Castlemilk Moorit singlesDay 3: Plied 2 bobbins of Castlemilk MooritDay 4: Tuesday Challenge!Day 5: Started spindle spinning some cottonDay 6: ‘Topped up’ my Castlemilk Moorit BobbinsDay 7: Plying more Castlemilk MooritDay 8: Spun & Plied the rest of this weeks Castlemilk Moorit batts
I have around half the Castlemilk Moorit fleece left to card and spin, so I’m hoping I can make good progress on that next week and hopefully introduce some Black Welsh Mountain to make things a little more varied.
If you are also joining in with Tour de Fleece I’d love to hear how you’re getting on, let me know in the comments below!
My stats also tell me that this is my 100th blog post since starting Loose Ends Fibre, so I want to say a massive thank you to everyone who has joined me on my fibre journey so far, I hope my woolly ramblings have been interesting and provided some calm in the increasingly volatile world we live in.
Happy Spinning!
For more information about my tour de fleece challenge my introductory blog post is here. I’m also posting my progress photos daily on my instagram.
It’s Tour de Fleece time again from the 5th – 27th July!
This year I’m in a position to hopefully spend a bit more time spinning, and having put fibre processing on hold while university deadlines were looming, I’ve decided to use TDF to dive right back in, tackle my stash and do a few experiments and challenges along the way. That being said, I’m still going to make a list to help give me some focus. As per usual, I’m including fibre prep within my challenge so without further ado, this years’ to-do list incudes:
Castlemilk Moorit – Long term followers may remember my fibre prep post for this fleece – I wasn’t happy with the way it was hand carding so put it to the side. Since then I’ve acquired a drum carder and after experimenting, I think I prefer it in batts. This is quite a small fleece and I have a project in mind, so I’m hoping to get it all carded and spun.
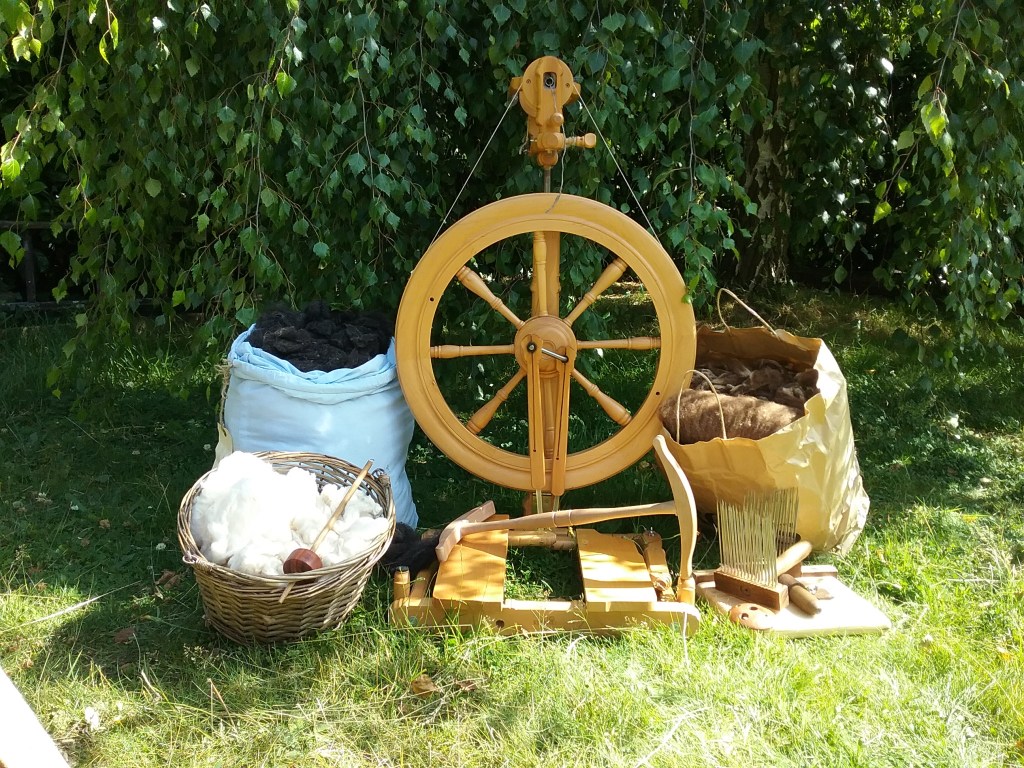
Black Welsh Mountain – This was one of my early fleece purchases from an online marketplace that arrived damp (the hazards of buying a fleece without seeing it). I washed and dried it thoroughly before storing, but some of the fibres are breaking as a consequence of it being damp for so long. Rather than discarding it, I’m going to comb it which should remove broken fibres; then I can spin the combed nests and use the combing waste at a later date for felting. Combing takes a bit longer than carding, so I’ll have to see how much of the fleece I can process.
Cotton – A few years ago I bought some cotton fibre second hand. I’ve never spun cotton before, but it has a short staple which I’m hoping will make it a good spindle project.
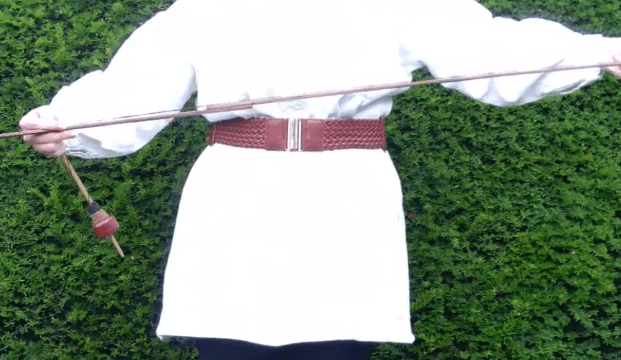
Challenges – I’ve had a few different challenges suggested this year which should test both my skill and technique. I’ll tackle one per week to attempt in the hope it will be entertaining while also improving my spinning.
As usual I’ll be doing weekly updates on the blog and daily updates on my Instagram, but I’ve also decided to try and film snippets of my week too, including the TDF tasks I don’t normally show on the blog (such as skeining, washing and winding), which although not part of my progress, are important. Providing technology doesn’t play up, I’m aiming to get the videos edited and released weekly too.
If you are also joining in with Tour de Fleece feel free to share your goals and progress in the comments section and if you want to find out what I got up to last year I’ve included links below.