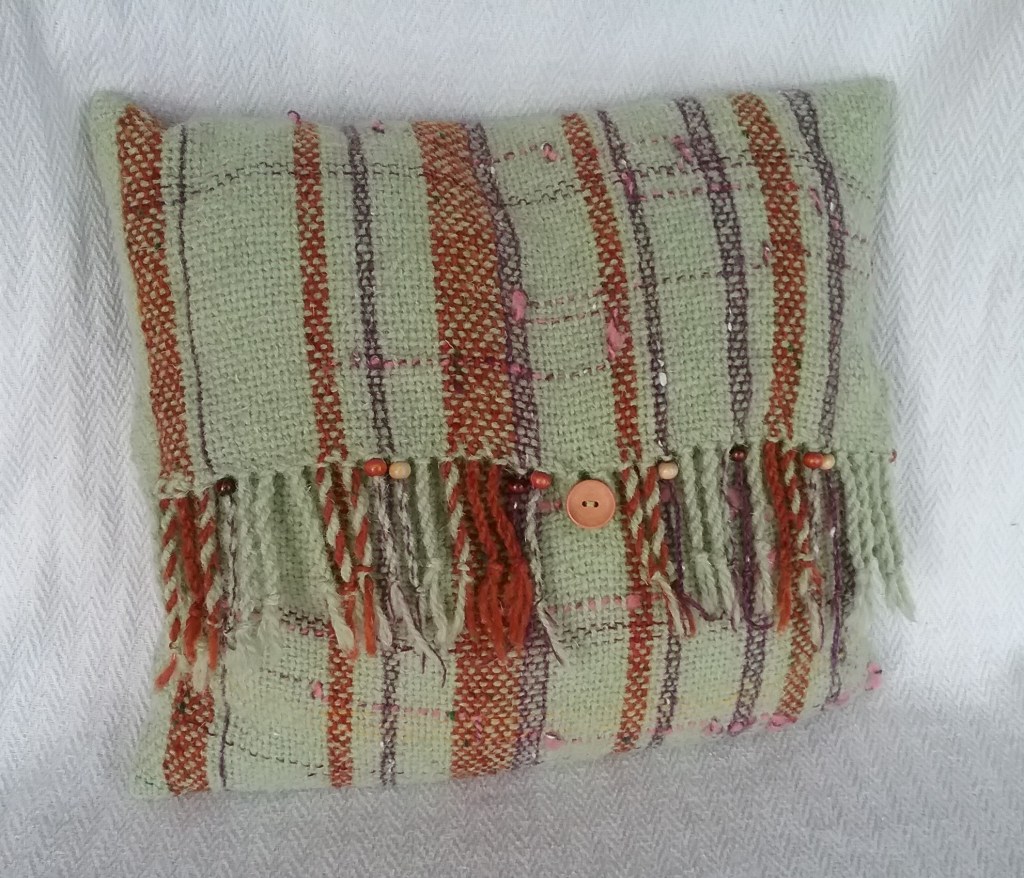
The next project that I thought I would share is a woven cushion cover I made for a friend. It had to have a modern art feel and pastel colours, which differs from my usual style, but it gave me an opportunity to explore some new techniques.
I first measured the size of the cushion the cover would need to fit. The length of the warp needed to be twice the height of the cushion, some extra for the fold over, plus an allowance for shrinkage (these measurements depend on the size of cushion and the amount of shrinkage in the yarn used). Whilst my Saori loom was engaged in another project and I only needed a small warp, I decided to use my rigid heddle with the weavers choice heddle set up in a random dent configuration. Instead of overcomplicating the mathematics for the warp width, I took the width measurement of the cushion, plus extra for shrinkage/seams and clipped my heddles together until they reached that measurement. I then picked some colours out and warped up my loom using the direct warping method.

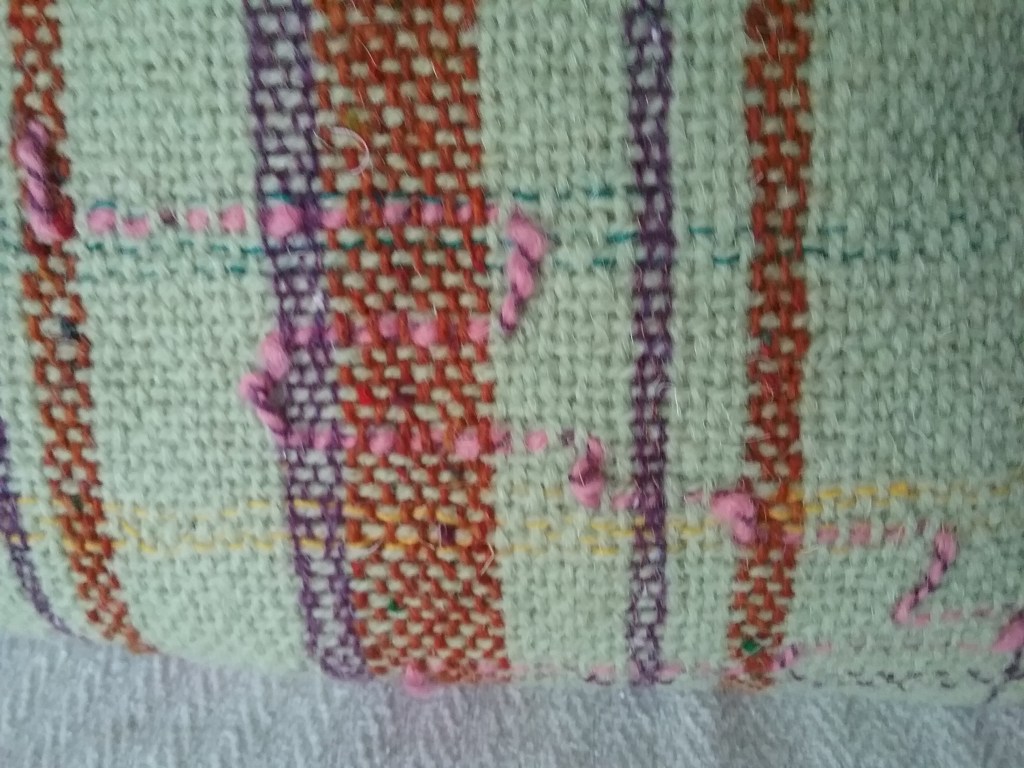
After warping and winding on I began weaving. The cushion is a plain weave using the mint green as the main weft thread to contrast the warp stripes and the pink ‘wandering weft’ hand spun yarn (this was the first yarn I tried spinning on my drop spindle). Ashford have a good tutorial on using art yarn in weaving here. I also added some contrasting weft threads in at random intervals.

When I’d finished weaving I hemstitched both ends (I have a habit of forgetting to hemstitch the start of the weaving and having to do it at the end!) and then cut it off the loom before washing it to allow the threads to properly move into place. To save having to weave in loose ends, I like to use the Saori method and weave them into the fabric as I go.
Although I omitted to take any pictures, sewing was completed on a vintage Singer hand crank machine – I have found that vintage machines sew handwoven fabric very well. The cushion is a simple folded construction. Firstly one of the edge widths is ‘hemmed’ and the excess fringe cut off – this will be the end that sits under the fringed fold. The fabric is then folded around the cushion (you can choose any configuration) and pinned right sides together at the seams. The cushion is then removed and the seams sewn. I find it is easiest to pin and sew the bottom seams first and then pin and sew the seams at the folding top. The cushion then slides into the cover.
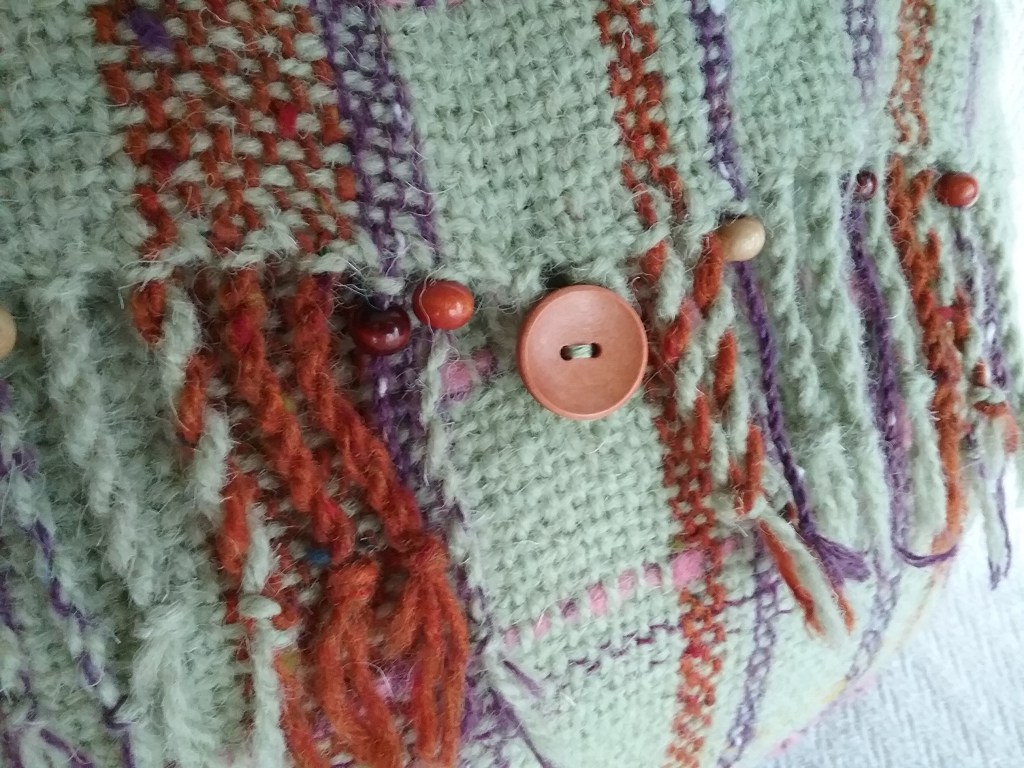
I added a twisted fringe with wooden beads (good Youtube video showing twisted fringe here). To close the cushion I encircled two of the twisted fringes around each other and sewed them to create a button loop, before sewing on a button.
This was quite a quick weave and gave me an excuse to try out new techniques I’d wanted to do for a long time. As always, let me know in the comments below if you’ve attempted something similar.
Happy Weaving!

I love that! So creative and pretty.
LikeLiked by 1 person
Thank you! 😊
LikeLiked by 1 person