It’s been a few weeks since my last post – I’ve got quite a backlog of spinning, weaving and fibreprep, so whilst I catch up with all that, I thought I would share a tutorial for some simple braid weaving that uses very little equipment. It can be used as embelishment for other projects or have a practical use. I was taught this many years ago and have not researched how far back the method dates, although lots of braiding appears in the medieval era, so other braids may have been developed around the same time.
Materials
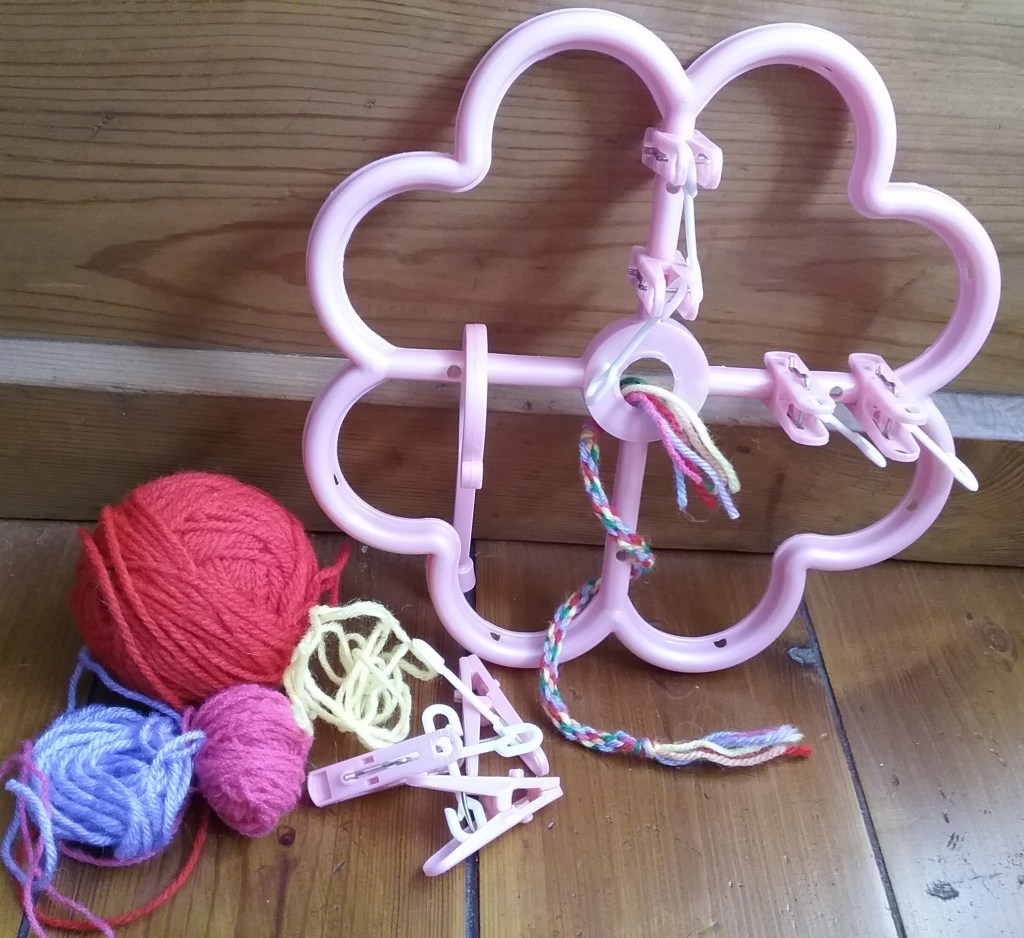
- ‘Flower’ shaped sock airer (for this technique it needs to have 8 grooves)
- Wool
Preparation
Before starting to weave the airer has to be de-constructed. The hook in the centre needs to be removed and the pegs unhooked – don’t discard these as you will use them as weights (you can remove the plastic bits hanging from the pegs if you feel like it). This should leave you with a setup seen below:

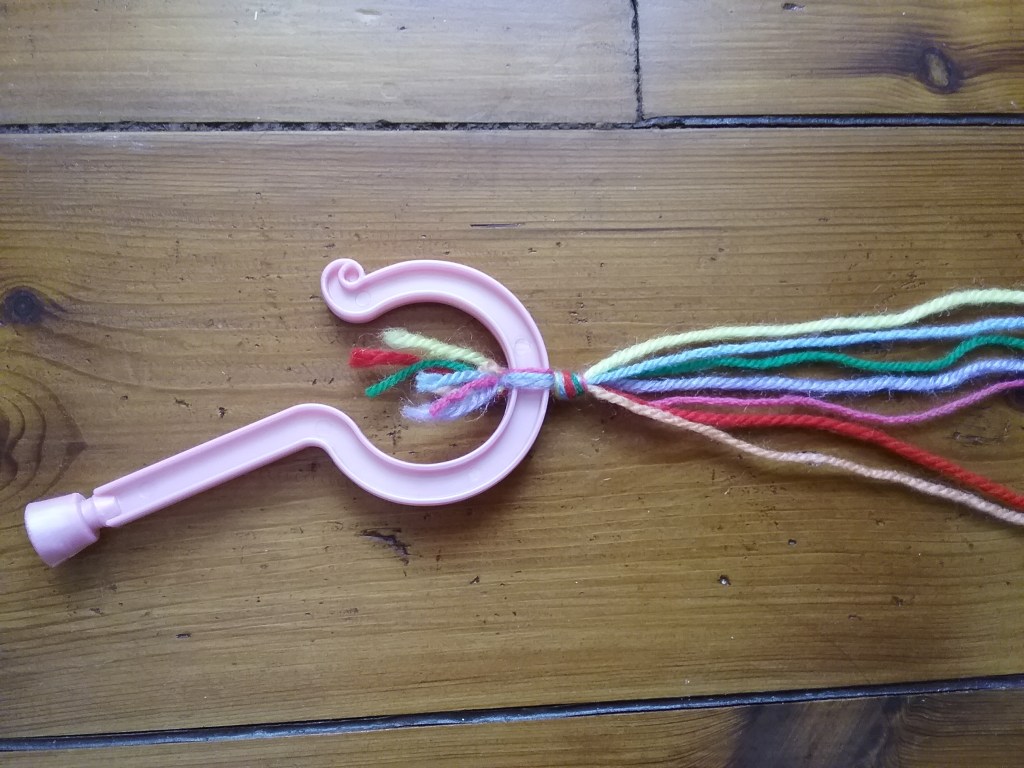
Next you need to prepare your yarn. As a rough guide for length use 1.4x the length of wool than you want you finished cord to be (so if you wanted 1m of cord, use 140cm of wool) plus a bit extra for the knots at the ends.
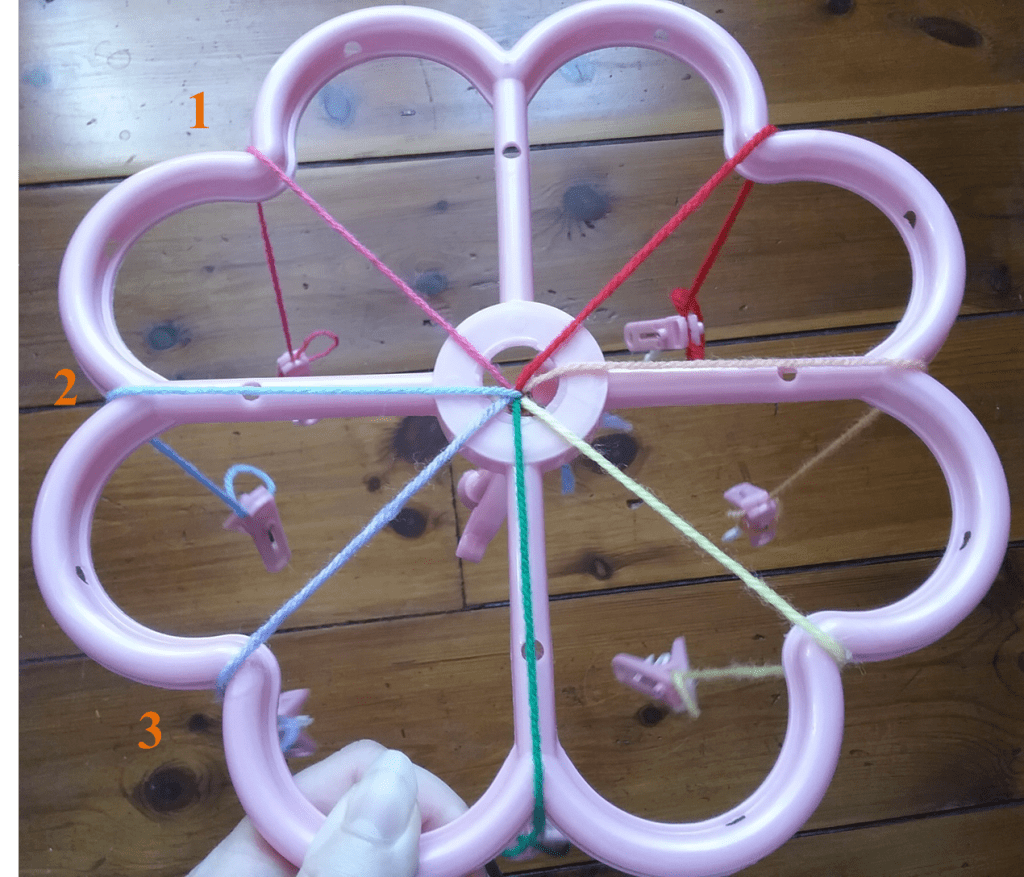
Cut out 7 of lengths of wool, tie a knot at one end leaving enough tail to tie this end to the hook as seen opposite
Then thread the hook through the centre hole. You might want to lay it on a table at this point ready for the next step.

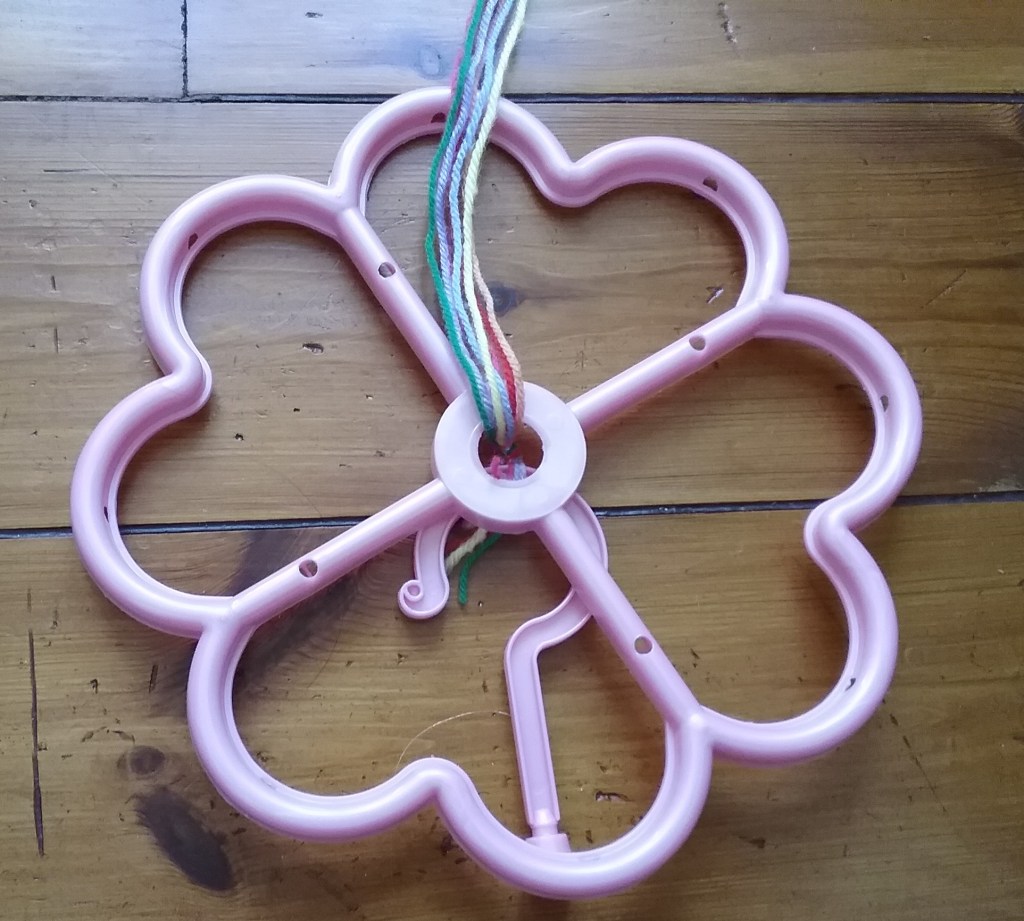
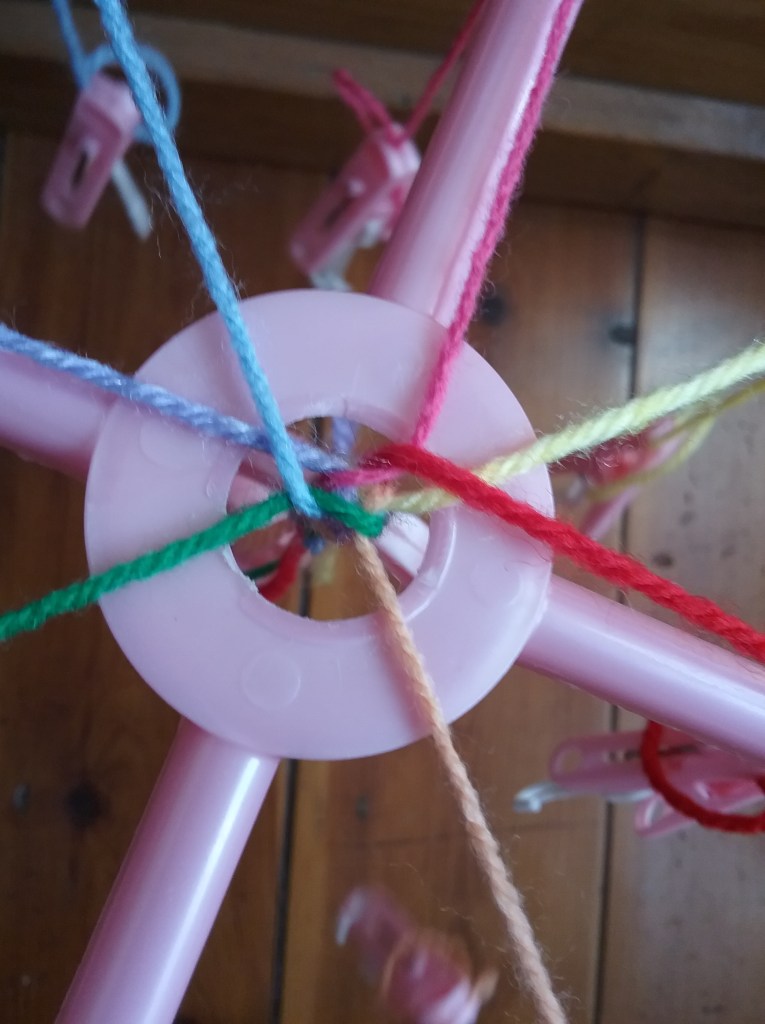
Spread out the lengths of wool laying them into the grooves (there’s no particular order to this, just lay them where they naturally fall). You should be left with one empty groove.
Finally, wind the extra lengths of each strand into a ball and clip a peg to it – the pegs will serve as weights so you can lift the ‘loom’ off the table and the hook won’t pull the wool straight through. You should have something that looks like this.
Weaving
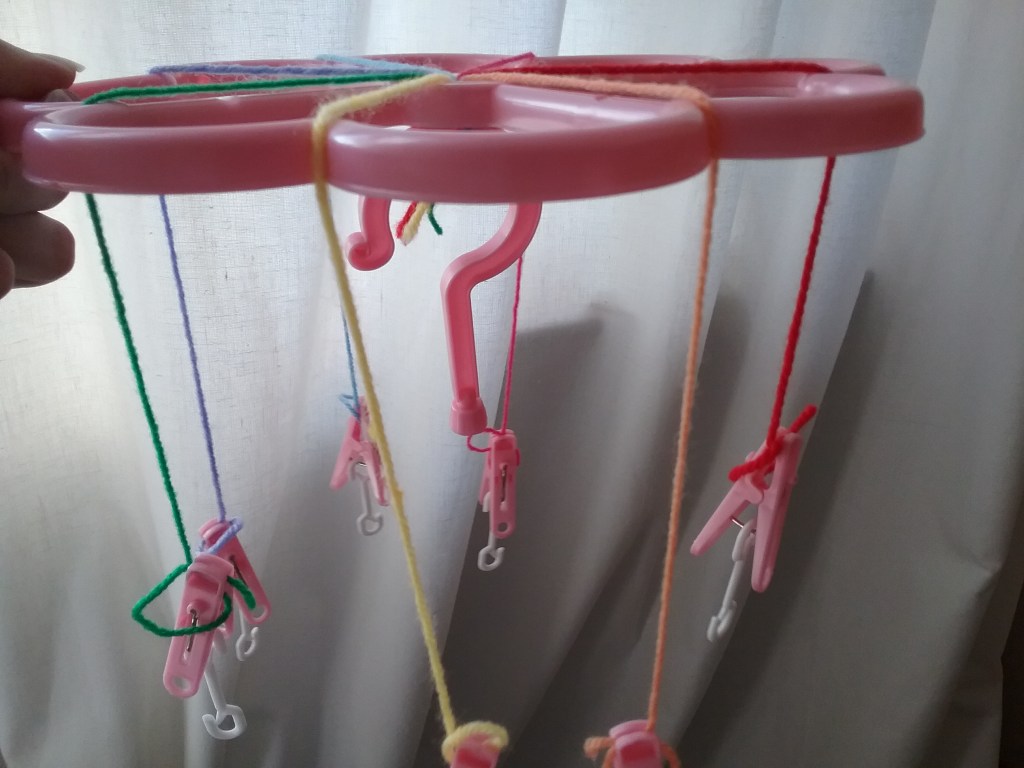
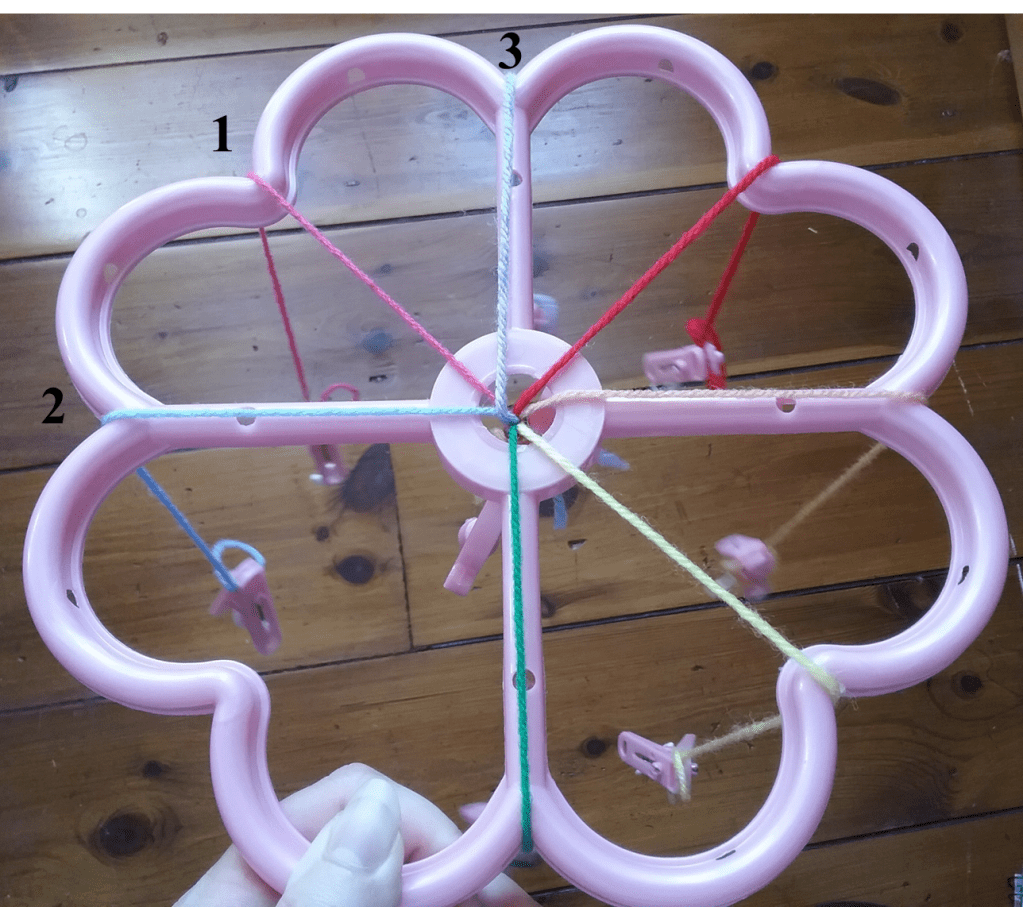
Now that the ‘loom’ is prepared you can being to weave. This pattern is made up of 3 simple steps that repeat until you reach the desired length of cord. For the purposes of this tutorial I’ve used scraps of different coloured wool in an attempt to illustrate the steps more clearly.
Step One
Start with the empty groove facing away from you. Then count three strands to the left (anticlockwise) from this groove. I’ve numbered the strands on the opposite photo.
Step Two
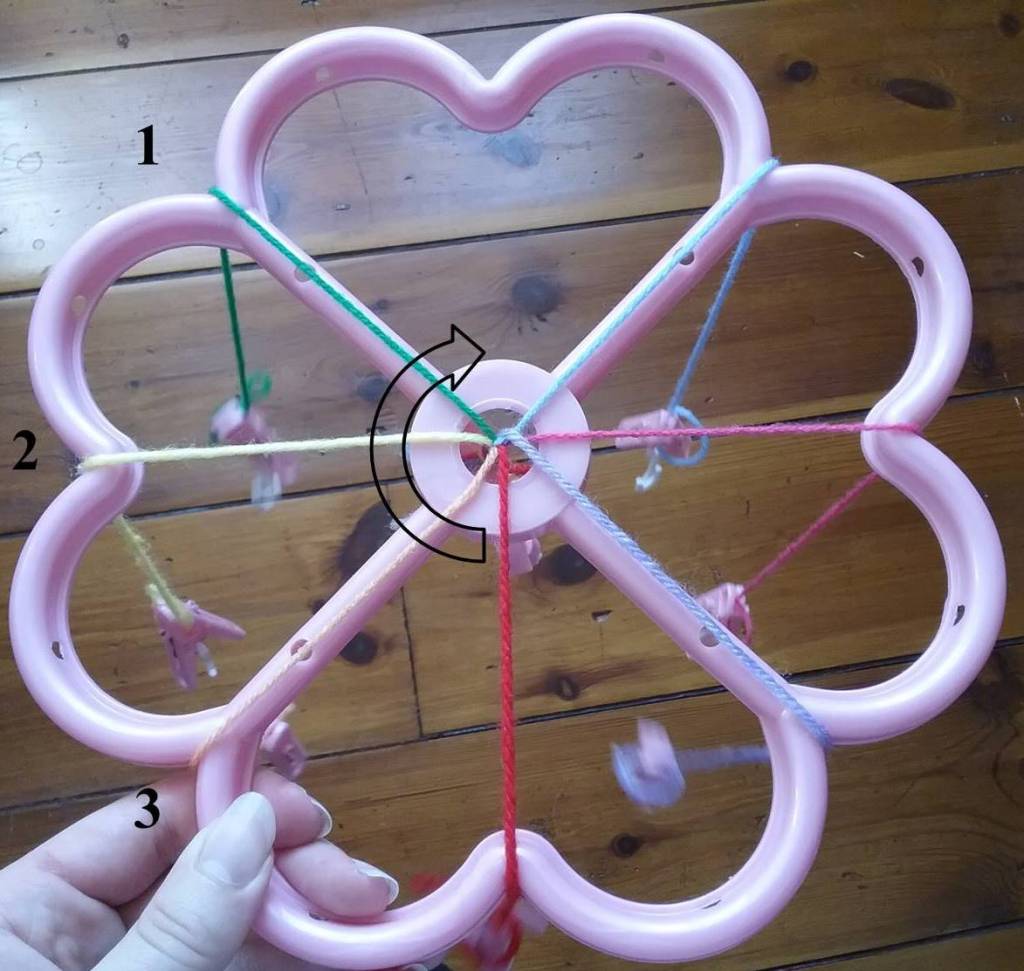
Take the third strand you just counted and place it in the empty groove.
Step Three
Turn the loom clockwise about 90 degrees to reset. The groove the third strand came from now becomes the empty groove and the pattern starts again from step 1.
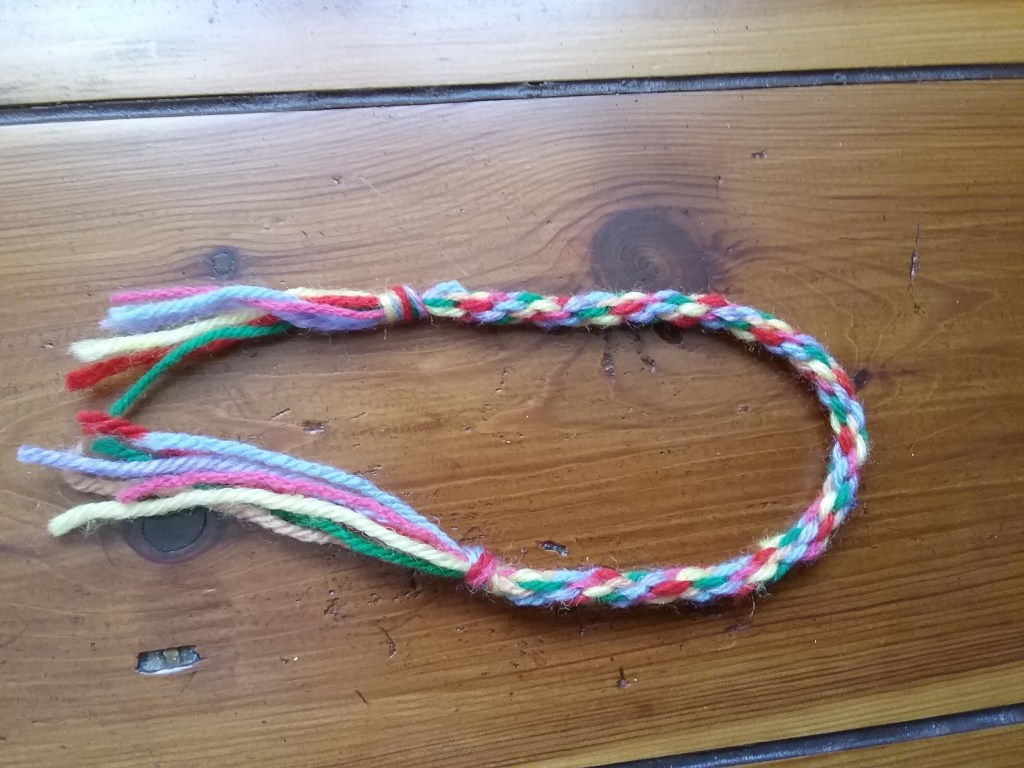
And that’s it! The cord will take a little while to start moving down through the centre, but if it seems stuck at top of the loom after a few rounds, give it a gentle pull. As the pegs move closer to the loom, release some of the wound on wool.
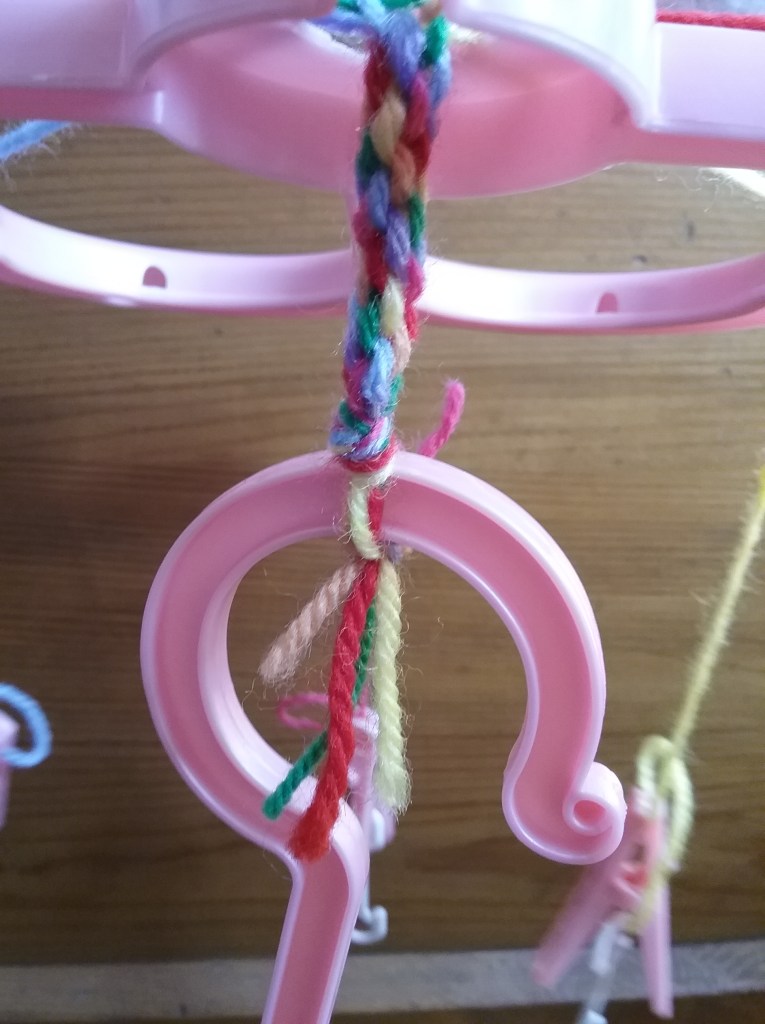
Keep going until the cord is the desired length, then unclip the pegs, tie a knot in that end and untie the hook at the other end.
For a different design, play around with changing the number of strands and the pattern, there are many other variations that could be achieved on a sock airer loom.
If you are going to give this a go, let me know in the comments, tag me on your blog, or share with me on Pinterest – I would love to see your creations!
Happy Crafting!

My sock airer is like an octopus with legs but I will keep a look out for this style just in case. I guess you could try the same method on something cut out from cardboard? But I love the way you’ve used all parts.
LikeLiked by 1 person
Cardboard should work just as well and is a good eco friendly alternative (I bought my airer from a charity shop when I was about 8, so although it’s plastic, I consider it recycled). Let me know how you get on if you make one out of cardboard! 🙂
LikeLike