It’s been a while since I’ve posted any projects that are not solely for me, but I do love the challenge of making something for someone else. One of my very good friends is a fellow Lord of The Rings nerd and I’ve also managed to get them on board with the wonders of historical pockets. Unlike modern pockets which range from completely useless to being just about able to squeeze something in (if there are any at all), historical pockets were usually tied around the waist separately, either over or under skirts and put todays pockets to shame. I’ve been putting pockets in all my sewn garments (including my most recent sewing project) and can easily fit a couple of small books in them if I want.
Happily, it was easy to combine pockets and LOTR in the form of Gollum and Bilbo’s exchange during the riddles in the dark sequence. I originally made just one pocket for my friend for Christmas, but then found myself wanting my own. So, since the dialogue is two ways I made two pockets; a darker pocket with Gollum’s line for my friend whose wardrobe comprises of mainly black and a hobbit-y pocket with Bilbo’s line for myself to match my autumnal colour palette.
Gollum’s Pocket
Pockets were historically made from scraps and leftovers so make fantastic stash-busting projects. I had some black crushed velvet style material left over from a project when I was a teenager. Unfortunately it was synthetic, but ultimately it’s better for the environment to use what’s in one’s stash than to buy new (though if you do need some black velvet for a pocket or similar project, I recommend cotton velvet since it has a better stiffness than synthetic). Since this fabric was quite drapey I used a grey cotton blend from my stash for the backing which I’ve used for nearly all my skirt pockets and have been really happy with. I thought this would subtly echo the washed out colours of Gollum’s loincloth in the film.
I free-handed a pocket shape adapting my usual pattern (see further reading section), traced around it on both fabrics and cut them out with about a 1″ seam allowance. For a cleaner finish for what I was going to do later, rather than binding the front opening I rolled it back and stitched it down in a very small seam, before setting the pocket pieces aside.
I then had to think up the design; I’m usually quite averse to doing this sort of thing digitally, but it can be useful to move things around and resize them on a computer to see what looks good. You could easily do this on any program, but I ended up using Cricut’s Design Space (I have an early Cricut maker machine which has come in very handy for lots of projects over the years). I don’t have a subscription as I tend to upload my own images for the machine to cut or draw and in this instance I wanted to quickly make a stencil. Once I was happy with the layout I sent the stencil to cut and then laid it out on the front pocket piece to check.
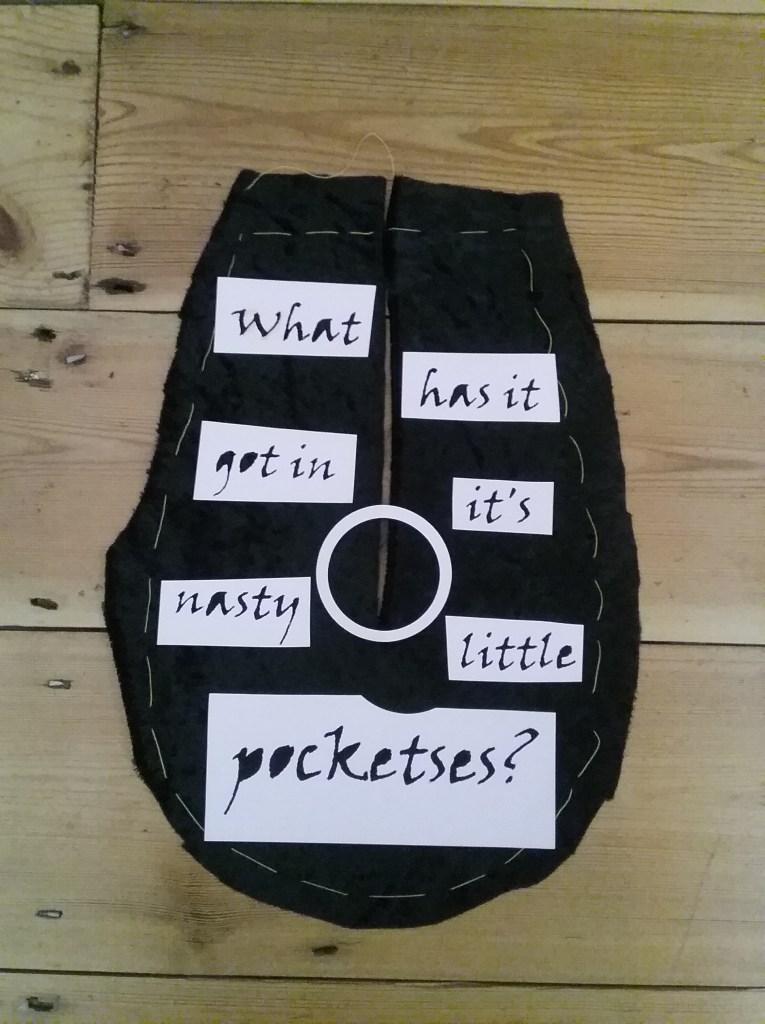
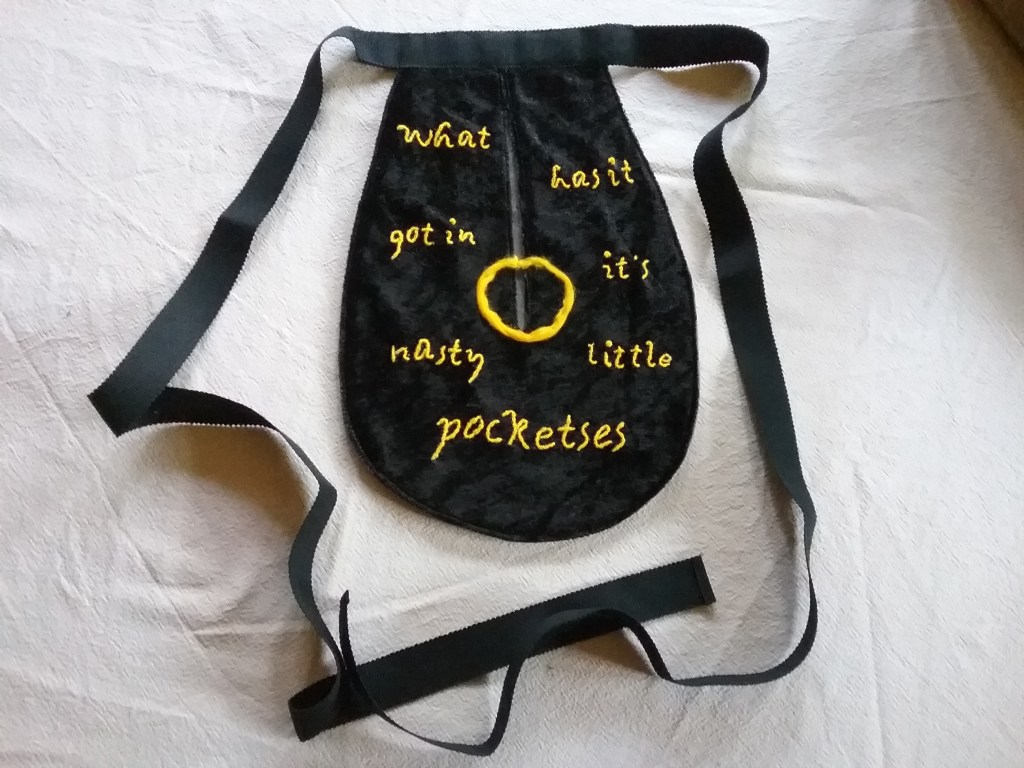
Next came the embroidered text, which was three strands of yellow/gold yarn couched down with yellow thread. The black velvet was a nightmare to draw on as it had a tendency to shift, so this was where the stencil came in handy over free-handing. I would lay out the whole stencil, pick one word and hold it down very firmly before tracing over it using a white wax dressmakers pencil. This temporarily ‘stuck’ the words onto the fabric so I could remove the stencils, place it in an embroidery hoop and stitch it on. The central ring was made of dyed fleece from my stash. I wanted it to echo some of the elegant designs on the book covers, but also to look like it was on fire. To achieve this I loosely needle felted a ‘sausage’ of yarn before sewing it into a circle being careful to catch only the back of the fibres so unlike the couching, it didn’t look stitched down.
This done, I could then sew the back and front of the pocket together with a French seam and add a grosgrain ribbon tie to the top to finish.
Bilbo’s Pocket
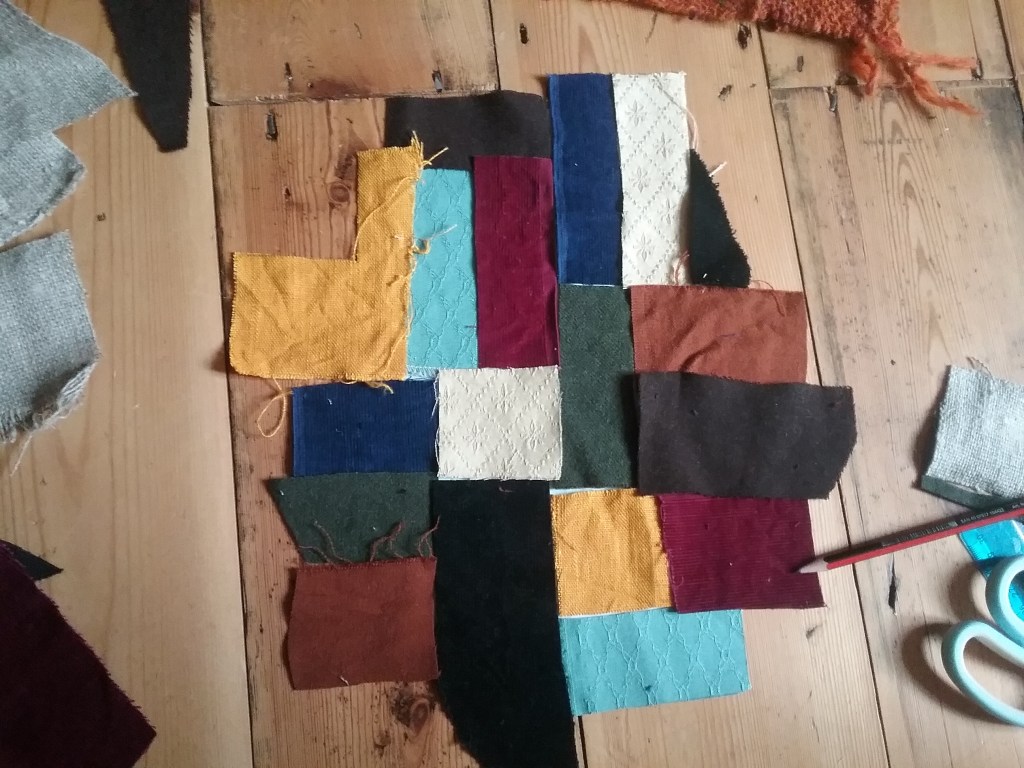
In the true spirit of historical pocket making, I wanted my hobbit-ish pocket to use up more scraps. Bilbo’s costumes (and indeed all the hobbits in the fellowship) have rich autumnal hues contrasting with lighter natural shades. Most of the fabrics are corduroys, linens and wools, with the odd touch of velvet, and happily these are fabrics I fawn over. In the Hobbit films, Bilbo is shown wearing a patchwork dressing gown, which the costume designers created from scratch. While the design can be seen in film stills, there is a photograph of the flat fabric in The Hobbit Chronicles: Cloaks & Daggers book (if you’re interested in the behind the scenes, of costume, props and set design, it’s a fantastic read) and it was this I based my patchwork layout on.
I searched my stash for offcuts and pulled out several scraps of fabric left over from previous projects and picked up some corduroy scraps from the local charity craft centre (I was meant to be dropping things off!). After gathering my fabrics together I felt I needed an orange/rusty coloured fabric; I had an uncut wool fabric in the right colour, but was hesitant to cut into it since this project was meant to be using scraps. I decided instead to weave some pin loom squares that I could cut into shape, but when laying everything out I realised they were too thick, so abandoned that idea and cut a couple of small rectangles from the end of my rust wool (there’ll be offcuts from that fabric eventually after all!).
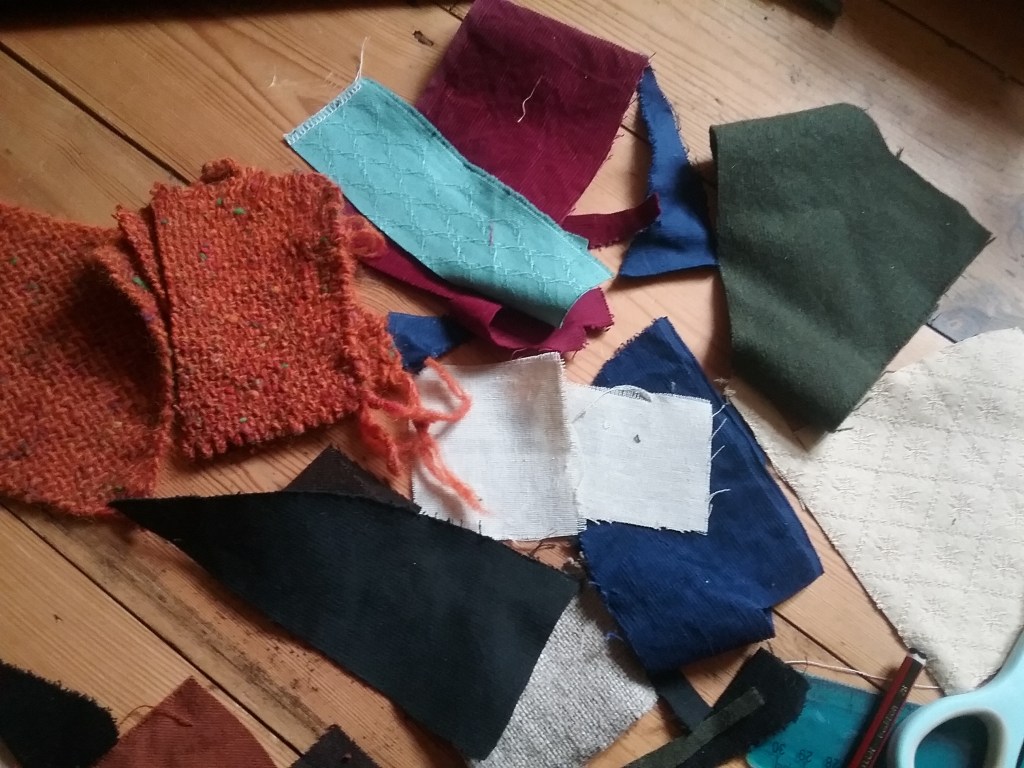
Scraps gathered, I then began to cut them down and arrange them over the pocket shape. I left some overlap to account for seam allowance when sewn together (but not quite enough vertically). Once happy with the layout, I sewed the patchwork pieces together and pressed the seams flat before attaching the grey cotton blend as a backing fabric.
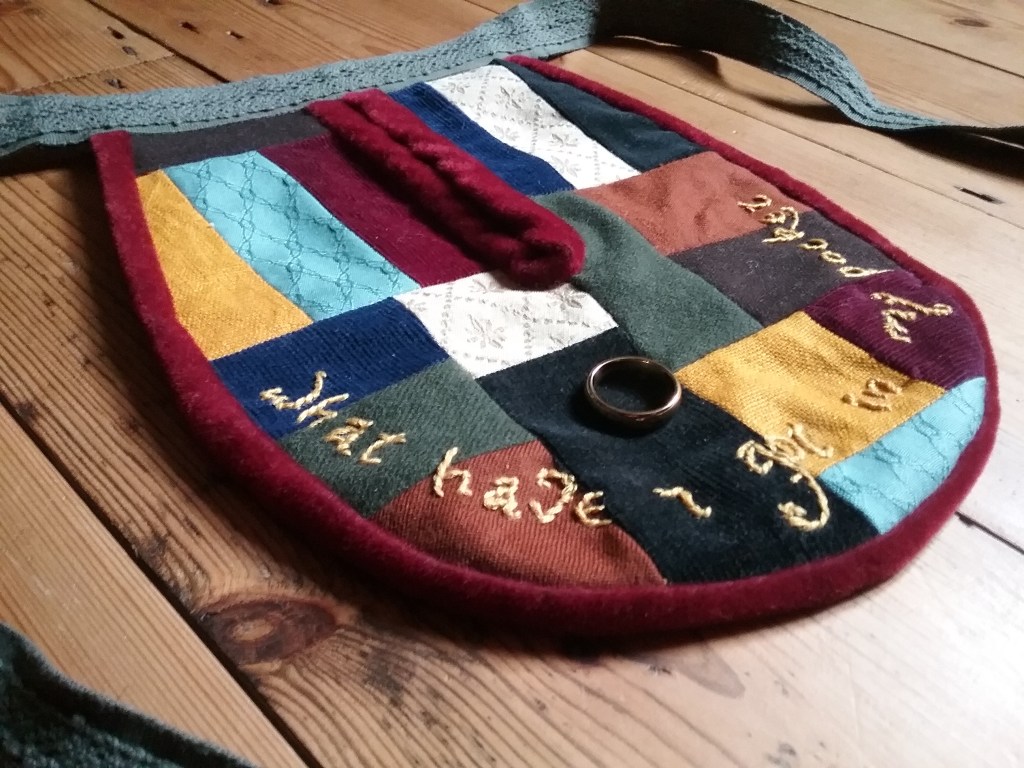
I had a very small number of red velvet scraps in my stash that came from a childhood coat that was turned into a shoulder cape for world book day when I outgrew it, and I decided these would make the perfect edging for the pocket, as Bilbo’s dressing gown has similar cuffs and collar. I attached the inside edging before going any further so it was easier to wrangle under the machine and kept the raw edges from fraying while I worked on the rest of it.
Next it was onto the embroidery, I opted for a gold cotton embroidery thread and stem stitch to resemble Bilbo’s handwriting as depicted in the films. I ended up using the wax pencil and stencil technique again, but ended up forgoing the embroidery hoop since the pocket was quite thick and I didn’t want to crush the velvet. Since I was working on a small section at a time and the fabric was quite stiff this worked out ok and didn’t cause any wrinkling to the embroidery.
Embroidery complete, it was time for the finishing touches. Unlike the first pocket, I finished this in the more traditional method, sewing the back and front of the pocket together wrong sides together with a binding covering the raw edge. I stitched together my very last scraps of velvet into a length that would fit around the pocket, sewing the front seam with the machine, cutting away as much excess seam allowance as I dared to reduce bulk and then hand felling the binding at the back. I then trimmed the excess fabric at the top of the pocket and attached a waistband made of a lace embellished twill tape I ‘burgled’ from my mum’s stash.
Riddles in the Dark
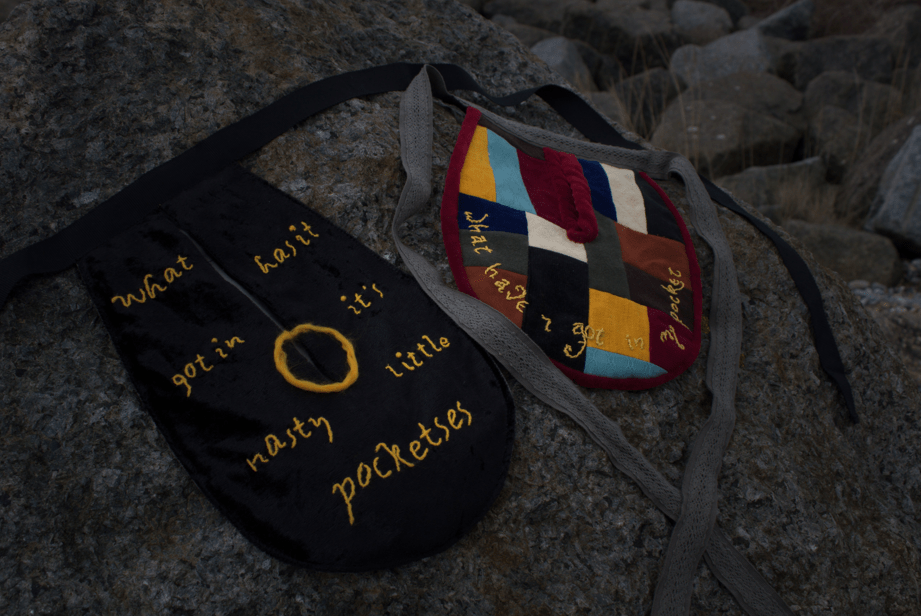
In true LOTR fan style it was time to get creative with the final reveal and pay homage to one of my favourite scenes. I roped in the wonderful leanagibsonphotography to join me on the other side of the camera in some riddles in the dark pocket-ography (choreography with pockets?!), which you can see towards the end of the video.
I had a lot of fun making these; I love the challenge of having complete creative freedom, yet also be working from an existing reference. I’m really happy with how they turned out and I now have the perfect pocket to put other precious things like seam rippers in when I’m crafting so I don’t put them down and then turn into Gollum for half an hour while I look for them!
Happy Sewing!
Further Reading/Useful Links:
- V&A: Women’s Tie on Pockets
- V&A: Make your Own Tie-On Pockets
- Free Skirt Pocket Pattern from Truly Victorian
- Royal School of Needlework: Couching Stitch
- Royal School of Needlework: Stem Stitch
- Riddles in The Dark scene from The Hobbit for anyone completely befuddled by this post!
