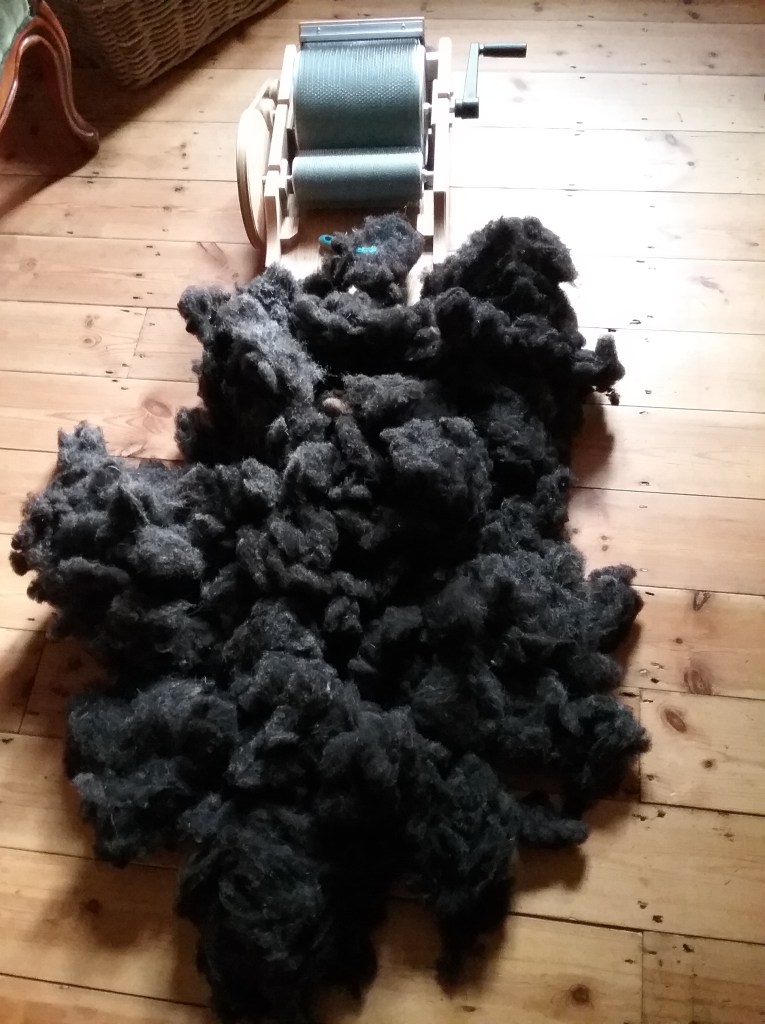
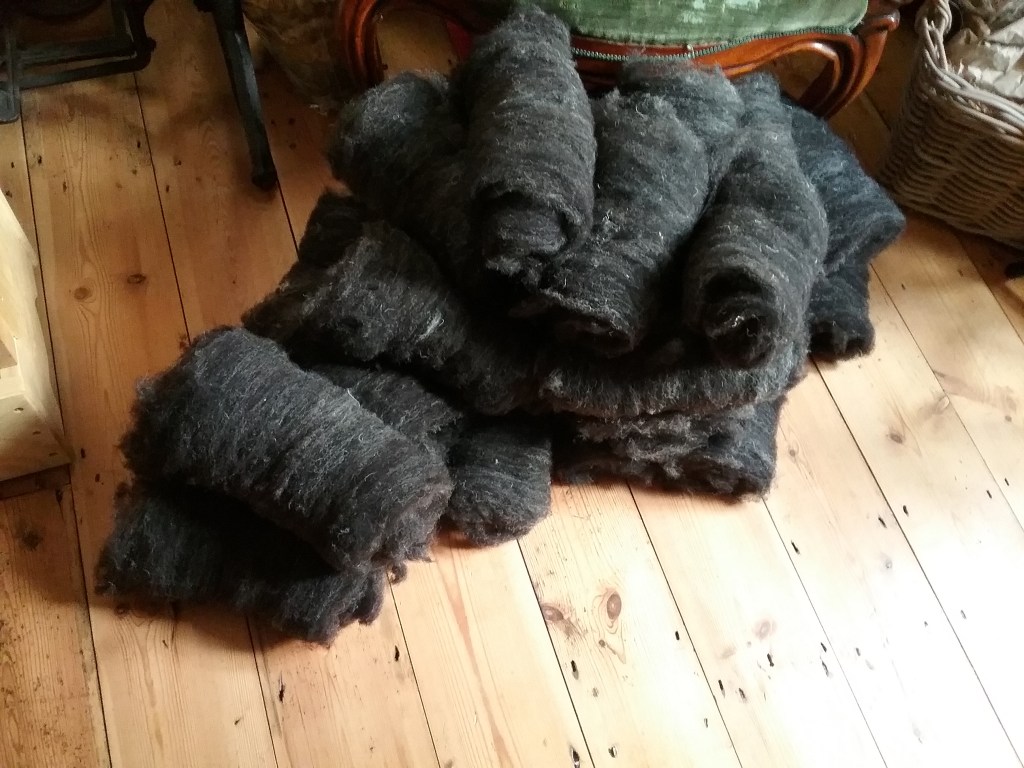
After my feather collar I had a lot of combing waste and couldn’t bear to throw it away. I gathered it together and quickly ran it through the drum carder so it formed loose batts. Despite being the second time it had been prepped, there was a lot of dust and broken fibre under the drum carder.
Now, I could pretend that I always intended to make a hood, but sometimes projects just don’t go to plan and I think it’s just as important to share those moments as the successes.
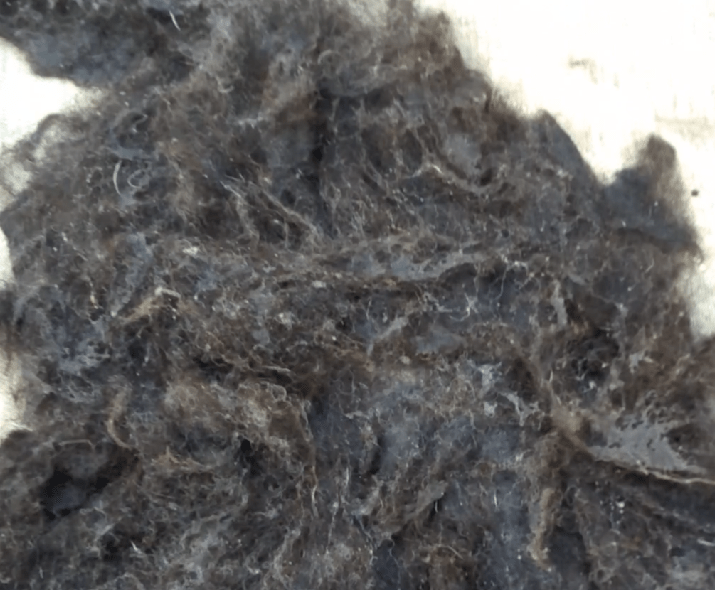
The misguided genius below was the start of the wet felting project I planned to use the BWM combing waste for. I’m no expert in wet felting, but have had enough experience and time researching to know when something really isn’t working. I’d been working the first layer of the first side for around an hour, within which time I’d also tried shocking it with cold and boiling water, trying with more and less soap, but to no avail – the fleece absolutely refused to wet felt (in fact after I tried in a last ditch effort to roll it so I could put more pressure on, it was fluffier than before I laid it out!). I’d seen a couple of felting bloggers who had said BWM could be tougher to felt, I just hadn’t expected that much of a challenge!
I could have kept at it and hoped that eventually the thing would felt, but I’m a firm believer in working with the fleece rather than against it when spinning, so if my BWM didn’t want to felt then I wasn’t going to force it. I can save that project for another time with a fleece that is more suited; I’ve got a good resist made up (from thick canvas so I can avoid using plastic) so it will be ready for when I need it.
In the meantime I rinsed and dried out the un-feltable BWM and pondered my next steps – I still had to get a BWM project out in 13 days. I was curious if I might have more luck needle-felting it, so I grabbed a very small section of one of my batts to experiment with. It held together better than the wet felt, but I could still separate the fibres more than I would be able to with other fleeces – evidently it was a tough old fleece (though I do still want to experiment more with needle felting it later)!
What to do next?
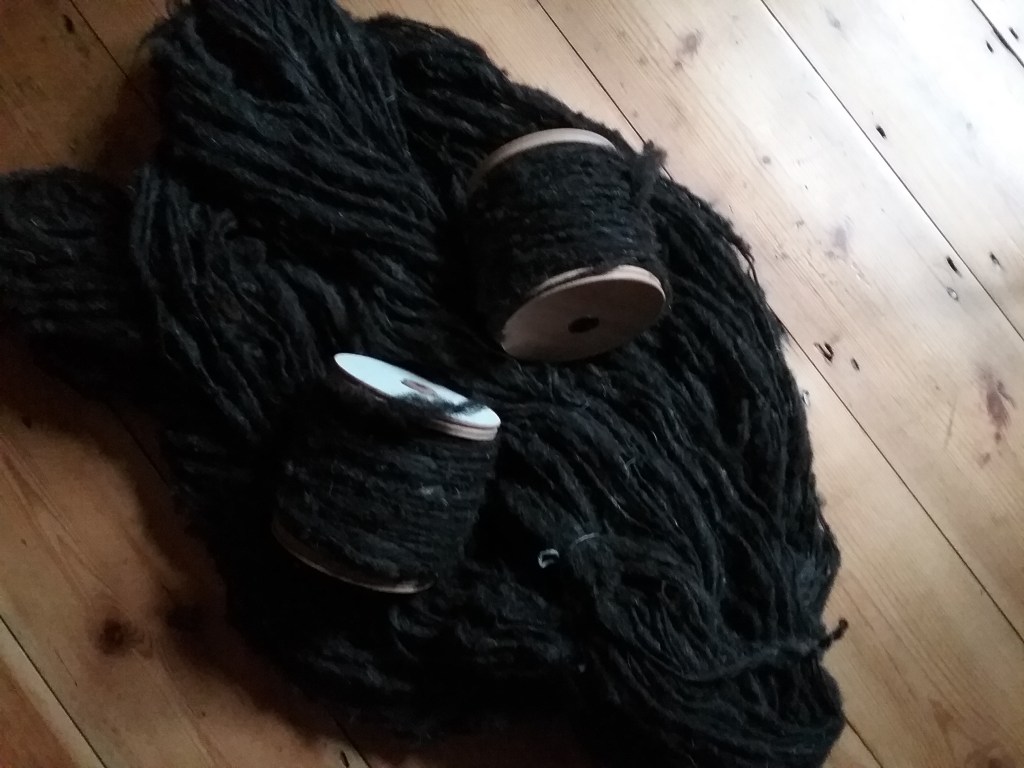
Realising felting wasn’t the best solution, I began loosely spinning it into singles with the intent of weaving it into a useable fabric. I set up my jumbo flyer and managed to fill nearly six bobbins worth, which was more than I expected considering I’d already used a lot of the fleece in the feather collar. The batts made from the combing waste had shorter staples and some broken fibres trapped within them, so the resulting yarn was shedding quite a bit. In an effort to reduce this (and test just how felt resistant this fleece was) I decided to set the twist by boiling the yarn with soap, agitating it with a wooden spoon and then plunging it straight into cold water to rinse. While it definitely tightened up the yarn, I didn’t notice much shrinkage and when winding it onto my shuttle later, I could still break apart the fibres with my hands when needed.
Now I had some very fluffy textured yarn, I had to decide what I was going to turn it into. I had a tight deadline, but I also wanted to show off the fleece’s dramatic natural colouring as the original project would have. I needed something that was simple, but with enough drama to show off the fleece, so I turned to some of my old projects for inspiration. Several years ago I made a hooded scarf for a friend and always thought I should have made something similar for myself, so looked online for inspiration and discovered several patterns inspired by the Skjoldehamn hood, a Viking/Iron Age archaeological find from Norway made up of rectangles and squares. I decided to use this as my initial inspiration and calculated what width and length of warp I would need to weave two rectangles that could be assembled into the hood.
Weaving
I’d set aside 3 balls of coarser Zwartbles yarn from my previous fleece processing which I intended to use for weaving rather than knitting, and decided this would be the perfect opportunity to put them to use. The Zwartbles was a ‘grabby’ yarn (it easily sticks to itself), so I thought if the BWM wasn’t going to felt in the slightest, perhaps the fabric would be tighter and more secure if the Zwartbles felted a bit around it.
Since this was a small project I warped up my rigid heddle loom and began to weave. Taking inspiration from the weaving style I used in my Herdwick rugs last year, I wound the yarn onto the shuttles as a single and compacted the weft tightly with the reed (the intention being that this would help give the fabric more structure). Weaving was straightforward, I hemstitched both ends and also tied knots over the hemstitching to further secure the ends before fulling.
Once again, I wanted to push the BWM’s felting limits. I submerged the fabric in soapy water as hot as I could bear my hands in and washed it vigorously. There was still quite a lot of shedding, but once dry the gaps had closed up and the Zwartbles warp was definitely catching on itself; the BWM was still completely unaffected, so the only further experiment I could have done would have been to put it in the washing machine (that would have risked losing the drapey quality of the fabric, but I might try this with the breed study square when I get round to it).
Assembling & Changing the Design
I then began folding and tacking (basting) the two pieces of fabric together into the Skjoldehamn hood style, but found that I just wasn’t happy with how it was sitting. The fabric had a fluffy quality, and much like my woven Ryeland, it didn’t have the drape a thinner worstead weave would have. So I spent some time playing around with the fabric to see what would work best, eventually deciding that I would use some of the fabric folding techniques in the Skjoldehamn hood, but make it more scarf like.
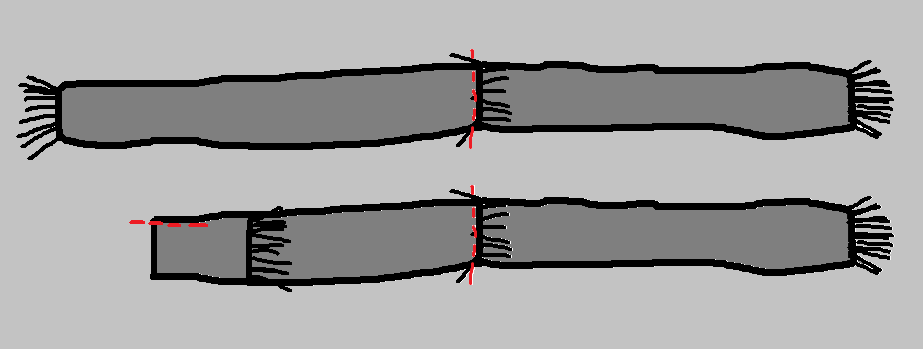
To achieve this I first sewed the two pieces of fabric together at one end, offsetting the tassels so they would show on whichever side was visible (arguably I could have just woven a double length of fabric in one go, but it was quite thick so would have overloaded the front beam of my loom – plus I always like handspun fringe detailing!). I then folded one end onto itself the length of the top of my head to just past my shoulder and stitched down the side the length from the top of my head to my neck – the diagram shows this a little more clearly.
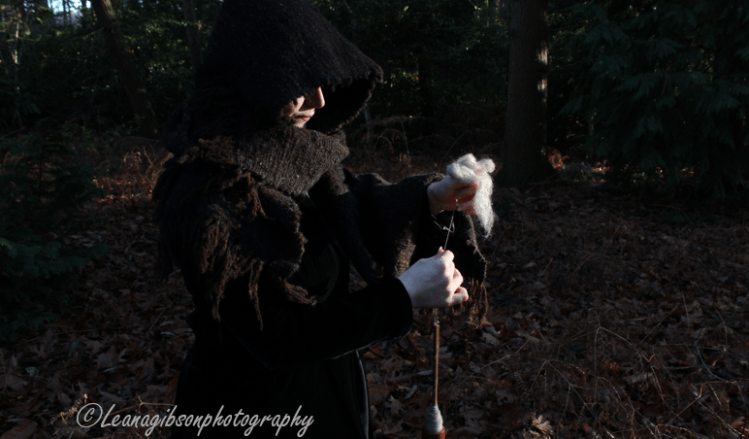
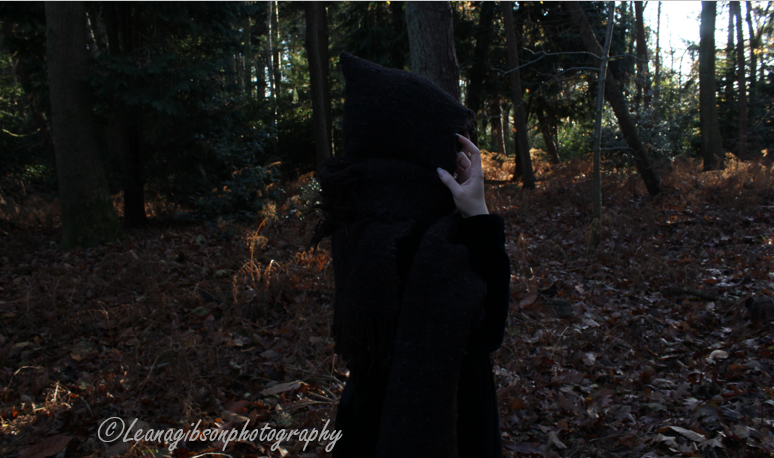
All that was left was for me to turn the hood portion the right side out to hide the seam allowance. The long side of the scarf then wraps around the neck and shoulders to secure it in place (I’ve used a shawl pin to further secure it from slipping off my shoulder), and now I was ready to go and frolic as a wool witch (or possibly a Sith or Nazgul!) in the woods…
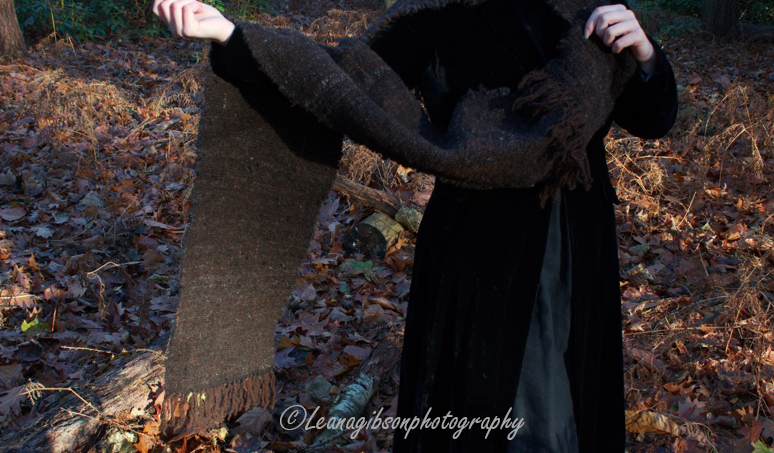

Thank you to the wonderful @leanagibsonphotography for braving the cold for another little photoshoot!
Once again there’s a video of the making of process (apologies for the dull lighting in places, my daylight filming hours were limited!):
Despite not being quite the project I planned, on the whole, I’m pleased with how this turned out. There are definitely some things I might tweak to make it fit better, and I need to sort out a way of fixing it at the shoulder for when I’m wearing it double wrapped (I couldn’t get my usual shawl pin through four layers of fabric!), but it will definitely keep me cosy on winter walks. I still have a little yarn left over, so I’m hoping to experiment with some more mixed fibrecrafts with that next year.
Thank you for joining me this Wovember, I hope you’ve enjoyed the posts – if there are any that you’ve particularly enjoyed and would like to see more of (either in general or for Wovember) then do let me know! In the meantime, it’s back to more wool witchery…
Happy Crafting!
