(or an ode to the projects you think will ‘only take a day’)
Falling down the fibre rabbit hole has led me to explore sustainability, particularly of clothing. There are many problems with fast fashion; environmental pollution from synthetic materials and dyes, overconsumption, and worker exploitation to name but a few. Working with and researching wool over the years has made me acutely aware of this and I’ve found myself becoming a bit of a fibre snob, checking labels and avoiding fast fashion to slowly curate a more sustainable wardrobe. I also have a fascination with historical clothing, which has given me a good excuse to try my hand at sewing my own garments. My foray into sewn garment making has been relatively recent and I never thought to document the first few garments I made (hence this is my first blog post that isn’t about wool), however after my deluge of wool posts during Tour de Fleece, I thought this little side quest might provide some alternative reading!
The Plan
A few months ago I acquired some red brushed cotton fabric that used to be curtain linings, thought them too nice a fabric to use for making clothing mock-ups, and thought they would work well as a cosy autumnal skirt. I wasn’t sure how the fabric would behave as a skirt, so wanted to avoid cutting the fabric as much as possible, should I change my mind later in the process. Happily one of the easiest (and zero fabric waste) skirts to make is an 18th Century petticoat; 2 rectangles, 2 seams and a waistband that is adjustable, so while my red brushed cotton was not the most historically accurate of fabrics, I proceeded, naively thinking this project would only take a day…
Making Pockets
Before starting on the skirt I had to make some pockets. Unlike modern pockets, historical pockets can fit all manner of objects from books to spindles and fibre, being either sewn into the waistband (directly as I did here, or with a support), or tied around the waist as a separate ‘garment’ (hence pockets could be ‘picked’). You can easily make a pattern for these, however I already had the free pattern printed from Truly Victorian, so opted to adapt this instead.
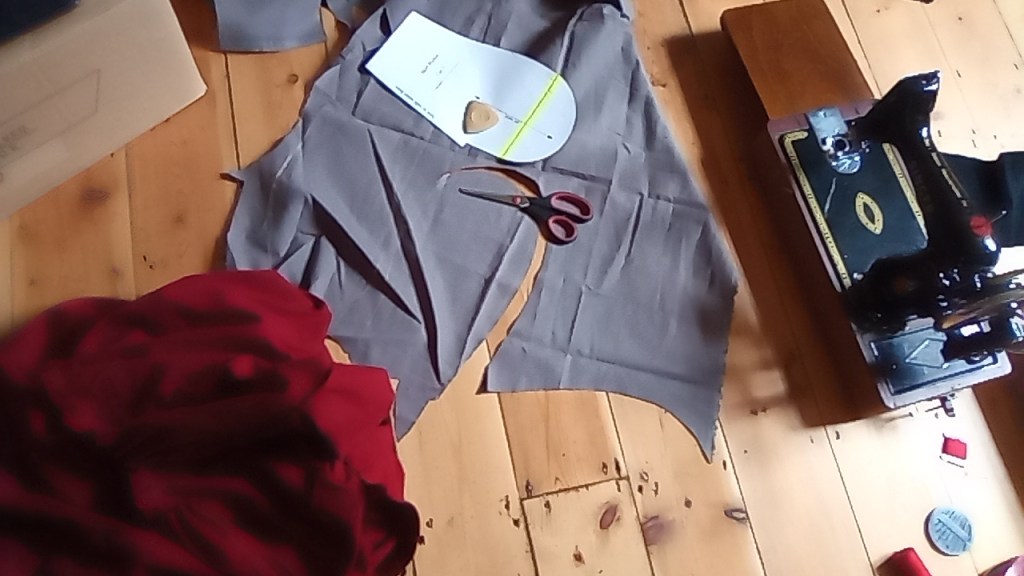
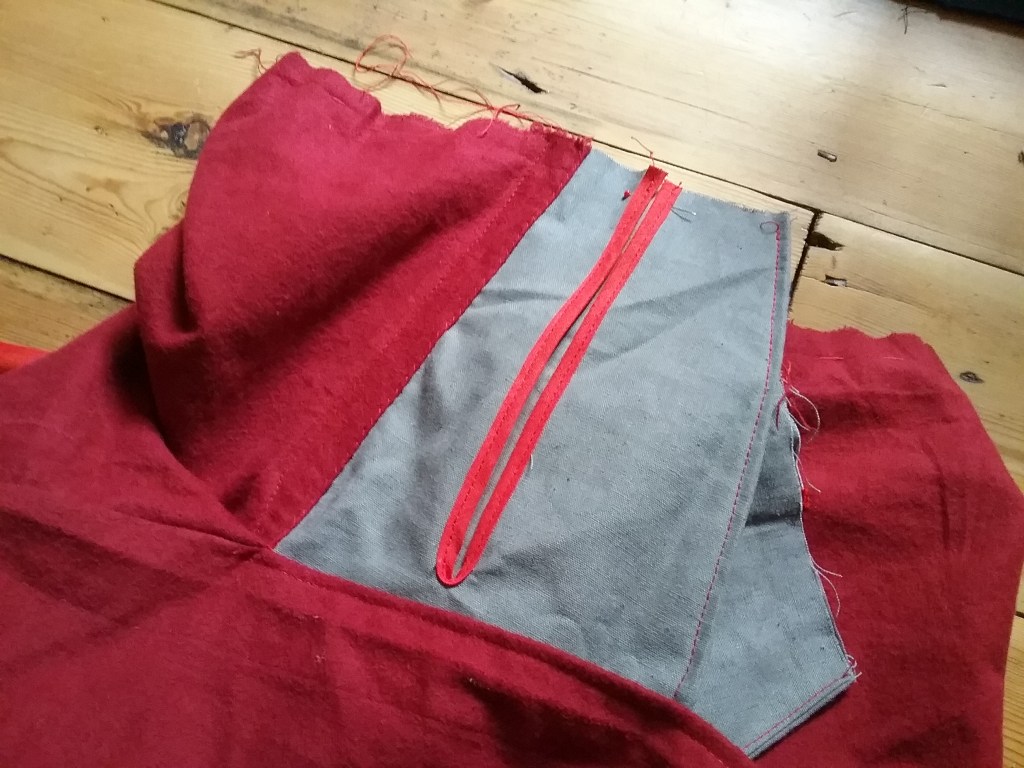
Since the pockets won’t be seen when wearing the skirt, I cut them out of some grey cotton/linen blend fabric and French seamed them around the entire edge leaving the top edge free. I then cut a slit long enough to get my hand in on one side so they opened at the ‘front’ rather than in the seam. I then covered the raw edges in bias binding from my stash, which by happy coincidence was red! In hindsight, it would have been easier to bind the edges before French seaming the pockets together, but my sewing machine is quite well behaved when it comes to fiddly corners.
The Skirt Body
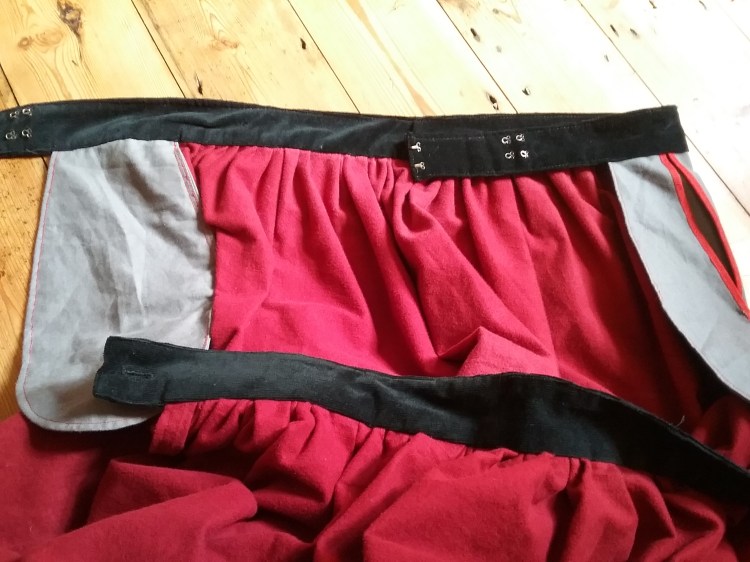
I then stitched both brushed cotton rectangles together at the short ends leaving around 3″-3.5″ open at the top. The idea is that the front and back panels each get gathered down into half the waist measurement and attached to separate waistbands; the back then ties around your front and the front ties around your back so the skirt overlaps at the sides where the pockets go, hiding the gap at the side seams and meaning the skirt is adjustable (this makes more sense in the photos towards the end of the post).
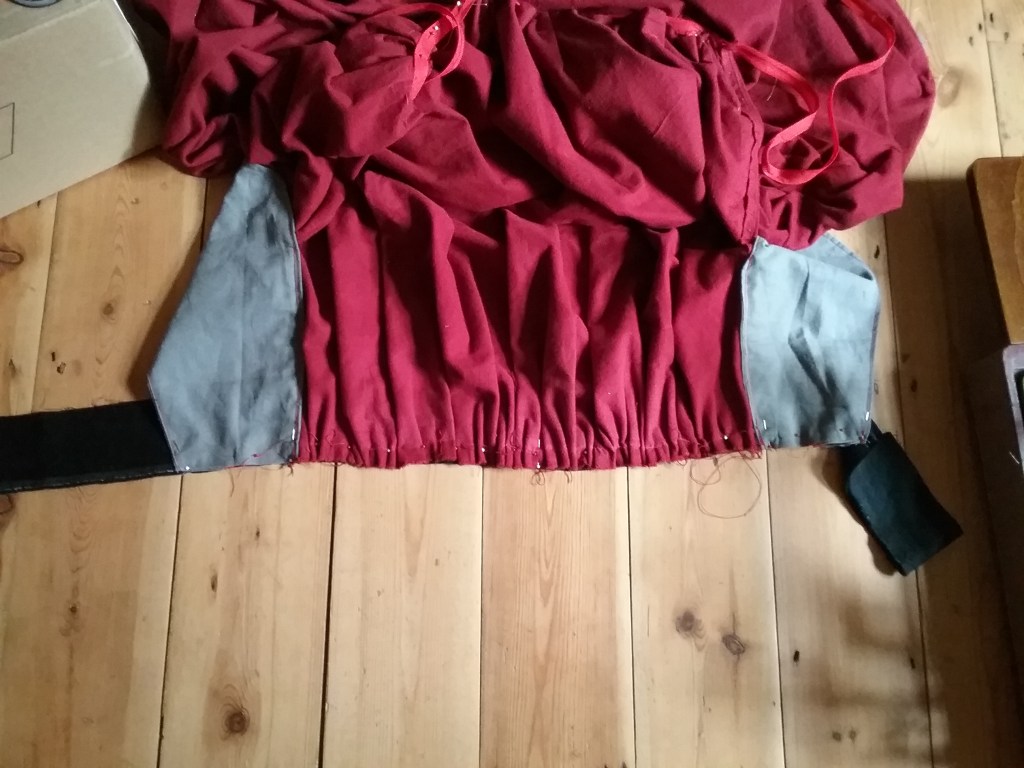
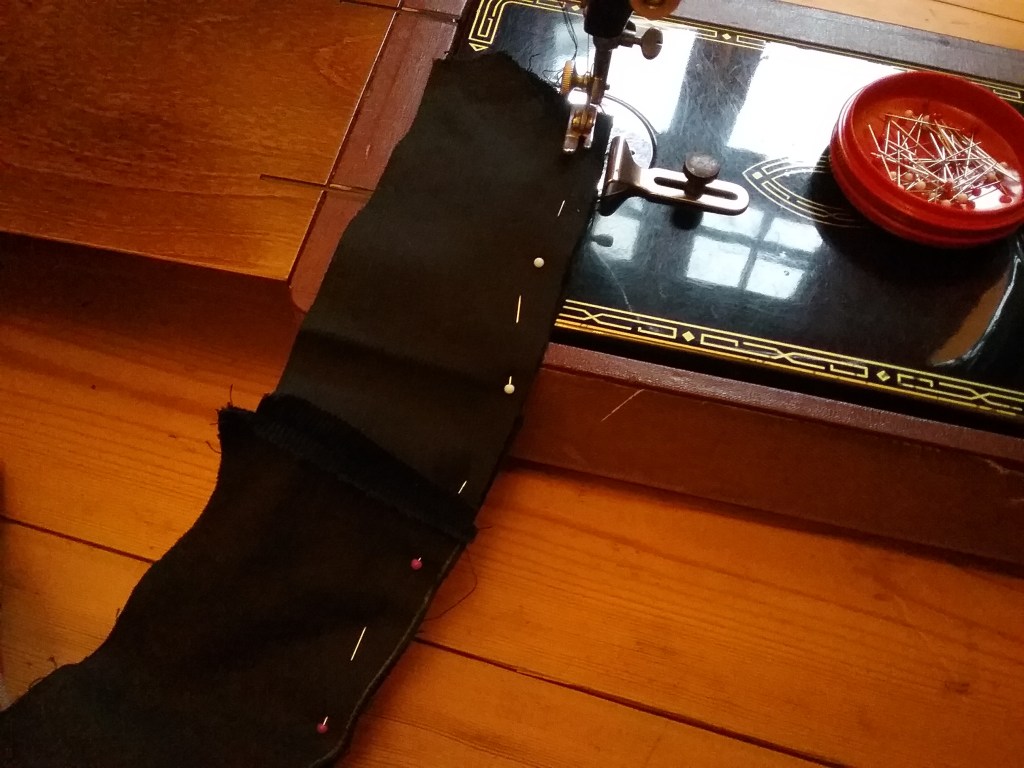
I finished the raw edge on the front panel and sewed the pockets onto the raw edge of the back panel after which it looked something like this:
The Waistband
I dug out some ribbon and twill tape from my stash intending to make the waistband ties – once the waistband was gathered and sewn on, my final step would be finishing the hem and side seam edges – easy! However, the ties I had found either didn’t complement the red or were not sturdy enough to hold the weight of the brushed cotton. I delved back into my fabric stash and found some long scraps of black corduroy which contrasted nicely with the red fabric and were sturdy, but thick corduroy would have been too bulky to successfully tie around the waist front and back. Rather than go back to the drawing board I decided to get creative and overengineer it, so my simple one day project continued on and off for the rest of the week!
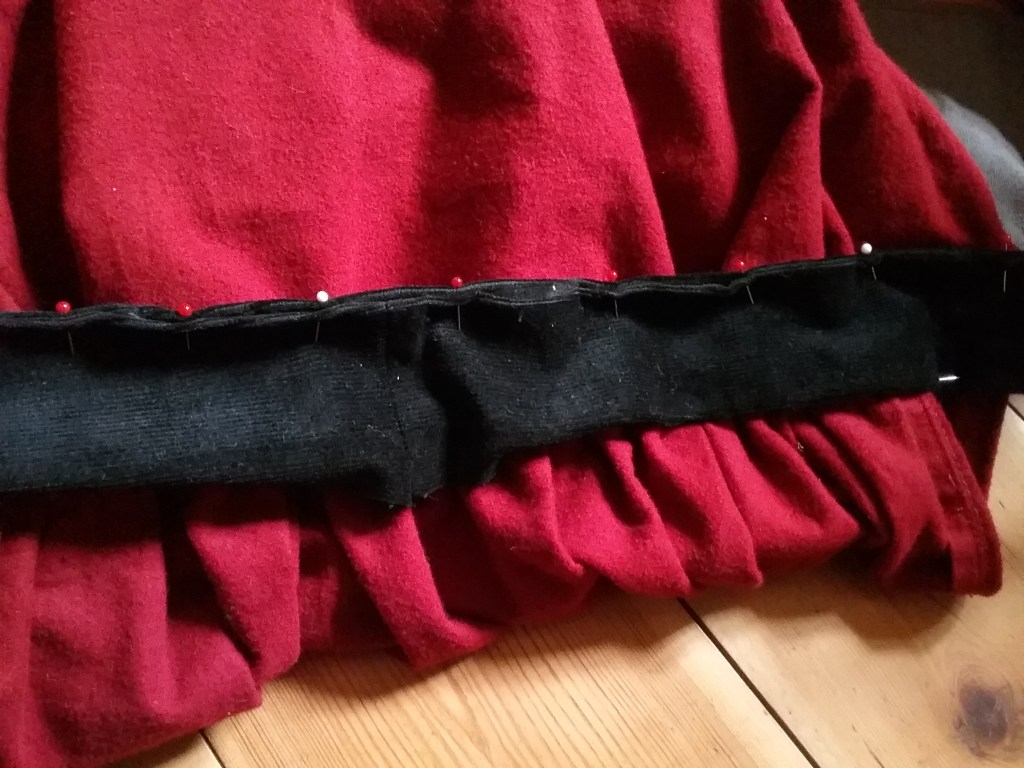
I focused first on the back waistband; I couldn’t tie it, so joined enough length in scraps to fit around the back of my waist and overlap slightly at the front where it would be fastened with hook and eye closures (retaining the adjustable nature of the waistband since I could install multiple closures). I ran a gathering thread through the skirt panel and pinned the centre back of the waistband to the centre back of the skirt panel right sides together. I then measured 1/4 of my waist either side from the centre back of the waistband and pinned this to the front pocket edges before gathering the fabric down by eye:
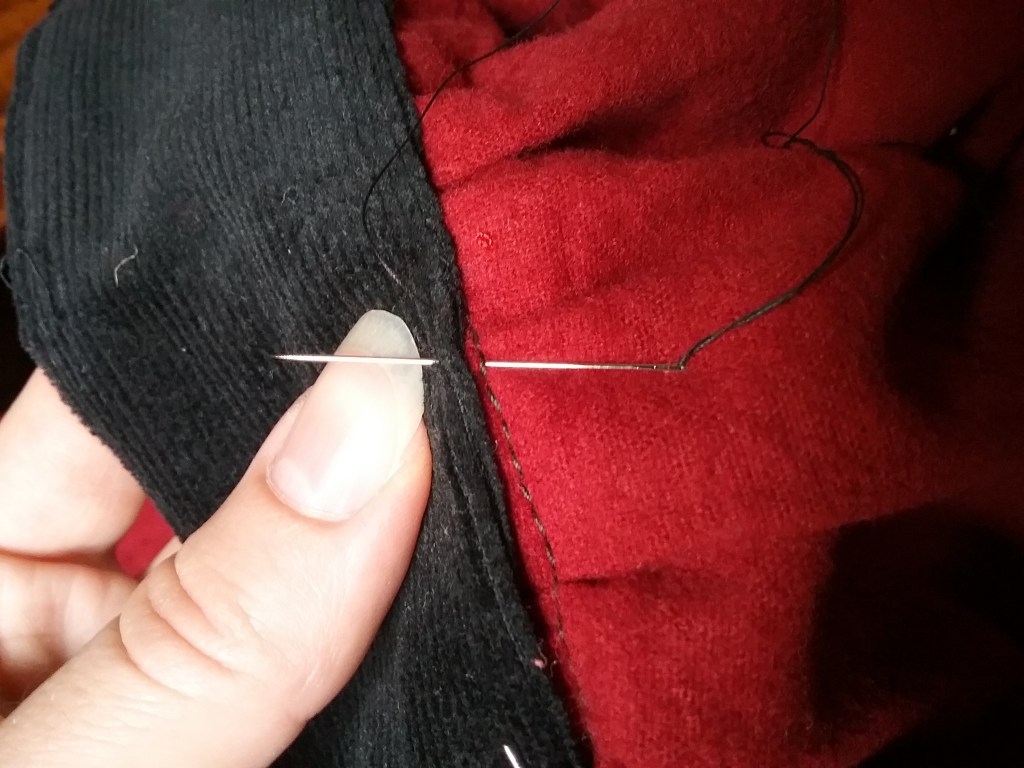
This was then stitched down, after which the waistband could be turned to conceal the raw edge. However, since I was working with scraps my waistband wasn’t wide enough to turn on it’s own, so I stitched another length of corduroy to the top of the waistband, pressed the seam and topstitched it to avoid puckering at the same time as I finished the other edges. I opted to finish the seam by hand felling along the back of the skirt panel to avoid a black stitching line showing at the front.

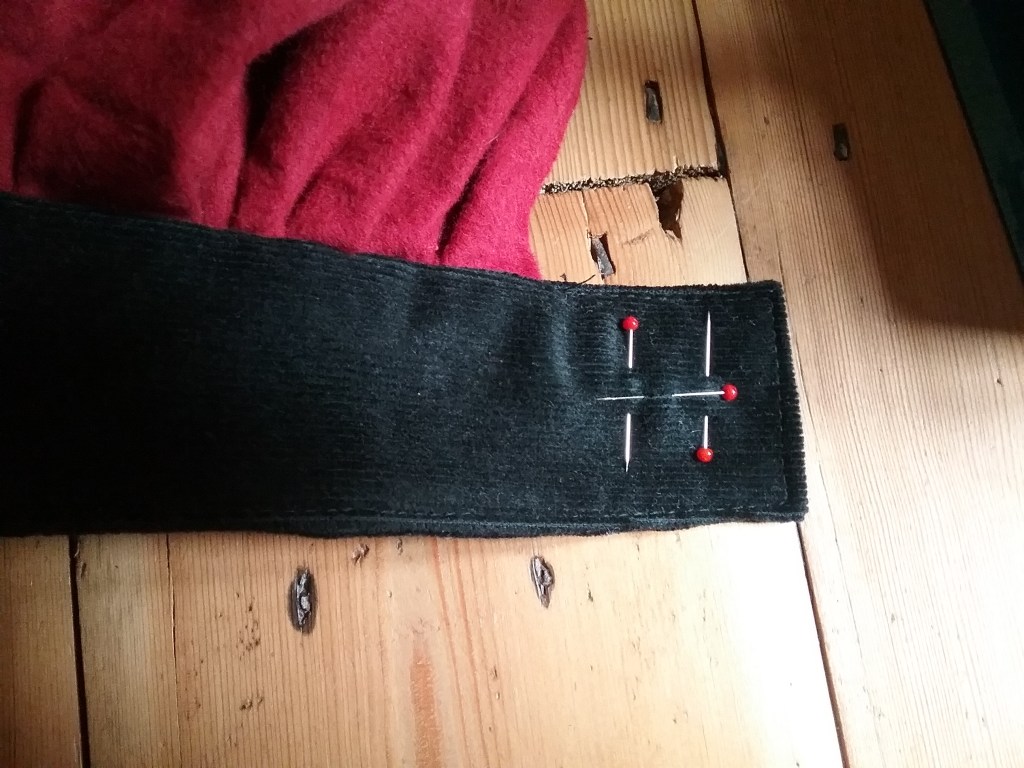
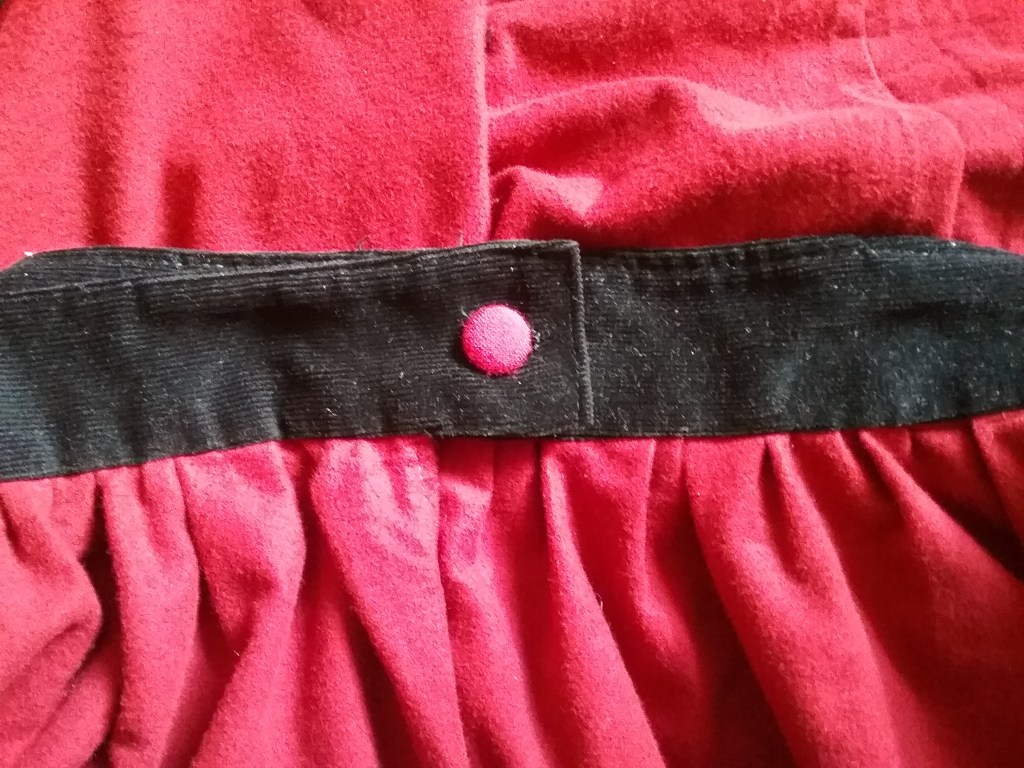
I then stitched hook and eye closures to secure the back waistband at the front.
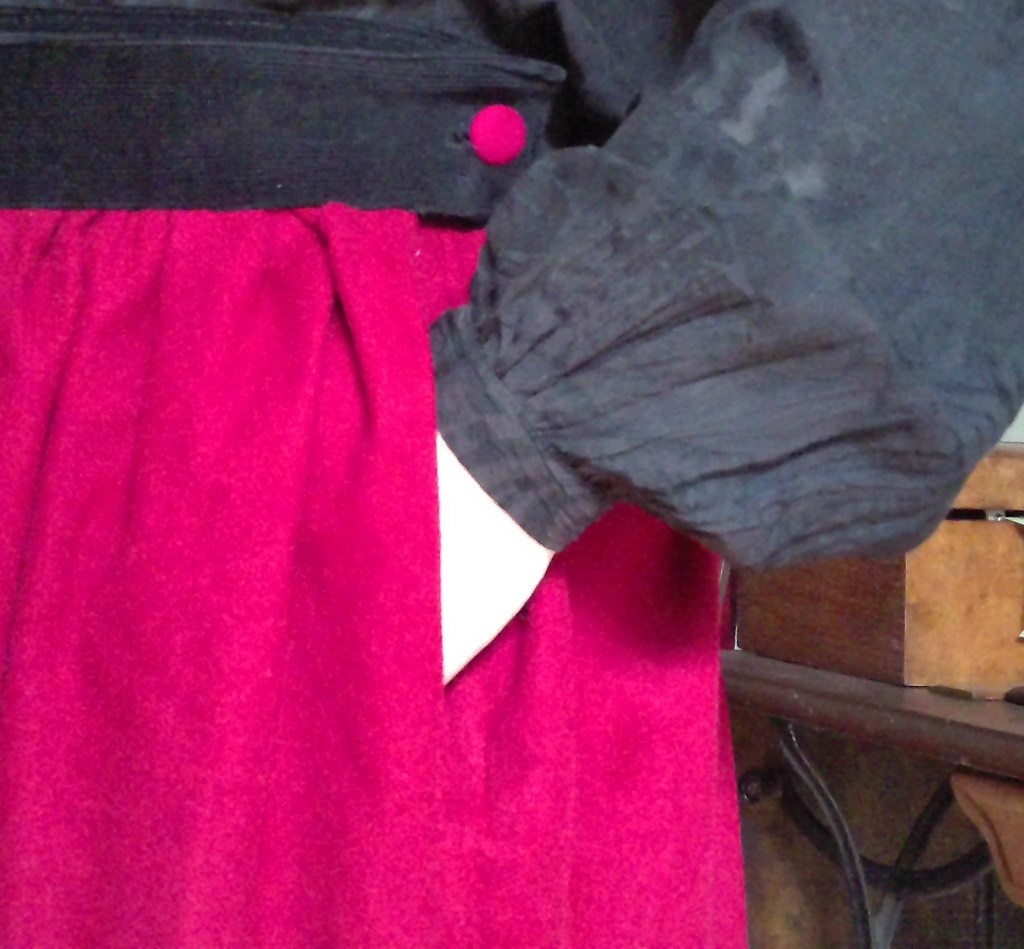
The process was much the same for the front waistband (I had to join several more scraps of fabric on the inside of the waistband, but piecing fabric was very common historically); however rather than fastening all the way at the back, I decided to fasten the front waistband to the sides of the skirt. Originally I was going to use hooks and eyes again, but decided that the black and red was looking quite dramatic and I should make more of a feature of it. I dug out some red buttons which were a near perfect match to the fabric, and proceeded to mark out and hand stitch the buttons and buttonholes with silk twist.
The following slideshow illustrates the order in which the closures work:

Finishing Touches
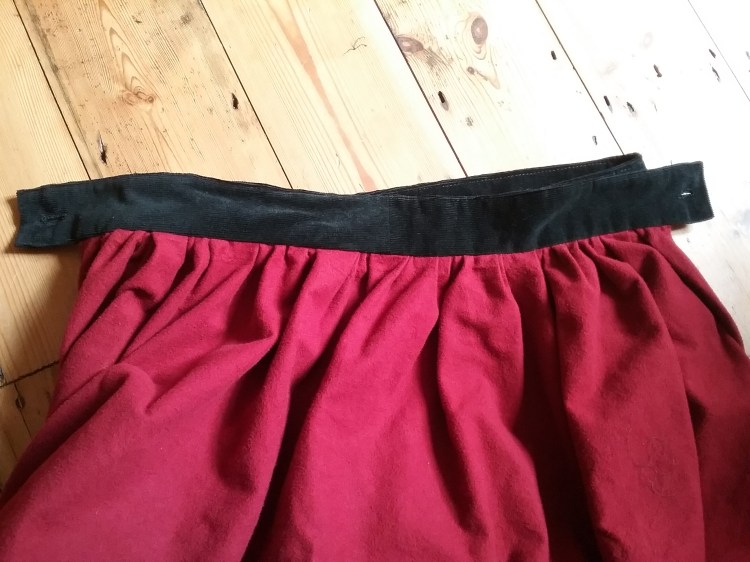
Waistband secure, I finished off the side seams with the red bias binding and then turned up the hem so it wasn’t dragging on the floor. There was quite a bit of seam allowance, but in the interests of not cutting my fabric, I treated it like a facing to give the skirt some body and it seems to work quite well.
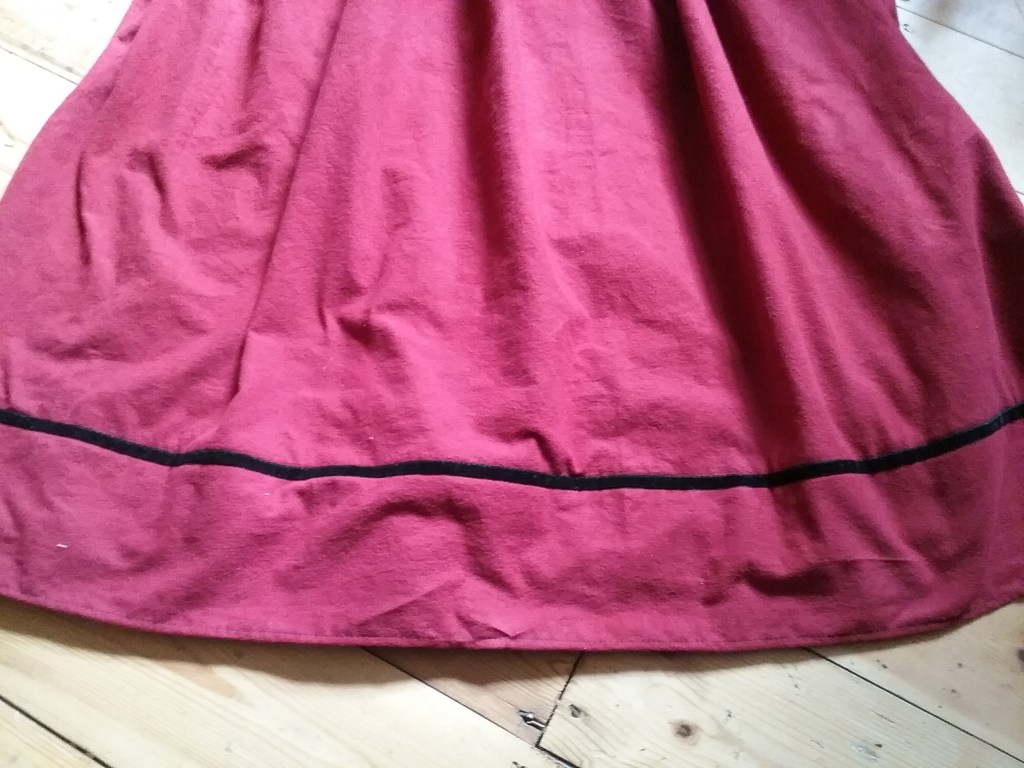
With all the contrasting elements on the waistband the skirt itself was looking quite plain and I decided that since I’d gone to all that effort, I might as well add some decoration. I have a habit of accumulating vintage velvet trim, so decided to stitch a black stripe around the skirt hem that would strategically cover the hem line stitching.
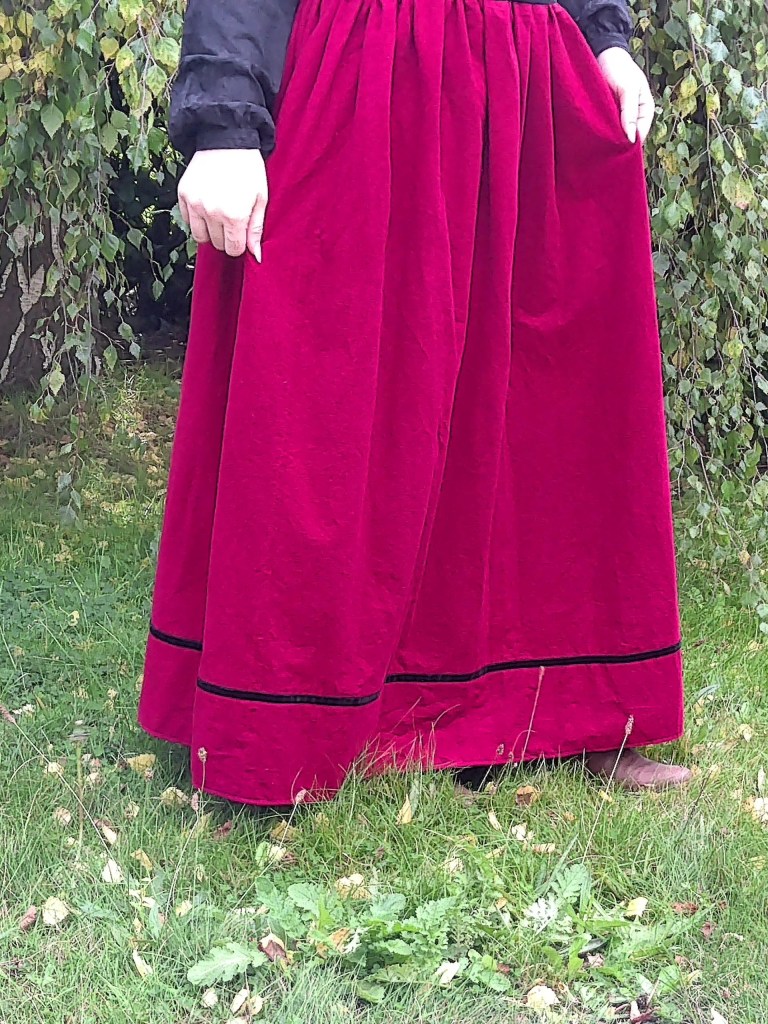
Final ‘Reveal’
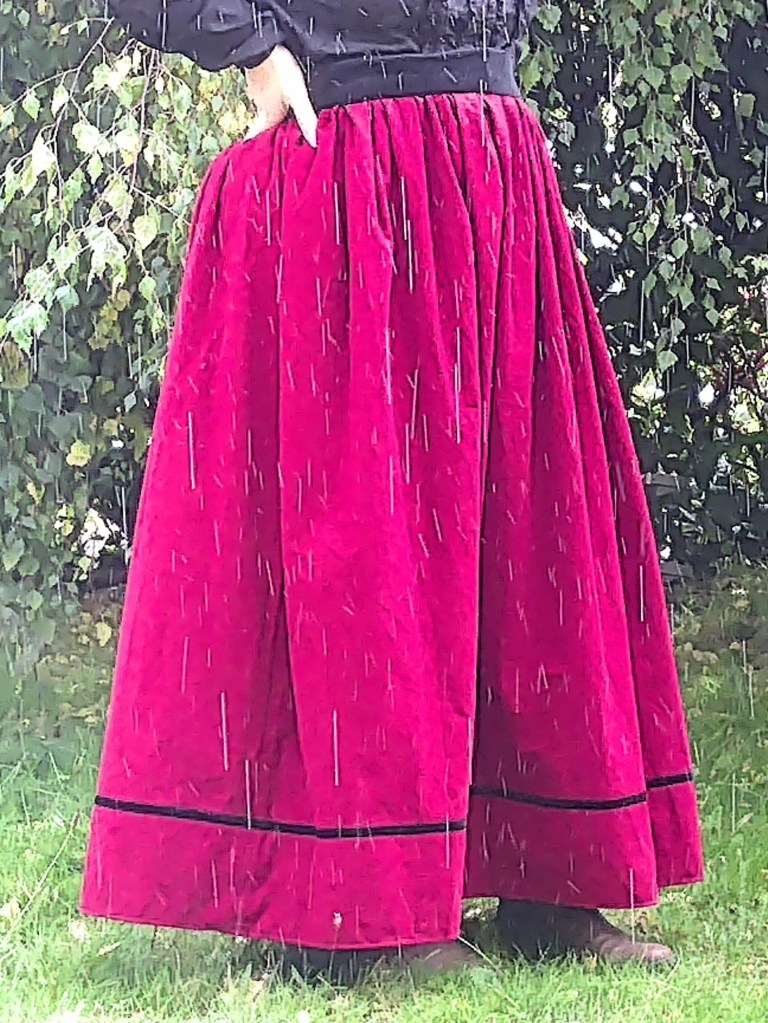
Excuse the rain – the weather changed just as I was taking a photo!
Since it’s only secured at the sides the front waistband has a habit of slipping, so I may add some more buttons to the front (which opens up the possibility of adding braces too), and I’m not sure if I need to add some more decoration to the hem. But, on the whole, I’m pleased with how this project turned out – I used supplies that I already had, it fills the ‘cosy skirts’ gap in my wardrobe and is suitably dramatic (and slightly pirate-y)!
If you would like me to try and remember to document future sewing adventures (either by photo or video) do let me know in the comments. For anyone interested in making their own skirt, but completely confused by my ramblings – there’s a short Youtube tutorial here which might help clarify things!
Happy Crafting!

The skirt turned out great! I have seen videos of the pattern that you started out making, with the front and back panels tied around the waist. It is very satisfying to make something you can really use with just materials you have on hand. I have a tub of clothes that I thought were candidates for upcycling the fabric into something else, but I never seem to get around to it. Yes, I would be interested in hearing about any future sewing projects you make!
LikeLiked by 1 person
It is a very simple skirt to make as there isn’t much that can go wrong (if I’d have cut my red fabric I could have made the waistband ties in the normal manner), so definitely a good starter project if you’re getting back/into sewing. So many projects, so little time I think is a common problem among crafters – I confess one of my main motivations for starting the skirt when I did was running out of space in my fabric trunk, so it’s great to hear sewing projects are of interest to fellow wool enthusiasts as I’ve got a decent stash to work through!
LikeLiked by 1 person