
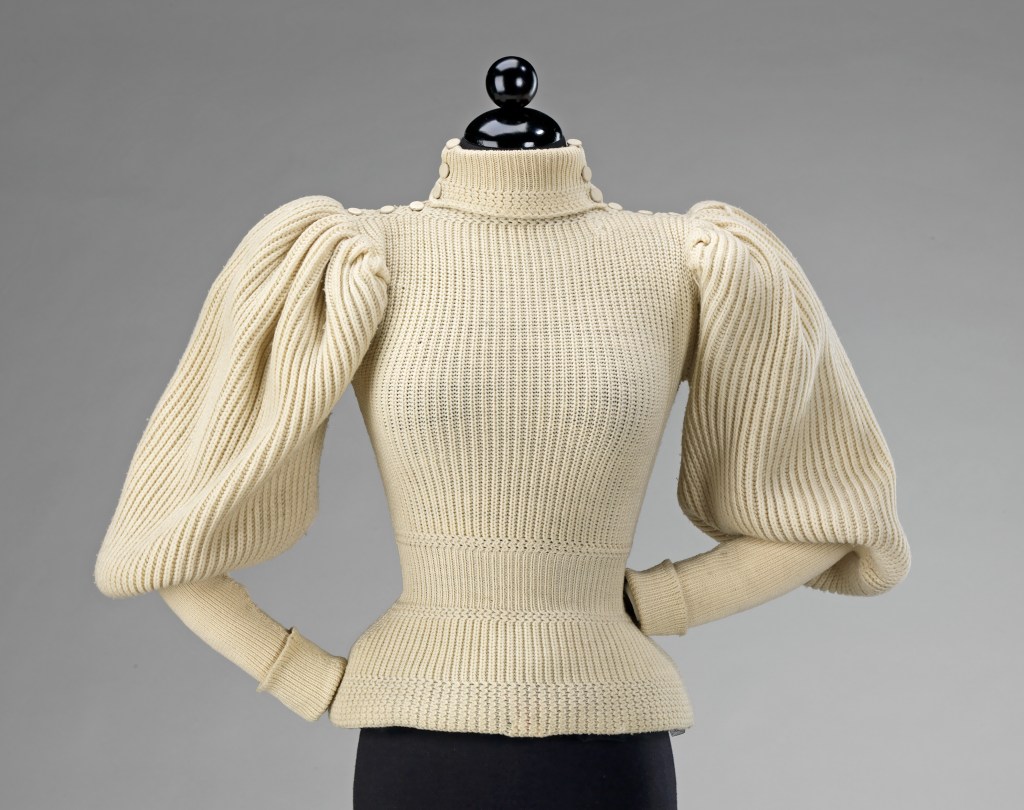
I cast on this project spontaneously back in 2021 after I had to frog a lace mitten with a sizing issue in the pattern. I’ve never knitted anything as big as a jumper before as I generally find myself losing interest in long lengths of repetitive knitting, but I’ve wanted a proper Victorian cycling jumper for a long time now, so after coming across an original pattern online which is nearly identical to a jumper in the collections in the MET museum, I decided to give it a go. At the suggestion of my friends I’ve also made a short video of the process at the bottom of the post.
Patterns & Research
The pattern I used is style No.2 Ladies’ and Misses’ Sweater (Pg. 167-168) from the book Fancy and Practical Knitting which dates to 1897 and can be found for free online here at Archive.org. My first challenge was deciphering the pattern; although knitting is much the same throughout the years, Victorian directions can be trickier to follow, particularly since some things that aren’t common knowledge now are assumed known.
The pattern instructs the use of 3 types of needle: no.12 steel, fine steel and ivory needles, which are not directly comparable to modern sizes. Fortunately this pattern and similar were published in many knitting pamphlets, and several pattern designers have created modern translations (so if you want to make this jumper the easy way, I highly recommend looking one up). Most of the designers state the gauge and needle sizes required on their pattern requirements, so after seeing what several patterns used and doing a quick swatch, I opted to use two sizes of needle (3.75mm & 2.75mm) since both of these worked with the diameter of my handspun yarn. Where the pattern mentioned No.12’s I used the 3.75mm and the 2.75mm were used in the place of the ivory and fine steel.
My yarn selection wasn’t particularly considered, the Clun Forest I’d started spinning that year (thin and chain plied with the intent of weaving it) was sitting next to me when I decided to swatch and happened to be the right gauge. Unsure how much yarn this project would use, I also had two fleeces worth of it, so I knew I wouldn’t run out. In retrospect the chain ply made it easy for me to spin small amounts while I was knitting the jumper and also gave the fabric a bit more structure than if I’d used a drapey yarn, so I’m pleased I opted for this fleece.
Despite wanting to follow the pattern closely for historical accuracy, I decided to knit the jumper on circular needles in the round up until the armscye instead of flat like the pattern instructed. There were several reasons behind the decision, firstly I wanted to be able to try the jumper on while I was knitting to check it fitted rather than reaching the end and having to start again (Ankany who used the same pattern on Youtube ran into fit issues), I also wanted to avoid bulky seams and didn’t want to injure my wrists holding more and more weight on straight needles. To account for this I wrote down the original pattern line by line so it read as a series of clear steps, but included both sides as if it were on circular needles. I also noted the number of stitches for each line and how many inches the jumper was at each part (the pattern states 8 sts per inch). I could then do the following:
- Work out the proportions of the original pattern to compare against my own – there is a 5″ difference between the waist and hip measurement which matched my proportions exactly, so I didn’t need to edit the number of increase/decrease sts.
- Re-write the pattern adding an extra 8 sts for every inch increase I needed to match my measurements. I also included the number of stitches that should be on my needles at each line so I could easily check I hadn’t gone wrong as I knitted.
Knitting
After checking my pattern thoroughly and comparing it against the original I finally cast on, placing a marker at the start and halfway point between back and front of the jumper and began to knit. Since this is knit in 1×1 rib with a few rows of ‘fancy’ basketweave pattern I didn’t have to change which stitches I was using for the circulars, just to be aware of it when it came to the decreases. Since this was my first big project and I really struggle to pick up rows with the stitches in the right direction after ripping work back, I decided to place several ‘lifelines’ as I knitted each section. These were annoying to extract and I didn’t end up needing to undo anything, but I’m so glad I had them there.
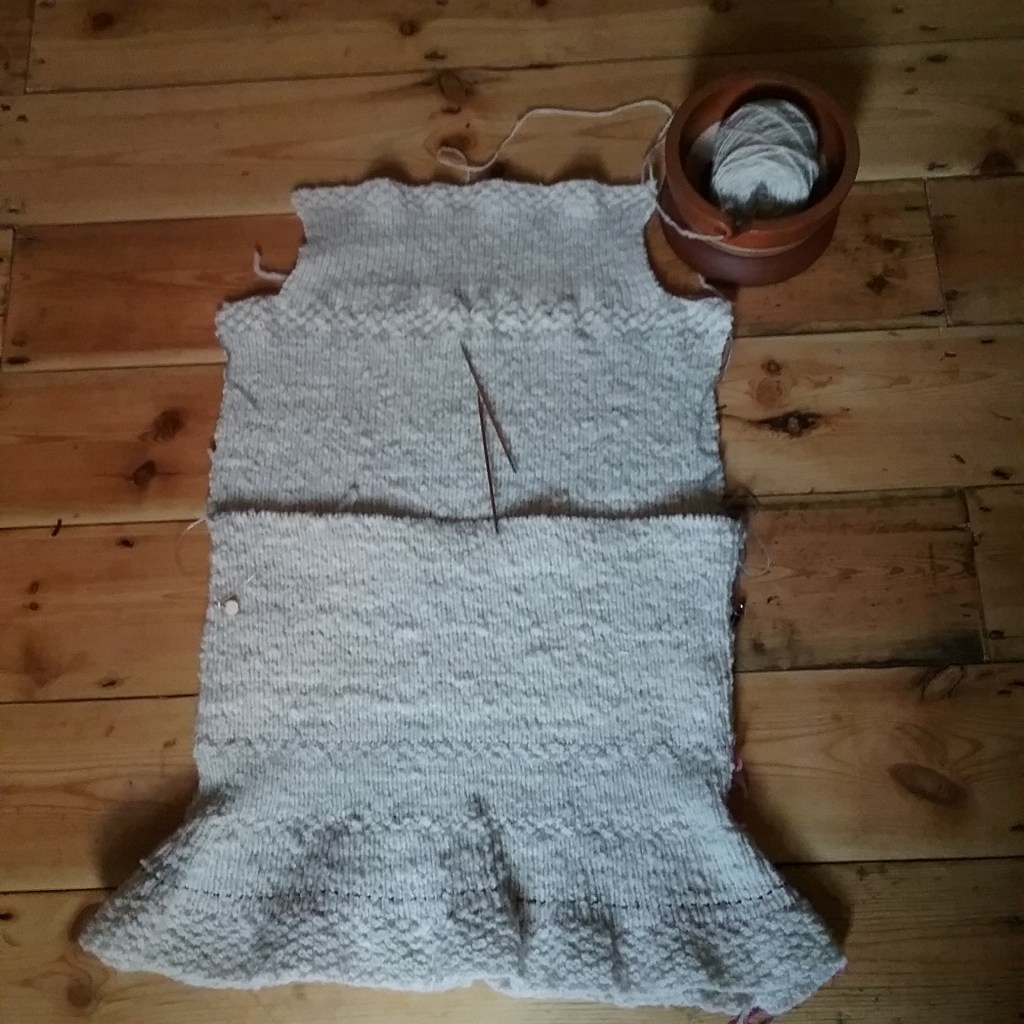
I made quite good progress reaching the underarm around May 2022 and then wondered how I was going to split the jumper so it was back to being knit in two halves. Not wanting to get it wrong, I put the jumper aside for around 6 months before having the embarrassing realisation that I didn’t have to take it off the needles at all and could just knit back and forth on one side of the jumper until the cast off edge and then join the yarn to work on the other side as I had a long cable! After that I was able to carry on following the pattern as per the original, constructing buttonholes at the front as directed.
*As a side note to anyone wanting to make their own, I have realised that the one thing I didn’t check was the proportions of the neck. When decreasing for the neck, the pattern instructs you to ‘cast off 14 sts, knit to within 14 sts and cast off those 14sts’. This means the extra width I added to the jumper overall was translated to the neck, making it slightly wider than the pattern illustration shows. Since my fabric is quite stiff it doesn’t make much difference and looks nice aesthetically, but a drapey yarn might have struggled to hold up the voluminous sleeves.
After casting off the main body, I began the first sleeve. The sleeves are knit from the top down and get sewn in with pleats, so I knitted it flat and then joined to knit in the round after the first 4 rows of fancy pattern, decreasing from a 50″ to 14″ cable and finally to dpns throughout. The sleeve looked odd at this stage and I thought I’d gone horribly wrong, but kept going and when I tried the sleeve on, I realised the decreases become the structural part of the sleeve puff. Then it was time for sleeve number 2, which seemed to take much longer to knit (probably because I kept running out of yarn and had to card and spin some more).
Assembly
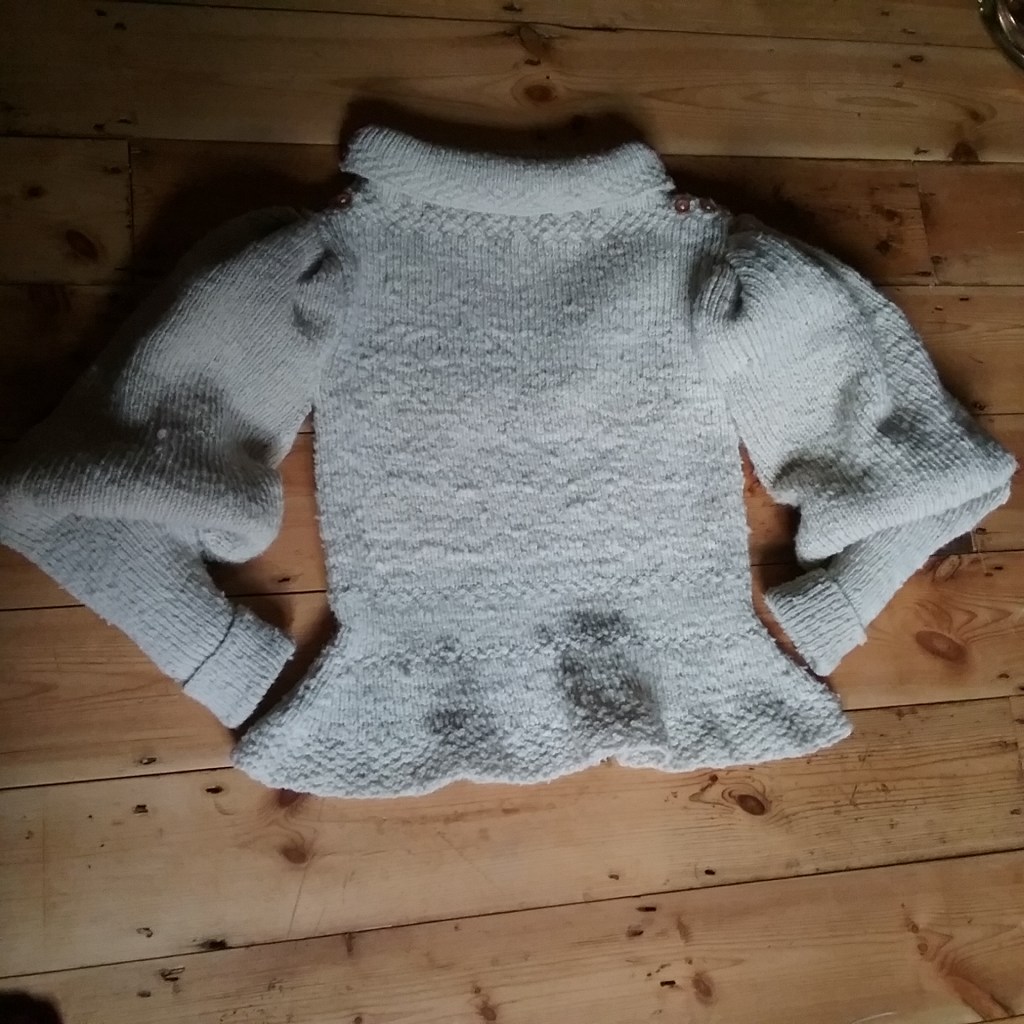
After knitting the jumper in the round, assembly was quite easy, if time consuming as I kept trying it on to make sure everything was positioned correctly. I sewed buttons to the back portion as directed where they overlap, however the pattern states that where the collar turns the buttons should be sewn to the back of the jumper so they show when it’s folded. With the buttonholes on one side of the collar this doesn’t logically work, but I found it was possible to overlap the buttonholes to correspond to the buttons sewn as the pattern directs if there is a twist in the fabric (it’s more clearly shown in the video below). I’m not sure if this is what the pattern is instructing, but I can’t figure out any other way using only the amount of buttons they call for (and for all of them to be functional), the example in the MET museum also looks like it could have a twist halfway too.
After sewing on all 16 buttons I pinned in the sleeves, adding box pleats as directed. I made slightly fewer pleats since my fabric was stiffer and I have never before sewn a such as thick fabric (often 4-5 layers!). Thankfully it was knitted so my needle didn’t have much problem passing through and securing everything with a strong backstitch. I then wove in all the ends and the project was finally finished…
I didn’t keep track of my yarn yardage, but did attempt to time roughly how long it took me (although I wasn’t strict about this). I spent approximately 207 hours knitting, while carding, spinning & plying took a further 20 hours (though this is more difficult to be exact about since I didn’t time everything and used both hand and drum carding). Rounding up to account for skirting, washing and assembly, the whole project took me a minimum of 230 hours to make.
Overall I’m really pleased with how this came out, despite it taking so long. Though I’ve done a lot of knitting on the blog, it’s not my strongest fibrecraft (but I do like a challenge!), so for a first jumper I’m pleased. There are things that I would do differently (spinning all my yarn at the same time so it’s the same shade of fleece and easier to keep the same size for example), but I love how warm and comfortable it is and the sleeves are incredibly fun! I’m much less intimidated by large knitting projects now and I’ve got better at translating knitting patterns on paper before I start knitting.
Happy Crafting!

That’s a fantastic knit!
LikeLiked by 1 person
Thank you! It was good fun to make.
LikeLiked by 1 person
That is amazing! Very ambitious for not liking big long projects but it turned out great. Not only a big project, but having to figure out a lot of stuff since you were kind adapting the instructions to your yarn and size and today’s language.
LikeLiked by 1 person
Thank you! I do like a challenge and it makes a world of difference if the repetitive knitting is for a project that you really want to knit instead of a garter stitch scarf! The sleeves took longer than I thought they would, having nearly the same number of stitches as the body, but despite how long it took, it was definitely worth the effort!
LikeLiked by 1 person