There are several fleeces in my stash that I have put to the side as the fibres are too long to successfully card. There are two methods generally used to prepare wool depending on the staple length of the fleece, namely carding for short staples and combing for long staples. Some fleeces can be carded or combed depending on the intended use (a good example I’ve worked with being the Romney), but others will favour just one method – carding a long staple fleece is hard work and the fibres can become tangled, while combing is very difficult with a short staple.
Wool combs are expensive to purchase and tend to hold their price second-hand. After realising that I needed a pair of combs, but feeling I couldn’t justify spending a lot of money, I decided to see if I could DIY some for myself. Several people have come up with ingenious ways of DIYing combs, from using beekeeping combs to pet combs and a google search will bring up many different results. Antique wool combs come in various guises too, some are simply nails in wood and others have layers of fine sharp spikes. After looking at a range of commercial, DIY and antique combs I decided to try and fashion something with two rows of tines that was a medium sort of size.
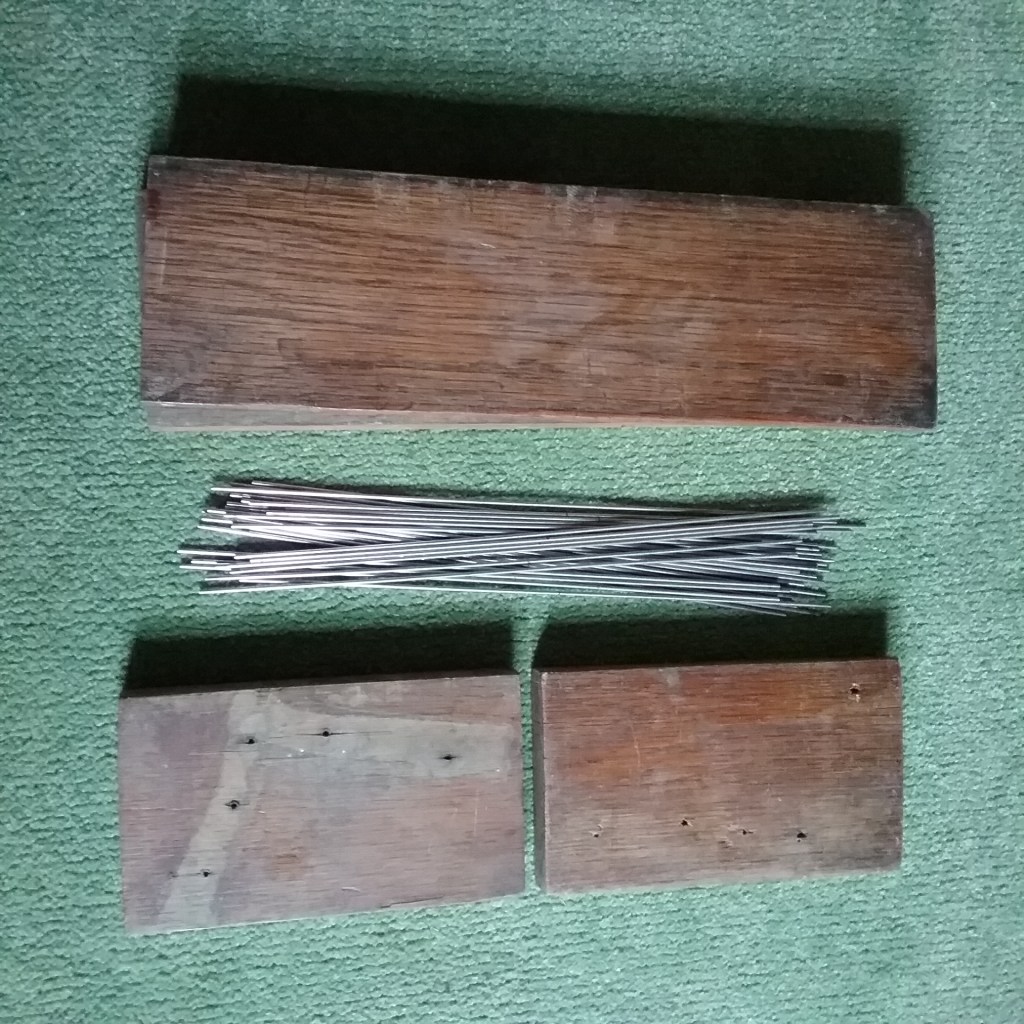
I began with sourcing materials; the paddle portion of the comb would be made from the salvaged wood of a bookshelf made by my Grandfather, the handles from an offcut of oak and the tines from some 2mm stainless steel rods found at the bottom of a craft drawer (it’s important that the tines don’t rust as fleece is greasy and can sometimes need spritzing with water if it gets too static during combing). The stand was made from an offcut of windowsill and a section of leather from a damaged strap found in my Grandfathers shed.
Constructing the combs:
My first task was to decide on the paddle size; I wanted the combs to be light enough to be used in the hands, but large enough that they could also be put on a stand. I also wanted to have two rows of tines as I felt these would do a better job of separating the fibres than a single row (most commercial single row combs are finer than my tines would have been). After lots of experimenting within the confines of my materials I decided my paddles would measure approximately 11.5cm wide x 2cm deep x 3cm tall. The wood was cut, sanded and given a coat of oil.
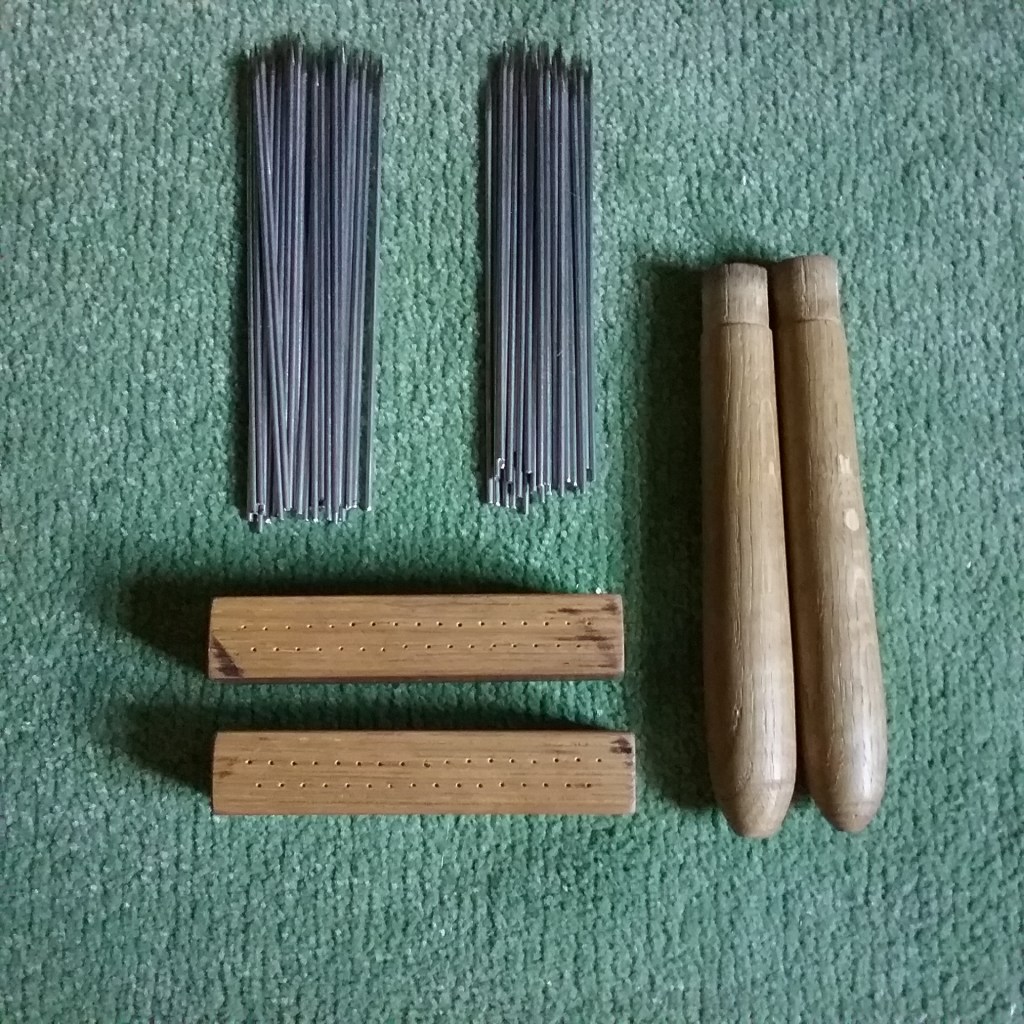
I marked the tines 6mm apart starting 1cm in from each end and offsetting the second row so each tine was positioned in a gap. Each of my combs used 33 tines (16 in the back row, 17 in the front row). Most commercial combs have the back row of tines closet to the handle slightly shorter than the front row. My rods needed to be cut down before turning into combs so I offset the length measurement when I cut them in two so one side was longer than the other. One end of the tines was then ground down to a point. I also turned some simple handles.
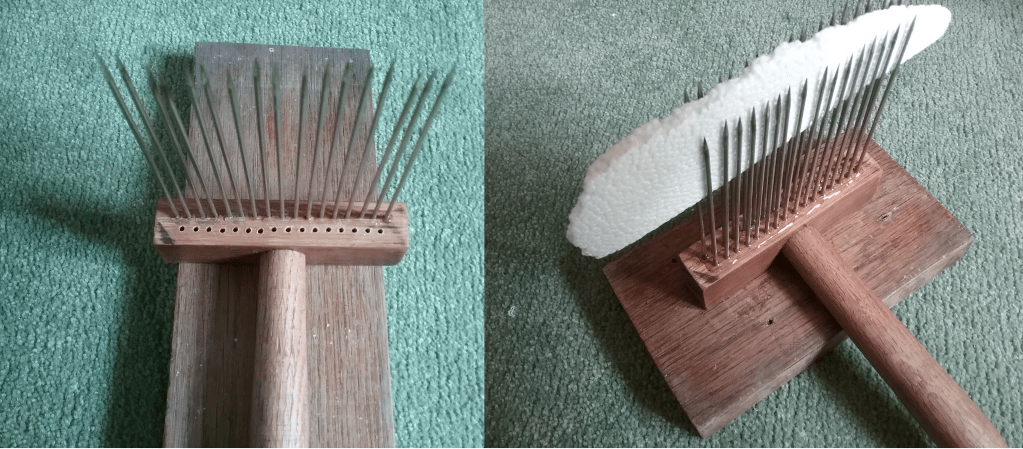
The handles were attached and then holes were drilled through the paddles where I’d marked and the tines fixed in the first row using gorilla glue to secure them in place (the tines go all the way through the paddle so are unlikely to fly out). After 24 hours I could repeat the process on the second row. To keep the tines aligned as best as I could a thin piece of polystyrene slotted between the two rows worked wonders.
To finish off the combs I cut out a thin strip of leather to cover the bottom of the paddle where the ends of the tines were showing and glued it in place.
Constructing the base:
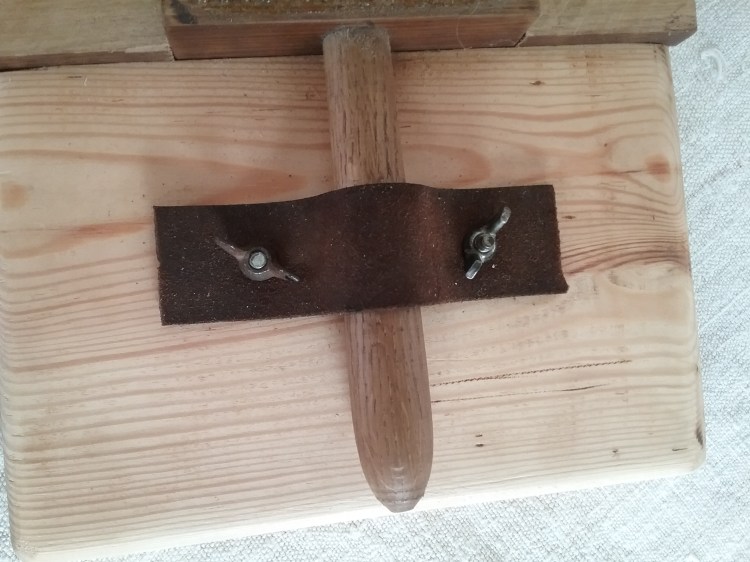
Most wool combs have a base that you can clamp to a table to make combing easier and safer, so I decided to construct one. I was confined to the dimensions of the offcut of wood I was working with, but a strip the width of my paddle was chiselled out so the comb could slot in. Two offcuts of wood the same width as the paddle could then be slotted in either side to reduce movement.
To secure the comb at the handle I decided to use leather and add wing nuts either side so the comb could be removed easily. The base itself had plenty of space to be clamped to a table.
Conclusion
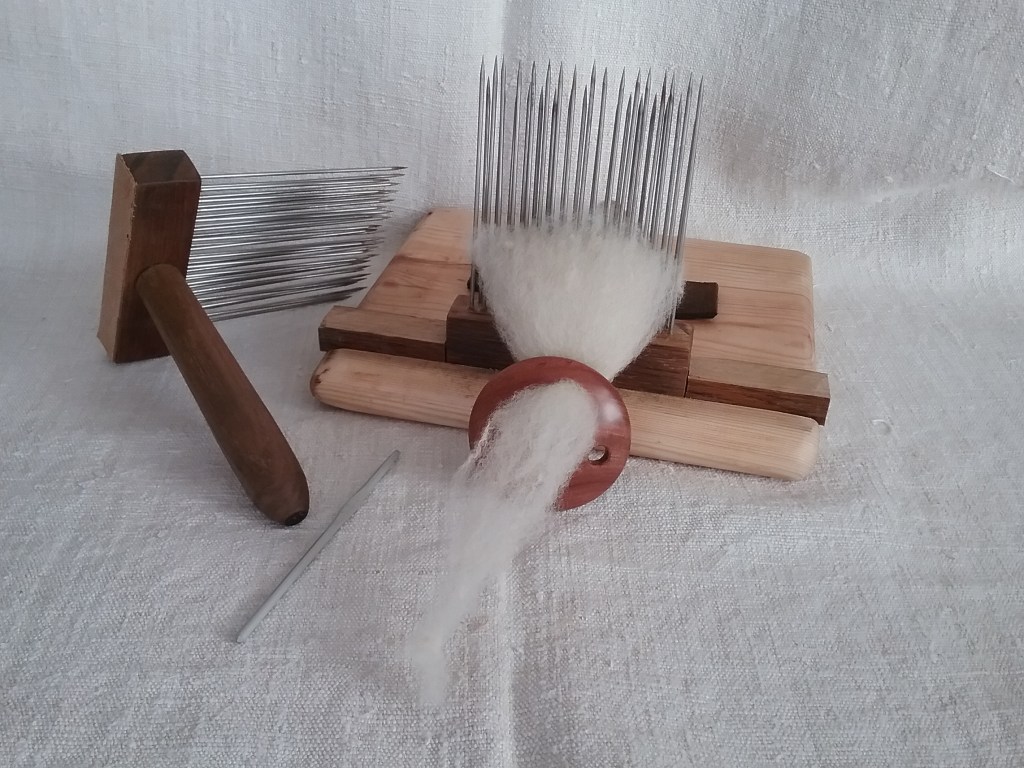
The wool combs were a joint effort (thanks Dad!) and I’m very pleased with how they turned out. They make easy work of processing long fibres and are not too heavy. The tines aren’t perfectly straight, but this doesn’t seem to cause a problem. Most commercial tines seem to be a little thicker than the rods I have used, but although there is some flexibility in the tines, it doesn’t seem to be a problem. My tines may be a little sharper than commercial combs, so I am careful when handling them and removing waste fibre. I was lucky that I didn’t have to purchase anything to make the combs, so I can’t factor in a materials cost, but they were time consuming to design and make (though did allow me the option of customising them a little). I’m sure one day I will invest in some professional combs, but in the meantime these are proving effective and producing some beautiful combed nests.
If you have any tips for wool combing or have made wool combs/wool comb substitutes let me know in the comments below!
Happy Crafting!

Wow! They look great! When I was digging out my spinning supplies a few months ago, I found not one, but two sets of combs. They look like they came from estate sales and must have been cheap. I remember taking a class where the teacher taught us how to comb without clamping to a table. It was a very specific technique so we wouldn’t impale ourselves or put an eye out. Unfortunately, I don’t remember how (before phone video), so I need to dig out some clamps!
LikeLiked by 1 person
While I was making the stand I used mine as hand combs and as long as I was combing away from myself I didn’t feel like I was going to be injured (having said that I did make the combs slightly smaller in size to some of the commercial versions available, which does make them easier to wield). I find I can comb much faster using the stand and clamps though!
LikeLike
Beautiful job!
LikeLiked by 1 person