
In March 2021 I put out a blog post showing my progress of some woven ryeland fabric, which I have finally turned into something. It’s been a long while in the making as my original idea didn’t work, so it sat folded on a chair while I pondered what to do about it. Although this was a simple project I’ve learnt a lot from it and made several mistakes, so I thought I’d talk through it from the very beginning explaining how it’s evolved. If you’d prefer to skip the background and just see the final project, you can jump straight to that section here.
The Original Plan
I’d seen a style of woven jumper by Fran Casseli in Ashford’s The Wheel Magazine (Issue 32) and thought it would look very nice in the Ryeland. I had already calculated the total yardage of wool I had, so I did some quick calculations to find the warp length that I would need. I then directly warped my rigid heddle the full width using a 5dpi reed (I use a weavers choice heddle that lets me swap out my dents rather than buying each size of reed). The idea was to weave the front and back of the jumper on one warp and the sleeves on another narrower warp, thereby reducing the amount of threading. Although I had taken into account extra length for loom waste and shrinkage in the wash, I did not take into account how woollen yarn behaves when warping.
So, I wound the warp onto the loom and began pleasantly weaving the first length. I used a piece of waste yarn the length my first half needed to be as a measure that wound onto the front beam with my weaving. After reaching the end of the first piece I had a feeling that I was more than halfway along the warp, but since I couldn’t do anything about this, I hemstitched the end, left a gap and then continued weaving the second piece. I then removed the weaving from the loom, separated the pieces and washed them. This was the point I realised what had gone wrong.
Woollen yarn is particularly good for knitted items because of its ability to stretch and shrink, unfortunately I hadn’t taken into account that it does the same thing when used in weaving. It stretches when put under tension on the loom and then springs back when that tension is removed even before washing. Its springy nature also makes it a little harder to manage when direct warping (not to mention that my setup was not ideal and my warping peg fell off the stool it was clamped to twice!). This is probably why worsted yarn is normally used for weaving! Both my pieces of cloth were slightly different sizes and were too short to use for the original jumper idea.
Thinking of Another Solution
Still wanting to turn my fabric into a jumper I turned to my Saori weaving book for some inspiration. Saori clothing takes an ‘origami for clothes’ approach, so I found a boat neck jumper that I could make by sewing my two existing pieces together as one and weaving another length the same size. Unfortunately I misread the diagram and mistakenly added two measurements together so my second piece of weaving was too long for that jumper. Not despairing, I found another pattern that used two pieces the length I had and tacked it together. When trying it on however, I realised that the woollen fabric was too bulky in this style to drape nicely, and looked more like a marshmallow. As the fabric was a relatively loose weave, cutting it was out of the question and at this point I was running low on ryeland yarn. I folded the three lengths of fabric and sat them on a chair while I debated what to do about them.
I considered that the Ryeland might look nice stitched together as a blanket, but still didn’t want to give up on the idea of a piece of clothing. There was a circle poncho pattern in the Saori book that I’d wanted to make for a long time, but didn’t think I had enough yarn to make it from the ryeland. I decided that whatever I did I was going to have to weave another length, so if I ran out of yarn I would just have to source some more ryeland fleece.
Third Time Lucky
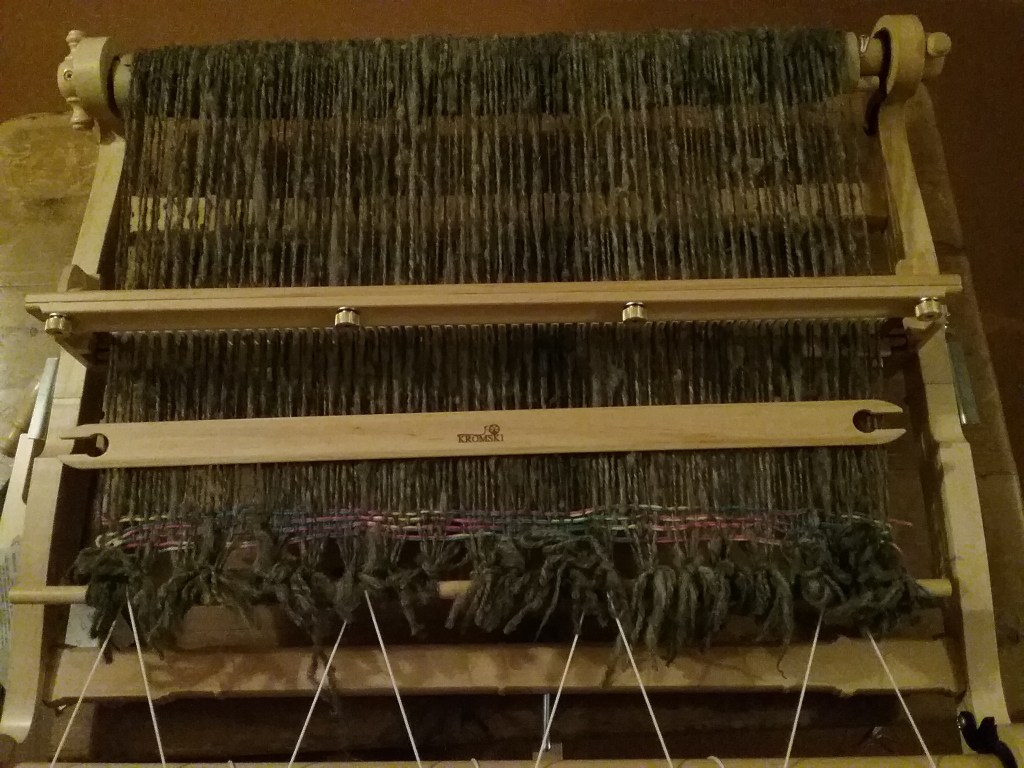
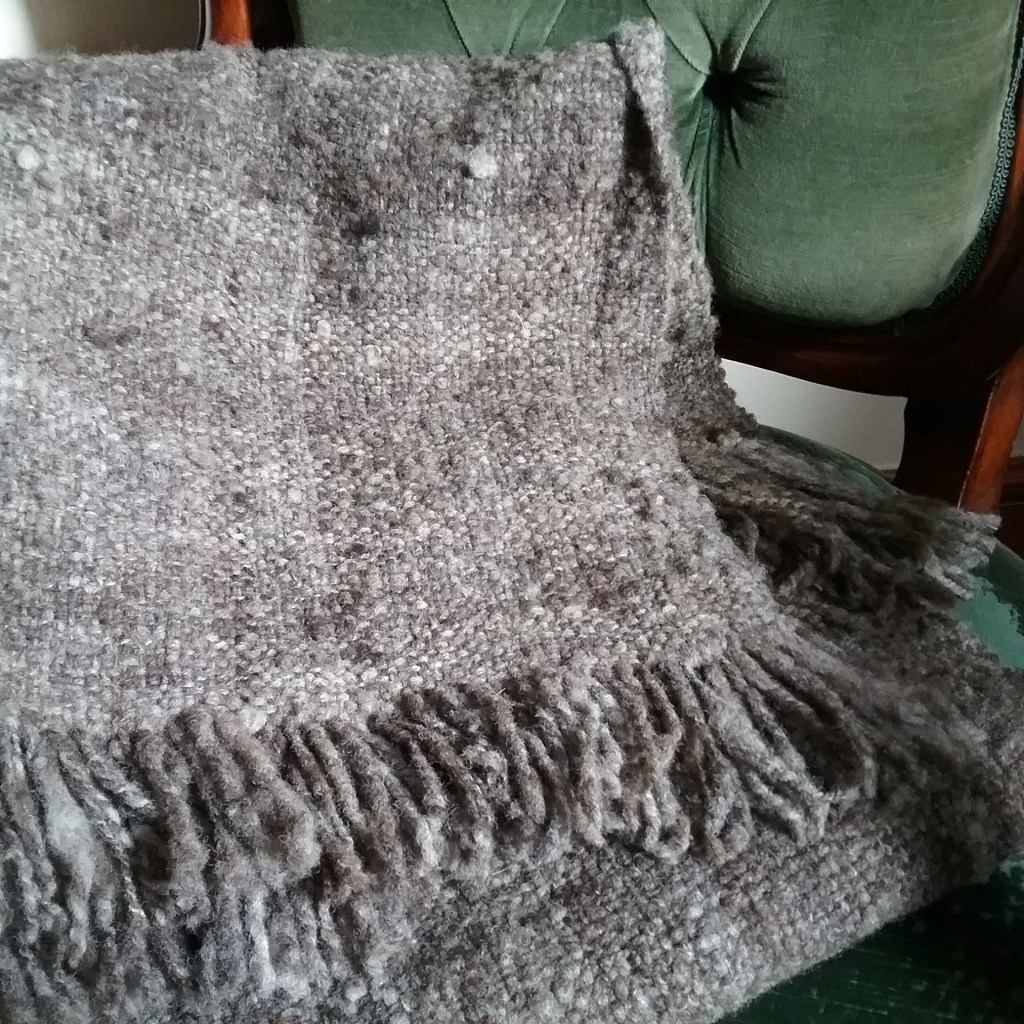
Using the same 5dpi full width set up on my rigid heddle I set to work warping the loom. To try and have less waste (and an accurate length) of warp I decided to try out indirect warping, turning my loom upside down and using the warping pegs (there are a couple of good tutorials for indirect warping from Kromski and Ashford). Once I’d established my threading cross I found it quite easy to do and it saves your legs and back from walking and bending. My previous tensioning issues were also solved as the warp is not threaded under tension.
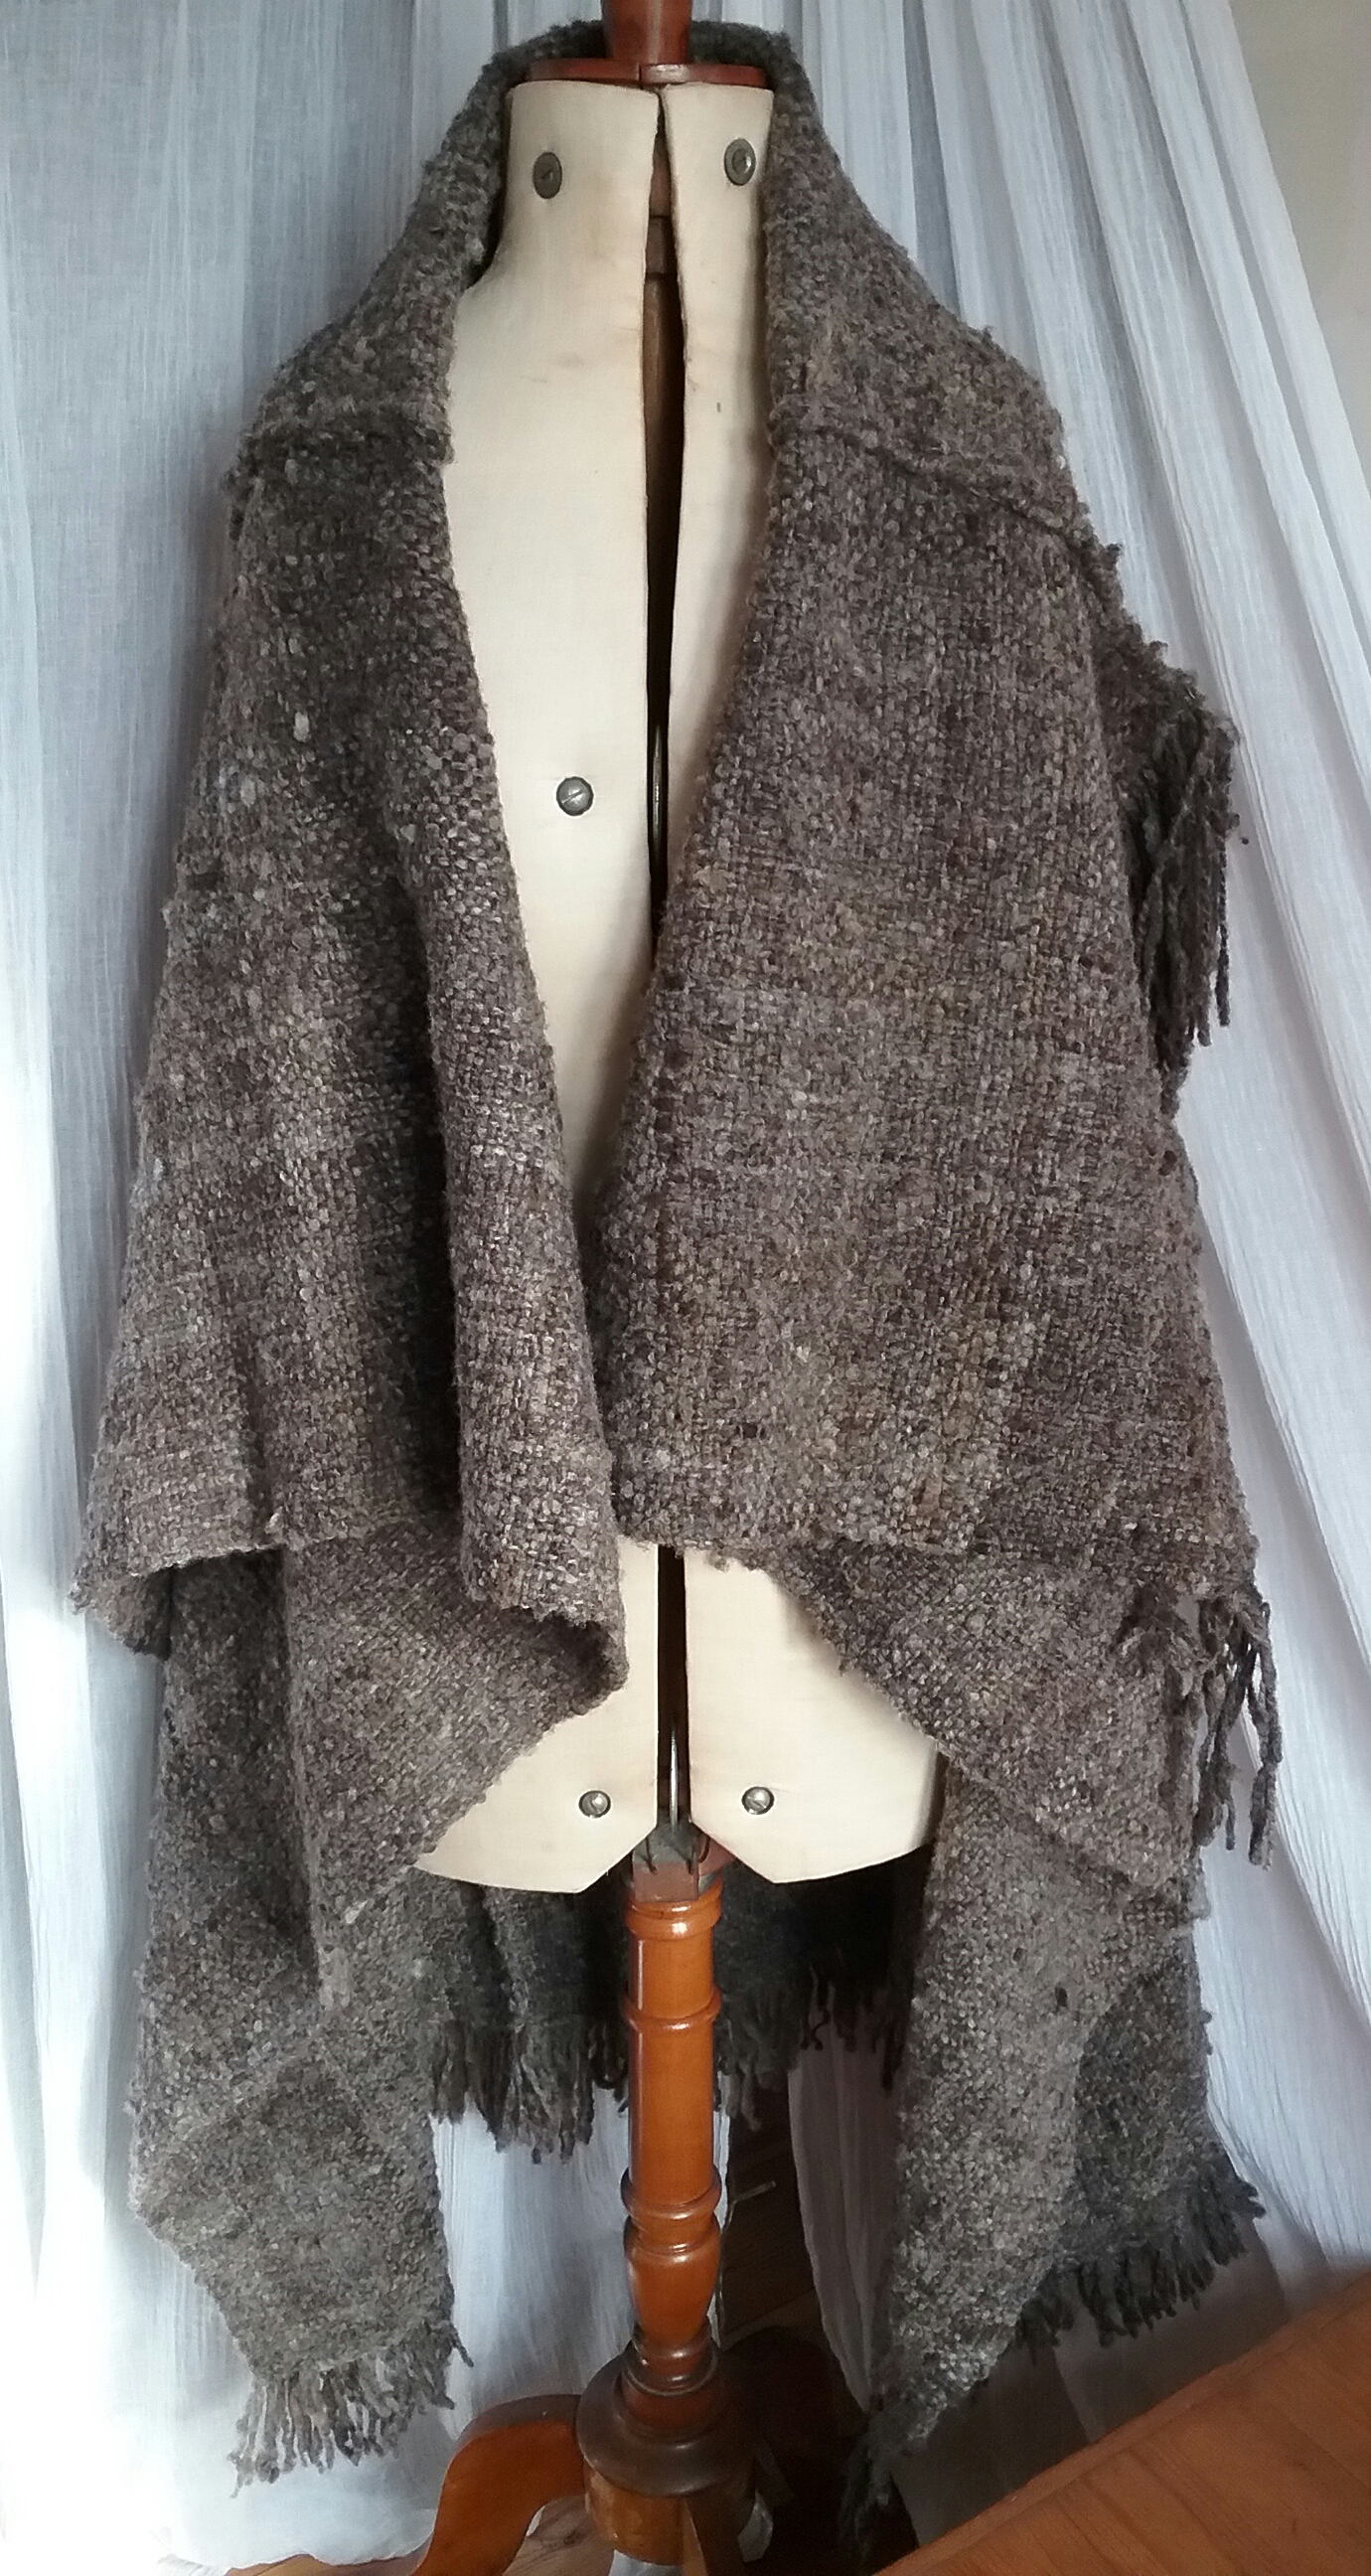
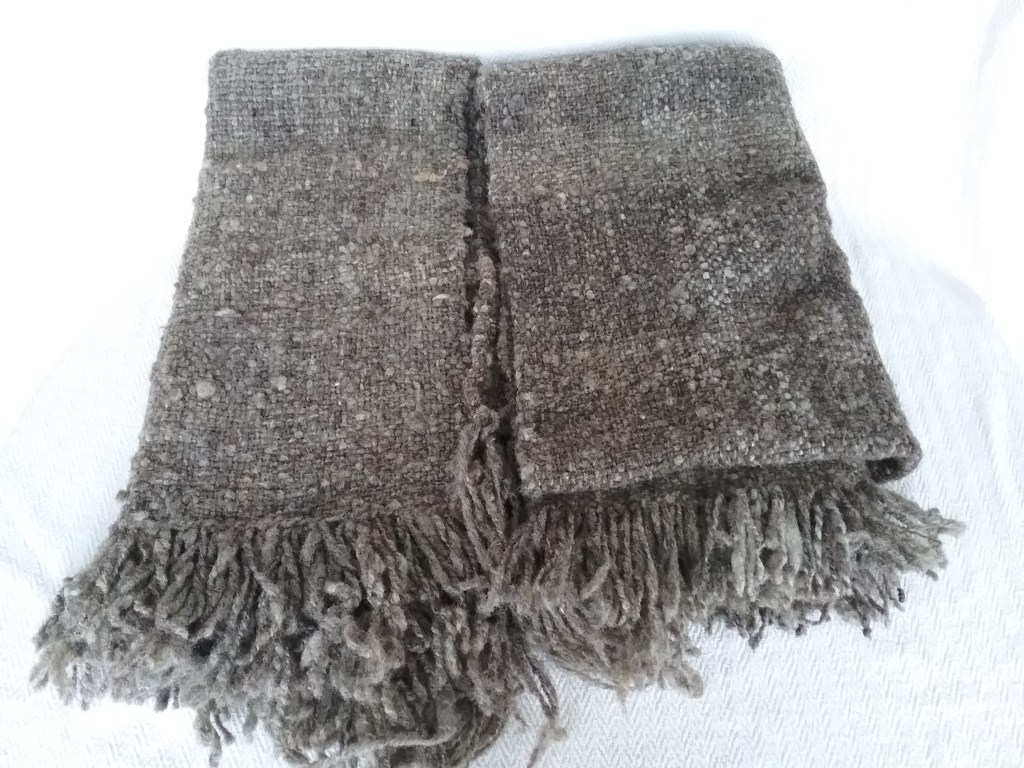
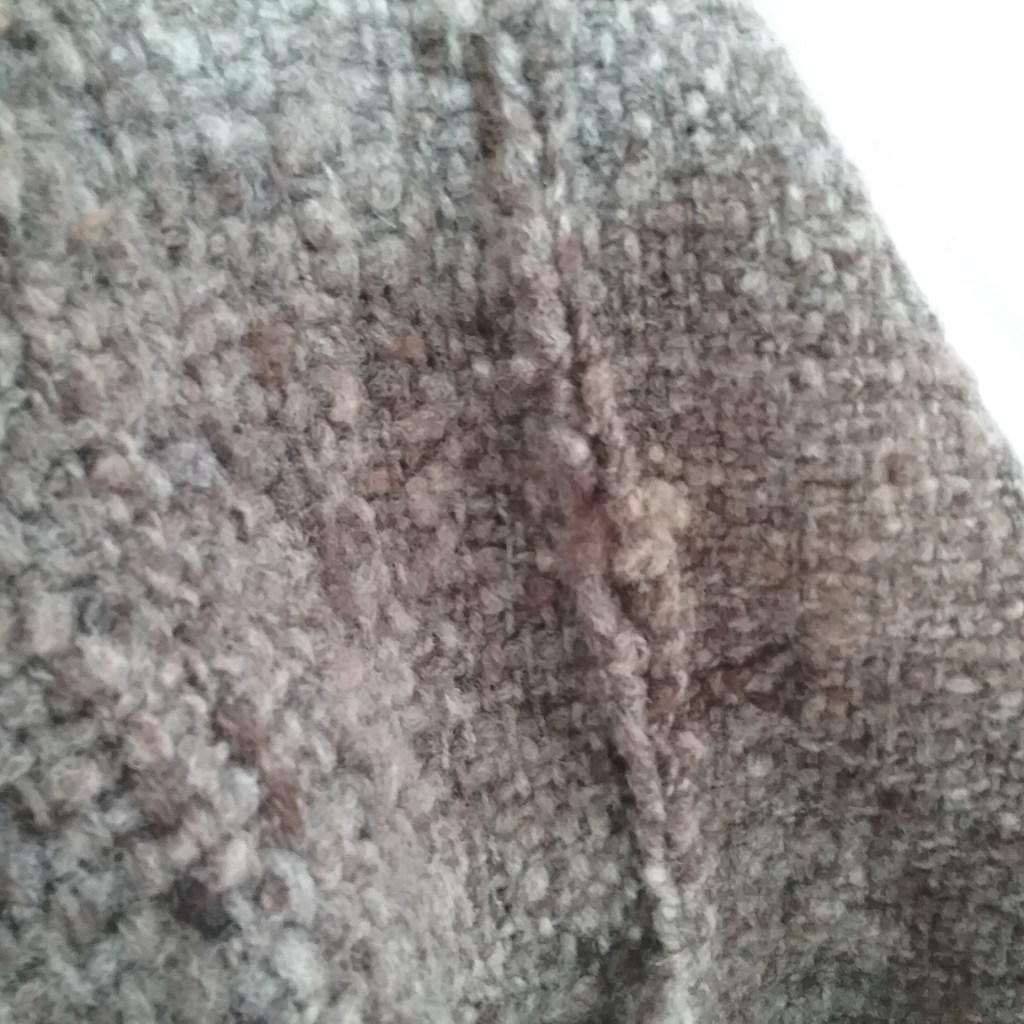
After weaving and washing I could begin assembly. The first job was to join the two short pieces together to make one length. I had grown very fond of the fringe, so wanted to preserve as much of it as possible. I decided to overlap the two ends so that the neat fringe of one was on top and the knotted fringe of the other was at the back and got trimmed down. I did this on the sewing machine, but the fabric was probably a bit too thick as it got caught on the presser foot a few times.
Then I laid out all the pieces and decided on the asymmetrical arrangement as none of them were quite the same length. This decided, I tacked them down to check the fit before setting to work hand stitching the long seams into place as per the pattern. I could have used a sewing machine, but I wanted to sew using the ryeland wool, which needed a tapestry needle. The seams were sewn right sides together with a short backstitch for strength and a slit left for the armholes (pattern can be found on page 104 of ‘Saori Self-Innovation Through Free Weaving’ Book). Finally I evened up the fringe at both ends and it was ready to wear.
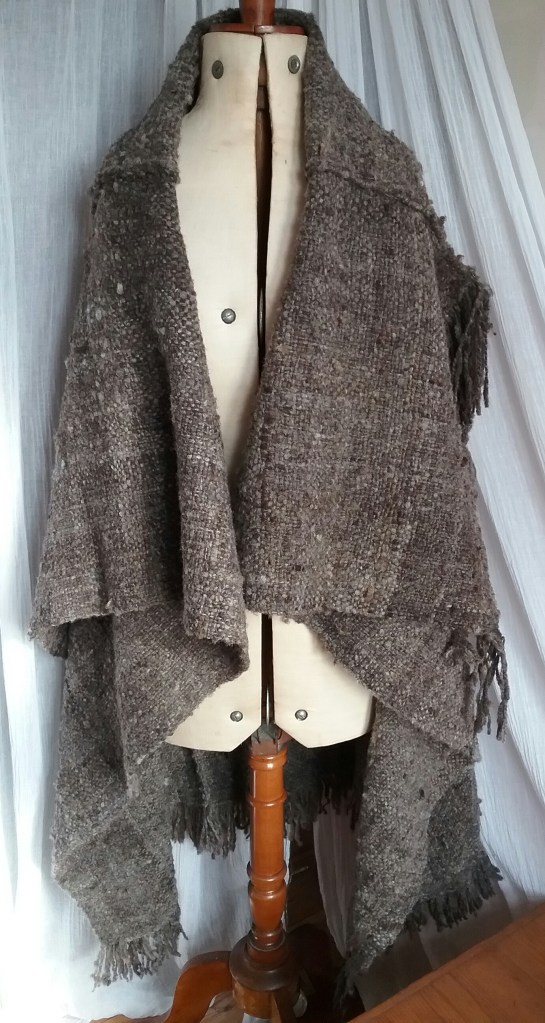
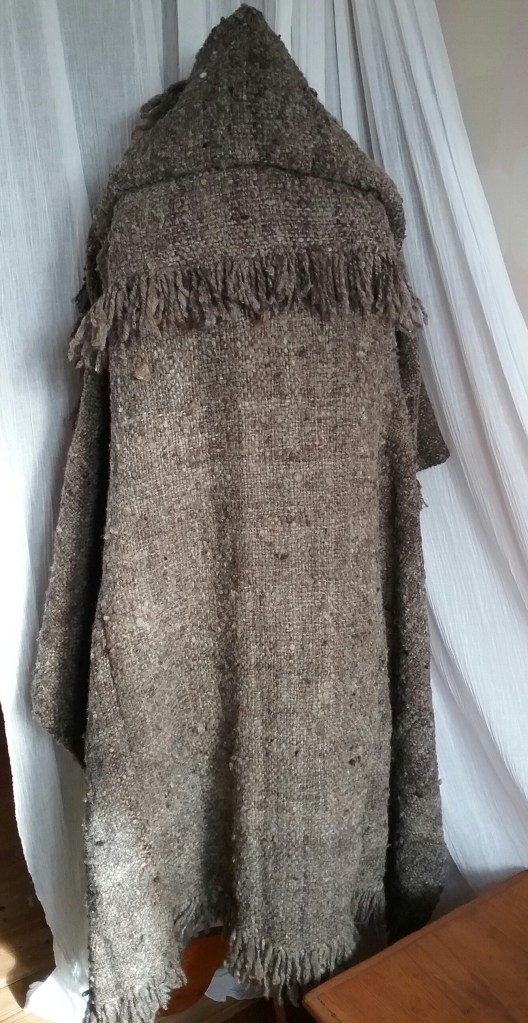
I am very happy with how this eventually turned out, it works both as a very cosy poncho/jacket, but also can be used as a blanket, so is the best of both. I’m also glad I took the time to think about it as it’s forced me to try indirect warping which has been on my to-do list for quite some time. In spite of my worries about having enough wool, I still have a couple of balls left at the end of it, which shows just how much fabric can be made from one small fleece.
Happy Crafting!
