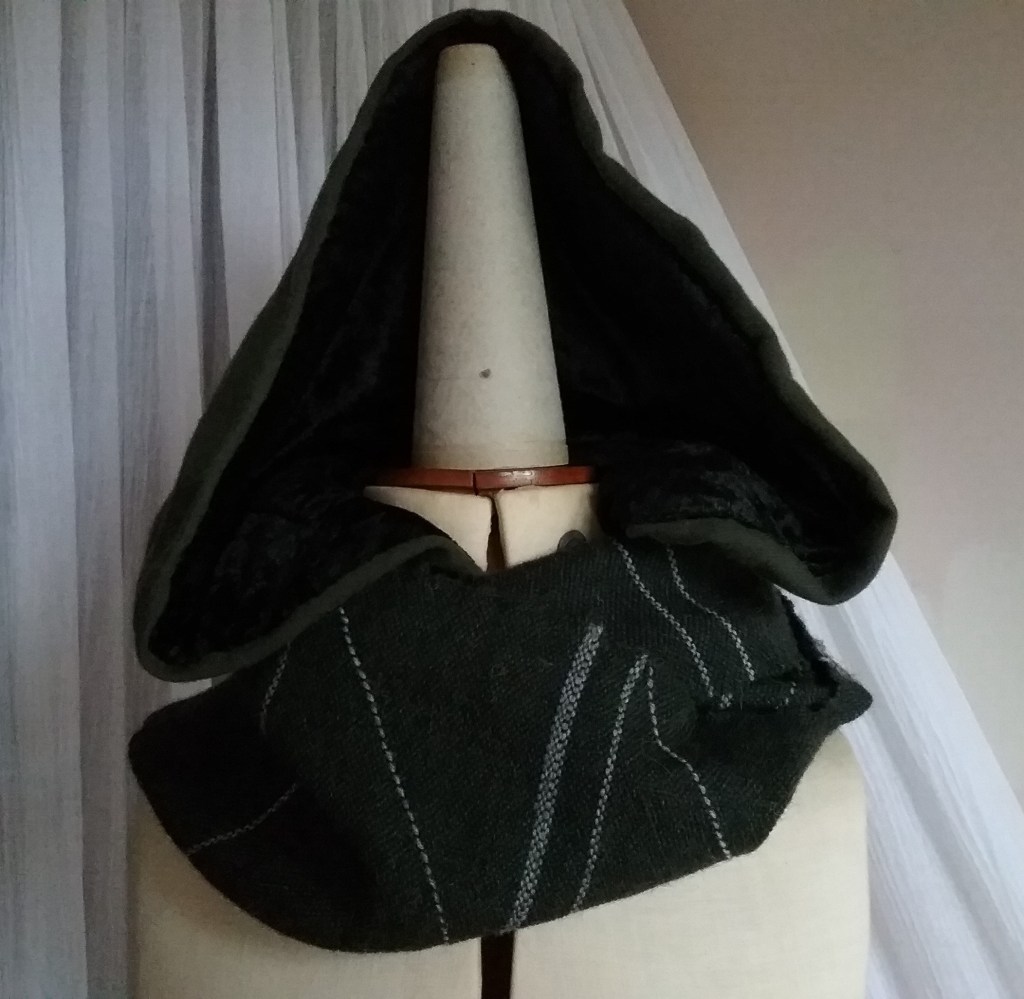
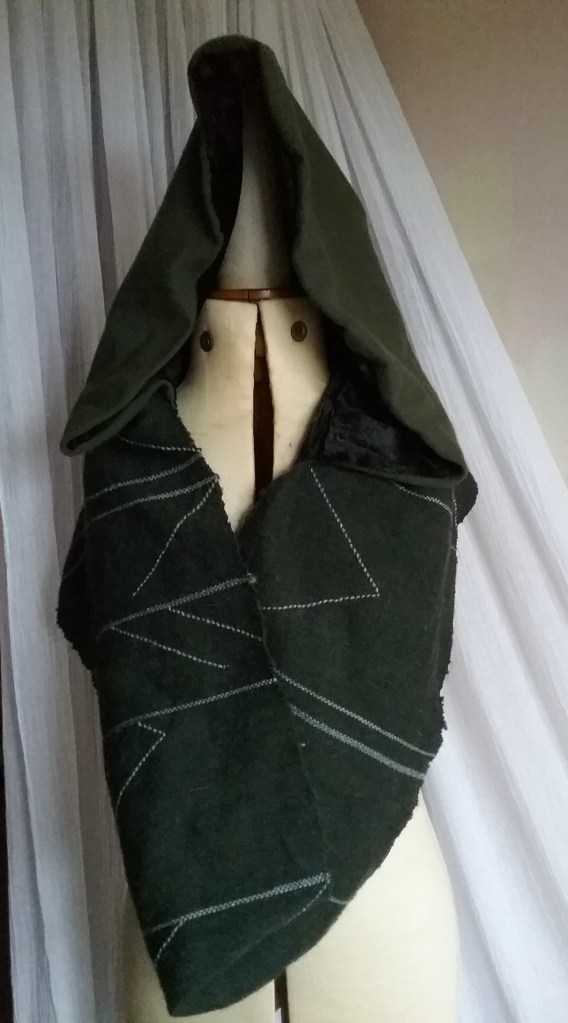
A final fibre related gift I made last year was this Lord of the Rings inspired hooded scarf. I was trying to think of a way of incorporating the medieval/fantasy style hood into something that could be worn every day and this was the result.
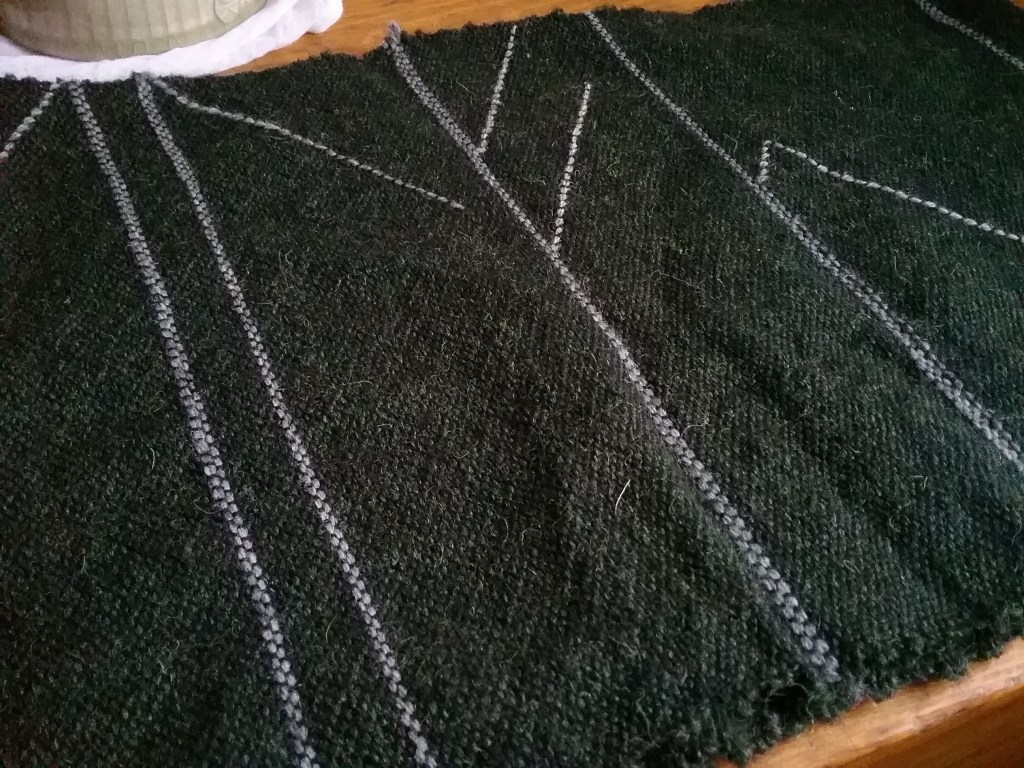
My Saori loom had a narrow thin black cotton warp currently on it that I wanted to use up ready to put another warp on and this was a perfect width for a scarf. I selected a forest green for the weft and a contrasting grey to weave patterns. I had originally intended to weave a pattern of curved lines evocative of elvish patterns, but whilst experimenting realised that my lines had turned into half of a dwarvish rune (seen in the front of The Hobbit book and on Thorin’s map) and I spiralled down a rabbit hole of weaving a message into the cloth. A Saori loom only has two shafts for a plain weave, so a different method might work better on a multi shaft loom.
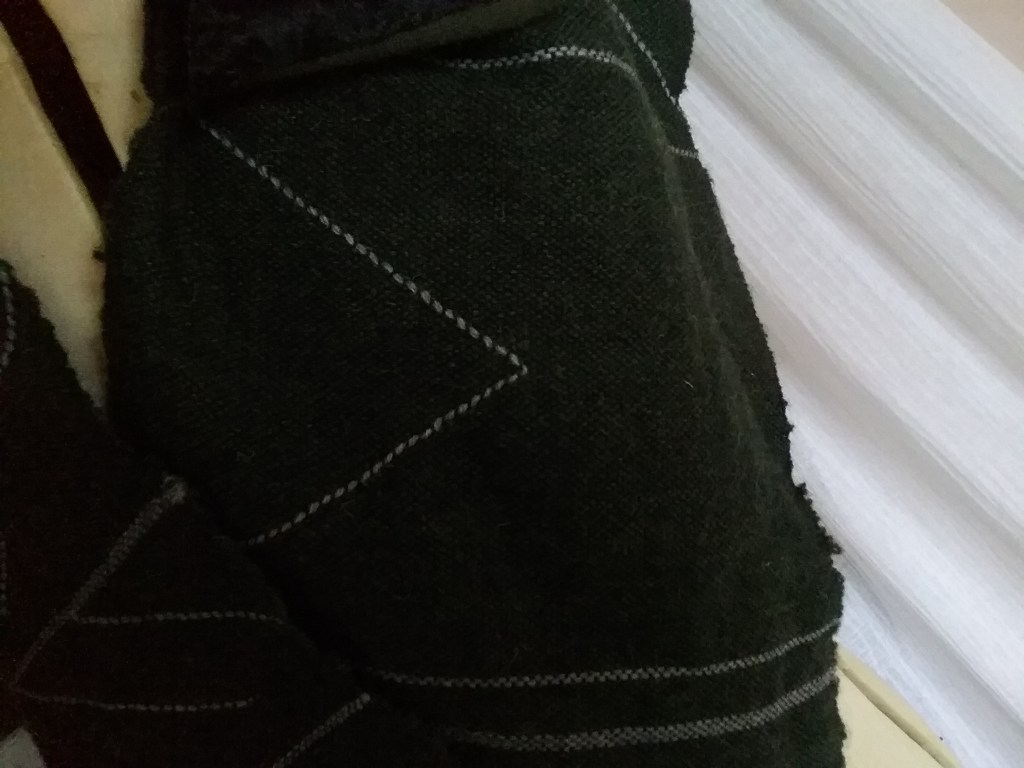
All the runes had to be woven sideways (as above) so I found a reference sheet was useful here. I also counted in from either side for the centre thread and made a note of this as it was useful for lining up where diagonal lines met. I had 1 boat shuttle threaded with green for the background and 1-2 bobbins threaded with grey depending on the rune. These bobbins were ‘free’ and I rested them atop the weaving as I worked. I began by weaving some plain green for seam allowance later on, before moving onto the runes. Straight lines were created by weaving 2-3 lines of grey thread instead of green. The diagonal lines were created by moving a grey bobbin under one warp thread at a time every other row in the direction required, whilst the green weft continued in a two row repeat i.e.
Row 1: Grey thread under 1 warp thread (right or left), weave 1 row green
Change shed as usual
Row 2: Weave back with 1 row green changing shed as usual
Depending on the letter, more than one grey bobbin may need to be moved at the same time.
After I had woven the length I required, I cut the weaving from the loom and knotted it before washing. I tidied up any loose grey ends by weaving them as invisibly as I could into the back of the fabric. I then sewed both ends together creating an ‘infinity scarf’ loop.
Although I had planned on weaving the fabric for the hood as well, I was running short on time, so I opted to use a complementary green wool fabric for this with a velvet lining. I used the hood shape from pattern C of Simplicity 5794, but opted to hand sew the lining into the hood so I could set it back a bit to prevent it from turning to the outside. After assembling the hood and hemming the bottom to prevent fraying I attached it to the top edge of the scarf, making sure both hood and scarf seams were aligned.
This was a very enjoyable project, most of it was experimenting and lots of pinning to get the positions right. The scarf can be worn either wrapped around as an infinity scarf or draping down (and who knew an empty yarn cone would make such as good hood prop!)
Happy Crafting!
